

It was 2:14 AM. I was creeping toward the kitchen for a glass of water, trying my best to avoid waking the toddler, when it happened. Pop. Then a sharp click. It sounded like I’d stepped on a bowl of dry cereal. The dog barked, the baby cried, and I stood there in the dark, wondering why my beautiful new floor sounded like a haunted house. If you are reading this, you probably know that exact feeling of frustration. You put in the work, you spent the money, and now your floor won’t stop clicking every time you take a step. Today, I am going to help you figure out why your laminate is making those irritating noises and how we can silence it for good.
Your Floor Is Talking Back and It Is Not Saying Anything Nice
That popping sound is almost never a ghost; it is usually the sound of your floor’s locking system physically struggling under pressure. When I first started out, I made the classic mistake of thinking the underlayment would hide a subfloor that was “mostly” level. Spoiler alert: it didn’t. I ignored the penny gap rule for installing laminate and ended up with planks that had nowhere to go when the humidity changed. The result? A floor that snapped and popped like a jazz drummer. Most of the time, the noise comes from friction. Whether it is because of subfloor prep mistakes or the lack of expansion space, that noise is a cry for help from your planks. You might even find that your laminate floor sounds like a drum because it is bouncing off a hollow spot in the wood underneath.
Is My Floor Actually Ruined Beyond Repair?
This is the big fear, isn’t it? You think you’ll have to rip the whole thing up and start over. While it feels like a disaster, most popping issues are fixable without a total demo. According to the North American Laminate Flooring Association (NALFA), most “noisy” floor complaints are actually installation-related issues involving subfloor flatness or expansion gaps rather than a failure of the product itself. Sometimes, you might just need to know the T-molding secret for long runs to give those planks the room they need to breathe. We aren’t just looking for a temporary fix; we want a floor that stays silent through every season. Have you noticed the popping gets worse when the heater kicks on in the winter, or is it a year-round symphony in your house? Let’s dig into the physics of why this happens so you can finally walk to the kitchen in peace.
Look for the Breathing Room Around Your Walls
The first thing you need to do is become a detective of the perimeter. Laminate is basically a giant wooden sponge; it expands and contracts with the seasons. If it hits a wall, it has nowhere to go but up, creating tension that snaps when you step on it. I usually start by pulling a few pieces of baseboard to see if the installer left enough space. If the planks are jammed tight against the drywall, you’ve found your culprit. You need to follow the expansion gap rule for flooring under door jambs and along every wall. Think of it like wearing shoes that are half a size too small; eventually, your feet are going to hurt. If you find tight spots, you can use an oscillating multi-tool to carefully trim back the edge of the plank while it is still on the floor. It’s a surgical move that saves you from ripping the whole room apart.
Check for Valleys and Peaks in Your Subfloor
If your gaps are fine but the floor still pops, you are likely dealing with a bridge. This happens when a plank spans over a low spot in the subfloor. When you step on it, the plank bows down into the valley, and the locking mechanism groans under the stress. I learned this the hard way on a living room remodel three years ago. I thought a 1/4-inch dip over six feet wouldn’t matter. I was wrong. Every time the homeowner walked to the couch, it sounded like a firecracker. Now, I never start without performing the string line test for perfectly level subfloors. If you’ve already installed the floor, your options are limited, but you can sometimes inject a specialized floor-fix adhesive through a tiny hole in the joint to fill that void.
Use the Suction Cup to Close Moving Gaps
Sometimes the popping isn’t about the subfloor or the walls—it is just a loose joint that has unzipped. This is common in high-traffic areas where the floor takes a lot of lateral force. Instead of taking the floor apart, you can use the suction cup hack for adjusting gapped laminate planks. By sticking a glass suction cup to the problematic plank and tapping it with a mallet, you can slide it back into its locked position. 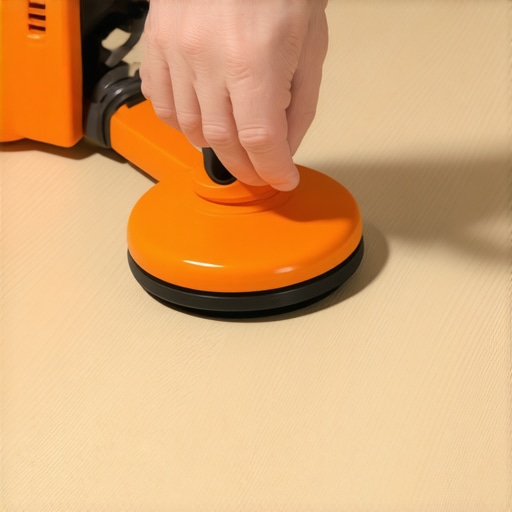 I once used this trick to fix a mystery pop in a hallway in under five minutes, and the homeowner thought I was a magician.
Clean Out the Crunches in the Doorways
Doorways are the most common failure points because they involve complex cuts. If your floor is popping specifically near a door, check if the casing was properly undercut. If the plank is trapped under the trim, it can’t move freely. Using the under cut move for fitting flooring perfectly under door casings ensures that the floor can float as intended. Also, make sure you didn’t skip the T-molding secret for long runs. If your floor spans more than 30 feet without a break, the cumulative expansion is simply too much for the click-lock system to handle. Giving the floor a break at the doorway with a transition strip is often the final piece of the silence puzzle.Most DIY guides tell you that if your floor is noisy, you should just add thicker underlayment next time. I am here to tell you that is a recipe for disaster. In the professional world, we call this the ‘trampoline effect.’ Everyone thinks a thicker pad equals a softer, quieter walk, but the reality is that too much cushion allows the planks to deflect too far downward. When the tongue and groove flex beyond their engineered limit, they rub together and scream. According to the North American Laminate Flooring Association (NALFA), using underlayment that is too soft or exceeds 3mm in thickness often causes the very joint failure you are trying to avoid. If you want to be sure about your environment before you even lay a plank, you should be using the moisture meter test every flooring pro uses to ensure the subfloor is actually ready.
Don’t Let Your Baseboards Sabotage the Expansion Gap
One of the most common ‘pro-level’ mistakes is what I call ‘pinning.’ You can leave all the expansion space in the world, but if you drive your baseboard nails at an angle that catches the flooring, or if you press the trim down so hard that it crushes the plank against the subfloor, the floor can’t move. This is why you should never nail baseboards into the bottom plate only without checking for clearance. When the floor tries to expand and meets the resistance of a pinned baseboard, it buckles slightly, creating those ‘hollow’ pops. I have seen countless beautiful installs ruined because the installer was too aggressive with the finish nailer. 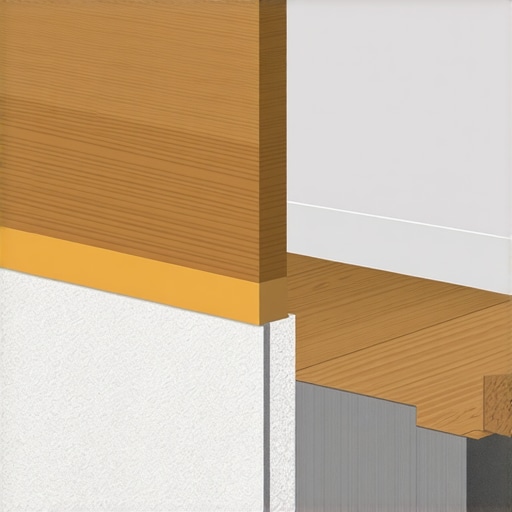
Why Does the Popping Get Worse specifically in the Morning?
If you notice your floor is a chatterbox at 7:00 AM but silent by noon, you are dealing with thermal expansion. As your home warms up, the planks expand. If there is a slight high spot in the subfloor, the expansion increases the friction at the joint. You might have made the tapping block mistake that breaks vinyl tongues during the install, leaving the joints weakened and more prone to noise during these temperature shifts. It is a nuanced dance between the humidity in the room and the flatness of the wood.
Save the Finish with Better Trim Techniques
Sometimes the noise is not the floor at all, but the trim rubbing against the floor. If your miters are rubbing, you can use the cardboard shim hack for flush baseboard miters to give yourself that tiny bit of breathing room. If you are already seeing the effects of a poor install, don’t panic; you can often learn how to fix baseboard gaps without replacing the trim to alleviate some of that downward pressure. Have you ever fallen into the trap of thinking more padding would solve your problems? Let me know in the comments if you’ve found a mystery pop that defied all logic!
My Must-Have Toolkit for Floor Surgery
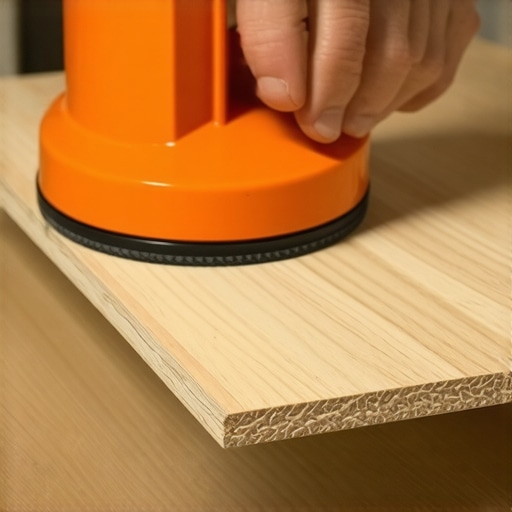
I’ve spent thousands of dollars on tools over the years, but when it comes to silencing a noisy floor, you only need a few specialized items to get professional results. First, quit using a standard hammer for adjustments. I swear by a high-quality dead blow hammer. Unlike a regular mallet, a dead blow is filled with steel shot that prevents bounce-back, transferring all the energy into the plank without damaging the finish. It is the only way to properly execute the block and hammer move for tight vinyl floor joints without risking the integrity of the locking profile. If you have a gap that has opened up in the middle of a room, do not even think about prying it from the edge. That is a fast track to chipping your floor. Instead, I always reach for a heavy-duty glass suction cup. It allows you to grab the center of a plank and slide it back into place with incredible leverage. Seriously, the suction cup hack for adjusting gapped laminate planks has saved me more times than I can count during final walk-throughs.
For those of you dealing with baseboard issues, precision is everything. I don’t just eyeball my cuts anymore; I use a dedicated scribing tool to ensure the wood follows the exact contour of the wall. Using the scribing tool every diyert needs for tight baseboards turns a mediocre job into a custom-looking masterpiece. Even if you are working on complex areas like bathrooms, you can apply these same principles to shower repairs or transitions to keep the whole house looking seamless. It is all about having the right leverage and the right measurement before you commit to the cut.
How can I maintain a quiet floor over time?
Long-term maintenance is not just about keeping the surface clean; it is about environmental stability. According to the NWFA technical standards (specifically the guidelines for floating floors), keeping your home’s relative humidity between 30% and 50% is the golden rule for stability. If your air gets too dry, the planks shrink and the joints loosen, leading to those irritating clicks. I highly recommend investing in a digital hygrometer—they are inexpensive and tell you exactly when to turn on the humidifier to protect your investment. Beyond humidity, you should learn how to fix baseboard gaps without replacing the trim so you can address minor seasonal shifts before they cause structural stress. If you ever run into a plumbing disaster, knowing how to save a floor after an ice maker leak quickly can be the difference between a small patch and a total demo.
What to Expect from Next-Gen Flooring Tech
I have been watching the industry closely, and the trend for 2025 and beyond is moving toward ‘stress-proof’ locking systems. We are starting to see planks with built-in micro-gaskets that allow for natural expansion without the friction noise that plagues current laminate and vinyl. It is an exciting shift that finally addresses the biggest homeowner complaint. Until those systems become the standard, we have to rely on professional prep. Always run the moisture meter test every flooring pro uses before you even open a box of flooring. If you want to stay ahead of the curve, check out these top trends in installation for 2025 to see where the industry is heading. My advice? Grab a suction cup today and try that sliding trick on your most annoying floor gap. You will feel like a hero when that ‘pop’ finally disappears for good.
The Hardest Lesson I Learned About Floating Floor Physics
After years of fixing “haunted” floors, I realized that silence isn’t a luxury; it’s a result of respecting movement. The biggest lightbulb moment for me was accepting that laminate doesn’t just sit there—it breathes. If you ignore the subfloor prep, you aren’t just making a mistake; you’re building a drum. I’ve seen so many homeowners try to solve clicking with more weight or furniture, but that only traps the tension. Another revelation was the ‘acclimation myth.’ Just because the box sat in your house for 48 hours doesn’t mean it’s ready if your HVAC wasn’t running. You have to match the installation environment to the living environment to avoid flooring installation mistakes to avoid for a seamless look. Finally, remember that the locking tongue is the most fragile part of the system; once it’s compromised, no amount of glue can truly replace the mechanical bond.
My Battle-Tested Kit for Silent Planks
If you want to move from frustration to a finished product, you need the right leverage. I never step onto a job site without my dead blow hammer. It provides that specific, non-rebounding strike needed for the dead blow hammer secret for flat floor seams without marring the surface. Second, a digital hygrometer is your best friend; it tells you if your house is too dry or too humid before the floor starts complaining. Third, for those mid-room gaps that cause the most popping, the suction cup hack for adjusting gapped laminate planks is the only non-destructive way to reset a joint. Lastly, I always keep a bottle of PTFE-based dry lubricant. A tiny spray into a clicking joint can sometimes act as a miracle cure for friction-based noises without damaging the wood core.
Step Toward Your Silent Home Today
#IMAGE_PLACEHOLDER_E#
Fixing a popping floor is one of the most rewarding DIY wins because you can literally hear the difference with every step you take. Whether you are following a step-by-step flooring installation from planning to perfect finish or just troubleshooting a single annoying click, the key is patience. Don’t be afraid to pull back a piece of trim or use that suction cup. The peace of mind of a quiet house is worth the effort. As we look toward transform your flooring top trends in installation for 2025, the focus is shifting toward these more resilient, quieter systems, but for now, your hands-on repairs are the best solution. Have you ever had a mystery floor noise that drove you crazy—did you find the cause? Let me know in the comments!