

I remember kneeling on my subfloor in a pool of sweat, staring at a 1/2-inch thick, high-density rebond pad that I was certain would make my living room feel like walking on clouds. I’d spent extra money for the ‘premium’ experience. But as soon as I tried to stretch the carpet over the edge, reality hit me hard. The padding was so tall it completely buried the tack strip pins. There was nothing for the carpet backing to grab onto. I had effectively created a massive, spongy ramp that made the room look like a DIY disaster. It’s one of those flooring installation mistakes to avoid if you want a professional finish, and today, I’m going to make sure you don’t repeat my expensive blunder. We are going to dive into why ‘thicker’ isn’t always ‘better’ and how to balance comfort with structural integrity.
When Your Plush Padding Becomes a DIY Disaster
My first big mistake was thinking that more cushion always equaled more luxury. I ignored the height of the architectural tack strip, which is usually only about 1/4 inch tall. When your pad exceeds that height significantly, the carpet ‘floats’ above the pins rather than being pierced by them. This leads to the carpet slipping, bunching, and eventually failing at the seams. If you have ever felt that annoying, bouncy lump under your feet right at the doorway, you know exactly what I’m talking about. Have you ever tried to force a thick pad to work, only to have the carpet pop off the wall ten minutes later?
Does Extra Cushion Actually Lead to Early Carpet Failure?
It sounds counterintuitive, but a pad that is too thick can actually destroy your carpet’s lifespan. According to the Carpet and Rug Institute (CRI), residential padding should generally not exceed 7/16 of an inch for most cut-pile carpets, as anything thicker allows for too much vertical movement, which stresses the backing. I learned this the hard way when I had to rip out a brand-new installation because the seams were peaking. If you’re currently struggling with this, you might need to learn carpet install secrets for managing transitions or consider trimming the perimeter. Even if you’ve mastered the tuck and roll secret for carpet on bullnose steps, a pad that is too thick at the wall will prevent a clean tuck. We need to look at how to properly ‘feather’ or shim the area so your carpet stays tight and your transition strips actually sit flush. Let’s get into the mechanics of why those pins are losing the battle against your padding.
Trim the Fat Before You Stretch the Fabric
Think of your tack strip like a tiny row of teeth. If you put a thick, high-density winter coat over those teeth, they simply cannot bite into the fabric above. To fix a pad that is overwhelming your pins, you must create a ‘relief zone.’ I take a sharp utility knife and trim the padding back about 1/2 inch to 3/4 inch from the inside edge of the tack strip. This creates a valley where the carpet can dip down and firmly engage with the pins. If you leave the pad flush against the strip, the carpet stays elevated, and you lose all tension. This is a critical step in carpet install secrets that pros use to ensure the carpet doesn’t just sit on the floor but becomes part of it. 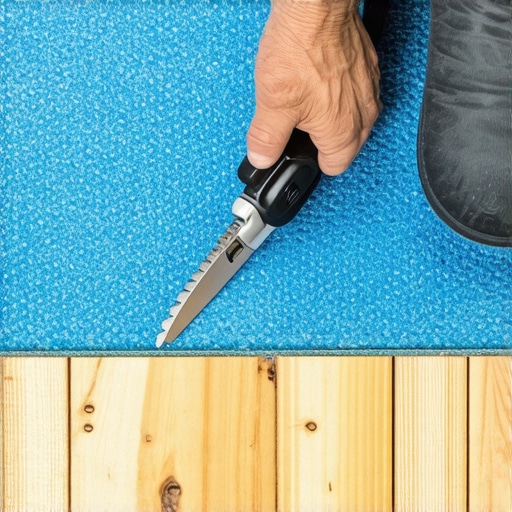
Stop Using Your Knees as a Hammer
Many DIYers try to solve the thickness issue by simply kicking the carpet harder with a knee kicker. All this does is bruise your patella and potentially tear the carpet backing. Instead, you need to employ the directional pull rule for power stretching carpet. A power stretcher uses a long pole to push against the opposite wall, providing the mechanical leverage needed to force the carpet over that thick padding hump and onto the pins. If you’ve already finished and noticed a wave, you might need to learn the power stretcher move to fix loose carpet bubbles before the ripples become permanent creases.
The Day My Guest Room Turned Into a Trampoline
I once attempted to install a 15-pound memory foam pad in a small guest bedroom, thinking I was being ‘extra.’ By the time I was halfway through, the carpet was so bouncy that it felt like walking on a marshmallow. The real nightmare started when I tried to tuck the edges. Because the pad was nearly 5/8 of an inch thick, the carpet was under so much upward pressure that it kept popping off the wall. I spent four hours fighting it before I finally admitted defeat, pulled the carpet back, and performed a surgical trim around the entire perimeter. It was a messy, sweaty lesson in why the CRI guidelines exist. If you find yourself in this situation, don’t keep stretching; you have to address the subfloor contact first. You might even find that you need to how to fix a squeaky subfloor through the carpet while you have the edges pulled back.
Give Your Baseboards Room to Breathe
Thick padding doesn’t just affect the stretch; it ruins your trim work. If your pad is too high, you’ll find that your baseboards sit awkwardly high, or worse, the carpet looks like it’s being swallowed by the wood. When installing your trim, you might need to utilize the inside corner cope for perfect baseboard installs to ensure everything stays tight even if the carpet height varies. Once the baseboards are in, you can use stop baseboard gaps with the caulk and paint sequence to hide the transition where the thick carpet meets the wood. If you ignore the pad height during the trim phase, you’ll end up with visible gaps that look like an amateur was at the helm.Everyone assumes that high-density padding is the ultimate upgrade for any room, but I’ve seen this ‘luxury’ choice backfire more times than I can count. While we think we’re adding durability, we might actually be inducing ‘delamination.’ When a pad is too dense for a specific carpet backing, it doesn’t compress enough to absorb foot traffic, causing the carpet’s primary and secondary backings to rub against each other. This friction eventually leads to the face fibers pulling away. If you’re working with high-performance synthetic fibers, checking out the best carpet types for high traffic areas in 2025 is the first step, but pairing them with a heavy 10lb memory foam pad might actually be the kiss of death for your seams. Let’s dig deeper into the mechanics of footfall.
Can You Actually Feel the Difference Between 8lb and 10lb Density?
The short answer is: probably not under your feet, but your carpet definitely can. According to a technical bulletin by the Carpet and Rug Institute (CRI), excessive cushioning can increase the amount of vertical travel at the seams. If the pad is too soft or too thick, every time you step near a transition, the carpet flexes downward significantly. This constant movement is exactly why your carpet seams are visible in morning light; the light hits the slight peak created by the tension. I always tell my clients that an 8lb density is the Goldilocks zone—firm enough to support the backing but soft enough to provide that luxury feel without stressing the glue bonds. The real trap happens when you finally get the carpet down and realize your doors won’t shut. People forget that a 1/2-inch pad plus a 3/4-inch plush pile equals an 1-1/4 inch of material. If your subfloor was already high, you’ll be taking your doors off the hinges to trim them with a circular saw—a mess nobody wants. This is why I always suggest checking clearances while you’re learning how to stretch carpet in a room full of furniture. If the height is becoming an issue at the walls, don’t just force the baseboards down. You might need to use the back bevel move for tight baseboard miters to allow the wood to sit flush against the drywall even if the carpet is pushing back with significant upward pressure. 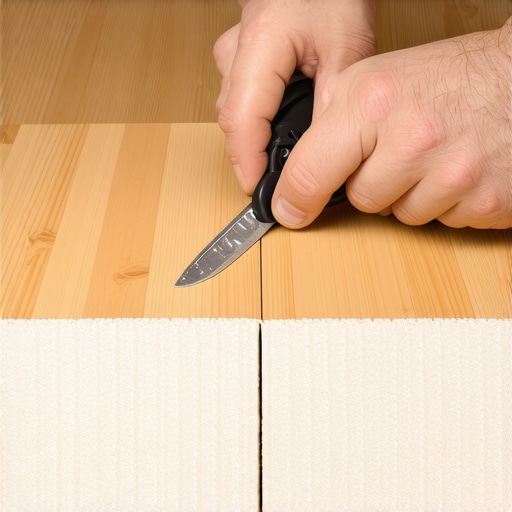 Have you ever fallen into this trap where your ‘premium’ upgrade caused more problems than it solved? Let me know in the comments.If you’re serious about making that thick padding work, you need to stop relying on a knee kicker for anything other than positioning. I personally swear by my Crain 825 Power Stretcher. Why? Because it provides the uniform tension required by the CRI 105 Standard for Installation of Residential Carpet, which is the industry ‘bible’ for pros. Without it, you’re just guessing at the stretch, and in six months, you’ll be searching for the power stretcher move to fix loose carpet bubbles. I’ve seen expensive carpet jobs ruined because the installer was too tired to haul the heavy poles into the house. Don’t be that person. Even if you’re following a step-by-step flooring installation from planning to perfect finish, the mechanical advantage of a stretcher is the only way to ensure that the carpet stays locked onto those tack strip pins despite the upward pressure of the pad.
Stop Relying on Your Knees
Using a knee kicker for a full-room stretch is like trying to drive a nail with a screwdriver—you might eventually get it done, but you’ll likely break something in the process. A power stretcher allows you to stand upright, using a lever to apply hundreds of pounds of force precisely where you need it. This ensures the primary backing is taut across the entire span of the room. If you’ve ever noticed why your new carpet has a visible line through the center, it often goes back to uneven tension during the initial pull or improper tool usage.
How do I keep my high-end carpet looking fresh for years?
The secret isn’t just a fancy vacuum; it’s about managing the subfloor environment and the fiber integrity. Before I even roll out the pad, I always use a moisture meter. It’s a habit I picked up after a basement job went sour. Now, the moisture meter requirement for basement flooring jobs is my first rule of business. If the subfloor is damp, your premium pad becomes a sponge for mold. For daily care, avoid the heavy chemicals that leave a sticky residue. I’ve seen too many DIYers create ‘crunchy’ spots that attract dirt like a magnet. Instead, stick to the basics and stop carpet odors with the baking soda vacuum trick to keep things smelling fresh without degrading the latex backing. 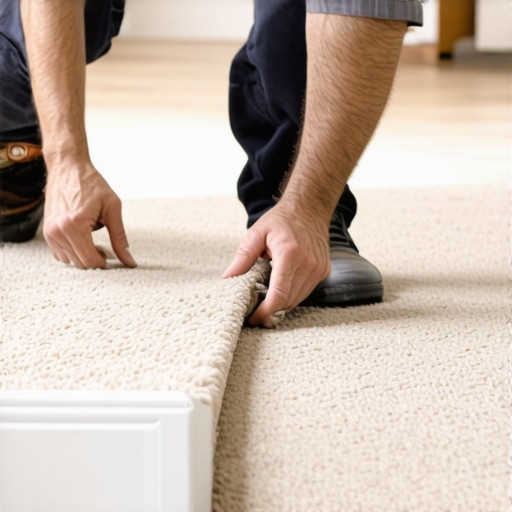
Why Your Floors Will Soon Be Smarter Than Your Phone
Looking ahead, I’m seeing a massive shift toward ‘smart padding’ and sustainable, low-VOC materials. By 2026, I expect we’ll see padding with integrated moisture sensors that can alert your smartphone to a pipe leak before a single mold spore grows. We’re also moving away from petroleum-based foams toward recycled polymers that offer high density without the chemical ‘off-gassing.’ If you want a head start on these trends, look into the best carpet types for high traffic areas in 2025 which are already leaning toward these greener technologies. Mastering carpet install secrets now means you’ll be ready when these high-tech materials become the standard. My advice? Grab a power stretcher for your next project—it’s the single best investment you can make for a professional-grade finish.
Why My Hardest Padding Lessons Will Save Your Project
Reflecting on those early days, I realize that the most expensive upgrades often cause the biggest headaches if you aren’t prepared for the mechanics. One lightbulb moment for me was realizing that padding isn’t just about comfort; it is a structural component of your floor. If you choose a material that is too thick, you are fighting physics at every wall. I also learned that 8lb density is the sweet spot for almost every residential application. Anything more and you risk the carpet delaminating because it can’t grip the subfloor correctly. Finally, never skip a subfloor check; even the best carpet types for high traffic areas in 2025 will fail if you trap moisture beneath a high-density foam layer. Moisture is the silent killer of even the most premium installs.
The Gear That Saves My Back and My Reputation
If you want to achieve results like the pros, you have to stop treating your tools like an afterthought. I never walk onto a job site without my Crain Power Stretcher; it is the only way to counteract the upward lift of a premium pad. I also suggest keeping a heavy-duty moisture meter in your kit to ensure your subfloor is ready for a step-by-step flooring installation from planning to perfect finish. For those pesky finishing touches after the heavy lifting is done, keep a clean white towel and a steam iron handy. Using the iron and towel trick for fixing carpet dents has saved me more times than I can count when moving heavy furniture back into a finished room. These small details are what truly professional results are made of.
Your Path to a Room That Feels as Good as It Looks
You now have the specialized knowledge to avoid the common flooring installation mistakes to avoid that stop most DIYers in their tracks. Don’t be intimidated by the extra prep work like trimming the pad relief zone or renting the heavy stretcher poles. That extra effort is what separates a floor that ripples in six months from a floor that stays taut for twenty years. You are building more than just a surface; you are creating the foundation for your home’s daily comfort. Go ahead and start your next project with total confidence, knowing you have the carpet install secrets needed to handle even the thickest, most luxurious padding. Have you ever tried to install an ultra-premium pad only to find your doors wouldn’t close or your carpet wouldn’t stay on the pins? Let me know your story in the comments below!