

I remember the exact moment I saw it. I was fresh out of the shower, reaching for a towel, when I noticed a shadowy, ink-like smudge creeping out from under the door frame. My heart did a slow-motion somersault. I had spent so much time perfecting my flooring installation that seeing those dark, bruised-looking spots felt like a personal betrayal. Was it mold? Was the subfloor rotting? I spent the next three hours on my hands and knees with a flashlight, convinced I’d have to tear everything up. Today, we’re going to get to the bottom of why those spots appear and exactly how you can stop the spread before your beautiful oak or maple turns into a charcoal mess.
That Ugly Black Stain Doesn’t Mean Your Floor is Dead
Let’s talk honestly: hardwood and water are like oil and water—they just don’t mix. But those dark spots aren’t always what you think. Often, it’s a chemical reaction between the tannins in the wood and the moisture seeping from your showers. I made the classic rookie mistake of ignoring a tiny gap in the baseboards thinking it was ‘just cosmetic.’ It wasn’t. That gap was an open invitation for every splash and steam cloud to find its way under my planks. According to experts at the National Wood Flooring Association, wood is a hygroscopic material, meaning it constantly absorbs and releases moisture from the environment, which is why even high humidity can trigger these dark reactions. If you’ve been putting off shower repairs, your floor is likely the one paying the price.
Is it really possible to save these planks?
You might be looking at that black spot and thinking it’s time to call the dumpster. I get it; the skepticism is real because wood is expensive. But unless the wood is soft and crumbly to the touch, we can usually fix it without a full-scale demolition. We might need to look at the transition strip move for carpet to bathroom tile or re-evaluate your baseboard styles to ensure a tighter seal. Have you ever walked into your bathroom and noticed a mystery spot that seemed to appear overnight? Tell me about it, because chances are, I’ve faced the exact same headache. We’re going to look at the chemistry of these stains and the mechanical failures—like a leaky shower niche—that cause them.
Find the Ghost in Your Bathroom Plumbing
The very first thing you have to do is stop the bleeding. You can bleach a floor until you are blue in the face, but if the moisture is still migrating, that black bruise will return within a month. Think of your bathroom as a high-pressure zone and your hallway as the relief valve. I once spent an entire weekend chasing a damp spot that refused to dry, only to find that my tiled shelf was the culprit. Water was traveling behind the drywall and surfacing five feet away right under my oak planks. This is why you must investigate why your shower niche keeps leaking through the bathroom wall before touching your sander. Often, the failure happens at the transition between materials where the waterproofing wasn’t overlapped correctly. If you’re currently in the middle of a project, always opt for the liquid membrane move for fail-proof shower pans to ensure that moisture stays in the drain and out of your subfloor.
Identify the Stain Chemistry
The black color isn’t actually rot—at least not yet. It is a chemical reaction between the iron in your water (or in the nails of the subfloor) and the natural tannins in the wood. It’s essentially homemade iron gall ink. If you try to sand this out without treating it chemically, you will end up sanding halfway through your board and the spot will still be there. You need to break that chemical bond.
The Chemistry Hack for Stubborn Iron Stains
Oxalic acid is your best friend here. It’s a mild acid that specifically targets iron stains without destroying the wood fibers. I remember the first time I used it; I was terrified I’d burn a hole through the floor. I mixed the crystals with warm water until they wouldn’t dissolve anymore—a saturated solution—and brushed it onto the dark spot. Within ten minutes, the black ‘ink’ started to fade into a light gray. If the stain is deep, you might need two or three applications. 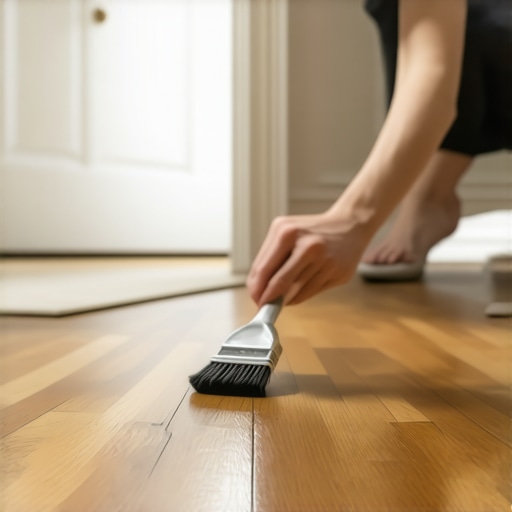
Neutralize and Refinish properly
Once the stain is gone, you can’t just slap a finish over it. You have to neutralize the acid with a mix of two tablespoons of baking soda to a quart of water. If you skip this, your new finish won’t stick, and you’ll be dealing with flooring installation mistakes to avoid for a seamless look later on. Let the wood dry for at least 48 hours. Use a moisture meter if you have one; you want the wood back down to about 8-10% moisture content before you even think about sealing it. Use a fine-grit sandpaper to smooth the raised grain, then apply a high-quality polyurethane that matches your existing sheen.
Lock Out Future Moisture Today
Now that the wood is clean, you have to armor the perimeter. Most of the water that ruins floors near bathrooms enters through the expansion gap. This is where a baseboards makeover becomes more than just an aesthetic choice; it’s a structural defense. You want to ensure your baseboards are tight and sealed. I recommend you stop baseboard gaps with the caulk and paint sequence to create a water-resistant barrier. For the transition between the tile and wood, don’t just use a generic strip. Look into the transition strip move for carpet to bathroom tile techniques to ensure a flush, sealed fit. By sealing these entry points, you turn your floor from a sponge into a shield.
Most DIYers and even some pros fall into a dangerous sense of security when they see the word ‘waterproof’ on a box of flooring. I’m going to go against the grain here: waterproof materials are often the reason people ignore the actual cause of long-term damage. If you have a hidden leak in your shower renovation ideas, it doesn’t matter if your planks are made of plastic or high-end vinyl; that water is going to find the subfloor and sit there until it rots the structural joists. I’ve seen homeowners ignore flooring installation mistakes to avoid for a seamless look because they trusted the marketing on the box more than their own common sense. The real nuance isn’t about the surface; it’s about the vapor pressure coming from underneath.
The Subfloor Trap You Probably Ignored
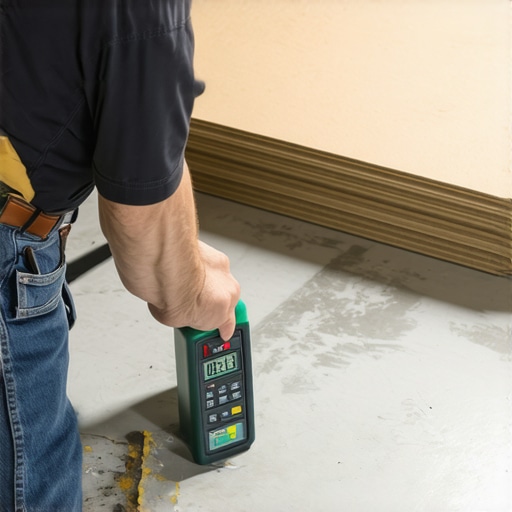
The most common ‘oops’ factor I encounter is skipping the subfloor moisture test on concrete. Even if the slab looks bone-dry, it acts like a giant, slow-moving sponge. A study by the Flooring Contractors Association (FCICA) highlights that subfloor vapor emission is the leading cause of adhesive failure and mold growth in modern installations. If you trap that vapor under a ‘waterproof’ floor without a proper barrier, you’re creating a pressurized petri dish. This is why the acclimation test for avoiding hardwood floor gaps is just as vital for synthetic materials as it is for oak. You need the environment to stabilize before you lock it down.
Why does your floor keep failing despite using the ‘best’ materials?
Sometimes the failure isn’t the material, but the tool used to install it. In the world of textiles, the knee-kicker mistake that ruins luxury carpets is a classic example of expertise gone wrong. Pros know that for any room larger than a walk-in closet, you must follow the power stretcher rule for large living room carpets. Without that mechanical tension, you’ll be asking why your carpet is buckling only three years later. The same level of precision applies to your bathroom; if you are installing a high-end walk-in, you need to know the linear drain secret for modern walk-in showers to ensure the pitch of the floor actually directs water away from your bedroom’s hardwood.
Your Baseboards Are Actually A Structural Gasket
People treat trim like jewelry—something pretty you slap on at the end. In reality, your baseboard styles should function as a gasket. When you combine them with a proper sealant, they are the last line of defense against the ‘ink stains’ we discussed earlier. If you leave a gap, you’re just waiting for a spilled mop bucket to ruin your subfloor. Have you ever fallen into the ‘it’s waterproof’ trap only to find a mess underneath? Let me know in the comments, because understanding these mechanical nuances is what separates a five-year floor from a fifty-year floor.
You can have all the passion in the world, but if you are using a dull blade or a cheap level, you are essentially building a future headache. I never walk onto a job site without my digital moisture meter. According to the technical documentation provided by Wagner Meters, a leader in wood moisture technology, even a 2% variance in moisture content between your flooring material and the subfloor can lead to catastrophic cupping or gapping. It is the one tool that keeps me honest and prevents those flooring installation mistakes to avoid for a seamless look that haunt your Pinterest boards. When I am working on those tricky transitions near masonry or uneven plaster, I always rely on the scribe tool trick for baseboards against stone walls to get that razor-tight fit that keeps moisture out.
The Precision Tools That Keep My Floors From Moving
It is not just about the heavy machinery; it is about the finesse. For those of you tackling a living room project, you need to understand that carpet install secrets achieving flawless results every time often come down to the quality of the stretcher and the sharpness of the trimmer. In the bathroom, I have seen too many beautiful builds fail because someone forgot how to seal a marble shower without changing the color. Using a high-quality, breathable impregnating sealer is the only way to ensure that expensive stone does not become a breeding ground for pink mold within the first six months. If you are aiming for that spa-like shower experience, your tool belt needs to include a high-end caulk gun with a drip-stop feature to ensure your silicone joints stay clean and functional. 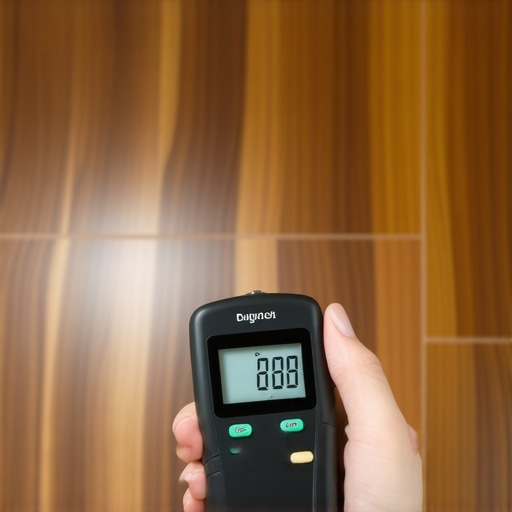
How do I maintain my new floors and showers over time?
The secret is not a magical cleaning solution, but a consistent mechanical routine. For hardwood, you need to implement the felt pad routine on every piece of furniture—no exceptions. I also swear by the vacuum seal trick for cleaning dust out of floor grooves to prevent grit from acting like sandpaper between your planks. In the shower, maintenance means checking your grout annually. If you notice a hairline crack, do not wait; address it immediately using how we fixed the grout crack in the shower corner for good techniques to prevent subfloor saturation.
Look Ahead to 2025 and Beyond
The industry is shifting toward ‘smart’ integration. We are already seeing the beginning of top trends in installation for 2025, which include moisture-sensing underlayments that can alert your phone if a leak starts under your dishwasher or behind your shower renovation. This technology will eventually make the ‘ink stains’ I mentioned earlier a thing of the past. For now, the best defense is a proactive offense. I want you to try one thing this weekend: go buy a high-quality scribe tool and use it on just one piece of difficult trim. Once you see that gap disappear, you will never go back to the ‘caulk and pray’ method again.
Hard-Won Lessons from My Darkest Flooring Days
Over the years, I have realized that the biggest mistake any homeowner can make is waiting for a stain to look truly bad before investigating the source. Here are the lightbulb moments that saved me thousands in repairs: First, moisture does not just fall; it travels through vapor pressure, which is why we must never overlook why we never skip the subfloor moisture test on concrete even if the house feels dry. Second, that black ‘ink’ stain is actually a gift—it is a clear chemical signal that your waterproofing has failed, likely at a transition point or a hidden shower niche leak. Third, never trust a ‘waterproof’ label to protect your home if you have not mastered the basics of perimeter sealing. Small gaps in the trim are the number one cause of long-term structural rot.
#IMAGE_PLACEHOLDER_E#
The Gear That Saved My Sanity and My Subfloor
If you want to move beyond guessing, you need a specific toolkit that professionals rely on every single day. I personally swear by a digital moisture meter; it is the only way to know if your wood is truly ready for a new finish or if it is still holding onto a hidden reservoir of water. For the stains themselves, keep a jar of technical-grade oxalic acid crystals on hand—it is magic for iron-tannin reactions that nothing else can touch. I also recommend investing in a professional-grade scribe tool, as using the scribe tool trick for baseboards against stone walls is the only way to get a truly moisture-tight seal in a bathroom. Finally, always keep a high-quality coping saw in your bag to execute the coping saw technique for flawless inside baseboard corners, which prevents water from wicking into the vulnerable end-grain of your trim.
Time to Turn Your Floors from Sponges into Shields
You have seen the damage, you have learned the chemistry, and now you have the professional tool list. Fixing a black stain is satisfying, but building a floor that never stains in the first place is the true mark of a master craftsman. Whether you are deep into a step-by-step flooring installation or just starting a small bathroom refresh, remember that precision at the perimeter is your absolute best defense. Take your time, test your subfloor, and seal every gap like your investment depends on it—because it does. Have you ever found a mystery stain under your baseboards that turned out to be a hidden leak? Let me know in the comments below!