

I still remember the first time I felt that pit in my stomach. It was a freezing January morning, and as the sun hit my newly installed white oak floors, I noticed a series of dark, yawning lines between the planks that definitely weren’t there in August. I could have sworn I did everything right, but there I was, staring at gaps wide enough to swallow a credit card. It’s a visceral kind of heartbreak when you invest your weekends and your savings into a home project, only to watch the wood literally shrink away from your hard work. I had fallen for the classic ‘wait two days’ myth that circulating around big-box hardware stores, and my floor paid the price. If you’ve ever seen why your vinyl plank floor is gapping at the short ends, you know the frustration is universal across all flooring types. Today, I’m going to show you the exact ‘Acclimation-Test’ I learned the hard way so you can stop guessing and start installing with total confidence.
Stop Watching the Clock and Start Testing for Moisture
The single biggest mistake I made early in my career was treating acclimation like a countdown on a microwave. I thought that if I just left the boxes in the room for forty-eight hours, some magical invisible timer would ding and the wood would be ‘ready.’ That is a dangerous game to play with your home’s interior. Wood is essentially a giant, rigid sponge; it breathes, it expands, and it contracts based on the environment around it. When I ignored flooring installation mistakes to avoid for a seamless look, I was ignoring the laws of physics. Now, I never even open a box without my moisture meter in hand. According to the National Wood Flooring Association (NWFA), wood can shift significantly in size with just a 1% change in its moisture content. That tiny percentage can be the difference between a floor that stays tight for decades and one that starts crowning in the summer or gapping in the winter. Real acclimation isn’t about time; it’s about reaching a state of equilibrium between your new planks and the air in your house.
Is a moisture meter actually worth the extra money?
You might be tempted to skip the extra gear, especially if this is your only big DIY project. I used to feel the same way until I realized that a fifty-dollar tool could protect a five-thousand-dollar investment. It isn’t just about the wood itself, either. You have to consider what’s happening underneath. We never skip the subfloor moisture test on concrete because moisture rising from below is just as destructive as dry air from above. In certain climates, you might even need the moisture barrier move for concrete slabs to keep things stable. Have you ever noticed your floors behaving differently when the seasons change? I’d love to hear about your own flooring battles in the comments below. Let’s dive into the step-by-step process of how to run this test properly so your floor stays exactly where you put it.
Find Your Baseline Before Tearing Into the Boxes
To get this right, you need to understand that your house has a ‘rhythm’—a baseline moisture level that fluctuates with your HVAC system. Before you even think about laying the first plank, you need to measure the moisture content of your subfloor in at least twenty different spots per thousand square feet. I remember a job in a coastal town where I was installing beautiful 5-inch wide oak. The client was in a rush, and I let them talk me into starting early because the humidity ‘felt fine.’ I didn’t verify the equilibrium. Within three months, that floor looked like a washboard because the planks expanded against a subfloor that was still holding onto construction-phase humidity. It was a costly mistake that taught me to never trust my gut over a digital reading. This is a vital step in any step-by-step flooring installation from planning to perfect finish. Use your moisture meter to get an average for the subfloor, then do the same for the new wood. To avoid common flooring installation mistakes to avoid for a seamless look, you are looking for those two numbers to be within a very specific range of each other.
The 2% Rule for Wide Planks
If you are working with wide-plank flooring, the industry standard is that the moisture content of the wood must be within 2% of the subfloor’s moisture content. For narrower strips (less than 3 inches wide), you have a bit more wiggle room—up to 4%. Think of the moisture meter as a bridge between the forest and your living room; until that bridge is level, you don’t cross it. Even if you are planning the row-start tactic for balanced flooring layouts in narrow hallways, the wood will fail if it isn’t stable. If you’re tackling something tricky like stairs, even using the stair-nose tactic for solid hardwood steps won’t save you if the wood is still ‘wet’ compared to the house air. This level of precision is why professional installers often insist on the glue-assist method for wide plank hardwood floors to add an extra layer of stability against seasonal shifting.
Stack Your Wood Like a Jenga Tower for Better Airflow
Don’t just drop the boxes in a pile in the corner and call it a day. For the wood to actually acclimate, air needs to touch every side of the plank. I use a technique called ‘cross-sticking.’ You take the planks out of the boxes and stack them in layers, with small spacer sticks (or ‘stickers’) between each layer. This allows the air in the room to circulate through the pile like a breeze through a screened-in porch. 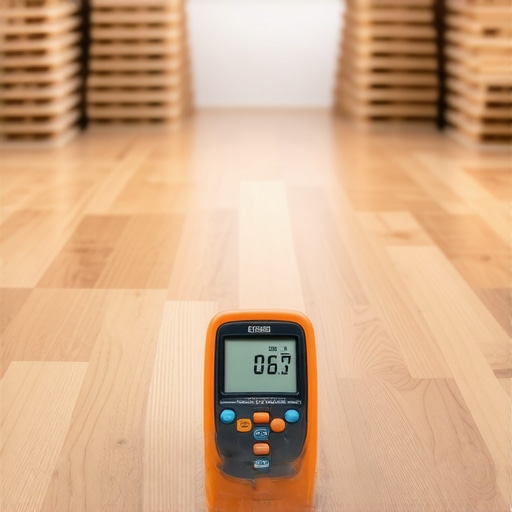 If you leave them in closed boxes, the planks in the middle will never reach equilibrium with the room. While the wood is sitting there, I usually take the time to plan my layout and remind myself of the spacer block rule for consistent gaps in hardwood installation. This ensures that once the wood is ready, the physical installation goes as smoothly as the preparation. By the time my moisture meter tells me the planks have matched the room’s rhythm, I know I’m building a floor that will stay flat and silent for the next thirty years.
Why Flat Beats Level Every Single Day
Many homeowners—and even some contractors—waste hours trying to make a subfloor perfectly ‘level’ with the horizon. Here is the contrarian truth: your floor doesn’t actually need to be level to look perfect, but it absolutely must be flat. I’ve seen beautiful homes where the entire structure leans slightly, and trying to force a level floor would create massive, awkward transitions at every doorway. However, if your subfloor has a dip of just an eighth of an inch, your luxury vinyl will eventually fail. I learned this when I started hearing a rhythmic ‘snap-crackle-pop’ in a kitchen I finished. To avoid why your vinyl plank floors are making a clicking sound, you have to prioritize flatness over levelness. According to the Tile Council of North America (TCNA) Handbook, surfaces for large-format tiles should not deviate more than 1/8 inch in 10 feet. If you find a low spot, the self-leveler move for perfectly flat vinyl installs is your best friend. Have you ever spent way too much time chasing a bubble on a level? Let me know in the comments.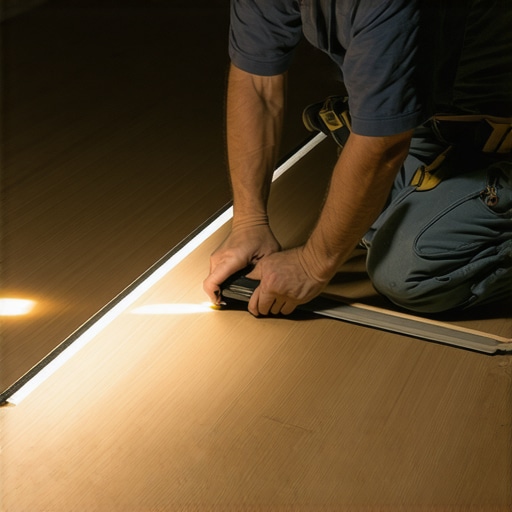
The Waterproofing Trap That Most Shower DIYers Miss
When it comes to bathroom remodels, people obsess over the tile but ignore what’s behind it. The most common mistake I see is the ‘sandwich’ of moisture. If you use a vapor barrier behind the cement board and then apply a liquid waterproof membrane on the front, you’ve essentially created a mold incubator. Moisture gets trapped and has nowhere to go. In my own projects, the liquid membrane move for fail-proof shower pans is my go-to, but I never double up on barriers. If you’re building from scratch, why we prefer pre-sloped pans for custom tile showers is because it removes the guesswork of drainage. Without that perfect slope, you’ll find that why your shower grout is crumbling just months after install is often due to standing water saturating the joints from beneath.
How do I stop my carpet from buckling after just three years?
This is a question I get constantly from frustrated homeowners. The ‘Oops’ factor here is almost always the tools used. Most people rent a knee-kicker and think they’re done. But a knee-kicker is only for positioning; it doesn’t actually stretch the carpet. For a lasting finish, the power-stretcher rule for large living room carpets is non-negotiable. If you don’t use a power stretcher to anchor the carpet into the tack strips, you will inevitably see why your carpet is buckling only three years later. Even if you follow carpet install secrets achieving flawless results every time, skipping the mechanical stretch is a recipe for wrinkles. Professional installers know that a carpet must be under significant tension to withstand the daily foot traffic of a busy home. Finally, don’t forget the finishing touches; even a perfect floor looks unfinished without the right trim. To get those corners tight, the coping saw technique for flawless inside baseboard corners is the only way to account for walls that are never truly square.Once the last piece of baseboard is nailed in and the grout has finally dried, you might think the hard work is over. But that is exactly when the ‘wear and tear’ clock starts ticking. One of the most heartbreaking things I see is a homeowner spending five figures on a renovation only to ruin the finish within six months because of a five-dollar set of furniture glides. I’ve learned that why we prefer felt pads over rubber for luxury vinyl isn’t just a preference—it’s a survival tactic for your floors. Rubber can actually react chemically with certain finishes, leaving permanent yellow stains that no amount of scrubbing will fix. If you already have some minor scratches, don’t panic; the no-sanding fix for scuffed hardwood floor finishes can save you from a full sand-and-refinish nightmare. It’s about maintaining that ‘just-installed’ glow for as long as humanly possible.
How do I maintain my flooring and shower surfaces over time?
Maintenance isn’t just about cleaning; it’s about preservation. For bathrooms, I always tell my clients that the day you finish is the day you start your sealing schedule. If you went with a high-end stone, you have to know how to seal a marble shower without changing the color to keep that luxe look without the staining. According to the Carpet and Rug Institute (CRI), even your soft surfaces need a strict regimen; they recommend a professional deep cleaning every 12 to 18 months to maintain the fiber integrity and your manufacturer’s warranty. Neglecting this is why why your shower grout is crumbling just months after install or why your carpets lose their bounce. I’ve found that best carpet types for high traffic areas in 2025 are designed for easier cleaning, but the tools you use still matter. If you’re noticing gaps in your trim, a quick baseboards makeover elevate your interior with simple updates like re-caulking with a high-flex sealant can make the whole room feel new again. #IMAGE_PLACE_HOLDER_D#
Ditch the Old Mop for These Modern Cleaning Secrets
Looking ahead, I see a massive shift toward ‘smart’ maintenance. We are moving away from saturating floors with water—which is the enemy of almost every material—and toward precision moisture-control tools. I’m already using the vacuum seal trick for cleaning dust out of floor grooves to prevent abrasive grit from acting like sandpaper between my planks. In 2025, top trends in installation for 2025 are going to focus heavily on longevity and ‘repairability.’ Whether you are eyeing baseboard trends in 2025 or a full kitchen overhaul, think about how you will access the subfloor or pipes later. I’ve started using the back-cut secret for tight baseboard outside corners even during repairs because it allows for a cleaner fit as the house settles. I highly recommend you go out and buy a high-quality pH-neutral cleaner this week; it is the single simplest change you can make to stop your finishes from dulling prematurely. If you really want to level up, try applying a fresh coat of sealer to your shower corners—it’s a thirty-minute job that prevents a thousand-dollar mold problem later. Taking care of your home isn’t a chore; it’s an insurance policy on your hard work.
The Hardest Lesson I Learned While Watching Wood Move
Looking back at twenty years of sawdust, the biggest epiphany wasn’t about a specific tool, but about respect for the materials. Wood is alive, even when it’s planks in a box. I used to think I could outsmart humidity with high-end adhesive, but physics always wins. If you respect the acclimation process, the floor rewards you with silence. Another lightbulb moment was realizing that ‘perfect’ is the enemy of ‘functional’—especially with subfloors. You don’t need a level house; you need a flat surface where the planks can rest without tension. When I started implementing the tension-first rule for stretching carpet into a doorway, I realized that every material—not just wood—has a ‘sweet spot’ of tension and release.
The Professional Toolkit I Actually Use
If you’re serious about doing this right, don’t just wing it. I swear by my pinless moisture meter to check equilibrium. For those tackling soft surfaces, I always point people toward the carpet install secrets achieving flawless results every time, which emphasize the importance of mechanical stretching over simple positioning. If you’re venturing into wet zones, mastering the dry-pack secret for a perfectly sloped shower floor is the difference between a spa and a swamp. Finally, keep a set of the wood shim secret for baseboards on uneven slabs handy; they are the unsung heroes of a professional finish that hides the quirks of an older home.
Now Go Build a Floor That Lasts Decades
Every cut you make and every row you lay is an investment in your sanctuary. Don’t let the fear of a small mistake stop you from starting. Whether you are following top trends in installation for 2025 or sticking to timeless classics like baseboard trends in 2025 fresh styles for every room, the pride of walking across a floor you installed yourself is unmatched. Your flooring installation journey starts with that first measurement—so take it with confidence and don’t be afraid to ask for help along the way. #IMAGE_PLACEHOLDER_E# Which part of the prep process do you find the most intimidating: the moisture testing or the subfloor leveling? Let me know in the comments!