

Last Thanksgiving, my neighbor Sarah didn’t just walk into my kitchen; she performed a near-perfect Olympic vault over the transition strip between my hallway and the dining room. It was one of those slow-motion moments where the gravy boat in her hand tilted dangerously close to the white rug. I had spent weeks obsessing over the finish of the wood, but I’d completely ignored the slight 1/2-inch height difference where the hardwood met the tile. That tiny lip turned my beautiful renovation into a literal obstacle course. We’ve all been there—you think you’re done with the hard part of a proper flooring installation guide, only to realize your guests are catching their toes on every doorway.
The Hidden Danger of the ‘Good Enough’ Transition
The truth is, most of us treat transitions as an afterthought. We buy the pre-made T-molding from the big-box store, slap it down with some construction adhesive, and call it a day. But those generic solutions often create a hump that is just high enough to catch a heel. Early in my career, I made the mistake of thinking a standard reducer would work for every height gap. I ended up with a transition so steep it felt like a speed bump in my living room. That failure taught me that a truly professional finish requires a bit more nuance, like using the feather edge secret to level out the subfloor before the planks even go down. According to the National Safety Council, even a change in flooring height as small as 1/4 inch can significantly increase the risk of trips and falls for older adults and children. We aren’t just talking about aesthetics here; we’re talking about making your home safe for the people you love.
Can You Really Get a Seamless Look Without Ripping Up the Subfloor?
I know what you’re thinking: ‘I don’t have the time or budget to rebuild my entire floor just to fix a 3/8-inch gap.’ It sounds like a massive headache, but you don’t have to settle for those chunky, toe-stubbing strips. Today, I’m going to show you how to navigate those tricky height differences, especially when you need to transition from thick carpet to thin vinyl without creating a dangerous lip. We will look at custom-ripped reducers and shim techniques that make your floors feel like one continuous surface. Have you ever had a guest nearly take a tumble because of a floor transition in your home? It’s an embarrassing moment for everyone, but it’s also one of those common flooring installation mistakes that is surprisingly easy to correct once you know the right tricks.
[image_placeholder]
How to Kill the Lip Before the First Plank Hits the Floor
Getting a flush finish isn’t about luck; it’s about physics. Think of your subfloor as the foundation of a house. If the foundation is tilted, the windows won’t shut. In flooring, if the subfloor has a dip, your transition strip becomes a tiny mountain range. I learned this the hard way during a condo remodel in 2018. The living room had a 1-inch dip right at the doorway. Instead of doing it right, I tried to ‘bulk up’ the underlayment with extra scraps of foam. Within a week, the luxury vinyl planks started making a sickening clicking sound every time the homeowner walked by. I had to rip up ten rows of flooring just to how to level a subfloor dip without removing the old subfloor properly. It was a four-hour mistake that taught me never to trust a ‘quick fix’ for a height gap.
The Feather Edge Secret for Butter-Smooth Transitions
To avoid my 2018 nightmare, you need to treat your floor leveler like frosting on a cake. You don’t just dump it; you taper it. Using the feather edge secret for smoothing subfloor transitions involves applying a high-quality patch compound and pulling it out at a long, shallow angle—usually 12 inches of ‘run’ for every 1/8 inch of ‘rise.’ This gradual slope is what makes the transition feel invisible underfoot. If you are working with concrete, you must ensure the vapor seal requirement for luxury vinyl on concrete is met first, or that beautiful leveling job will eventually crumble from trapped moisture. 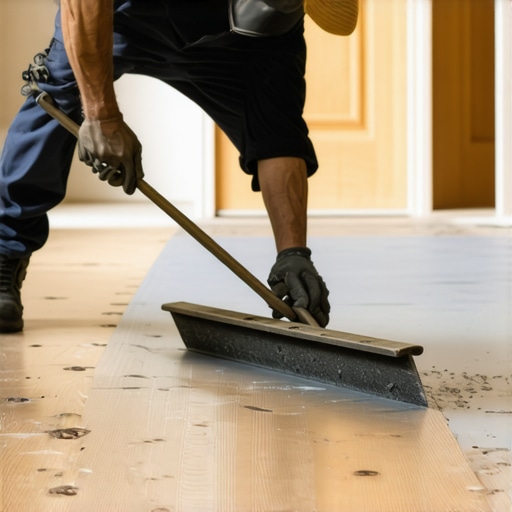
Stop Tripping Over Your Carpet to Vinyl Gaps
When you are moving from a thick, plush carpet to a thin vinyl plank, the height difference is staggering. You can’t just slap a metal strip down and hope for the best. The pro move here is to build up the vinyl side slightly using a thin plywood underlayment or specialized shims. This brings the two surfaces into a closer ‘neighborhood.’ From there, you can how to transition from thick carpet to thin vinyl without a lip by tucking the carpet edge tightly against a Z-bar. If the carpet isn’t pulled tight enough, it will eventually bunch up and create a new trip hazard. That’s why we always emphasize the power stretcher rule for large living room carpets to ensure that tension stays permanent, preventing those annoying ripples that develop over time.
Scribe Your Way to Perfect Baseboard Lines
Even if your floor is level, your walls might not be. When you drop your baseboards onto a new floor, you’ll often see gaps that look like little caves. Instead of filling those gaps with a mountain of caulk—which will eventually crack—you should use the wood shim secret for baseboards on uneven slabs. This involves placing small shims behind the baseboard to keep it plumb and then ‘scribing’ the bottom edge to match the floor’s contour. For those tricky spots where the floor meets a stone fireplace or an uneven wall, the scribe tool trick for baseboards against stone walls is your best friend. It allows you to trace the exact profile of the stone onto your wood, so when you cut it with a jigsaw, it fits like a glove. This level of detail is what separates a DIY ‘good enough’ job from a carpet install secret that looks like it was done by a master craftsman.
I’ve seen it a hundred times: a homeowner buys the thickest, softest padding available, thinking they’re buying luxury. They believe the myth that ‘thicker is always better’ for comfort. However, this is one of the most common flooring installation mistakes that can actually destroy your investment. According to the Carpet and Rug Institute (CRI) 104/105 standards, residential carpet cushion should typically not exceed 7/16 of an inch in thickness. When you go thicker, you create too much vertical ‘give.’ This constant flexing underfoot eventually causes the carpet backing to stretch and delaminate, leading to those unsightly waves that appear just a few years after install. If you’ve ever wondered why your carpet is buckling only three years later, it’s often because the pad was too soft for the style of carpet you chose.
Thicker Padding Is Actually Your Carpet’s Worst Enemy
The ‘Oops’ factor here is subtle but devastating. Beyond just the thickness, the density matters more than the height. A high-density 3/8-inch pad will outlast a low-density 1/2-inch pad every time. Early in my career, I let a client talk me into a ‘cloud-like’ padding that felt amazing for six months, but by the following Christmas, the carpet had stretched so much it was tripping people at the hallway transitions. We ended up having to pull the whole thing up. Now, I always insist on carpet install secrets like matching the pad density to the specific traffic patterns of the room. It’s a nuance that separates a showroom-quality job from a DIY disaster.
Is Your Installer Skipping the Power Stretcher on Purpose?
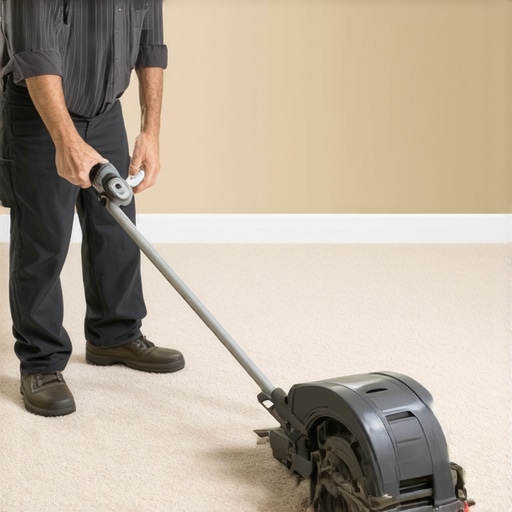
This is the question you must ask before the first tack strip is nailed down. Many installers rely exclusively on a ‘knee kicker.’ While a kicker is great for positioning, it is physically impossible to get a large room properly tensioned with your knee alone. If an installer doesn’t bring a long-handled power stretcher into your living room, they are cutting a major corner. You need to follow the power stretcher rule for large living room carpets to ensure the material stays taut for a decade, not just a week. Ignoring this is the knee kicker mistake that ruins luxury carpets, and it’s one of the hardest things to fix once the furniture is back in place. Have you ever fallen into this trap? Let me know in the comments.
The Deadly Sins of Shower Niche Waterproofing
Moving into the bathroom, the biggest misconception I encounter is that tile and grout are waterproof. They aren’t. They are merely water-resistant ‘clothing’ for your shower. The real heavy lifting is done by what’s underneath. I once consulted on a shower repair when to fix vs replace project where the homeowner had a beautiful niche that was leaking into the studs. Why? Because they relied on the grout to keep the water out. To prevent this, you must use the liquid membrane move for fail-proof shower pans and niches. This creates a continuous, rubberized ‘tanking’ system that doesn’t care if a grout line cracks. It’s an advanced step that many budget contractors skip to save fifty bucks, but it’s the difference between a spa-like retreat and a moldy nightmare.
Stop Mitering Your Inside Baseboard Corners
Finally, let’s talk about the baseboards. Most people think you just cut two 45-degree angles and push them together. But walls are never perfectly square. If you miter your inside corners, they will eventually pull apart as the house settles or the wood shrinks. The pro alternative is the coping saw technique for flawless inside baseboard corners. By cutting the profile of one board into the end of the other, you create a joint that stays tight even when the walls shift. This is how you achieve that high-end, seamless look that defines baseboard styles that elevate your interior design. It takes five minutes longer per corner, but it eliminates the need for that thick, cracking bead of caulk that screams ‘amateur hour.’ Have you ever noticed your baseboard corners opening up over the winter? That’s exactly what coping prevents.
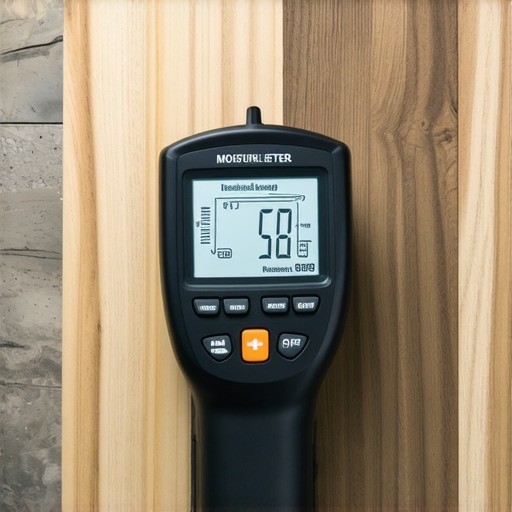
I used to trust my eyes. Then I met a 40-year veteran installer who laughed as he watched me check a concrete slab by just touching it. He handed me a high-quality moisture meter and told me that my hands weren’t sensors. He was right. According to the Tile Council of North America (TCNA) Handbook, specifically method B422, the integrity of your installation depends entirely on the preparation of the substrate. If you ignore the moisture meter requirement for basement flooring jobs, you are essentially gambling with your entire budget. Concrete might look dry, but it can hold gallons of water that will eventually cause your planks to buckle or your grout to effloresce. I never start a job anymore without verifying that we have met the moisture barrier move for concrete slabs in livonia kitchen remodels standards.
Stop Guessing and Start Measuring Subfloor Moisture
Beyond just moisture, the tools you use define the speed and accuracy of the job. For years, I used a chalk line to layout my showers, only to find that my first row of tile was off by a hair because the line ‘smudged’ when I applied the thinset. Now, I won’t touch a bathroom without a 360-degree green beam laser. Using the laser level move for perfectly horizontal shower tiles ensures that your layout is perfectly plumb from floor to ceiling, which is vital for those modern large-format tiles everyone loves right now. If you are doing this yourself, remember that step-by-step flooring installation from planning to perfect finish requires checking your layout at every third row to ensure things aren’t drifting.
How do I keep my floors from wearing out too fast?
Maintenance is where most homeowners drop the ball. You’ve spent thousands on your guide to durable flooring installation for a stylish home, so why treat it like a sidewalk? The single biggest favor you can do for your hardwood or vinyl is a simple routine. I’m a huge advocate of stop hardwood scratches with the felt pad routine. It sounds basic, but rubber feet on furniture can actually chemically react with certain finishes and cause permanent staining. That is why we prefer felt pads over rubber for luxury vinyl and hardwood alike. In the future, I expect we will see ‘self-healing’ finishes on luxury vinyl, but until then, physical protection is your only real defense against the grit and grime of daily life.
Laser Lines Beat Chalk Every Single Time
As we look toward 2025 and beyond, the trend is shifting toward larger, heavier materials. This means the ‘old ways’ of just slapping down mortar won’t work anymore. You need to understand the full bed mortar rule for large format shower tiles to prevent air pockets that lead to cracked tiles. We are also seeing a massive rise in pre-fabricated systems. I personally recommend why we use pre-sloped pans for custom tile showers because it eliminates the human error associated with hand-troweling a mortar bed. Scaling your home projects means working smarter, not harder. My best advice? Try the ‘felt pad routine’ on your heavy kitchen chairs tonight—you will hear the difference in sound immediately, and your floors will thank you for the next decade.
Finishing a home project is about more than just checking items off a list; it is about the peace of mind that comes from knowing every layer was handled with care and precision.
The Most Expensive Mistakes I Made So You Don’t Have To
If I could go back and talk to my younger self, I would say: ‘Slow down on the pretty stuff and look at the subfloor.’ I’ve learned that the biggest failures don’t happen during the final hour; they happen during the first. Here are a few lightbulb moments that changed how I work:
- Subfloors never lie: You can buy the most expensive tile in the world, but if your subfloor has too much flex, those grout lines will crack within months. I always recommend learning how to reinforce a bouncy subfloor before tiling to save yourself a massive headache.
- Moisture is a silent killer: I used to think a dry-looking slab was safe. Now, I know that the moisture meter requirement for basement flooring jobs is non-negotiable if you want your luxury vinyl or hardwood to stay flat and stable.
- Tension is the secret to longevity: If you are installing carpet, never settle for just a knee kicker. Following the power stretcher rule for large living room carpets is the only way to avoid those unsightly ripples that show up three years down the road.
Tools That Turn a DIY Project Into a Professional Masterpiece
You don’t need a warehouse full of gear, but you do need the right gear. These are the tools I never head to a job site without because they guarantee a level of precision that manual methods just cannot match. I trust a 360-degree laser level more than my own eyes when it comes to the laser level move for perfectly horizontal shower tiles. It ensures that your layout stays straight even if your walls are slightly wonky. I also swear by a high-quality coping saw. While it might seem old-fashioned, the coping saw technique for flawless inside baseboard corners creates a much tighter, more professional joint than any miter saw ever could. Finally, keep a moisture meter in your drawer. It is the only way to verify why we never skip the subfloor moisture test on concrete before laying down expensive materials.
Create a Foundation Your Family Can Trust
Your home is likely your biggest investment, and the floors are the part you interact with most. Taking the extra time to scribe a baseboard or flood-test a shower pan isn’t just about ‘being a perfectionist’—it is about protecting that investment for decades. When you follow a step-by-step flooring installation from planning to perfect finish, you aren’t just making a room look better; you’re creating a space where your family can live without worrying about trips, leaks, or creaks. Don’t be afraid to take it slow. The results will be worth every extra minute you spend on the details. If you ever feel stuck or need professional insight, feel free to contact us for guidance on your next project. Have you ever found a surprise under your old flooring that completely changed your installation plan? Let me know below.