

I stood there, squinting through a face full of soapy lather, and my heart sank. There it was again—that tiny, jagged hairline crack running right down the corner of my shower. It felt like a personal insult. I had just ‘fixed’ it three months ago. I’d spent a whole Saturday morning digging out the old stuff and packing in fresh grout, convinced that this time, it would hold. Spoiler alert: it didn’t. I was caught in a cycle of frustration that many of you probably know all too well. It’s that nagging worry that while you’re scrubbing your hair, water is slowly seeping into the wall cavity, inviting mold to set up shop where you can’t see it. In this guide, I’m going to share the exact method we used to finally kill that crack for good. No more annual patches. No more worrying about shower repairs. We are moving beyond the ‘put more grout on it’ mentality and into a solution that actually accounts for how houses behave.
The Recurring Nightmare in My Master Bathroom
I’ll admit it—I was stubborn. When I first saw the crack, I figured I just hadn’t mixed the grout thick enough. I thought I could out-muscle physics. But here’s the thing: your house is alive. It breathes, it settles, and it shifts with the seasons. When two walls meet in a corner, they don’t just sit there perfectly still; they move independently. Hard grout has zero flexibility. It’s like trying to hold two moving cars together with a ceramic plate. Eventually, something is going to snap. I made the classic mistake of treating a dynamic joint like a static one, a common pitfall in shower renovation.
Will silicone really look as good as my grout?
This is the big fear, right? You spent a fortune on that beautiful tile and you don’t want a thick, shiny bead of plastic-looking caulk ruining the aesthetic. I was terrified of this, too. I thought silicone would look cheap or peel off in a week. But once I discovered color-matched 100% silicone, my whole perspective changed. It doesn’t have to look like a messy DIY disaster. In fact, if you use the blue tape secret, it looks even cleaner than the original grout line.
Why Grout Fails When the Walls Start Breathing
The technical term for this is a ‘change of plane.’ Whether it’s where the wall meets the floor or where two walls meet in the corner, these areas are subject to different stresses. According to the Tile Council of North America (TCNA), flexible sealants are mandatory in these spots because grout simply cannot handle the movement. If you’ve been wondering how to stop shower mold where the tile meets the tub, the answer is almost always flexibility. By replacing that rigid grout with a high-quality sealant, you create a waterproof bridge that expands and contracts without breaking. It’s the difference between a bridge that sways in the wind and one that collapses. If you’re aiming for a spa-like shower experience, you need to start with a foundation that won’t leak. Have you ever spent hours patching a crack only to have it return within months? Drop a comment and let me know—I need to know I’m not the only one who fought this battle for years!
Strip Away the Old Mistake Before You Re-Seal
You can’t just layer new material over the old; that’s like trying to paint a car without sanding the rust first. The very first thing you need to do is get that failing grout out of there. I used a manual grout saw because I like the control, but a steady hand with a rotary tool works too. You need to dig deep enough—at least 1/8th of an inch—to give the new sealant enough surface area to grab onto. I remember my first attempt at this; I was so scared of scratching the tile that I only scraped the surface. The silicone ended up peeling off like a sunburned layer of skin within a month. Be brave, get into that corner, and clear it out. This is a critical step in any shower renovation project. If you find the tiles themselves are loose, you might be dealing with deeper issues, similar to how to avoid hollow spots under your new tile.
Clean the Joint Until It’s Hospital Grade
Once the grout is gone, your vacuum is your best friend. Get every single speck of dust out of that crack. Even a tiny bit of grit will prevent the silicone from forming a waterproof bond. After vacuuming, take a rag soaked in 100% isopropyl alcohol and wipe the joint down thoroughly. This removes soap scum and oils that your eyes can’t see. If you’ve got stubborn residue, you might even try the toothbrush trick for cleaning stubborn shower grout to ensure the substrate is perfectly bare. Alcohol is better than other cleaners because it evaporates completely and leaves no residue behind.
Apply the Blue Tape for a Flawless Edge
This is where the magic happens. If you want that professional, sharp line that looks like it was done by a master plumber, you have to use the blue tape secret. Run two strips of painter’s tape parallel to the joint, leaving about an 1/8th of an inch of tile exposed on either side of the crack. 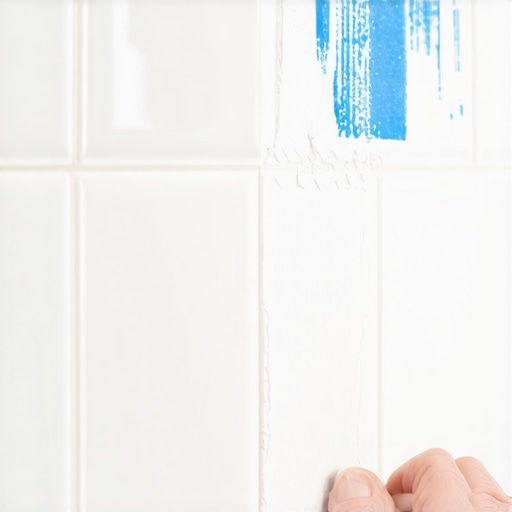 My first time using this method, I thought it was overkill. I figured I could just ‘wing it’ with a wet finger. I ended up with silicone smeared three inches up the wall, looking like a giant slug had crawled through my shower. The tape acts as a dam, keeping the sealant exactly where it needs to be. It’s the same precision needed when you want to stop shower mold where the tile meets the tub once and for all.
Lay Down the Bead and Pull the Tape Immediately
Cut the tip of your 100% silicone tube at a 45-degree angle. The hole should be no wider than the gap you’re filling. Consistency is the name of the game here. Apply a steady, even bead of silicone into the taped-off joint. Once the bead is down, use a gloved finger dipped in a little bit of soapy water to smooth it out. Don’t over-work it; one or two passes is enough. The most important part? Peel that blue tape off immediately while the silicone is still wet. Pull the tape away from the joint at an angle. You’ll be left with a crisp, perfect line that can actually handle the house shifting and breathing without ever cracking again. This level of detail is what separates a basic fix from professional-grade shower repairs.
While that perfect silicone bead feels like a victory, it’s only one piece of the puzzle. I’ve seen homeowners spend thousands on premium materials only to have the entire project fail because of a nuance they didn’t even know existed. One of the biggest myths in the DIY world is the ‘tight is right’ philosophy. Whether you are installing luxury vinyl or trimming out a room, the instinct is to jam everything together as tightly as possible to avoid gaps. In reality, that’s exactly how you end up with vinyl planks buckling at the windows or baseboards that pop off the wall during a humid summer. Your home isn’t a static box; it’s a living, breathing structure.
The Baseboard Trap That Most DIYers Fall Into
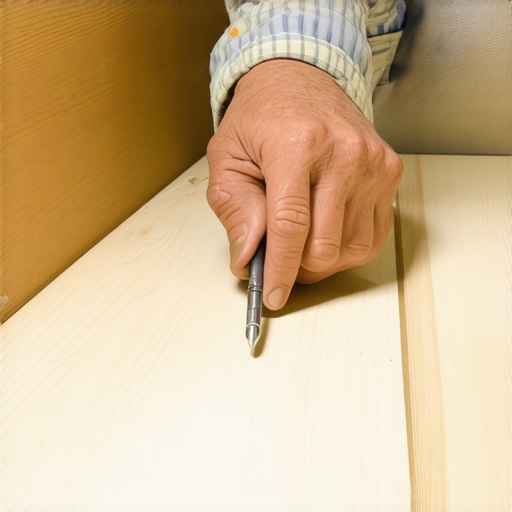
Here is a contrarian view: Your baseboards should never be pinned to the floor. I learned this the hard way during a massive living room remodel. I thought that by driving nails at a steep angle through the trim and into the subfloor, I was creating a ‘super-seal’ against drafts. Instead, I created a anchor that prevented the floor from moving. When the humidity spiked, the floor tried to expand but had nowhere to go, resulting in a mountain-like peak in the middle of the room. This is why pros religiously follow the expansion gap rule for flooring. You must nail into the wall studs, and the studs only. If your floor is uneven and you’re worried about a gap, don’t just push harder—use the scribing tool every diyer needs to shape the wood to the floor’s profile rather than forcing it down.
Is your knee kicker actually ruining your new carpet?
This is a question I get from readers who see wrinkles appearing just eighteen months after a professional-looking install. Most people assume a knee kicker is the primary tool for stretching. In reality, a kicker is for positioning; if you don’t use a power stretcher, you are essentially setting yourself up for failure. The National Wood Flooring Association (NWFA) and many carpet trade bodies emphasize that improper tension leads to premature wear and delamination. Falling for the knee kicker mistake is the number one reason why your carpet is wrinkling two years after install. A power stretcher applies thousands of pounds of force that a human knee simply cannot replicate, locking the backing into the tack strips for a lifetime bond.
Another nuance that separates the pros from the amateurs is the ‘moisture memory’ of the subfloor. I’ve seen gorgeous hardwood cupping within weeks because the installer didn’t perform the moisture meter test before laying the first board. If the moisture content of your subfloor and your new flooring are more than 4% apart, you’re inviting a structural disaster. These are the hidden details that don’t show up in a 60-second social media tutorial but determine if your shower renovation or floor project actually lasts a decade. Have you ever fallen into this trap and had to pull up your work? Let me know in the comments—I’ve definitely been there, and the second time is always the charm!
Building a home that lasts means looking past the day you finish the trim. I used to think the job ended once the last bead of caulk dried, but I’ve since realized that maintenance is just ‘installation in slow motion.’ If you want your hard work to hold up, you need to think about the long-term structural integrity of your materials. For example, if you’re seeing movement in your living room, you might need the hidden screw fix for squeaky floors under existing carpet. This isn’t just about noise; it’s about preventing the friction that eventually shreds your carpet backing from the inside out. I cannot stress this enough: buy a moisture meter. I personally use the Delmhorst J-2000 because it’s rugged and dead-accurate. The National Wood Flooring Association (NWFA) explicitly states in Technical Publication No. A100 that ‘moisture testing of both the wood flooring and the subfloor is an essential part of the installation process.’ If you skip the moisture meter test every flooring pro uses, you are basically gambling with your bank account. I’ve seen ten-thousand dollar floors ruined because someone didn’t want to spend two hundred on a tool. 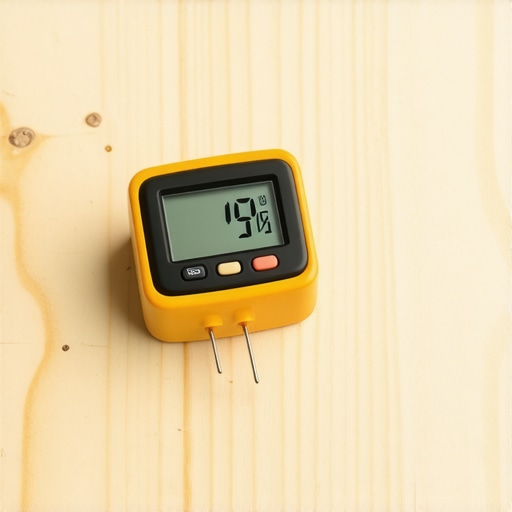 Looking ahead, I see a massive shift toward ‘smart’ integration in our floors and walls. We’re already seeing moisture sensors that can detect a leak behind a shower wall and ping your phone before the first drop hits the subfloor. In the world of transform your flooring top trends in installation for 2025, these preventative technologies will become the standard, not the exception.
How do I maintain my shower and floors so they stay like new?
For your shower, the golden rule is consistency. Once you’ve performed necessary shower repairs, you must check the silicone beads every six months. If the edges start to pull away, it’s time to re-seal. For carpets, the secret is all in the tension. If you start to see the faintest ripple, don’t wait. Use carpet install secrets like a power stretcher to re-tension the room before those ripples become permanent creases. When it comes to the finishing touches, stop trying to fill gaps with mounds of caulk. It looks terrible and it doesn’t last. Instead, master the art of the scribe. I swear by the scribing tool every diyer needs for tight baseboards. By physically tracing the irregularities of your floor onto your trim, you create a fit so tight that you won’t even need a sealer. If you’re feeling fancy, using a compass for the ultimate baseboard to rock scribe is the pro-level move that will make your neighbors think you hired a master carpenter. I challenge you to try a dry-fit scribe on your next piece of baseboard—it’s a total game-changer for a professional finish.
The Brutal Truths About DIY That Nobody Tells You
I’ve spent years fixing my own mistakes, and the biggest one was assuming that aesthetics equal quality. A beautiful tile job is useless if the substrate is rotting underneath. First, remember that ‘tight’ is actually your enemy when it comes to floors. If you don’t respect the expansion gap rule for flooring under door jambs, you’re essentially building a future headache. Second, never trust your eyes over a professional tool. I’ve seen dry-looking concrete ruin thousands of dollars in expensive vinyl because it was holding deep, invisible moisture. Finally, don’t be afraid of the ‘re-do’. If a carpet seam looks bad on day one, it won’t magically heal; it will look like a canyon after a year of foot traffic.
My Personal Toolkit for a Lifetime Finish
If you’re serious about moving beyond basic maintenance, there are specific tools I never start a project without. I rely heavily on a high-end moisture meter because the moisture meter test every flooring pro uses is the only way to guarantee your floor won’t buckle or warp down the road. For trim work, a quality compass or scribe is non-negotiable. Using the scribing tool every diyer needs for tight baseboards allows you to follow the natural, imperfect curves of your home, making even standard materials look like high-end custom cabinetry. Lastly, for any carpet work, rent a power stretcher. Relying on a simple knee kicker is a gamble that usually ends with you wondering why your carpet is wrinkling two years after install.
#IMAGE_PLACE_HOLDER_E#
Take the First Step Toward a Better Home
Renovating your space can feel overwhelming, but every expert was once a beginner staring at a jagged crack in their tile. Whether you’re diving into complex shower repairs or simply trying to get your baseboards to sit flush against an uneven floor, the key is patience and a commitment to proper technique. You now have the knowledge to avoid the structural pitfalls that trap most DIYers. Your home is your biggest investment, and it deserves the care of someone who treats every joint and seam as a craft. You’ve got the tools and the plan—now it’s time to build something that lasts.
Have you ever had a simple repair turn into a weekend-long project because of a hidden mistake you didn’t see coming? Let me know in the comments below!