

I will never forget the sound of my wife’s heel catching on the transition strip between our laundry room and the hallway. It wasn’t just a trip; it was a sharp ‘pop’ that signaled another failed DIY attempt. I had spent hours on the step-by-step flooring installation, feeling like a total pro, only to have the most visible part of the floor fail in under a month. If you have walked through your house and felt that loose metal or wood strip wiggle under your toes, you know exactly the frustration I am talking about. Concrete slabs are notorious for being ‘fussy’ roommates. They are hard, cold, and—as I learned the hard way—constantly trying to push away anything you try to stick to them. Today, I am going to show you why those transitions won’t stay put and how we can finally marry your flooring to that slab using methods that actually last.
That Annoying Click-Clack Sound is Driving Us All Crazy
Early in my career, I made the classic rookie mistake of thinking a bit of construction adhesive and some cheap plastic anchors would hold a T-molding in place forever. It did not. I ignored the fact that flooring installation mistakes usually come back to haunt you right where the different materials meet. Concrete is not just a solid rock; it is a porous sponge. According to the ASTM F1869 standard, concrete can release significant amounts of moisture vapor, which effectively ‘lifts’ your glue or rusts out cheap fasteners from the inside out. This moisture is often why the concrete moisture test is so vital before you even think about finishing a room. If you have been battling a strip that refuses to stay down, have you noticed if it is worse during the humid summer months? Drop a message on our contact page and let me know—I bet we can find a pattern.
Is a Glue-Down Fix Just a Waste of My Time?
You might be skeptical. Maybe you have already tried ‘The World’s Strongest Glue’ only to have it peel off the slab like a sticker. The truth is, a transition isn’t just a decorative piece; it is a bridge that deals with constant expansion and contraction. Whether you are working with a T-molding for long runs or a simple reducer, the bond has to be mechanical or specifically rated for high-alkalinity environments. When I was first starting out, I did not realize that the pH of the concrete surface could actually break down the chemical bonds of standard adhesives. We are going to dive into the exact mechanical fasteners and hybrid adhesives that actually work, so you can stop stubbing your toes and start enjoying a floor that feels solid under every step.First, you have to realize that concrete and wood are like oil and water. To get them to stick, you need a mediator. I start by vacuuming the channel like my life depends on it. If there is even a speck of dust, your adhesive is just sticking to the dust, not the slab. Think of it like trying to tape a dusty cardboard box; the tape just slides right off. I often use a stiff wire brush or even borrow the toothbrush trick for cleaning stubborn shower grout to get the inside of the expansion channel perfectly clean. Once it is sterile, we can talk about the mechanical fix.
The Secret to a Mechanical Bite in Solid Concrete
I used to rely on those little plastic sleeve anchors, but they are useless if the hole is slightly too wide or if the concrete is old and crumbly. Now, I use a more robust ‘wood plug’ method for any step-by-step flooring installation. I drill a 1/4-inch hole into the concrete using a carbide-tipped masonry bit, hammer in a small, tapered piece of scrap wood—cedar shims work great for this—and then drive a finish nail or screw through my transition strip into that wood. It creates a physical ‘bite’ that concrete alone simply cannot offer. 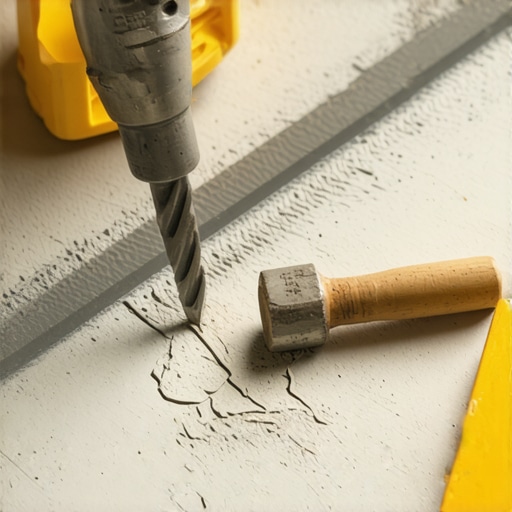 I remember one specific job where I tried to shortcut a transition in a humid basement using only a heavy-duty construction adhesive. I thought the weight of a few heavy toolboxes would hold it down until it cured. Two days later, the homeowner called because their kids had kicked the strip loose while playing—the glue never bonded because the slab was too cold and the pH was too high. That was a frustrating example of how flooring installation mistakes can double your workload in an afternoon.
Why Flexibility Saves Your Transition from Snapping
If you are dealing with complex layouts like the best way to transition hardwood to a tiled shower, you have to account for different material heights and different rates of movement. For these scenarios, I swear by hybrid polymer adhesives. These stay slightly rubbery even when they are fully cured. Unlike standard yellow glue that turns into brittle glass, these polymers act like a shock absorber for your feet. This is very similar to the flex glue move for baseboards on curved walls where you need the material to ‘give’ slightly without snapping the bond. Also, never ignore the wiggle room. You must respect the expansion gap rule for flooring under door jambs. If you pin the transition strip too tight against the floorboards, the first time the humidity spikes, your floor will buckle or the strip will pop out like a champagne cork. Always leave a ‘penny gap’—roughly 1/8th of an inch—between the flooring edge and the center track of the transition. This allows the floor to expand underneath the lip of the molding without pushing the whole assembly off the concrete slab. Keeping the track centered is the difference between a floor that lasts twenty years and one that fails in twenty days.Most people assume that once concrete is dry to the touch, it is a static, dead surface. This is a massive misconception that leads to those wiggling T-moldings and popping transitions. Concrete is actually a dynamic environment that fluctuates with temperature and humidity. According to the National Wood Flooring Association (NWFA), substrate moisture and pH levels are the two most overlooked factors in installation failure. If the alkalinity of your slab is too high—a common issue with newer concrete—it will chemically break down your adhesive from the bottom up, leaving your transition strip floating uselessly in a pool of degraded glue.
Stop Treating Your Concrete Like a Piece of Plywood
Many DIY guides suggest just ‘gluing it down’ with whatever construction adhesive is on sale. In my experience, that is a recipe for a callback. You cannot treat a porous, mineral-heavy slab like you would a wooden subfloor. A common trap is using a rigid epoxy that doesn’t allow for the natural ‘breathing’ of the house. This rigidity is often why your self-leveling compound is cracking or why your transition eventually snaps. You need a bond that offers structural integrity but retains enough elasticity to handle the house settling. 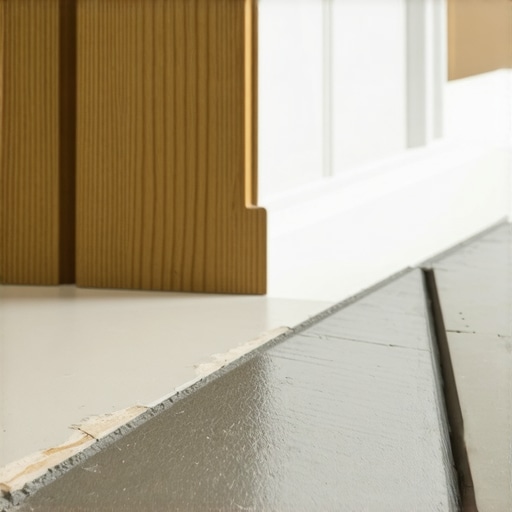
Why Does Your Transition Strip Keep Popping Up Every Summer?
It usually comes down to the ‘seasonal shift’ and a failure to respect the physics of expansion. If you didn’t leave enough room for the floor to grow, the pressure from the planks will physically shove the transition strip right out of its track. This is just as critical as carpet install secrets where tension determines longevity. If you pin the material too tightly, it has nowhere to go but up. I have seen beautiful homes where the owner spent thousands on materials, only to have the stair-step pattern mistake or a tight transition ruin the entire aesthetic. Have you ever fallen into this trap? Let me know in the comments.
The Nuance of the Mechanical and Chemical Hybrid
For a fix that actually lasts, I recommend a hybrid approach. Don’t just rely on glue. Use a masonry bit to create anchor points, but instead of plastic, use the wood-plug method I mentioned earlier. Then, apply a high-quality polymer adhesive. This same attention to detail applies to wet areas; for instance, understanding the back-buttering secret for large format shower tiles is the only way to prevent hollow spots that eventually lead to cracks. Even when finishing the room, how you handle the trim matters. To get that high-end look without the gaps, I always use the caulk and dab method for perfect baseboard joints. By combining mechanical fasteners with flexible chemical bonds, you create a transition that can survive both the humid summers and the dry winters without ever budging.I have realized over the years that even the best installation won’t survive a decade of heavy foot traffic if you don’t have the right maintenance routine and the correct gear from day one. I stopped guessing about my subfloor conditions long ago. If you want to stop the cycle of ‘fix and fail,’ you need to invest in a high-quality pinless moisture meter. I personally swear by the Wagner Meters Rapid RH system because it gives me a digital reading of the relative humidity deep inside the slab, not just on the surface. This is exactly the moisture meter test every flooring pro uses to prevent transitions from popping. When you know the numbers, you stop blaming the glue and start addressing the environment.
The Gear That Separates Pros from Frustrated Weekend Warriors
Beyond moisture detection, your mechanical toolkit needs a serious upgrade if you are moving past basic DIY. I never step onto a job site without my 18-gauge brad nailer for those delicate trim pieces and a high-torque hammer drill for the concrete work. For the flooring itself, I avoid the cheap plastic tapping blocks that come in those $20 kits. Instead, I use a weighted professional block and the rubber mallet hack for locking stubborn vinyl planks. This ensures the joints are seated so tightly that there is zero ‘give’ when you eventually install your transition strip over them. Having the right leverage means you aren’t fighting the material; you are guiding it. 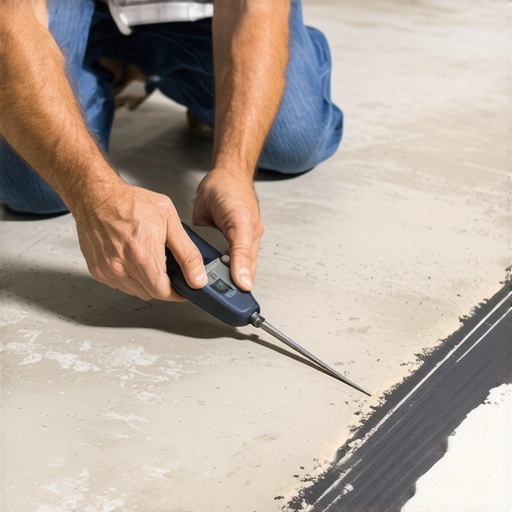
How Can I Keep These Transitions Rock Solid for Decades?
Maintenance is not just about cleaning; it is about inspection. Every spring and autumn, I do a ‘sock walk’ through my house. I slide my feet across the transitions to feel for the slightest wiggle. If I feel a movement, I address it immediately with a bead of flexible sealant before it turns into a trip hazard. This is the same proactive approach I take with shower repairs when deciding to fix vs replace for longevity. For the perimeter of the room, keep an eye on your edges. If you notice a gap opening up, don’t ignore it. You can often learn how to fix baseboard gaps without replacing the trim by using a high-flex caulk that moves with your house’s seasonal shifts.
Smarter Materials are Coming to Your Living Room
Looking ahead to 2025 and beyond, I predict we will see a massive shift toward ‘smart’ transition systems. We are already seeing prototypes of magnesium-oxide based flooring that is virtually immune to moisture-driven expansion. In the near future, our transition tracks might even be integrated directly into the subfloor during the initial pour. This would eliminate the need for drilling into concrete entirely. Until then, we have to master the hybrid methods of today. If you are struggling with a carpet-to-tile jump, don’t just tuck it and hope for the best; use carpet install secrets like the double-glue method for the most durable bond possible. I want you to try this today: pick your loosest transition strip, pull it up, and try the wood-plug mechanical fix I described earlier. It is a game-changer that will make your floor feel like a single, solid unit.
The Hard Truth About Glue and Concrete
After a decade in the field, I have realized that concrete is never truly static. It is a breathing, shifting surface that demands respect. One of the most important lessons I have learned is that cleanliness is 90% of the battle; if you do not vacuum that channel until it is spotless, your high-end adhesive is just sticking to dust. I also learned that the ‘wiggle’ you feel under your foot is not just a nuisance—it is a signal that moisture or pH levels are winning. Transitioning your mindset from ‘just stick it down’ to ‘mechanically anchor it’ is what separates a DIYer from a craftsman.
The Gear That Lives in My Truck Permanently
For a truly professional transform-your-home expert flooring installation, I rely on a few non-negotiable tools. A high-quality SDS-plus rotary hammer is essential for drilling into the slab without cracking it. I also keep a stash of tapered cedar shims for the wood-plug trick we covered earlier. To finish the look, I always have flexible filler on hand to fix baseboard gaps without replacing the trim. These tools turn a frustrating afternoon into a successful project that you won’t have to touch again for twenty years.
Build a Floor That Stands the Test of Time
Finishing a room is about more than just laying planks; it is about the details that make the house feel solid and safe. Whether you are applying carpet install secrets or finishing a vinyl layout, that final transition strip is your signature on the project. As you look toward future projects, stay updated on baseboard trends in 2025 to keep your home’s aesthetic as modern as its structural integrity. You have the knowledge now to stop the ‘pop’ and ‘click’ for good. Which doorway in your home currently has a loose transition that’s been driving you crazy? Let me know in the comments below!