

I’ll never forget the morning I realized my “dream bathroom” was literally falling apart under my feet. It was mid-January, about three years ago. I’d just finished a DIY radiant heat install, and that first cup of coffee tasted better because my toes weren’t freezing on the tile. Then, out of nowhere, I heard it—a sharp tink like a glass breaking in another room. I looked down and there it was: a hairline fracture snaking right through my beautiful slate. I felt like a total amateur. I’d spent weeks on that floor, only to watch it spider-web because I didn’t respect the physics of heat. If you’re seeing those same cracks or hearing those ghostly pops, I know exactly how much it hurts. Today, we’re going to dig into why this happens and, more importantly, how you can save your floor from a total teardown.
Heat Changes Everything Under Your Feet
Most people think tile is indestructible, but it’s actually quite brittle when it’s forced to move. When you turn on that radiant system, the subfloor, the mortar, and the tile all expand at different rates. This is called the coefficient of thermal expansion, and if you don’t account for it, your floor is basically a ticking time bomb. Early in my career, I made the classic blunder of bonding the tile directly to a rigid substrate without a “buffer” zone. It’s one of those flooring installation mistakes to avoid if you want your hard work to last more than one season. According to the Tile Council of North America (TCNA), most tile failures over heated floors aren’t caused by the heat itself, but by the “shear stress” created when the tile and the subfloor fight each other for space.
Is radiant heat actually worth the risk?
You might be wondering if you should just rip it all out and go back to traditional radiators. I get it. The fear of wasting thousands of dollars is real. But here is the truth: radiant heat is incredible—you just have to install it with an “uncoupling” mindset. When I finally swallowed my pride and redid my own bathroom, I made sure to stop floor tile cracking with this uncoupling membrane that allows the subfloor to move without taking the tile with it. It’s the difference between a floor that lasts five years and one that lasts fifty. Have you noticed your grout lines turning to powder or seen a crack that follows a perfect straight line across multiple tiles? I’d love to hear your story, as it helps me figure out exactly where your system might be failing.
Why Thinset Choice Can Make or Break Your Project
Another hard lesson I learned is that not all “sticky stuff” is created equal. You can’t just use any old bag of mortar from the clearance aisle. You need something with high polymer content that can flex. If your mortar is too rigid, it acts like a bridge, transferring every vibration and expansion straight into the tile. To avoid hollow spots under your new tile that lead to cracks when stepped on, you have to ensure nearly 100% thinset coverage, which is much harder to achieve than a standard dry-area install.
Get the Subfloor Flat Enough for a Marble to Sit Still
If your substrate looks like the rolling hills of Kentucky, your tile is doomed before the first bag of thinset is even opened. High and low spots are the absolute enemies of radiant systems. I remember a job in a 1920s bungalow where I thought I could “eyeball” the slope of the subfloor. I poured the self-leveling compound, only to watch it race toward the hallway like a silver river because I hadn’t sealed my perimeter properly. I spent the next morning with a scraper and a bad attitude. To avoid that nightmare, you need to understand why your self-leveling compound is cracking before the floor goes down. The floor must be dead flat so the heating wires or mats lay flush. If a wire sticks up even a quarter-inch, it creates a “hot spot” that can weaken the bond of the tile directly above it.
The Uncoupling Membrane is Your Best Friend
Think of an uncoupling membrane as a “slip sheet.” It’s like putting a layer of wax paper between two pieces of dough; when you pull the bottom piece, the top one doesn’t have to tear. In a radiant setup, this membrane allows the subfloor to expand and contract horizontally without transferring that movement—and the resulting stress—into your rigid tile. When you stop floor tile cracking with this uncoupling membrane, you’re basically giving your floor a suspension system. It’s the same logic we use when we learn how to stop floor tiles from cracking over a concrete expansion joint. You are creating a controlled break in the bond that prevents the physics of heat from shattering your slate or porcelain.
Ditch the Standard Trowel and Go Big
You cannot use a small notch trowel for heated floors. You need deep ridges to ensure the mortar collapses and fills every void around the heating elements. Making the trowel size mistake that ruins your shower tile bond is even more dangerous here because air pockets act as insulators. Those pockets trap heat, causing the tile to expand unevenly and eventually pop loose.
How to guarantee 100% thinset coverage
To truly succeed, you must back-butter every single tile. This means spreading a thin, flat layer of mortar on the back of the tile before pressing it into the combed ridges on the floor. It’s tedious, but it’s the only way to avoid hollow spots under your new tile. 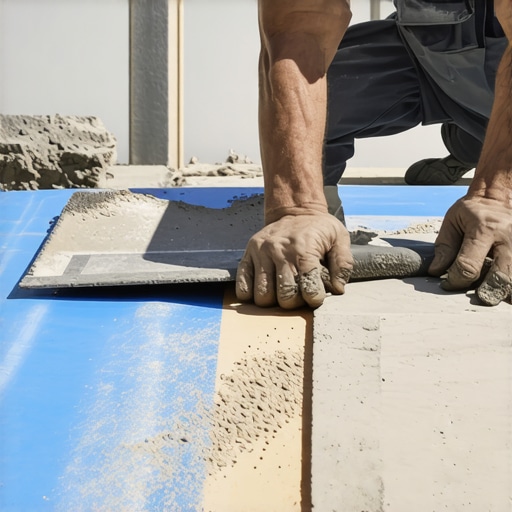 If you tap your finished floor and it sounds like a drum, you’ve failed. A solid floor sounds like a dull thud, indicating a perfect thermal bridge between the heat source and your feet.
Respect the Cure Time
The biggest temptation is to turn the heat on the moment the grout looks dry. Don’t do it. I’ve seen beautiful floors ruined because the homeowner turned the thermostat to 80 degrees just 24 hours after the job was done. The moisture in the mortar needs to evaporate naturally. If you force-dry it with the heating system, the mortar becomes brittle and loses its chemical grip. Give it at least two to three weeks of “cold” curing before you even think about touching that dial. This patience is the secret to a step-by-step flooring installation from planning to perfect finish.But even with a perfect cure time, there are ‘invisible’ mistakes that catch people off guard months down the line. Take baseboards, for instance. Most DIYers think the trim is just the ‘mascara’ of the room—purely aesthetic. In reality, it’s a functional gap-cover. One of the biggest traps is the assumption that the bottom plate of your wall is a solid nailing surface. I used to think as long as I hit wood, I was fine. But you should never nail baseboards into the bottom plate only. If the house settles or the subfloor shifts slightly, those nails will pull or, worse, squeak every time you walk near the wall. You need to hit the studs to create a structural anchor that survives seasonal humidity swings.
Stop Relying on the Knee Kicker for Your Carpet
When it comes to soft flooring, there is a massive misconception that ‘tight is tight.’ I’ve seen guys go to town with a knee kicker, thinking they’re getting a professional stretch. But here is the contrarian truth: a knee kicker is a positioning tool, not a stretching tool. Over-reliance on it is the knee-kicker mistake that ruins carpet tension and leads to those ugly ripples two years later. According to the Carpet and Rug Institute (CRI), a power stretcher is mandatory for a warrantied install. If your installer shows up with only a small padded tool and no long-handled pole stretcher, send them home. You’re paying for a floor that stays flat, not one that looks like a calm ocean by next summer.
Can your shower pan actually handle the heavy lifting?
This is the ‘Oops’ factor that keeps me up at night. People spend $5,000 on Italian marble but $50 on a generic liner. If you don’t know how to spot a bad shower pan liner before tiling, you’re essentially building a swimming pool with a hole in the bottom. The nuance here is the ‘pre-slope.’ Most people put the liner flat on the subfloor, then build the slope on top. That’s a recipe for stagnant, stinky water. The slope must be *under* the liner so that any water that penetrates the grout actually finds the weep holes in the drain. 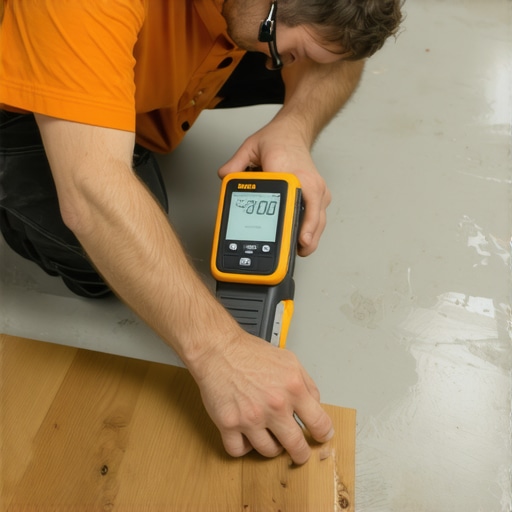
The Scientific Way to Measure Moisture
We often trust our eyes too much. I once installed a beautiful wide-plank floor in a basement that looked bone-dry. Three weeks later, the boards looked like Pringles. I hadn’t used the moisture meter test every flooring pro uses to check the concrete’s vapor emission. Concrete is a sponge; it holds moisture for decades. If you’re transitioning from that slab to a wet area, you must know the best way to transition hardwood to a tiled shower to ensure the different expansion rates don’t rip your transitions apart. Have you ever fallen into this trap where a project looked great on day one but failed by day ninety? I’d love to hear about it—let me know in the comments or contact us to troubleshoot your current headache.Once you’ve dodged the major installation landmines, the real challenge begins: time. I’ve seen gorgeous $20,000 bathroom remodels look like gas station restrooms after just two years because the homeowner didn’t understand the ‘wet-dry’ cycle. For showers, the most common point of failure isn’t the tile itself, but the change of plane where the wall meets the floor. You have to use 100% silicone here, not grout. To get that factory-perfect look, I always use the blue tape secret for professional shower silicone lines every time. It prevents that jagged, messy edge that catches soap scum and eventually turns black with mold. If you’re already seeing issues, you need to evaluate shower repairs: when to fix vs replace for longevity.
How do I maintain my high-end flooring and shower systems over time?
Maintenance isn’t just about cleaning; it’s about inspecting. For carpets, the Carpet and Rug Institute (CRI) 104 standard emphasizes that ‘maintenance’ actually begins with proper entry mats to capture grit before it ever touches your fibers. If you’ve invested in a premium install, don’t kill it with grocery-store steam cleaners that leave a soapy residue—that’s a magnet for dirt. For your baseboards, stop using cheap painter’s caulk that dries out like a saltine cracker. I’ve switched entirely to high-flex elastomeric sealants to ensure why your baseboard caulk is cracking and the flex-fill fix is a conversation you never have to have again.
Why My Oscillating Multi-Tool Is Non-Negotiable
If you’re going to buy one pro-grade tool for your next project, make it a high-torque oscillating multi-tool. I don’t use it just for demolition. I use it for the under-cut move for fitting flooring perfectly under door casings. Without it, you’re stuck trying to scribe complex shapes around trim, which always leaves a gap. This tool allows the flooring to slide *under* the wood, creating a seamless, professional finish that looks like it was built into the house. 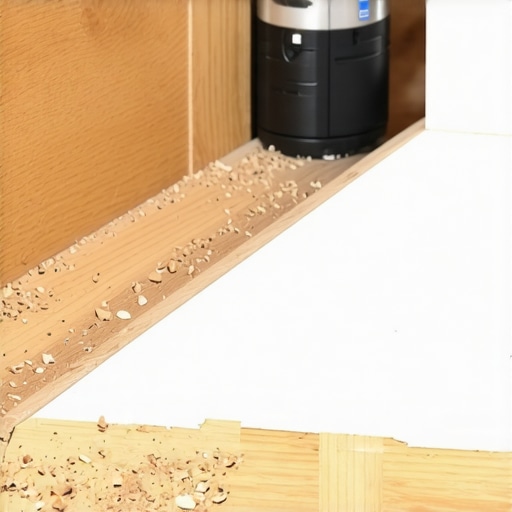 Pair this with the high-build primer secret for smooth baseboard paint, and your trim will look like custom cabinetry.
Smart Sensing Is the Future of Flooring
We are moving toward ‘intelligent’ flooring. I’m already seeing moisture-sensing subfloor layers that can alert your phone to a leak before you see a single drip on the ceiling. It’s a game-changer for those of us who have lived through the nightmare of a failed shower pan. For now, focus on the basics. I challenge you to go into your bathroom today and check the corners of your shower—if that grout is cracked, scrape it out and replace it with color-matched silicone this weekend. It’s a two-hour job that could save you a $10,000 floor replacement later.
Real Talk from a Guy Who Has Seen Too Many Cracks
If there is one thing I’ve learned, it’s that the smallest details determine whether your floor stays silent or screams in protest. First, stop treating grout like a structural adhesive; it is simply a filler. When you are tackling flooring installation over heat, think of the system as a living organism that needs to breathe. Second, never underestimate the power of thermal mass. A thick slate tile will hold heat longer but takes longer to warm up, so plan your thermostat schedule accordingly. Finally, the bond between your floor and your wall is where most DIYers fail; use the back-bevel secret for seamless baseboard corners to ensure those joints do not pull apart when the wood expands during the humid summer months.
Gear I Will Not Start a Job Without
I have wasted thousands on cheap gadgets, but these tools are non-negotiable for a professional result in 2025. I always use a digital moisture meter to verify the subfloor is ready; you can see why the moisture meter test every flooring pro uses is the industry standard for a reason. For any carpet work, the power stretcher is the absolute MVP—forget the knee kicker if you want to avoid ripples two years from now. I also swear by high-build primers for trim to hide the wood grain before painting. And if you are working on a shower, don’t even think about starting without a dedicated laser level to align tile patterns across a shower floor and wall with surgical precision.
Build Something Your Feet Will Thank You For
Do not let the fear of a hairline crack stop you from upgrading your home. Every professional you see started with a crooked tile or a messy silicone bead. By taking it slow and following a step-by-step flooring installation from planning to perfect finish, you are not just laying down materials; you are building long-term comfort. If you hit a snag or things start looking wonky, do not panic—you can always contact us for troubleshooting advice. Your dream bathroom is closer than you think. What is the one part of your flooring project that makes you the most nervous—the heating wires or the tile layout? Let me know in the comments below!