

I will never forget the sound of my aunt Martha’s lasagna hitting the floor. It was not the mess that bothered me—it was the look of pure shock on her face after her heel caught that floppy bit of carpet where the hallway meets the living room. I had walked over that loose transition a thousand times, always thinking, “I will get to that next weekend.” Well, next weekend came in the form of a marinara-stained rug and a bruised ego. That loose carpet transition was not just a minor annoyance; it was a trip hazard waiting for a victim. If you are tired of warning guests to “watch their step” every time they enter a room, you are in the right place. Today, we are going to stop the tripping and finally secure that transition so it stays flat for years to come.
Stop the Stumble Before Someone Gets Hurt
The truth is, most of us ignore these little flooring failures because we think we need an expensive toolkit or a specialized contractor to fix them. I used to think that too. In fact, one of my biggest flooring installation mistakes early on was assuming that a few extra staples would solve everything. Spoiler alert: they did not. They just made the transition look like a middle-school shop project and eventually pulled right back out. Whether you are dealing with transitions popping loose on concrete or just a strip that has seen better days, the fix is actually more about technique than brute force. Proper carpet install secrets often come down to how you handle the tension at the edges. Have you ever had a transition strip turn into a mini-hurdle in your own home? It is frustrating, right? Let me know if you have dealt with this in your house!
Is a DIY repair really going to last?
I get the skepticism. You are worried that you will spend an hour on your knees only for the carpet to bunch up again in a month. But here is a surprising fact: according to data from the National Floor Safety Institute (NFSI), falls account for over 8 million hospital emergency room visits annually, and uneven walking surfaces are a massive contributor. Fixing this is not just about aesthetics; it is about safety. By using the tension-first rule for stretching carpet, you can ensure that the transition remains taut. I have found that when people fail at this, it is usually because they did not understand how the tack strip interacts with the transition metal. We are going to dive into the exact steps to get that carpet tucked and secured so it looks just as good as a modern flooring installation.To start, you have to peel back the loose edge to see what is happening underneath. Most people try to fix this from the top, which is one of those classic flooring installation mistakes that only hides the problem temporarily. If you see that the metal transition strip is bent or the teeth are flattened, it is time for a new one. If you are working on a concrete slab, make sure you are choosing the right tack strip for concrete subfloors so the nails actually bite into the ground instead of just bouncing off.
Clear the Path and Check Your Hardware
The foundation of a good transition is the grip. If the metal ‘teeth’ on your transition strip are dull or clogged with old fibers, no amount of pushing will make the carpet stay. I learned this the hard way during a guest room remodel. I once spent three hours trying to fix a threshold with a butter knife and a prayer. I thought I could just force the carpet back into the metal channel, but all I did was fray the edges and ruin the backing. Within three days, the carpet had slipped out again. That is why you need to use a knee kicker to apply force evenly. Learning from the knee kicker mistake that ruins carpet tension will save you from over-stretching or damaging the weave. 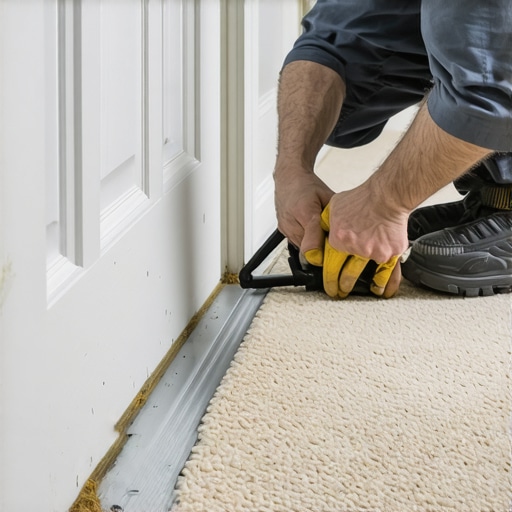
Why You Cannot Just Push Carpet with a Screwdriver
Attempting to shove the carpet into the transition strip without stretching it first is like trying to put a fitted sheet on a mattress while you are still lying on it. You need to create tension across the room toward the doorway. Use a pair of pliers to gently pull back any loose threads and vacuum the subfloor to ensure a clean seat. If the existing strip is loose, you can often secure it with 1-inch ring-shank nails or specialized concrete screws if the subfloor is stubborn.
Master the Tension First Rule
Once your hardware is set, it is time for the stretch. You want the carpet to be under tension toward the doorway. Think of it like a drumhead; if it is loose in the middle, it will ripple at the edges. By following the tension-first rule for stretching carpet into a doorway, you ensure that the weight of foot traffic actually pulls the carpet tighter against the teeth rather than pushing it away. Position the head of the knee kicker about two inches back from the transition strip. Give it a firm, controlled nudge with your knee—not a violent strike. You want to see the carpet move just enough to hook onto the metal spikes.
The Power Tuck for a Flat Finish
After the carpet is hooked, you still have that raw edge sticking up. This is where the magic happens. You need to use a carpet tucker or a wide-bladed putty knife to drive the excess fabric down into the gullet of the transition strip. This is known as the kicker move for tucking carpet into tight corners and transitions. Once the carpet is tucked deep, take a rubber mallet and a scrap piece of wood to tap the metal lip of the transition strip down. This ‘pinches’ the carpet in place. This technique is one of the essential carpet install secrets that separates a DIY job from a professional-grade finish. It creates a mechanical lock that prevents the carpet from ever creeping back out.Most homeowners believe that if the carpet looks flat on day one, the job is done. I see this all the time—people focus so much on the textile that they ignore the subfloor, which is a classic flooring installation mistake. People think the padding hides everything. In reality, an unlevel subfloor or a hidden moisture issue will telegraph through the fibers within months. Let’s dig deeper into why simply ‘tucking’ isn’t always enough. Have you ever fallen into this trap? Let me know in the comments!
The Truth About Wrinkles and Waves
There is a common belief that carpet ‘stretches out’ naturally over time and just needs a quick kick back into place. In my experience, if your carpet is developing waves, it was never installed correctly to begin with. Many installers rely solely on a knee kicker, but that is only for positioning.
Why is your carpet already wrinkling after only 24 months?
The real culprit is usually the lack of a power stretcher. According to the Carpet and Rug Institute (CRI), power stretching is mandatory for a warrantied install. If you don’t use one, you aren’t actually tensioning the backing; you’re just moving the slack around. This leads to carpet wrinkling two years after install as the seasons change and humidity fluctuates.
Check the Foundation Before You Stretch
One of the biggest ‘oops’ factors I encounter is skipping the moisture check. Even if you’re not in a basement, concrete slabs can breathe. If you don’t use the moisture meter test every flooring pro uses, you’re gambling with your investment. Moisture trapped under the pad leads to mold and that ‘old basement’ smell that no vacuum can fix. 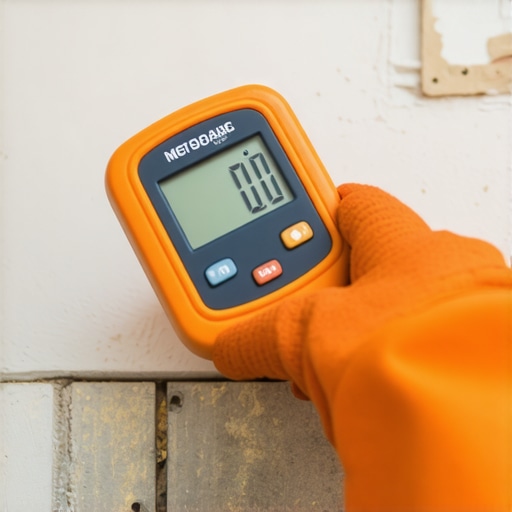 This is especially critical if you are doing shower repairs nearby; a small leak behind a wall can wick into your new carpet several feet away.
Seamless Transitions and Baseboard Mastery
Another detail that separates the experts is how they handle the perimeter. Most DIYers just slap baseboards against the wall. But for a professional look, you need the back-bevel secret for seamless baseboard corners. This ensures that as the house settles, those gaps stay closed. When you combine carpet install secrets with proper trim work, the result is a room that feels like a high-end hotel rather than a weekend project. If you are dealing with tricky layouts, such as transitioning hardwood to a tiled shower or carpet, always prioritize the mechanical bond of the transition strip over glue alone. Proper preparation is the difference between a floor that lasts decades and one that needs a redo by next summer.I used to think that a knee kicker was my best friend. But then I realized it was more like a fickle acquaintance. If you want a carpet that stays tight for fifteen years, you need to graduate to the power stretcher. I personally swear by the Roberts 10-600 Senior Power Stretcher. Why? Because it uses the opposite wall as leverage to pull the carpet taut across the entire room, rather than just shifting local wrinkles in a small area. According to the Carpet and Rug Institute’s CRI 105 standard, power stretching is a non-negotiable requirement for residential installs to prevent delamination and premature wear. Without it, you are just waiting for those ripples to return once the humidity hits. If you are planning a project, look into the best carpet types for high traffic areas in 2025 to pair with this professional tensioning method. 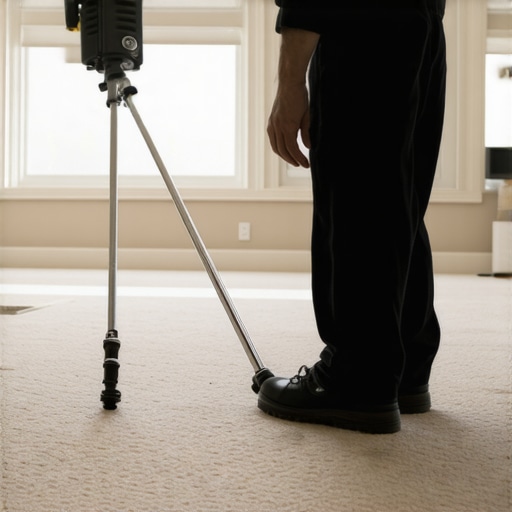
The Tool That Makes Your Baseboards Look Custom
Transitioning from the floor to the wall is where most DIY jobs lose their ‘wow’ factor. You can have the most expensive wood in the world, but if there is a quarter-inch gap between your trim and a wavy wall, it looks amateur. This is why I never start a trim job without the scribing tool every diyer needs for tight baseboards. It allows you to trace the exact contour of your wall onto the wood before you ever make a cut. It is the difference between a ‘close enough’ fit and a ‘how did they do that?’ finish. When you combine this with carpet install secrets achieving flawless results every time, you elevate the entire home’s market value. I have found that using a compass with a locking wing is the most reliable way to transfer those irregular wall bumps to your baseboard for a zero-gap finish that requires almost no caulk.
How do I keep my floors and showers looking new for a decade?
Maintenance is the part no one likes to talk about, but it is exactly what saves your wallet from thousand-dollar replacements. In the bathroom, it is all about the silicone integrity. Once every few years, you should inspect your joints for any signs of mold or separation. I always use the blue tape secret for professional shower silicone lines every time to ensure a clean, waterproof seal that looks like it was done by a high-end luxury contractor. It prevents the silent moisture seepage that leads to major shower repairs when to fix vs replace for longevity. For your floors, staying ahead of the game means understanding transform your flooring top trends in installation for 2025, which focuses heavily on easy-to-clean textures and modular repairability. I predict that within the next five years, we will see a major shift toward ‘smart’ adhesives that allow for easier single-plank replacements without the struggle of heat guns and scrapers. My challenge to you: do not just look at your floors—inspect the perimeter. If you see a gap or a loose thread, address it using the tension-first rule before it turns into a trip hazard like my Aunt Martha’s lasagna disaster.
Lessons Learned from a Decade of Floor Failures
Over the years, I have realized that flooring isnt just something you walk on; it is the physical foundation of your homes comfort. If I could go back and tell my younger self a few things, I would start with the fact that patience saves more money than any coupon. First, never rush the acclimation process. Whether it is wood or carpet, letting materials sit in the actual room environment for 48 hours prevents 90% of the buckling issues people face later. Second, the subfloor is your best friend or your worst enemy. If it isnt level and clean, even the most expensive step-by-step flooring installation will fail within three years. Finally, stop thinking of ‘close enough’ as a standard. In flooring, a quarter-inch gap today is a half-inch trip hazard tomorrow. When you apply the carpet install secrets of the pros, like using a power stretcher every single time, you aren’t just fixing a floor; you’re ensuring peace of mind for the next decade.
The Gear That Stays in My Work Truck
If you are serious about DIY, you have to move past the basic hammer and screwdriver. I personally trust the Wagner MMC220 Moisture Meter because it tells me exactly when a concrete slab is ready for a transition strip, preventing that dreaded adhesive failure. For those crisp edges, I never leave home without my General Tools Scribing Tool; it is the only way to get baseboards to sit flush against older, wonky walls. And for the bathroom, I always keep a supply of high-grade silicone and use the triple point seal for leak proof shower corners to prevent the kind of hidden rot that destroys floor joists. These aren’t just gadgets; they are the barrier between a professional result and a weekend disaster. #IMAGE_PLACE_HOLDER_E#
Stop Warning Your Guests and Start Fixing
You have the knowledge now to turn that loose, dangerous carpet transition into a flat, secure, and beautiful part of your home. Don’t let the fear of making a mistake keep you from securing your space. Whether you are diving into shower renovation ideas or simply stretching a hallway rug, the key is to take it one step at a time and prioritize the mechanical bond. Your home is your sanctuary, and every flat transition and tight baseboard adds to that feeling of quality and safety. You’ve got this! What is the most stubborn floor repair or ‘tripping hazard’ you have ever had to tackle in your own home? Let me know in the comments below!