

I still remember the smell of fresh fibers and the sweat dripping off my forehead as I stood back to admire my handiwork in my first home’s master bedroom. Everything looked tight—until I walked through the door. As my heel caught the edge of the carpet right at the transition, a hideous, serpent-like wrinkle slithered across the floor. I tried to “massage” it away with my foot, but all I did was make the problem worse. That was the day I realized that carpet isn’t just laid down; it’s a living, breathing thing that needs to be disciplined under tension.
The Day the Doorway Won and What It Taught Me
In those early days, I figured a few good whacks with a kicker were enough to call it a day. I was wrong. Doorways are the ultimate test for any carpet install secrets because they represent a break in the room’s structural tension. If you don’t get the “tension-first” rule right, you’re looking at ripples that eventually turn into permanent delamination. My biggest mistake? I used to stretch toward the doorway instead of setting the tension *at* the doorway first. I thought I could “chase” the slack out of the room, but I just ended up bunching it all up against the metal transition strip.
Is all this extra pulling actually worth the effort?
You might be thinking, “It’s just a three-foot opening, do I really need to get this aggressive?” The answer is a resounding yes. Without proper tension, the daily foot traffic of people pivoting as they enter a room will pull the carpet right out from under the tuck. According to the Carpet and Rug Institute (CRI), improper stretching is the leading cause of premature carpet failure and unsightly wrinkling. If you’ve ever seen a carpet seam that peaks, you know how a lack of structural integrity can ruin a room’s aesthetic.
Why Most DIYers Fail at the Threshold
The problem usually starts with a knee-kicker mistake where the user relies on brute force rather than strategic angles. To get it right, you have to understand that the doorway is your anchor point, not your finish line. You aren’t just trying to hide the edge; you are trying to create a drum-tight surface that resists the horizontal force of a walking foot. When you ignore the flooring installation mistakes to avoid, the doorway is where those errors become painfully visible. Have you ever spent hours on a room only to have a trip hazard pop up a week later? Drop a comment below if you’ve been there too!
Master the Perimeter Tension First
To avoid the ‘serpent’ wrinkles I mentioned earlier, you have to treat the room like a drum skin. Start by hooking your carpet onto the tack strips along the longest wall, but stop once you hit the doorway. Instead of working away from the entry, I now use the perimeter tension trick for wrinkle-free carpets to lock that doorway down first. This creates a solid anchor. If you wait until the end to stretch toward the door, you’re just pushing a wave of excess material into a space where it has nowhere to go. I once spent four hours re-stretching a plush pile in a master suite because I ignored this; by the time I got to the hall, the carpet was bunching so badly I couldn’t even trim it straight.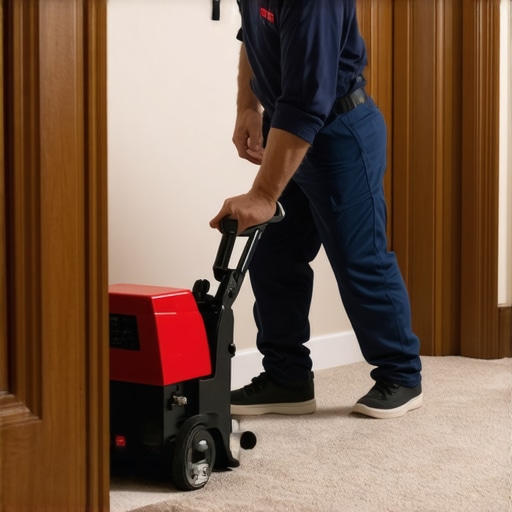
Secure the Doorway Before You Stretch Away
When you reach the threshold, don’t just kick it down. Use a power stretcher to pull the carpet toward the doorway from the opposite wall. This is where most people make the knee-kicker mistake that ruins carpet tension—they use the kicker to move the whole carpet, which often just dislodges the tack strips or creates localized ‘bubbles.’ The kicker is for fine-tuning the tuck, not for structural stretching. If you are working near a tiled area, like a bathroom, ensure you know the best way to transition hardwood to a tiled shower or carpet to tile, which often involves a Z-bar or a transition strip that needs to be pre-installed.
The Secret to a Clean Tuck Against the Baseboard
Once the tension is set, the finish work begins. You want the carpet to look like it’s growing out of the wall, not just shoved under the wood. If your trim is already up, you might need the under-cut move for fitting flooring perfectly under door casings to get a seamless look. Use a sharp wall trimmer to cut the carpet about 1/8 of an inch long. If you cut it flush, it will pull out the first time someone runs a vacuum. I’ve seen countless DIY jobs where the homeowner was too aggressive with the blade, leading to how to fix a carpet seam that was cut too short scenarios that require unsightly patches.
Avoid the Post-Install Bubble
Even a perfect-looking install can fail if you don’t account for the ‘relax’ period. This is why your carpet is wrinkling two years after install—the fibers eventually lose their factory stiffness and the backing settles. If you didn’t get that 1-1.5% stretch across the length and width of the room during the initial pull, those ripples are inevitable. When working around complex shapes like columns or curved walls, you might find that how to fix baseboard gaps on curved walls is just as important as the carpet itself to hide the inevitable slight imperfections in the subfloor.Most homeowners—and even some ‘pros’—believe that if a floor looks flat on the first day, the job was a success. In my experience, that is a dangerous assumption. Professional results aren’t just about what you see; they are about how the materials interact with the environment over time. Many people think that ‘tight is right’ when it comes to transitions, but they ignore the essential laws of expansion and contraction. Have you ever fallen into the trap of skipping the wait time? Let me know in the comments.
The Acclimation Lie and Why Your Floor is Growing
The biggest ‘oops’ factor I see involves impatience. You cannot bring flooring from a climate-controlled warehouse and install it immediately. I’ve seen beautiful wide-plank installs turn into a buckled mess because the installer ignored the moisture meter test every flooring pro uses. Wood and even some vinyls are sponges. If you don’t let them sit in the room for 48 to 72 hours, you are essentially installing a ticking time bomb. According to the National Wood Flooring Association (NWFA), failure to acclimate materials to the home’s baseline humidity is the primary cause of post-installation cupping and crowning. This isn’t just about wood; even tile jobs can fail if the subfloor isn’t prepped. You must learn how to avoid hollow spots under your new tile by ensuring full mortar coverage, or you’ll be listening to ‘crunching’ sounds within a month.
Why does your shower drain still leak even with the best tile?
This is the nuance most DIYers miss: waterproofing happens under the tile, not on top of it. I’ve fixed dozens of ‘luxury’ showers where the owner spent $2,000 on Italian marble but $0 on a proper pre-slope. If the water reaches the liner and has nowhere to go, it sits, stinks, and eventually rots your framing. This is why most DIY shower waterproofing fails at the drain—the lack of a secondary weep hole protection or a proper mortar bed. Before you even think about the aesthetic of your shower renovation ideas, you have to master the ‘boring’ stuff like the dry-fit rule for no-mistake shower drain alignment.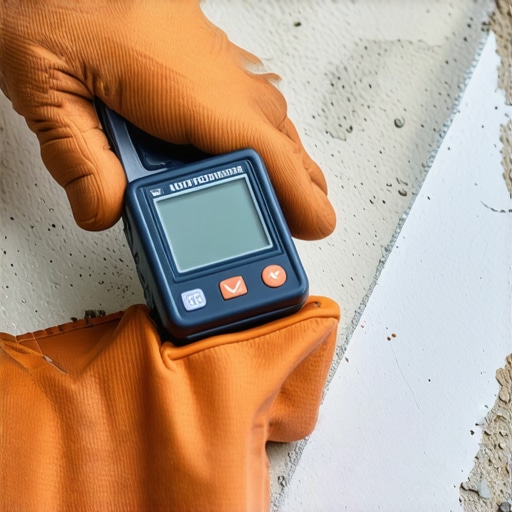
The Baseboard Secret the Pros Won’t Tell You
When it comes to trim, most people reach for the caulk gun to hide their sins. But if your miters aren’t tight, caulk will eventually shrink and crack, leaving a black gap that screams ‘amateur.’ I always use the back-bevel secret for inside baseboard corners. By cutting the back of the wood at a slight angle, you ensure the front edges touch first, creating a microscopic point of contact that looks seamless even if your walls aren’t perfectly square. If you are struggling with messy lines, try the caulk and dab method for perfect baseboard joints to keep things clean. Remember, expert flooring installation tips for 2025 emphasize that the details in the corners determine the value of the entire room. Don’t let a lazy corner ruin a $5,000 floor.
Stop the slow-motion collapse of your shower
I’ve learned that the finish isn’t actually the end; it’s the beginning of the floor’s life. I’ve seen it a hundred times—a beautiful install that starts to fail at month eighteen. It’s usually not the materials; it’s the lack of follow-through. For showers, everyone forgets that grout is porous and that houses breathe. According to the Tile Council of North America (TCNA) Handbook, EJ171 standards emphasize the necessity of specific movement joints to prevent stress-induced cracking in large tile fields. If you ignore these, your floor will literally fight itself until it cracks or delaminates. This is where shower repairs: when to fix vs replace for longevity become a reality sooner than you’d like. You have to think about the expansion and contraction from the very first day, or you’re just building a temporary solution.
The heavy-duty gear that separates pros from pretenders
I personally swear by my power stretcher and a high-quality moisture meter. Using a knee-kicker for a whole room is like trying to paint a house with a toothbrush; you’ll get it done, but you’ll be exhausted and the tension won’t be uniform. The power stretcher ensures that essential 1-1.5% stretch that prevents why your carpet is wrinkling two years after install later on. Similarly, I never lay a single plank of vinyl or wood without running the moisture meter test every flooring pro uses. If the subfloor is holding more than 4% moisture on a non-invasive scale, I walk away for the day. For my trim work, the scribing tool every diyer needs for tight baseboards is my secret weapon for those wavy plaster walls that look like the ocean.
How can I actually make these results last for years?
Maintenance isn’t just about vacuuming; it’s about structural vigilance. For carpet, you need to understand the best carpet types for high traffic areas in 2025 before you buy, because no amount of cleaning can save a low-density fiber from crushing. For tile, you have to keep the grout sealed. If things do get grimy, I use the toothbrush trick for cleaning stubborn shower grout to ensure I’m not using harsh chemicals that strip the sealant. For baseboards, remember that homes settle. If you see gaps appearing, don’t just use standard putty; understand why your baseboard caulk is cracking and the flex-fill fix to keep those joints looking seamless during the winter dry-out.
The shift toward smarter materials in 2025
Looking ahead, I see the industry moving toward completely waterproof wood-polymer composites that are much more forgiving of DIY mistakes. We are seeing transform your flooring top trends in installation for 2025 that focus on acoustic backing and simplified locking systems that resist gapping. However, no matter how ‘smart’ the material becomes, the physics of a solid subfloor never changes. I strongly encourage you to try the back-bevel secret for seamless baseboard corners on your next project; it is the single fastest way to take your trim work from looking like a weekend project to a master-level finish.
Three Truths That Changed How I Install Floors Forever
Looking back at my early mistakes, I’ve realized that the ‘hard way’ is usually just the correct way that we try to skip. First, the subfloor is more important than the surface. If your base isn’t level, your finish will always be compromised. Second, patience isn’t just a virtue; it’s a technical requirement. Rushing the acclimation process is the fastest way to ruin expensive materials. Finally, the details in the corners speak louder than the field. A perfect miter or a clean tuck at the doorway is what separates a DIY attempt from a professional legacy. Before you pick up a hammer, you need to know how to choose the perfect baseboards for your homes style to ensure the aesthetic matches your technical skill.
The Gear I Actually Reach For Every Morning
If I could only take three tools to a job site, it would be my power stretcher, my moisture meter, and a high-quality scribe. These aren’t luxuries—they are the insurance policy for your hard work. I also keep a stash of small tricks in my pocket, like the cardboard shim hack for flush baseboard miters, which has saved more joints than I can count. If you’re tackling a wet area, our upgrade your bathroom the ultimate shower renovation guide will help you avoid the common pitfalls of moisture management. These tools and guides provide the confidence needed to handle any curveball a house throws at you. #IMAGE_PLACEHOLDER_E#
Take Your First Step Toward a Professional Finish
I want you to remember that every expert was once standing exactly where you are—looking at a pile of materials and wondering if they’re about to make a huge mistake. The difference is just a bit of preparation and the willingness to do the job right the first time. For those ready to start from scratch, following a step-by-step flooring installation from planning to perfect finish is the only way to guarantee a result you’re proud of. You have the knowledge and the tricks to succeed, so go out there and transform your space. Your future self will thank you for the extra tension and the perfectly back-beveled corners. Your flooring installation will stand the test of time if you focus on the foundation. What’s the one tool or trick you refuse to start a project without? Let’s swap stories in the comments!