

I’ll never forget the sound. It wasn’t a bang or a crack; it was a soft, rhythmic hiss coming from behind the wall where I’d just fired my finish nailer. I was right in the middle of a baseboards makeover and felt pretty proud of myself—until the carpet started getting dark. I’d done what every DIYer dreads: I’d found the one water line I thought was safely tucked away. If you’re standing there right now with a hammer in your hand and a sinking feeling in your stomach, take a breath. I’ve been there, and we’re going to get this sorted before your flooring installation turns into a total tear-out. Today, I’m walking you through the ‘oh no’ protocol to stop the leak and patch the line yourself without needing a $500 emergency plumber visit.
Stop the water before your hallway becomes a pond
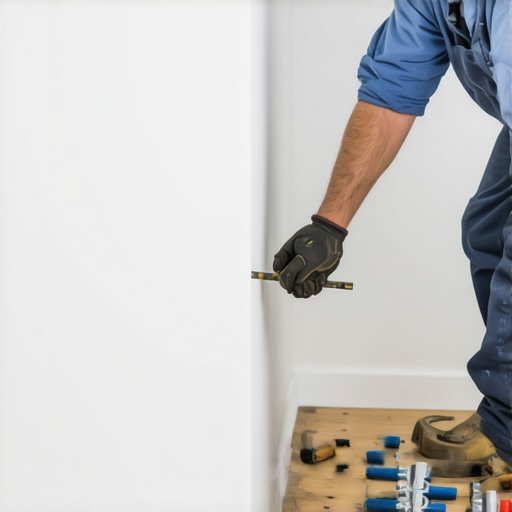
The very first thing you must do—before you even think about looking at the damage—is find your main water shut-off valve. I once made the mistake of trying to ‘plug’ the hole with my finger while yelling for someone else to find the valve, only to realize I was home alone. It was a mess. Once the pressure is off, you need to use the pry bar secret for removing baseboards to carefully get that trim out of the way. Don’t just yank it; you’ve already got a plumbing issue, you don’t need a drywall replacement project too. We need to see exactly where that nail went. Whether you were working on a shower repair or just adding some flair to your living room, the goal is the same: expose the pipe, dry the area, and assess if it is PEX, copper, or PVC.
Does a tiny puncture really require a full plumber visit?
You might be tempted to leave the nail in place, thinking it’s acting like a cork. Trust me, it’s not. According to the Insurance Institute for Business & Home Safety, even a small leak from a pressurized pipe can discharge enough water to cause thousands of dollars in mold and structural damage within just 48 hours. You have to fix it properly. Have you ever had one of those ‘heart-in-your-throat’ moments during a home project where you knew exactly what you hit the second the trigger pulled? It’s a rite of passage for many of us. But don’t panic—we’re going to learn how to fix baseboard gaps and plumbing mishaps with the same level of confidence. By the end of this, you’ll know how to cut out the damaged section and use a push-to-connect fitting or a solder sleeve to make it like new again.
Cut a clean window to access the damage
You can’t fix what you can’t see. Grab a utility knife or a small jab saw. You’re going to cut a small square of drywall—usually about 4 to 6 inches—centered on the nail hole. Pro tip: cut at a slight inward angle so the piece doesn’t just fall into the wall cavity. I remember the time I tried to just ‘peel’ the drywall back after a mishap during a step-by-step flooring installation. I ended up with a jagged mess that took twice as long to patch. A clean cut now saves you hours of mudding later. Once the drywall is out, you’ll see the pipe. If you’re lucky, it’s PEX; if you’re ‘old school,’ it’s copper. Regardless of the material, you need to clear enough space around the pipe to work your tools.
Prep the pipe like your flooring depends on it
Before you make the first cut on the pipe itself, ensure every drop of water has drained from the line. Open the lowest faucet in your house to let gravity do the work. If you leave water in the line, it’s like trying to glue something underwater—nothing will seat properly. Use a dedicated pipe cutter rather than a hacksaw. A hacksaw leaves burrs, and burrs are the primary reason why even the best shower repairs fail. You want a cut as square and smooth as the edge of a new plank during a flooring installation. If you’re working with copper, use a deburring tool or some emery cloth to shine up the ends until they look like a new penny.
The Cut and Click method that saves your Saturday
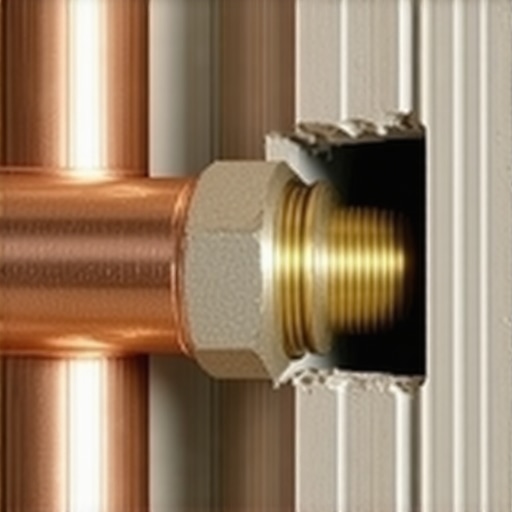
For most DIYers, soldering is a bridge too far when you’re stressed and staring at a wet wall. This is where push-to-connect fittings become your best friend. They work like a high-tech LEGO set. You slide the fitting onto the pipe until it ‘clicks’ or hits the depth mark. I used this exact method when I accidentally nipped a line while perfecting the back-bevel secret for inside baseboard corners. I was terrified it would leak, but ten years later, that wall is still bone dry. If you’re dealing with a small puncture, you’ll cut out about an inch of pipe and bridge the gap with a ‘slip coupling.’ This specific fitting allows you to slide the connector all the way onto one side, align the pipes, and then slide it back over the gap.
Why you should never rush the pressure test
Once the fitting is secure, don’t just slap the drywall back on. This is the ‘watch and wait’ phase. Slowly turn your main water valve back on. I mean slowly. Sending a hammer of high-pressure water into a new fitting is asking for trouble. While the system pressurizes, keep a dry paper towel wrapped around the new joint. Even a microscopic damp spot means you didn’t seat the pipe deep enough. It’s better to find out now than after you’ve finished your baseboards makeover and painted the trim. If you’re also dealing with floor issues nearby, make sure you haven’t ignored any flooring installation mistakes to avoid, like letting water sit on your subfloor while you were busy with the pipe. Use a fan to bone-dry the area before moving forward. If your carpet got wet, you might eventually need to know how to fix a loose carpet transition if the tack strip was damaged by the moisture, but for now, focus on the seal.
Once that pipe is patched and the drywall is buttoned up, most people think the hard part is over. They rush to nail the trim back on and call it a day. But here is the thing: most DIYers—and even some ‘pros’—treat baseboards like they are just decorative jewelry for the room. In reality, they are functional gaskets that manage the gap between two surfaces that are constantly in motion. If you don’t respect that movement, your beautiful baseboards makeover will look like a mess within one season.
Why a laser-tight miter is actually a liability
Everyone tells you to get those miter joints so tight they look like a single piece of wood. But if you live in a climate with shifting humidity, that ‘perfect’ fit is a ticking time bomb. Wood expands and contracts. According to the National Wood Flooring Association (NWFA), wood is hygroscopic, meaning it constantly gains or loses moisture to match its environment. If you wedge a miter joint too tightly without a micro-gap or the right adhesive, the wood has nowhere to go but out. This is exactly why your baseboard caulk is cracking later on. I’ve learned to use the 45-degree trick for perfect baseboard outside corners but I always leave a hair of breathing room for a high-quality flexible filler. It’s the same logic we apply to avoid grout cracks in the shower corner; you need a joint that can move without breaking.
Are you accidentally pinning your floor to the wall?
This is the ‘Oops’ factor that ruins more flooring installations than anything else. When you are reinstalling your baseboards after a floor repair, you must never nail the trim into the floor itself, and you shouldn’t pin the floor down with the trim. If you press the baseboard down too hard against a floating floor—like vinyl or laminate—you prevent the floor from expanding. This leads to the floor buckling in the middle of the room. I’ve seen homeowners wonder why vinyl planks separate in high sun areas, and often it’s because the perimeter is locked tight by the baseboards. Use the penny gap rule for installing laminate to ensure there is space behind the trim. 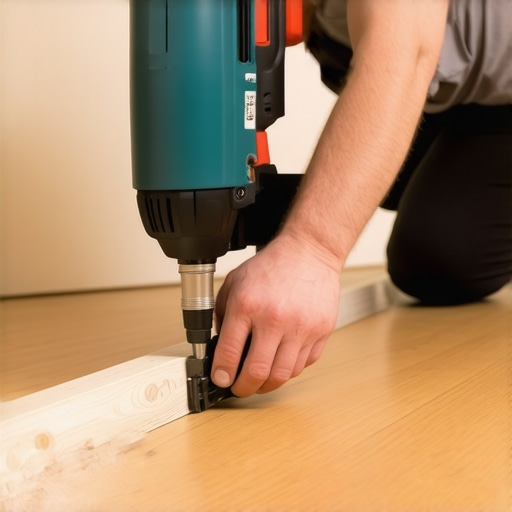
The bottom plate trap that leads to loose trim
One of the most common advanced mistakes is thinking you should only nail baseboards into the bottom plate of the wall. I used to do this until I realized that the bottom plate—the 2×4 that sits on the floor—is often slightly recessed or made of harder lumber that deflects nails. If you only nail low, the top of the baseboard will pull away from the wall, creating a gap that caulk can’t hide. You should never nail baseboards into the bottom plate only. Instead, find the studs and hit them at a slight downward angle. This ‘clamping’ force keeps the trim tight against the drywall. If you are working with carpet, remember that the thickness of the pad matters for your trim height. Failing to account for this is a primary reason why your carpet is wrinkling or the transition looks off later. Have you ever fallen into this trap and had to pull your trim back off? Let me know in the comments.
How do you manage transitions when floors aren’t level?
If you’ve fixed a leak and the subfloor is slightly uneven, a standard transition strip will eventually pop loose. Most people just add more glue, but the secret is a ‘double glue’ or mechanical fix. For a professional result, especially when moving between different materials, you might need to know how to transition from thick carpet to thin vinyl without creating a tripping hazard. Rushing this stage is a classic mistake. Take the time to use carpet install secrets like proper stretching to ensure the tension is even across the whole room, which prevents the ‘pull’ on your newly installed baseboards. Whether it’s a shower repair or a living room refresh, the nuance is in the expansion space.
Stop guessing with a dedicated scribing tool
If there is one thing that separates a DIY job from a masterclass, it is the scribe. You can have the sharpest miter saw in the world, but if your walls have the slightest wave—and believe me, they do—your trim will never sit flush. This is why the scribing tool every diyer needs for tight baseboards is my absolute non-negotiable. I personally use a simple brass compass or the General Tools 851, because it allows me to trace the exact contour of a floor or wall onto the back of the wood. When I was finishing a modern bathroom makeover, scribing saved me from huge gaps against the tile. It’s the difference between a project that looks ‘good enough’ and one that looks like it was built into the house from day one.
How do I keep these joints tight for years?
Maintenance isn’t about fixing things when they break; it’s about preventing the break before it happens. For baseboards and flooring, that means moisture control and high-quality sealants. Gary Katz, a leading authority in finish carpentry and a frequent contributor to the Journal of Light Construction, emphasizes that the longevity of any trim work depends on how you manage the wood’s ‘memory’ and movement. I’ve found that using a hybrid polymer caulk is the only way to go. Standard latex dries out and shrinks, which is why your baseboard caulk is cracking just a few months later. A hybrid sealant stays elastic, moving with your home as the seasons change. If you’ve just finished a durable flooring installation, check your perimeter every spring. A quick dab of flexible filler is much easier than a full re-caulk down the road.
The future of flexible flooring and trim
Looking ahead to 2025 and beyond, I predict we are going to see a massive shift toward bio-polymeric trim materials. These aren’t just ‘plastic wood’; they are engineered with internal structures that mimic the flexibility of natural fibers without the rot or massive expansion of MDF. We’re already seeing this in top trends in installation for 2025. Imagine baseboards that can wrap around a curved wall without needing the flex glue move or complex relief cuts. We’re moving toward a ‘set it and forget it’ era of home renovation, where the materials themselves do the hard work of resisting moisture and movement. Even in high-moisture zones like luxury shower renovations, the integration of waterproof, flexible composites is becoming the gold standard.
While the tech is changing, the physics of a solid subfloor never will. If you find that your new floor is bouncing, no amount of fancy trim will hide the structural movement. You have to address the joists before you worry about the finish. It’s all about the layers. Whether you are aiming for a spa-like shower experience or a cozy den, the foundation determines the finish. My challenge for you this weekend? Go grab a scribing tool and try it on one difficult corner. Once you see that hair-thin joint, you’ll never go back to ‘caulk-and-pray’ again. If you’re feeling stuck on the technical side, you can always reach out for a quick consult before you make that first cut.
Once the water is off and the patch is dry, the real work begins—turning a site of frustration back into a home. I have learned that the best projects aren’t the ones that go perfectly, but the ones where you prove you can fix whatever the house throws at you.
The Hardest Lesson My Flooded Hallway Taught Me
Looking back at my own ‘nail-meets-pipe’ disaster, I realized a few things that no manual ever mentions. These lightbulb moments changed how I approach every baseboards makeover today:
- Silence is louder than the nail gun: If you fire a nail and don’t hear the immediate ‘clink’ of wood on stud, stop. That soft thud is usually the first sign you hit a cavity or something softer, like a PEX line.
- The main valve is a safety tool, not a last resort: I now clear the path to my main shut-off before I even pull the trigger on a single nail. Speed matters when water is active.
- Drywall is just a skin: Don’t be afraid to cut a larger hole. Trying to work through a tiny ‘window’ to fix a pipe is how bad repairs happen. Give yourself the room to do it right the first time.
- Phone a friend before the flood: Having a flooring installation buddy who knows where your tools are is better than any insurance policy.
My Personal Kit for Wall and Floor Mishaps
I don’t recommend a lot of ‘gimmicks,’ but these three things stay in my truck because they have saved my skin more than once. First, I always keep a variety of push-to-connect slip couplings; they are the only reason I can finish a project on a Sunday when the hardware store is closed. Second, the scribing tool every diyer needs for tight baseboards is my secret weapon for hiding the fact that I had to patch a section of the wall. It allows the trim to hug the new drywall perfectly. Finally, a dedicated moisture meter is essential to ensure your subfloor is truly dry before you continue your your guide to durable flooring installation. I trust these because they remove the guesswork when stress levels are high.
#IMAGE_PLACEHOLDER_E#
Finish Your Room with Newfound Confidence
A plumbing mishap feels like a failure when it happens, but it is actually the best carpentry training you will ever get. You now know the ‘innards’ of your home better than most homeowners ever will. Whether you are aiming for a baseboards makeover or a full room refresh, remember that every professional started with a mistake and a bucket. Go ahead and finish that room; you have earned the right to call yourself a fixer. If you ever run into a situation that feels over your head, don’t hesitate to reach out for a quick consult. Have you ever hit a pipe or a wire during a weekend project? Let me know your ‘oh no’ story in the comments below!