

I stood in the center of my living room, the late afternoon sun pouring through the window, and all I could see was a jagged, fuzzy line cutting my beautiful floor in half. It was my first solo project, and I had been so proud of my progress until that moment. I thought I could just butt the factory edges together and call it a day. Instead, I created a trip hazard that looked like a scar across the room. It is a gut-wrenching feeling when you realize your hard work actually made the space look worse. I remember kneeling down, trying to brush the fibers over the gap with my fingers, hoping it would just magically disappear. It didn’t. That day, I learned that a floor isn’t just about the material; it is about the invisible details that hold it together. If you are staring at a seam right now that looks more like a canyon than a transition, take a deep breath. We are going to fix it together.
Stop Your Carpet Seams from Ruining the View
We’ve all been there—or we’re terrified we will be. Trying to figure out how to hide a carpet seam in the middle of a room is the ultimate test of any DIY enthusiast. It is not just about aesthetics; a bad seam can fray, trap dirt, and eventually pull apart, leading to a much shorter lifespan for your flooring. My big mistake back then? I used a dull blade and didn’t pay any attention to the pile direction. I learned the hard way that flooring installation mistakes to avoid for a seamless look start with the very first cut. Today, I am going to share the techniques that transformed my floors from ‘obvious DIY’ to ‘professional-grade’ without the thousand-dollar price tag. Have you ever spent hours on a project only to have one tiny detail stare back at you every time you walk into the room? It is incredibly frustrating, but I promise you that with the right approach, you can achieve that high-end look yourself. We will cover the tools you actually need—not just the ones the hardware store wants to sell you—and the specific ‘neighborly’ tricks I’ve picked up over the years to make those fibers blend perfectly.
Is an Invisible Seam Truly Achievable for a Beginner?
I hear this all the time: ‘Isn’t the seam always going to be visible if it’s right in the middle of the room?’ The honest answer is that while no seam is 100% molecularly invisible, you can absolutely make it vanish to the naked eye. The secret lies in the ‘nap’ or the direction the fibers lean. According to the Carpet and Rug Institute (CRI), nearly 80% of carpet performance complaints are actually related to improper installation techniques rather than the carpet itself. If you don’t align the grain, you will end up with carpet seaming errors that show up in bright daylight no matter how much you vacuum. I once tried to ‘force’ a seam by using a knee kicker mistake that ruins carpet tension, thinking I could just stretch the gap away. Spoilers: it didn’t work. We are going to focus on the ‘Why’ first—why seams fail—so that when we get to the ‘How,’ you’ll have the intuition of a pro. Let’s make sure your next carpet install is one you are actually proud to show off. The goal here is a floor that looks like one continuous, luxurious piece of fabric, and I am going to show you exactly how to get there.
Row-Finding Beats Straight Edges Every Time
Most beginners make the mistake of using a straight edge and a utility knife to cut through the carpet from the top. That is the quickest way to end up with a jagged mess. Instead, you need to be a surgeon. Use a row-finder—basically a blunt awl—to spread the fibers apart down to the backing. This ensures you are cutting between the tufts rather than through them. Think of it like parting hair before a braid; if you just hack across, you get split ends. By following the natural ‘valley’ in the carpet, you create a clean edge that fits against its neighbor like a jigsaw puzzle piece. I learned this the hard way during a renovation when I realized that flooring installation mistakes to avoid for a seamless look often start with disrespecting the carpet’s anatomy. If you cut the pile, that seam will always look like a bald spot in bright light.
Align the Nap Like You Are Grooming a Show Dog
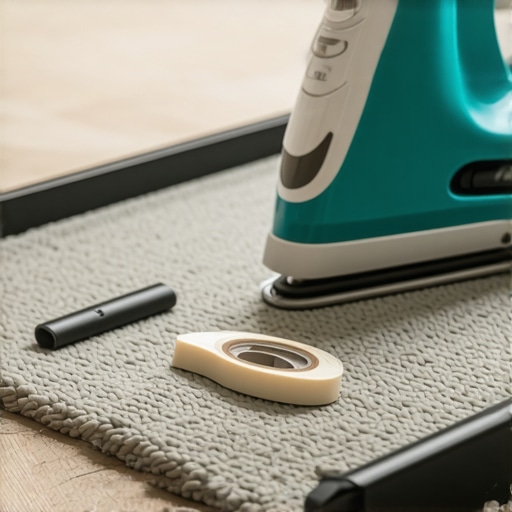
Before you even think about the heat iron, you have to verify the nap direction. Carpet fibers lean in one direction. If you join two pieces with the nap running toward each other, the light will hit them differently, creating a permanent shadow line. It’s like petting a cat from head to tail versus tail to head—the texture changes. This is exactly why your carpet looks different colors from different angles. To check this, run a scrap piece of wood or your hand across both sections. If one feels smooth and the other feels rough, rotate your carpet. If you skip this, no amount of glue or heat will save you from a visible line in the center of the room. You want both pieces ‘leaning’ the same way so the fibers can mingle and hide the junction point.
Heat Management is Your Best Friend
Once your edges are prepped and aligned, it’s time for the seaming iron. The iron doesn’t just melt the tape; it creates a chemical bond. I always set mine to a medium heat—too high and you’ll scorch the backing or, worse, melt synthetic fibers. Move the iron slowly, about two to three inches every thirty seconds. As the iron moves forward, press the carpet into the molten adhesive behind it. I like to use a seam roller or a smooth star wheel to ‘marry’ the two edges together. But be careful: don’t press so hard that you squeeze the glue up into the fibers. You are aiming for a flat, even bond. If you are working in a massive space, remember the power stretcher rule for large living room carpets to ensure there’s no slack that could cause the seam to buckle later under foot traffic.
My Disaster with the Short Cut and How I Saved It
I remember a humid Tuesday in a cramped hallway where I got overconfident and trimmed my piece just a hair too narrow. I was left staring at a 1/8-inch gap. It felt like a canyon. Instead of ripping it all out, I used a technique for how to fix a carpet seam that was cut too short by using a stay-nailing method to pull the backing together while the glue was still tacky. It saved the project, but the stress taught me to always ‘dry fit’ three times before applying heat. If you find a small gap, don’t panic. You can often use a seam tractor to gently pull the fibers toward the center. This level of detail is what separates a DIY attempt from carpet install secrets that professionals use to get that high-end, one-piece look. When done right, the transition is so tight you’ll forget how to hide a carpet seam in the middle of a room was ever a concern because it simply disappears.
Let’s dig deeper into the mechanics of what is actually happening under those fibers. Most homeowners and even some ‘weekend warriors’ assume that the goal is to stretch the carpet until it’s as tight as a drum. They think that more tension means a more secure seam. However, I’ve found that over-tensioning is actually the primary culprit behind ‘seam peaking.’ When you pull too hard, the two edges of the backing push against each other and have nowhere to go but up, creating a permanent ridge that catches light and creates a tripping hazard. It’s a classic example of flooring installation mistakes to avoid for a seamless look that only becomes apparent a few weeks after the tools are put away. Have you ever fallen into this trap? Let me know in the comments.
Why Do Some Seams Fail After Six Months of Looking Perfect?
The answer usually lies in the ‘Oops’ factor of thermal management. Beginners often rush the cooling process, thinking once the glue is tacky, they are good to go. But professional standards, such as those outlined in the IICRC S100 Reference Guide, emphasize that the integrity of the thermoplastic bond is entirely dependent on the cooling cycle. If the carpet is stretched or moved before the adhesive has fully crystallized, the bond weakens microscopically. This leads to the dreaded ‘seam separation’ later in the year when the house settles or humidity changes. It is the same principle as the liquid membrane move for fail-proof shower pans—it’s the invisible prep and patience that dictates the long-term success of the visible surface.
The Double-Cut Trap for Patterned Carpets
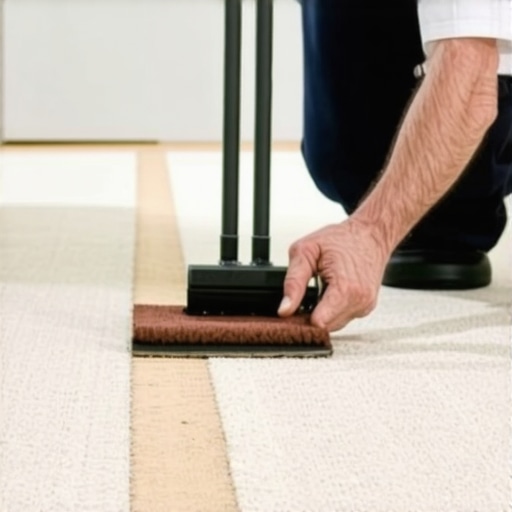
Another nuance that separates the pros from the amateurs is how they handle the cut. Everyone tells you that double-cutting—stacking the pieces and cutting through both at once—is the easiest way to get a matching edge. On a plain plush, sure, it might work. But on a patterned or looped carpet, this is a death sentence for your aesthetic. You end up cutting through the structural integrity of the loops on both sides, leading to fraying. Instead, you must use the row-finding method I mentioned earlier for each side independently. If you don’t, you’ll be searching for carpet install secrets to hide the bald spots you just created. I once saw a beautiful berber ruined because the installer used a standard utility knife for a double-cut, resulting in carpet seaming errors that show up in bright daylight that no amount of steam could fix.
Can a Knee Kicker Actually Be Your Worst Enemy?
While the knee kicker is an essential tool, using it directly on the seam is a common mistake. I’ve seen people try to ‘kick’ the seam together to close a gap. This usually results in the knee kicker mistake that ruins luxury carpets by delaminating the secondary backing from the primary one. If your edges aren’t touching during the dry fit, the kicker isn’t the solution; re-trimming is. You want ‘zero-stress’ alignment before the heat is even applied. This attention to detail extends to the very edges of the room as well. When you are finishing the perimeter, don’t just shove the carpet against the wall. Understanding the back-bevel secret for seamless baseboard corners helps you realize that the way your flooring meets the trim is just as vital as the seam in the center of the room for a truly high-end finish.
Invest in a Dedicated Row Cutter for Surgical Precision
If you take nothing else away from my trial-and-error journey, let it be this: throw away the generic box cutter for your seams. Professionals use a cushion back cutter or a loop pile cutter for a reason. These tools have a built-in guide that sits in the ‘valley’ between the rows of carpet fibers. It prevents you from shearing off the yarns, which is the number one cause of seams that look ‘fuzzy’ or gray. I remember the first time I used one; it felt like the carpet was cutting itself. This level of precision is part of the carpet install secrets that turn a home project into a masterpiece. When you use the right tool, you aren’t just cutting; you are preserving the structural integrity of the weave, ensuring that when the two pieces meet, they lock together like a handshake.
The Liquid Insurance Every Seam Needs
Even a perfectly cut seam can fail if you skip the seam sealer. Think of it as the ‘liquid insurance’ for your floor. I always apply a thin bead of latex sealer to the edge of the carpet backing on both sides before heat-seaming. This prevents the fibers from fraying over time, especially in high-traffic hallways. If you’ve ever wondered why your new carpet is shedding so much near the doorways, it’s often because the edges weren’t properly sealed. According to the Carpet and Rug Institute (CRI 105) standards, all seams in a professional installation must be treated with a specialty adhesive to prevent delamination. It only takes an extra five minutes, but it can add five years to the life of your floor.
How do I maintain these invisible seams for the next decade?
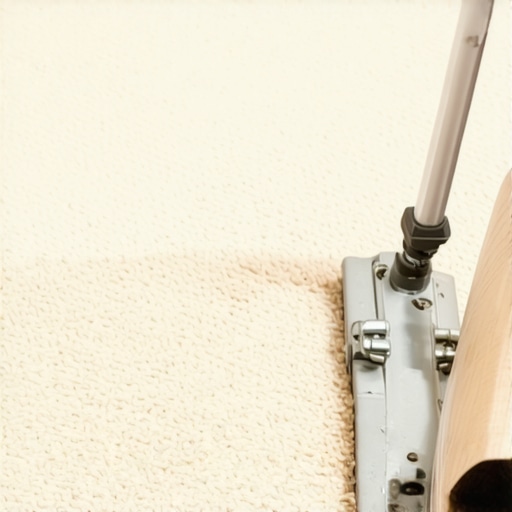
The secret to longevity isn’t just in the install; it’s in the care. Avoid using heavy-duty steam cleaners directly over the seam for the first few months. The intense heat can occasionally soften the thermoplastic tape underneath. Instead, focus on gentle vacuuming with the beater bar set to the correct height. If you accidentally snag a fiber, don’t pull it—you might unravel a whole row. I’ve learned how to fix a burnt carpet spot and small snags using just a pair of tweezers and a tiny dab of glue, which is a lifesaver for maintaining that ‘just installed’ look. Consistency is key; if you notice the seam starting to peak or gap, address it immediately by checking the tension. Just like the blue tape secret for professional shower silicone lines, the best maintenance starts with a clean, well-executed foundation.
The Future of Flooring is Smarter Adhesives
Looking ahead to the top trends in flooring installation for 2025, I predict we will see a massive shift toward ‘cool-set’ adhesives and laser-guided seam alignment. We are moving away from the dangerous, high-heat irons that can easily scorch delicate fibers. New polymers are being developed that bond at lower temperatures and offer more flexibility, which is crucial as homes settle and expand with the seasons. This technology will make it even easier for DIYers to achieve professional results without the risk of permanent damage. If you’re planning a step-by-step flooring installation, keeping an eye on these low-VOC, high-bond technologies will be the difference between a floor that lasts and one that requires constant repair. My advice? Try the row-finding method I mentioned earlier on a scrap piece of carpet this afternoon—you’ll see the difference in quality immediately.
Hard-Earned Truths from My Carpet Remodel Nightmares
After years of fixing my own mistakes and helping neighbors with theirs, I have realized that the ‘invisible’ part of a seam is 90% preparation. One lightbulb moment for me was realizing that carpet is not static; it breathes with your house. If you do not adopt a durable flooring installation mindset, the seam might look great on day one but fail by month six. I also learned that lighting is your harshest critic. Always check your work with the overhead lights on and the blinds open to catch shadows you might miss at night. Finally, never underestimate the power of a fresh blade; a ‘sharpened’ utility knife is still dull compared to a brand-new specialty blade. When you learn how to choose the right carpet for a cozy living space, you will find that some textures are far more forgiving than others, especially for your first DIY attempt.
The Tools I Will Not Start a Project Without
I have wasted enough money on ‘multi-purpose’ tools to know that specialized gear is actually cheaper in the long run because it prevents ruined materials. First, get a professional-grade row finder; it is a tiny investment that prevents ‘haircuts’ on your carpet fibers. Second, I always keep a bottle of premium latex seam sealer nearby to prevent fraying, even when working with the best carpet types for high-traffic areas in 2025. Third, I highly recommend checking the official Carpet and Rug Institute (CRI) guidelines—they are the gold standard for a reason. Having these expert flooring installation tips for 2025 in your back pocket makes you feel like a pro before you even make the first cut.
Step into Your New Room with Confidence
You have the knowledge now to turn that ‘jagged scar’ into a professional-grade finish. Do not let the fear of a visible line stop you from revitalizing your home. Remember that every expert was once a beginner staring at a roll of carpet with a racing heart. Take your time, trust the row-finding method, and you will successfully master how to hide a carpet seam in the middle of a room. I cannot wait to hear about the transformation of your space. Have you ever accidentally cut a carpet piece just a bit too short? Let me know in the comments how you handled that heart-sinking moment!