

I still remember the day I decided to rearrange my living room for the first time in five years. I dragged my heavy oak bookshelf across the room, only to reveal four deep, soul-crushing craters in my plush beige carpet. It looked like a herd of miniature elephants had been camping in the corner. My first instinct? Grab a stiff-bristled brush and scrub like a madman. Mistake. I ended up fraying the fibers so badly that the dent actually looked worse—it was now a fuzzy, ruined dent. I’ve learned the hard way that when it comes to keeping a living space cozy, brute force is never the answer.
Stop Staring at Those Ugly Carpet Craters
We’ve all been there. You get a wild hair to move the furniture, but your carpet has other plans. Those depressions are more than just an eyesore; they make your whole room feel dated and neglected. But here is the good news: those fibers aren’t dead, they’re just sleeping. Today, I’m going to show you how a simple household iron and a damp towel can breathe life back into your floors. It’s a trick I picked up after years of trial and error while learning carpet install secrets. This method isn’t just about appearances; it’s about restoring the integrity of the pile.
Can a Hot Iron Really Save Your Carpet Without Burning It?
I know what you’re thinking because I thought it too: “You want me to put a scorching hot appliance on my expensive flooring?” It sounds like a recipe for a localized house fire or at least a melted plastic mess. It’s a valid fear! Most modern carpets are synthetic, and heat can be their worst enemy. However, when you use a damp barrier, you aren’t melting the fiber; you are using localized steam to “reset” the memory of the yarn. It’s actually a similar principle to how we fix dents in solid wood.
Why Steam Beats a Stiff Brush Every Time
When you have high-traffic carpets, the fibers get crushed and matted down over time. According to the Carpet and Rug Institute (CRI), most carpets have a “memory,” and moisture combined with gentle heat is the most effective way to trigger that memory to return to its original shape. Scrubbing with a brush only damages the tips of the fibers. By using the ‘Iron-and-Towel’ trick, we’re targeting the root of the pile. Have you ever tried to move a couch only to realize the carpet was permanently scarred? Drop a comment below; I’d love to know if you managed to fix it or if you just moved the couch back to hide the evidence! Let’s get into the step-by-step process of how to do this safely.
Master the Heat Without Melting Your Floor
Before you even touch that iron, you need the right barrier. Grab a thick, white cotton towel. Using a colored towel is a rookie mistake; the heat can actually transfer the dye from the towel into your carpet, turning a small dent into a permanent blue stain. I learned this the hard way during a carpet install secrets demonstration where I grabbed a red shop rag and left a pink square on a brand new nylon pile. It was not my finest hour, but it taught me that patience and the right materials are non-negotiable.
Grab a White Towel and Get It Damp
Drench the towel in the sink and then wring it out until it is just damp. You do not want it dripping, or you will end up with a soggy subfloor and a potential mildew problem. Lay the damp towel directly over the dented area. This layer of moisture acts as a heat shield, preventing the synthetic fibers from melting while allowing the steam to penetrate deep into the yarn.
Let the Steam Do the Heavy Lifting
Set your iron to the medium-high steam setting. Once it is hot, press it onto the towel for about 15 to 30 seconds. Do not just let it sit there; keep it moving in small circles. This is very similar to the iron and towel fix for dents in solid wood floors where we use moisture to expand crushed cells. When you lift the iron, the towel should be steaming, and the area underneath should feel quite warm to the touch. 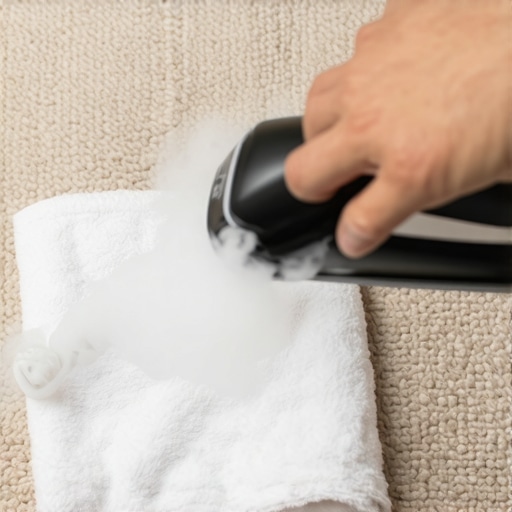
Tease the Fibers Back to Life
Now for the most satisfying part. Peel back the towel and use a common kitchen fork or even the edge of a spoon to gently rake the carpet fibers. They should feel soft and pliable. If the dent is particularly stubborn—like those left by heavy oak furniture on high-traffic carpets—you might need to repeat this process twice. I once spent forty minutes on a single room in a Victorian remodel because the previous owners had not moved their piano in twenty years. It felt like I was performing carpet surgery, but the results were flawless. If you find the carpet feels weirdly stiff once it dries, it might not be the dent; you could be seeing residue from old cleaners, which is why your carpet feels crunchy after a diy spill fix.
Safety Checks for Synthetic Fibers
Most modern carpets are made of polyester or nylon. These materials have a relatively low melting point. If you smell something like burning plastic, stop immediately. The goal is to shock the fiber back into its upright position, not to fuse it into a solid plastic pancake. Just like the precision required in step-by-step flooring installation, success comes from the details. If you are not sure about your carpet type, test a tiny, hidden spot inside a closet first. It is better to lose five minutes on a test than to ruin the center of your living room.
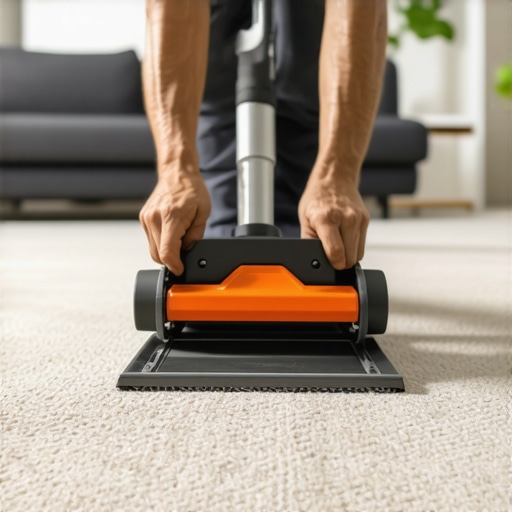
While the iron-and-towel trick is a lifesaver for furniture dents, true expertise in flooring comes down to understanding the physics of the material. A common myth I see all the time in DIY forums is that a knee kicker is all you need to install a carpet correctly. In my experience, relying solely on a kicker is a recipe for disaster. The Carpet and Rug Institute (CRI) specifically states in their residential installation standards (CRI 104) that a power stretcher is mandatory for most installs to ensure the carpet is under proper tension. If you skip this, you’ll likely find yourself asking why your carpet is buckling only three years later. It’s not just about getting it flat; it’s about stretching it enough so it stays flat through seasonal humidity changes.
Why Does My New Carpet Look Like a Rippled Lake After Six Months?
The answer usually lies in the tension—or lack thereof. When you use a knee kicker, you are only moving the carpet a few inches at a time, which often leads to uneven distribution of force. This is the knee kicker mistake that ruins luxury carpets, especially those with high-end backings that don’t ‘give’ as easily as cheaper alternatives. For larger rooms, always follow the power stretcher rule for large living room carpets to avoid those unsightly waves. Have you ever fallen into this trap? Let me know in the comments if you’ve seen those ripples start to form shortly after an installation.
The Hidden Moisture Trap Beneath Your Feet
Another advanced mistake involves the subfloor. People focus so much on the plush pile that they forget what’s happening underneath. If you are installing over a slab, why we never skip the subfloor moisture test on concrete becomes clear once you see a brand new installation ruined by “wicking.” Moisture from the slab can travel up through the pad and into the carpet fibers, carrying salts and minerals that create permanent stains. This is also why your carpet pad feels crunchy under your feet after a few months. It’s not just old age—it’s often a chemical reaction to trapped vapor that was never measured before the first tack strip was nailed down.
Don’t Trip at the Doorway
The real pros show their skill at the edges of the room. Anyone can lay carpet in an open square, but finishing a doorway is where things get tricky. I’ve seen many beautiful floors ruined by a bulky, tripping-hazard metal strip. Knowing how to transition from thick carpet to thin vinyl without a lip requires a bit of subfloor prep and a steady hand. It’s the same level of precision you need when dealing with woodwork, like using the spring miter secret for tight crown and baseboard corners. If the transition isn’t flush, it’s not finished. Whether you are dealing with a shower renovation or a bedroom refresh, the devil is always in the details of the layout and the integrity of the stretch.
You have conquered the carpet dents and managed the tricky transitions, but how do you scale these small wins into a home that stays pristine for a decade? My secret weapon for any renovation isn’t a hammer; it’s a high-quality oscillating multi-tool. It is the only way to get those clean, surgical undercuts on door jambs when you are deep into a step-by-step flooring installation. Without it, you are just hacking away at the wood and hoping the baseboard hides the mess. When you are deciding how to choose the perfect baseboards, remember that a tool-driven approach ensures the finish matches the vision.
The Multi-Tool Advantage for Precision Edges
I personally use my multi-tool more than my miter saw during the final stages of a project. It allows for flush-cutting baseboards in tight corners where a traditional saw simply won’t fit. This level of precision is exactly what separates a DIY look from a pro result. If you are looking at baseboard trends in 2025, you’ll notice that many modern styles require absolute vertical accuracy, which is impossible without the right gear. 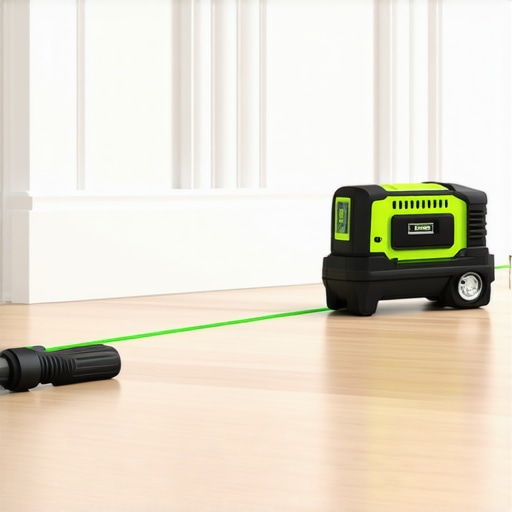
How can I make my flooring and shower repairs last for the long haul?
Maintenance is the bridge between a good install and a lifelong floor. According to the Tile Council of North America (TCNA) Handbook, sealant joints in wet areas should be inspected every six months to prevent water migration. If you ignore a tiny hairline crack in the corner of your stall, you will eventually find yourself reading about shower repairs and when to fix vs. replace. For my own home, I never settle for hardware store bargain caulk; I use 100% silicone sealants with integrated antimicrobial agents. This is a staple in every shower renovation I consult on because it prevents that stubborn pink mold from taking root in the joints.
Ditch the Bubble Level for Laser Precision
If you are still using a spirit level to line up your tile or baseboards, you are working harder than you need to. The laser level move has completely changed how I approach layout. It projects a perfectly straight line across all four walls of a room simultaneously, ensuring that your first row of tile or your baseboard styles stay perfectly level even if the floor itself has a slight dip. I predict that within the next five years, we will see even more advanced ‘smart’ levels that sync to your phone to map out floor variances in real-time, making expert flooring installation tips for 2025 look like ancient history.
Protect Your Investment with a Simple Routine
Long-term results are also about what you don’t do. I’ve seen beautiful floors ruined by the wrong cleaning chemicals or heavy furniture. Stop hardwood scratches with the felt pad routine the very same day you finish your installation. It’s a five-dollar fix that protects a five-thousand-dollar floor. Whether you are dealing with a ultimate shower renovation or a simple bedroom refresh, the goal is to create a space that works for you, not one you have to constantly repair. Go to your bathroom right now and perform the finger test on your grout lines; if anything feels soft or chalky, it’s time to reseal before moisture wins the battle.
What Decades of Flooring Taught Me About the DIY Trap
My biggest lightbulb moment was realizing that the ‘quick fix’ usually costs double in the long run. I used to think a knee kicker was enough until I saw a four-thousand-dollar install ripple like a pond after only one summer. Now, I never skip the proper tension required for carpet install secrets. I’ve also learned that the subfloor is the most honest part of any house; it tells you exactly how the previous owners treated the home. If you don’t listen to it and perform a subfloor moisture test on concrete, your new floor is doomed before you even open the first box of planks. Finally, remember that the right materials are your best friend. Learning how to choose the right carpet for a cozy living space isn’t just about the color; it is about the density and the fiber’s natural ability to bounce back after years of heavy foot traffic.
The Gear That Never Leaves My Truck
I don’t believe in hoarding tools, but there are three things I won’t step onto a job site without. First is my oscillating multi-tool. It is my surgical blade for undercutting door jambs, which is essential when you are following baseboard trends in 2025. Without those clean cuts, the transition looks amateur. Second, I always carry a high-end laser level. It is the only way I ensure my baseboard styles are dead level across an entire room, saving me hours of shimming and frustration. Lastly, I swear by 100% silicone sealant with antimicrobial agents. I’ve seen too many ‘bargain’ caulks fail and cause rot, so for shower repairs, I never settle for anything less than the professional grade.
#IMAGE_PLACEHOLDER_E#
Stop Planning and Start Transforming
Every dent you steam out and every miter joint you cut perfectly is building your skills for the next big project. Whether you are diving into a full shower renovation or just fixing a small furniture crater, take pride in the small details. Your home is where your life happens, and taking the time to transform your home with these expert tips ensures a space that is both beautiful and resilient. Don’t let the fear of a mistake stop you; the best lessons are often learned with a tool in your hand. Have you ever tried a ‘pro trick’ from a video that went horribly wrong? Let me know your biggest DIY fails or successes in the comments below!