

I’ll never forget the first time I tried to wrap crown molding around a living room. I’d bought the expensive pre-primed pine, sharpened my blade, and set my saw to a perfect 45 degrees. I felt like a pro—until I climbed the ladder. When I pushed those two pieces together, the top touched, but the bottom had a gap big enough to swallow a nickel. I spent the next three hours trying to ‘fix’ it with a tube of caulk and a prayer. It looked terrible. I realized then that a perfect 45 on the saw almost never means a perfect corner on the wall. If you’ve ever felt that sinking feeling in your chest when your trim doesn’t line up, this is for you. Today, we’re ending the ‘caulk-it-and-paint-it’ cycle by mastering the ‘spring-miter’ secret, a technique that forces the outside edges of your joints together so tightly they practically disappear.
Stop Trusting Your Miter Saw’s Factory Settings
Most DIYers make the same mistake I did: assuming houses are built with perfectly square corners. Spoiler alert: they aren’t. Walls bow, drywall mud builds up in corners, and floors settle. If you just slap a standard cut onto the wall, you’re going to see flooring installation mistakes manifest in your trim work. The spring-miter is about ‘over-cutting’ the angle just enough—usually about 1/2 to 1 degree—to ensure the visible face of the joint makes contact first. It’s a cousin to the back-cut secret for tight baseboard outside corners, which I eventually learned after ruining way too much expensive oak. Have you ever stood back from a finished wall and wondered why the gaps only seem to show up once the sun hits them a certain way?
Is the Spring-Miter really better than just using more caulk?
I get it. You’re thinking, ‘Why can’t I just fill the gap?’ Here’s the truth: caulk shrinks. Wood expands and contracts with the seasons. If your joint isn’t physically tight at the wood-to-wood level, that caulk will eventually crack and peel, leaving a dark, ugly line. I’ve seen beautiful baseboard styles ruined by lazy joints. According to the Architectural Woodwork Institute, proper jointing is the primary factor in the longevity of interior trim, as even small gaps allow moisture to penetrate and degrade the material over time. Using the spring-miter ensures that the tension is held at the very front of the joint, keeping it closed even when the house shifts.
The Hidden Physics of Why Your Corners Gap
The real secret is in the ‘spring.’ When you cut a miter at slightly more than 45 degrees—say 45.5—for an inside corner, you are essentially pre-loading the joint. When you nail it in, the wood is forced to compress slightly at the point of contact. This is especially vital when dealing with baseboards on uneven slabs where the floor might be pulling the bottom of the board away. I used to think I was being precise by using a digital protractor, but I learned that ‘feeling’ the fit is often more accurate than the numbers. If you’re struggling with those inside corners, you might also want to look into the inside corner cope, but for outside miters, the spring is king. Tell me, what’s the most frustrating gap you’ve ever had to hide?
Dial in the Magic Half-Degree
To master the spring-miter, you have to stop treating your miter saw like a precision instrument and start treating it like a tool for negotiation. Walls aren’t math problems; they’re organic, shifting surfaces that rarely cooperate with a factory-set 45-degree detent.
Identify the Wall’s True Personality
Before you even pick up a piece of trim, take two scrap pieces of your material—not random 2x4s, but the actual baseboard styles you’re installing. Cut two small 45-degree miters and hold them against the corner. If the top opens up, the corner is ‘proud’ (more than 90 degrees). If the bottom opens, the corner is ‘tight.’ This dry-fit is your roadmap; it tells you exactly where the gap lives. If you find yourself fighting a floor that isn’t level, which can pull the bottom of your miter apart, you might need the wood shim secret for baseboards on uneven slabs to keep the board plumb while you measure.
Cut for the Face and Not the Back
The spring-miter technique requires you to set your saw to about 45.5 degrees for a standard 90-degree corner. This creates a slightly ‘hollow’ joint. Think of it like a pair of scissors; you want the very tips—the visible edges of your trim—to touch first. When you apply pressure with your nails, the wood fibers at the tip compress, creating a seam so tight it looks like a single piece of wood. It’s a similar philosophy to the back-cut secret for tight baseboard outside corners, where you remove material from the rear to ensure the front is flawless. While you’re at it, don’t forget to stop baseboard splitting with this simple pre-drilling tactic. Because you’ve angled the cut to be ‘tight’ at the front, the wood is under more tension than usual. A finish nail fired into the end-grain without a pilot hole will pop that miter open faster than a cheap zipper.
The Victorian Column Disaster and the 93-Degree Save
I remember working on a hallway where I had to use the double mitre trick for wrapping baseboards around small pillars. The column was slightly flared at the bottom—a classic ‘fat’ corner. My first attempt with standard 45-degree cuts left a gap I could see from the next room. It looked amateur. I stripped it off, reset the saw to 46.5 degrees (to compensate for the 93-degree flare), and ‘sprung’ the joint. The pieces practically fused together. I didn’t even need wood filler. It taught me that precision isn’t about the number on the dial; it’s about the lack of light passing through the wood. If you can master this for outside corners, you’ll find that the coping saw technique for flawless inside baseboard corners becomes much easier to visualize because you’re finally thinking about how wood interacts in three dimensions. Just like using the block and hammer move for tight vinyl floor joints, the spring-miter is about using controlled force to eliminate gaps before they ever start.
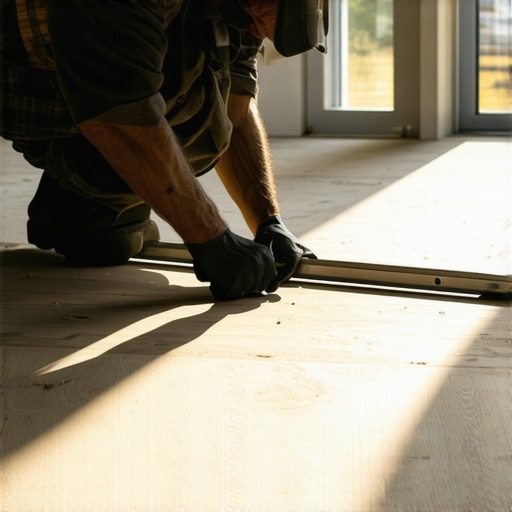
While the spring-miter fixes the visible symptoms of a bad corner, the real mastery of finish work begins below the surface. Most beginners—and honestly, plenty of seasoned contractors—get obsessed with the bubble in their spirit level. Here is the contrarian truth: a floor can be slightly out of level and look magnificent, but a floor that isn’t flat will eventually destroy your reputation. In my early days, I assumed a subfloor was good to go if it looked straight to the eye. I was wrong. If you don’t use the self-leveler move for perfectly flat vinyl installs, you are essentially gambling with the locking mechanisms of your planks.
Flatness Trumps Level Every Single Day
The National Wood Flooring Association (NWFA) is very clear on this: subfloors must be flat within 3/16 of an inch over a 10-foot span. If you ignore this, you’ll experience why your vinyl plank floor is clicking when you walk. That clicking isn’t just an annoying sound; it is the sound of your floor’s tongue-and-groove joints slowly snapping under the pressure of air gaps. Always check for ‘telegraphing,’ where even a tiny screw head or a stray piece of dried drywall mud can cause why your vinyl plank floor is telegraphing subfloor bumps through the surface weeks after you’ve left the job site.
The Soft Padding Trap That Ruins Your Carpet
I see this ‘oops’ factor in almost every high-end residential remodel. Homeowners think they are doing themselves a favor by choosing the thickest, softest carpet pad available. It feels like walking on a cloud at first, but it’s a trap. A pad that is too thick (usually over 7/16 of an inch for many styles) allows too much vertical movement. This creates excessive stress on the carpet backing, which is a primary reason why your carpet is buckling only three years later. Stick to a high-density, lower-profile pad to ensure the stretch remains tight and the seams stay invisible.
How Much Thinset Coverage Do You Actually Need?
When it comes to showers, the ‘dots of mortar’ method is a recipe for disaster. According to the Tile Council of North America (TCNA) Handbook, wet areas require at least 95% mortar contact to prevent moisture from pooling in voids behind the tile. Without this, you’ll find why your shower grout is crumbling just months after install. I always use a directional troweling technique and back-butter every tile to stop shower floor tiles from popping with the proper thinset coverage. It’s the difference between a shower that lasts five years and one that lasts fifty.
Don’t Let the Knee Kicker Overstretch Your Budget
Finally, let’s talk about the tool that has ruined more luxury carpets than any other: the knee kicker. It’s great for small closets, but if a contractor tries to stretch a whole living room with just a kicker, walk away. This is the knee kicker mistake that ruins luxury carpets because it fails to provide the uniform tension required for long-term stability. You need a power stretcher to avoid those unsightly waves that appear a few summers down the line. Have you ever fallen into this trap where a ‘level’ floor or ‘soft’ pad still caused issues? Let me know in the comments.
I’ve spent thousands on tools over the years, but if I had to start over today, I’d stop buying cheap spirit levels and invested in a high-end green cross-line laser. While the chalk line move for keeping long tile rows perfectly straight is a classic for a reason, a laser doesn’t lie when the floor starts to slope away from you in three different directions. I use the Bosch GLL3-330CG because the green beam is visible even in rooms flooded with afternoon sun. When you are trying to align complex shower enclosures, having a 360-degree reference point saves you from the nightmare of reaching the far wall only to realize your first row was an eighth of an inch off.
Toss Your Chalk Line for a Green Laser
Precision isn’t just about the initial install; it is about how the materials behave five years from now. I’ve started moving away from standard adhesives for my high-end jobs. If you are working with larger formats, you should absolutely adopt the glue assist method for wide plank hardwood floors. It’s an extra step, sure, but it eliminates the seasonal ‘creak’ that drives homeowners crazy. I’ve found that using premium urethane-based adhesives provides a flexible bond that breathes with the house, which is essential as we see more extreme temperature swings in our local climates.
How do I maintain my flooring and shower for the long haul?
Maintenance is where most DIY victories go to die. According to the Carpet and Rug Institute (CRI), professional deep cleaning every 12 to 18 months is non-negotiable for maintaining fiber resilience, especially if you’ve chosen the best carpet types for high traffic areas in 2025. Between those cleanings, you can stop carpet odors with the baking soda vacuum trick to keep things fresh without using harsh chemicals that can degrade the backing. For your wet areas, the secret isn’t just scrubbing; it’s monitoring. I always tell my clients to keep an eye on the transitions. Knowing the right time for shower repairs: when to fix vs. replace for longevity can save you from a five-figure mold remediation bill down the road.
The Glue That Keeps My Sanity Intact
As we look toward the future, I see a massive shift toward digital templating and modularity. We are already seeing ‘hybrid’ flooring materials that combine the waterproof nature of vinyl with the rigidity of stone dust, making them nearly indestructible. These materials require even more focus on expert flooring installation tips for 2025, as their lack of flexibility means your subfloor has to be flatter than ever. The days of ‘shimming as you go’ are ending; the future belongs to those who prep the subfloor with surgical precision. If you want to elevate your work immediately, I challenge you to try one advanced finishing move on your next project: use the blue tape secret for professional shower silicone lines every time. It is the single fastest way to make a $1,000 bathroom look like a $10,000 spa.
Hard-Earned Truths from the Job Site Trenches
After years of wrestling with uneven walls, I’ve realized that the tool is only half the battle; the mindset is the rest. First, never trust a ‘factory edge.’ Whether it’s a piece of LVP or a pre-primed baseboard, I always trim the ends myself to ensure a clean, square start. Second, I’ve learned that moisture is the silent killer of even the best work. I never skip the subfloor moisture test on concrete because a beautiful joint means nothing if the wood warps six months later. Finally, remember that your eyes can be deceived by shadows. I always keep a high-lumen work light at floor level to catch any ‘telegraphing’ or gaps that the overhead lights might hide.
The Gear That Actually Earns Its Spot in My Truck
If you’re serious about taking your expert flooring installation tips for 2025 to the next level, you need more than just a hammer. I swear by my Collins Miter Clamps; they are the only way to hold a spring-miter together while the glue sets. For anyone tackling a bathroom, the TCNA Handbook is my absolute ‘Bible’ for ensuring modern shower designs stay waterproof. I also never leave home without a quality Scribe Tool. Using the scribe tool trick for baseboards against stone walls is the only way to handle those wavy, organic surfaces that a miter saw just can’t calculate.
Go Ahead and Make Your First Cut
The biggest barrier to a professional-looking home isn’t a lack of expensive tools; it’s the fear of wasting a piece of wood. Yes, you will probably ruin a few boards while mastering baseboard trends in 2025, but that is just the tuition you pay to become a master. Every time you choose to ‘spring’ a joint instead of filling it with caulk, you are building a skill that stays with you. Whether you are aiming for carpet install secrets or a flawless tile layout, the precision you practice today is what makes your home feel solid and intentional for years to come.
Have you ever had a corner that just refused to close no matter how many times you re-cut it? Let me know in the comments below!