

I was standing in my basement, staring at a floor that cost me three weekends and two thousand dollars, and all I could smell was mildew. It wasn’t just a faint whiff; it was a full-on olfactory assault. I’d done everything “by the book”—or so I thought. I bought the high-end luxury vinyl, the kind with the fancy pre-attached pad, and laid it directly over the concrete. I assumed that since the flooring was waterproof, the concrete beneath it didn’t matter. I was dead wrong. That “waterproof” label only applies to the top; it doesn’t protect the underside from the relentless vapor pressure pushing up through a porous slab. It was a heart-wrenching lesson that forced me to rip up every single plank. [image_placeholder]
The Invisible Threat Lurking Beneath Your New Floor
Concrete looks solid, but it’s essentially a giant, hard sponge. Even if it feels dry to the touch, it is constantly breathing out moisture. When you slap a non-porous layer of vinyl over it without a proper vapor-seal, you’re creating a “sweat suit” for your slab. That moisture gets trapped, turns into alkaline salts, and eventually starts to degrade the adhesive or grow mold. I learned the hard way that flooring installation mistakes to avoid for a seamless look often start with what you can’t see. Today, I’m going to show you exactly how to avoid my $2,000 disaster by mastering the vapor-seal requirement. We are going to ensure your floor stays beautiful, smells fresh, and stays structural for decades, not just months.
Is that tiny plastic sheet actually worth the extra work?
I get it. You’re at the home improvement store, looking at a roll of 6-mil poly film, thinking, “My flooring already has underlayment, this is just an upsell.” I thought the same thing. But here is the reality: integrated padding is for comfort and sound, not for moisture blocking. According to the National Wood Flooring Association, moisture-related failures account for the vast majority of flooring claims. Even for vinyl, the hydrostatic pressure from a slab can be enough to buckle joints. Have you ever noticed a weird “clicking” sound when you walk? It might not be the locking mechanism; it could be moisture-related swelling. You can check out why your vinyl plank floor is clicking when you walk to see if you’re already facing this. If you’re planning a remodel, especially in a basement or a kitchen on a slab, you need the moisture barrier move for concrete slabs in your arsenal. It is the cheapest insurance policy you will ever buy for your home. Before you even open a box of planks, you have to know if your concrete is ready. That’s why why we never skip the subfloor moisture test on concrete is the golden rule in my house now. Have you ever skipped a step thinking it wouldn’t matter, only to have it haunt you later? Tell me your horror stories in the comments—I promise I won’t judge, because I’ve been there.
Fix the foundation before the film goes down
Before you even think about rolling out that plastic, you have to play detective on your slab. Any tiny pebble, stray staple, or dried glob of drywall mud will eventually turn into a mountain under your new floor. I remember a guest room where I thought a few specks of dried paint wouldn’t matter; six months later, every time I walked over that spot, the plank made a sharp snapping sound. It is a classic case of why your vinyl plank floor is telegraphing subfloor bumps. Sweep the area, vacuum it, and then vacuum it again. If your slab has dips deeper than 3/16 of an inch over a 10-foot span, the plastic barrier will simply bridge the gap. Over time, the weight of your furniture will force the floor into that void, snapping the locking joints. That is exactly why the self leveler move for perfectly flat vinyl installs is a mandatory step for a pro-grade result.
The 6-inch overlap rule that saves your subfloor
Now, let’s get into the actual barrier. Think of 6-mil polyethylene film as a high-quality rain jacket for your concrete. You want to lay it out so that every sheet overlaps the next by at least 6 to 8 inches. Do not rely on gravity to hold these together. Use a dedicated moisture-resistant seam tape to seal every single joint. I once tried to shortcut a narrow hallway by just overlapping the plastic without taping it. I figured the weight of the planks would seal it. I was wrong. The plastic shifted during the install, creating a gap where moisture eventually concentrated. This led to a failure right at the doorway, and I spent a Saturday learning why your floor transitions keep popping loose on concrete slabs when moisture is present. 
Don’t trim the plastic until the very end
One of the biggest mistakes I see—and one I definitely made on my first basement job—is cutting the vapor barrier flush with the floor. You want to run that plastic about two inches up the wall. This creates a “bathtub” effect that prevents vapor from escaping out the sides and rotting your wall studs or soaking into the bottom of your drywall. It looks ugly for a few hours, but you will eventually hide it. When you are ready to wrap up, how to choose the perfect baseboards for your homes style becomes your next priority, as the trim will perfectly conceal that excess plastic once it is trimmed down. If you’re dealing with tricky angles, remember that the inside corner cope for perfect baseboard installs will give you a much tighter fit than a simple miter cut, especially if your walls aren’t perfectly square.
Folding corners like a professional
Handling the plastic at the corners is where most people lose their patience. Instead of bunching the film into a ball—which creates a massive hump that your trim will never sit flat against—fold it neatly like you’re wrapping a gift. I used to just hack away at the corners with a utility knife, but that often led to accidental punctures in the main barrier. Now, I use a “tuck and fold” method that keeps the profile slim. This level of precision is the difference between a floor that feels solid and a step by step flooring installation from planning to perfect finish. Every minute spent smoothing out a wrinkle in the poly film pays off in the form of a floor that doesn’t creak, groan, or smell like a swamp five years down the line.
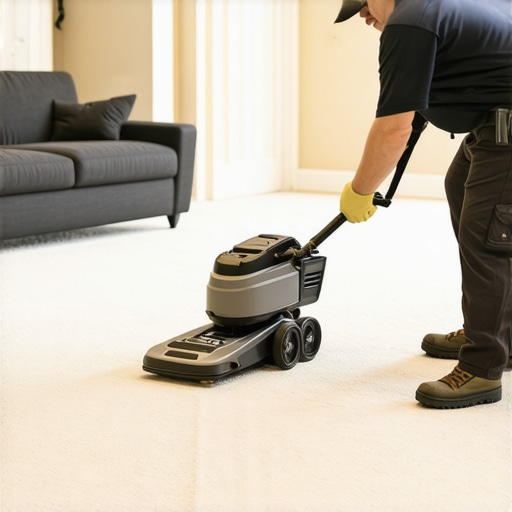
While I spent years thinking my basement floor was the ultimate trial, I soon realized that every room in the house has its own hidden trapdoor for the unwary DIYer. Take carpet, for instance. Most people think a ‘good’ install is all about how it looks on day one, but the real test happens three years later. I used to see folks—myself included—trying to save a few bucks by renting a knee kicker and thinking they could finish a whole 20-foot living room. This is a massive gamble. The Carpet and Rug Institute (CRI) 105 standard actually mandates the use of a power stretcher for nearly all installations to prevent ripples and premature wear. If you’re just ‘kicking’ it in, you aren’t getting the tension required for the secondary backing to stay stable. That’s why the knee kicker mistake that ruins luxury carpets is the number one reason I see otherwise beautiful rooms looking like a wavy ocean by year four. You need the power stretcher rule for large living room carpets if you want that tight, professional feel underfoot.
Beyond the carpet, I’ve found that baseboards are where the ‘amateurs’ are separated from the ‘artisans.’ The common belief is that if your floor is level and your miter saw is sharp, your baseboards will look perfect. But walls are almost never flat, and floors often have micro-slopes that a level won’t catch. If you just nail a baseboard tight to a wonky floor, you’ll end up with gaps at the top that look like a child installed them. This is why your baseboards look crooked on perfectly level floors. In my experience, using the wood shim secret for baseboards on uneven slabs is far superior to just ‘muscling’ the trim into place. You want to scribe the bottom or shim the back to ensure that the top edge stays a perfectly straight line, regardless of what the drywall is doing behind it.
Why does my shower grout keep cracking after just a few months?
This is the question that haunts bathroom remodels. Most people assume they just bought cheap grout or didn’t mix it right. The contrarian truth? The grout usually fails because the subbase is flexing. If you didn’t use the dry-pack secret for a perfectly sloped shower floor, or if your thinset coverage was spotty, those tiles are moving ever so slightly when you step on them. That movement is enough to pulverize grout. I’ve seen so many people skip the prep work and then wonder why your shower grout is crumbling just months after install. It’s almost always a structural issue, not a topical one. If you’re building a custom shower, why we use pre-sloped pans for custom tile showers is a lesson in longevity that you cannot afford to ignore. Have you ever fallen into this trap of focusing on the ‘pretty’ finish while ignoring the foundation? Let me know in the comments—I’ve made every mistake in the book, and I’m still learning every day.
That’s the thing—once the foundation is solid, the game shifts to the tools and the long-term upkeep. I used to think a hammer and a pry bar were all I needed, but now my kit is much more specialized. For instance, I never start a vinyl job without a fresh pack of carbide blades. I learned the stay sharp blade rule for cutting luxury vinyl the hard way; a dull blade doesn’t just make the job harder, it actually compromises the locking integrity of the plank. And when it comes to the bathroom, I don’t just ‘eye’ the sealer anymore. I’ve mastered how to seal a marble shower without changing the color because I want that natural stone look to stay vibrant, not turn a muddy amber over time. According to the Tile Council of North America (TCNA) Handbook, specifically the EJ171 standard for expansion joints, movement is inevitable in every structure. If you aren’t using color-matched 100% silicone in your change-of-plane joints, your grout will fail. It’s a technical detail, but it’s the difference between a five-year shower and a fifty-year shower. This is why understanding shower repairs: when to fix vs replace for longevity is so critical—knowing when a small crack is a symptom of a larger structural movement saves you thousands.
How do I maintain my new flooring and shower over time?
Maintenance is a proactive sport. For my floors, I follow a strict stop hardwood scratches with the felt pad routine. I replace those pads every six months like clockwork because they collect grit that eventually acts like sandpaper. Looking ahead, I see the industry moving toward ultra-low maintenance, high-style solutions. We are seeing a huge surge in the linear drain secret for modern walk-in showers. These aren’t just for looks; they allow for larger tiles on the shower floor, which means fewer grout lines and significantly less scrubbing for you. I predict that ‘smart’ flooring—integrated sensors for leak detection—will become the next big thing in the coming decade, protecting our investments from the inside out. 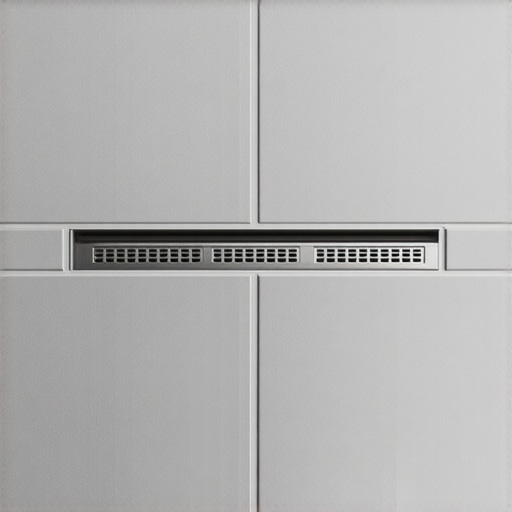 For now, my best advice is to pick up a high-quality laser level; it’s the one tool that will ensure your rows stay straight and your baseboards stay true across every room in your house.
The Hardest Truths I Learned While Crawling on Concrete
After years of DIY trials and professional errors, I’ve realized that the most expensive part of any project isn’t the material—it’s the redo. I used to think I could rush the process, but the acclimation test for avoiding hardwood floor gaps taught me that wood needs time to breathe before it’s pinned down. Similarly, if you find a stray mark or a small indentation in your carpet later, don’t panic; the iron and towel trick for fixing carpet dents has saved my sanity more times than I can count. The biggest lightbulb moment for me? Realizing that moisture is a permanent enemy, not a temporary nuisance. If you treat your subfloor like a living, breathing entity, your finished product will last for decades.
My Non-Negotiable Kit for a Professional Finish
I don’t step onto a job site without three specific things. First, the laser level move for perfectly horizontal shower tiles is the only way to ensure your eyes don’t play tricks on you in a small bathroom. Second, I always keep a fresh stash of utility blades because the stay sharp blade rule for cutting luxury vinyl ensures your locking mechanisms never get chewed up during the cut. Finally, I swear by the TCNA (Tile Council of North America) handbook. It might look like a boring technical manual, but it is the ultimate authority on avoiding the structural failures that lead to crumbling grout and leaking pans.
Turn Your House into a Sanctuary Without the Stress
The transition from a “project house” to a “dream home” happens in the details. Whether you are tackling a full flooring installation or just updating your trim, remember that every pro started exactly where you are now—staring at a messy subfloor and wondering if it would ever look right. Take your time, trust the prep work, and if you ever feel overwhelmed, reach out and contact us for a bit of guidance. Your home is worth the extra effort it takes to do it right the first time. What was the biggest “oops” moment you’ve had during a home renovation project? Let me know in the comments below!