

I remember the first night after I finished my DIY flooring project. I tiptoed into the kitchen for a glass of water, feeling like a total home renovation hero. Then I heard it. A sharp, plastic-on-plastic click right under my heel. My heart sank. I had followed all the basics, used a fancy mallet, and spent hours on my knees, but my floor sounded like it was snapping in half every time I shifted my weight. It turns out, I had made the classic rookie mistake of ignoring a slight dip in the subfloor, thinking the luxury in luxury vinyl would mask it. It did not. I learned the hard way that when you ignore the prep, the floor will never let you forget it. Today, I am going to show you exactly how to quiet those joints and fix the structural issues that are causing your floor to talk back to you.
Your Floor Shouldn’t Sound Like a Tap Dancer is Living Underneath
We install vinyl plank because it is durable, waterproof, and most importantly, supposed to be quiet. When it starts clicking, it is usually a signal that the locking mechanisms are moving in ways they were never designed to. It is one of those frustrating flooring installation mistakes to avoid for a seamless look that usually starts with rushing the subfloor prep. If the floor is not perfectly flat, the planks bridge over low spots. Every time you step on that bridge, the tongue and groove rub together, creating that annoying why your vinyl plank floors are making a clicking sound. It is not just about the noise; it is about the longevity of the product. If you are currently dealing with a floor that clicks every time you walk to the bathroom, you are not alone. Have you ever finished a big home project only to have one tiny, repetitive noise drive you absolutely bonkers?
Is this clicking actually going to break my floor?
The short answer is yes, eventually. You might think you can just live with the sound, but that vertical movement is actively destroying your investment. According to technical specifications from the National Wood Flooring Association (NWFA), most floating floors require a subfloor flatness of 3/16 of an inch over a 10-foot radius to maintain structural integrity. When the floor moves more than that, the locking lip undergoes fatigue until it eventually snaps. Once that happens, you will start noticing why your vinyl plank floor is gapping at the short ends, and the repair becomes much more invasive. Understanding why your vinyl plank floor is telegraphing subfloor bumps is the first step toward a silent home. Before we start pulling up planks, we need to look at the self-leveler move for perfectly flat vinyl installs and how it could have saved me a lot of heartache early on. Let us get into the grit of why this happens and how to stop it for good.
Flatten the Dips Before They Ruin Your Joints
Think of your vinyl floor like a high-speed train; it needs a perfectly straight track to run smoothly. When you have a 1/4-inch dip in your plywood or concrete, your floor is basically trying to jump a canyon every time you step on it. To fix this, you need to become obsessed with your straightedge. I use an 8-foot level to scan the room like a radar. If I can slide a nickel under that level anywhere, that spot gets marked for a fill. This is where the self-leveler move for perfectly flat vinyl installs comes into play. You aren’t just pouring goop on the floor; you are creating a structural foundation that prevents the tongue and groove from rubbing. 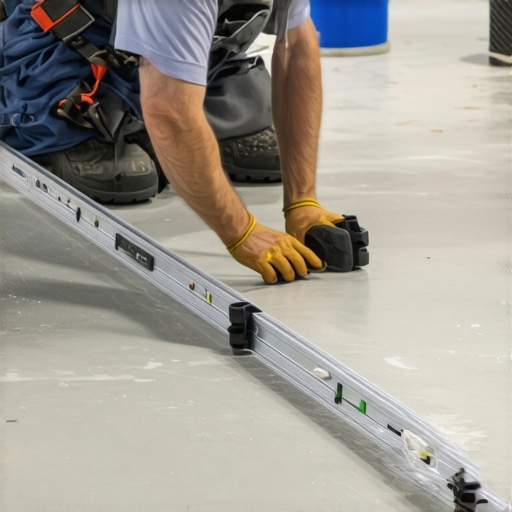
The Surgery Required to Kill the Click
If your floor is already down and singing to you, you have to decide if you want a patch or a cure. I once tried to ‘spot fix’ a click in a hallway by injecting low-expansion foam through a tiny hole. It worked for a week, then the foam compressed and the click returned, now accompanied by a sticky residue. Don’t be like past-me. The only way to truly silence the noise is to pull the planks back. If the click is near a wall, remove the baseboards and carefully unclick the rows. Once you expose the subfloor, you will likely see a literal ‘bridge’ of dust where the plank hasn’t been touching the ground. Clean that out using the vacuum seal trick for cleaning dust out of floor grooves, fill the dip with a high-quality patch, and re-lay the floor. This is the heart of how to fix a hollow sound under your vinyl plank floor.
Lock It Tight Without Damaging the Lip
When you are re-installing or starting fresh, the way you join the planks matters just as much as the floor’s flatness. I’ve seen people use a standard hammer and end up mushrooming the edges of their expensive LVP. You need to use the block and hammer move for tight vinyl floor joints to distribute the force. If that joint isn’t seated 100% flush, it will eventually wiggle, and wiggle leads to friction, which leads to that clicking sound. Also, make sure you are using the stay-sharp blade rule for cutting luxury vinyl. A dull blade creates ragged edges that can prevent a perfect lock, leaving microscopic gaps that grow over time.
Hide the Gaps Without Splitting Your Trim
Once the floor is flat and silent, you still have to deal with the perimeter. Many people jam their baseboards down too tight against the vinyl, which pinches the floor and causes it to buckle when the house shifts. I always leave a 1/4-inch expansion gap and cover it with a fresh baseboards makeover to elevate your interior with simple updates. If your slab is still a bit wavy at the edges, don’t force the wood to follow the floor. Instead, use the wood shim secret for baseboards on uneven slabs to keep your trim lines laser-straight while letting the floor breathe underneath. And please, learn from my mistake of blowing out a beautiful piece of primed pine: always use the simple pre-drilling tactic to stop baseboard splitting, especially near the ends of the boards.
Why Weight is the Secret Enemy of Your Floating Floor
Many DIYers and even some pros believe that a heavy kitchen island adds stability to a floating floor. In reality, this is one of the most dangerous myths in home renovation. A floating floor is designed to move as a single unit; when you park a 500-pound island on top of it, you are effectively pinning it to the subfloor. This prevents natural expansion and contraction, which leads to why your laminate floor is crowning at the short ends. To avoid this, you should always follow the expansion gap rule for heavy kitchen islands on laminate. If you must have an island, install the floor around it or use the island-anchor tactic for kitchen islands to ensure the rest of the floor remains truly floating. Have you ever fallen into the trap of thinking heavy furniture would ‘fix’ a bouncy floor? Let me know in the comments.
How do I handle the height difference between thick carpet and thin vinyl?
This is the ‘sophisticated’ problem that separates the amateurs from the masters. If you just slap down a standard transition strip, you create a trip hazard and a visual eyesore. The pro move involves how to transition from thick carpet to thin vinyl without a lip, which often requires shimmying the subfloor or using a specific reducer that matches the height profile. 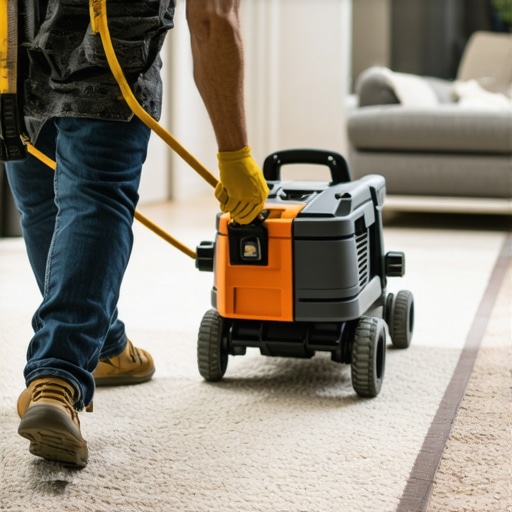
The Critical Failure Point Most Shower Renovations Ignore
When people think about shower renovation ideas, they usually focus on the tile or the expert tips for modern shower enclosures. However, the most advanced installers focus on what is underneath. According to the Tile Council of North America (TCNA) Handbook, nearly 90% of shower failures occur at the curb or the transition to the drain. This is usually because of poor thinset coverage. You must stop shower floor tiles from popping with the proper thinset coverage by ensuring at least 95% contact in wet areas. I’ve seen countless high-end bathrooms destroyed because someone ignored why your shower curb is always the first part to fail and skipped the liquid membrane move for fail-proof shower pans. Even a beautiful spa-like shower experience won’t save you from a moldy subfloor.
Stop Ruining Your Carpet with Outdated Tools
In the world of soft flooring, the biggest ‘oops’ factor is the over-reliance on the knee kicker. While it’s great for small adjustments, using it to stretch an entire room is a recipe for disaster. It leads to why your carpet is buckling only three years later. For high-traffic areas or large rooms, you must follow the power stretcher rule for large living room carpets. The mechanical advantage of a power stretcher ensures the backing is properly tensioned without damaging the fibers, unlike the knee kicker mistake that ruins luxury carpets. Finally, don’t forget the finishing touches. A baseboards makeover is the only way to truly hide the transition gaps. If you are aiming for a modern look, consider baseboard trends in 2025 to elevate the entire project from ‘DIY’ to ‘Designer.’I’ve spent years figuring out that the most expensive tool in your kit isn’t always the biggest—it’s usually the one that tells you when to stop. If I could go back to my first remodel, I’d hand myself a professional-grade moisture meter. We often guess if a slab is dry, but guessing is how you end up with mold under your beautiful new LVP. Beyond the prep, the long-term success of your home depends on having the right gear for the finish. For example, when I’m wrapping up a room, I never use a standard hammer to pull trim. I always rely on the pry bar secret for removing baseboards without damaging the drywall because it saves me hours of patching and painting later. If you’re struggling to find the structure behind your walls for those finishing nails, skip the cheap electronic finders and use the magnet hack for finding wall studs behind thick baseboards. It is simple, foolproof, and works every single time.
The Gear That Keeps My Projects From Falling Apart
When it comes to the actual ‘work’ of maintenance, I recommend investing in a high-quality coping saw. Most people try to miter their inside corners, but houses shift and gaps open up. Using the coping saw technique for flawless inside baseboard corners ensures that even as the seasons change, your joints stay tight. I also keep a stash of specialized cleaners; for those with older floors, I often suggest the no-sanding fix for scuffed hardwood floor finishes to bring back the shine without the dust storm of a full refinish. 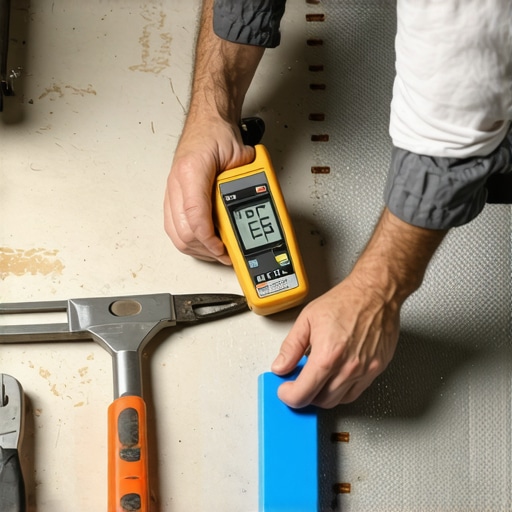
How can I tell if my shower needs a simple fix or a full teardown?
This is the question that keeps homeowners up at night. The ANSI A108.01 standards are very clear about movement joints and water management, but for the average person, it comes down to the grout. If you see cracking in the corners, it might just be a maintenance issue. You can often handle shower repairs when to fix vs replace for longevity by simply replacing the old, hard grout with a high-quality 100% silicone. To get that factory-perfect look, I always use the blue tape secret for professional shower silicone lines every time. However, if you see the tiles actually shifting or ‘tenting,’ that’s a structural failure that no amount of caulk can fix. Looking forward, I predict we are going to see a massive shift toward AI-assisted layout apps that will tell you exactly where to cut your tiles to avoid those awkward 1-inch slivers at the corners. For now, we still rely on the old-school tape measure and a sharp eye. If you want your bathroom to look like a Five-Star hotel suite, go grab a roll of high-quality painter’s tape and try the blue tape secret on your next weekend off—it’s the easiest way to elevate your space instantly.
The Three Hardest Lessons from My Most Expensive Flooring Fail
If there is one thing I have learned after years of dusty knees and sore thumbs, it is that your subfloor will always tell the truth eventually. You can buy the most expensive luxury vinyl in the showroom, but if you skip the prep, it will feel like a cheap imitation. My first big lightbulb moment came when I realized that level and flat are two different animals; a floor can be sloped and still work perfectly, but it must be flat to prevent that clicking. I also learned that patience during acclimation is a non-negotiable step. Rushing to install planks that haven’t sat in your home’s climate is a fast track to buckling. Finally, never trust your eyes over a straightedge. If you follow a step-by-step flooring installation from planning to perfect finish, you save yourself the heartbreak of pulling it all up six months later.
The Handful of Tools I Will Never Work Without
I don’t believe in buying every gadget in the aisle, but a few specific items have saved my sanity. First is a professional moisture meter. Before I lay a single plank, I use it to check the slab, especially if I am performing the moisture barrier move for concrete slabs. It takes thirty seconds and prevents a lifetime of mold issues. Second is my coping saw; I have found that using the coping saw technique for flawless inside baseboard corners is the only way to get a professional look in older homes with wonky walls. Lastly, for any textile work, I swear by a power stretcher. It is the difference between a floor that lasts decades and one that needs constant attention. If you are diving into a bigger project, I always recommend checking out a comprehensive ultimate shower renovation guide to ensure your waterproofing is as solid as your flooring.
Build a Home That Stays Quiet for Decades
Every cut you make and every joint you lock into place is an investment in your peace of mind. Taking the time to do things right—the way a pro would—doesn’t just increase your home’s value; it changes how you feel when you walk through your front door. There is a specific kind of pride that comes from a silent floor and perfectly mitered baseboards. If you ever feel overwhelmed by the technicalities, don’t hesitate to reach out or check the contact us page for professional advice. You have the knowledge now to avoid the clicks, the gaps, and the pops that plague most DIY jobs. Your home is your sanctuary, so treat its foundation with the respect it deserves. Have you ever discovered a shortcut that ended up costing you more time in the long run? Let me know your stories in the comments below!