

I remember staring at a massive, rolling wave in the middle of my master bedroom carpet, and honestly, I felt defeated. My wife was hosting a book club in two days, and that ripple looked like a small mountain range right where people needed to walk. The problem? The room was packed. We’re talking a California King bed, two heavy nightstands, and an armoire that probably contains a portal to Narnia. I didn’t have the time or the muscle to clear the room, and I certainly didn’t want to deal with why my carpet was buckling just a few years after moving in. I tried the “shuffle and kick” method, but all I got was a sore toe and a carpet that looked even worse. It was a total DIY fail that taught me the hard way: you can’t outsmart physics with brute force.
Stop Tripping Over Your Own Floors
Living with loose carpet isn’t just an eyesore; it’s a trip hazard waiting to happen. According to the Carpet and Rug Institute, properly installed and maintained carpet can last up to 15 years, but ripples significantly shorten that lifespan by causing premature wear on the backing. Today, I’m going to walk you through the exact process I used to get my guest room looking like a professional carpet install job without empty-room-panic. We are going to tackle the logistics of shifting weight, using the right tools, and finally getting that tension back where it belongs. Have you ever stood in the middle of a room, looked at a heavy dresser, and just sighed at the thought of moving it? Trust me, I’ve been there.
Is it even possible to get a tight stretch without a total room clear-out?
I used to be a huge skeptic. I thought if you didn’t have a clear subfloor, you couldn’t get the leverage needed for a lasting fix. In my early days, I made the classic knee kicker mistake—I thought I could just use a small kicker to “nudge” the slack toward the walls. Spoiler alert: it doesn’t work for large areas, and it usually ends up pulling the carpet off the tack strips elsewhere. The real secret lies in the power stretcher rule. This tool uses a long pole to push against the opposite wall, giving you immense mechanical advantage. Even if you have a sofa in the way, you can often “bridge” over or around it if you know the right angles. We’re going to look at how to manage that weight so the carpet actually slides under the furniture feet instead of getting pinned down. [image placeholder]
The Art of the Furniture Pivot
You don’t need to move the furniture out of the room; you just need to move it out of the path. If you’re dealing with a ripple in the center, we’ll be moving pieces to one side of the room, stretching that half, and then doing the old switcheroo. It sounds tedious, but it’s a cakewalk compared to lugging a dresser down the stairs. Before you start, you might even want to check for any subfloor issues that could be causing the unevenness. Once you realize that the furniture can actually act as an anchor to help you, the whole project becomes a lot less intimidating.
Master the Room Shuffle Without Breaking Your Back
Think of your carpet like a giant, heavy-duty bedsheet that has been pinned down by bowling balls. To get those wrinkles out, you don’t need to throw the bowling balls out the window; you just need to move them to the other side of the bed. Start by clearing one half of the room. I mean everything—the small rugs, the floor lamps, and that stack of magazines you’ve been meaning to read. Push your heavy furniture, like the sofa or the bed, to the far wall. This gives you a clear workspace to address the primary ripples. During my first attempt at this in a cramped rental, I tried to skip the clearing phase and just stretch around the legs of a heavy oak desk. It was a disaster. The carpet bunched up behind the legs like a pleated skirt, and I ended up having to redo the entire 12-foot section because the tension was completely uneven. Now, I always treat the room like a puzzle, ensuring the step-by-step flooring installation process is followed even for a repair.
Set Your Anchor Point Like a Pro
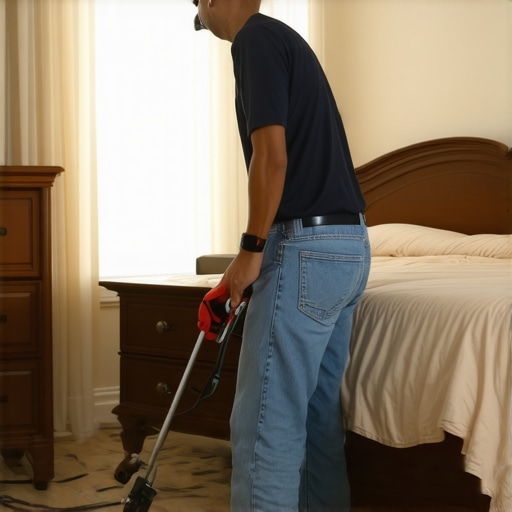
Once you have your clear floor space, you need a solid base. This is where the power stretcher rule comes into play. You’ll place the foot of the stretcher against the baseboard of the wall you are pushing away from. To protect your paint and wood, always use a scrap piece of 2×4 or a dedicated tail block to distribute the pressure. If you’re working in a room with high-ceiling baseboards, be extra careful not to apply the pressure too high up, or you risk cracking the trim. The goal is to create a straight line of force from the wall to the ripple. If the furniture on the other side of the room is heavy enough, like a filled armoire, it actually helps by acting as a secondary anchor, preventing the entire carpet from shifting while you work on the tension in the center.
The Science of the High-Tension Stretch
When you engage the handle of the power stretcher, you aren’t just giving it a little nudge. You are applying hundreds of pounds of force. You should see the ripple literally disappear as the carpet slides toward the wall. If you are working with best carpet types for high traffic areas, remember that the backing is often stiffer, requiring more leverage than a thin, cheap polyester pile. Once the slack reaches the edge of the room, you’ll use a knee kicker for the fine-tuning. This is where you perform the kick and tuck move, forcing the excess carpet over the tack strip pins. I once rushed this part in a hallway and ignored the transition point. I ended up with a tiny bump that eventually turned into a major trip hazard. I had to go back and learn how to fix a loose carpet transition that trips everyone because my shortcut didn’t account for the doorway tension.
Don’t Forget the Finish at the Walls
After the first half is tight, it’s time for the switcheroo. Move the furniture onto the newly stretched, flat section of the room. Because you’ve already secured the first half to the tack strips, that furniture is now resting on a stable surface. Repeat the stretching process for the second half. Using this method ensures you get a professional-grade carpet install finish without the cost of a full moving crew. Make sure you trim the excess carpet with a sharp wall trimmer, leaving just enough to tuck neatly between the tack strip and the baseboard. If you notice the carpet feels a bit “bouncy” near the edges, it’s a sign the pins haven’t fully grabbed the backing, so give it one more firm kick before you call it a day.
Most homeowners, and even some cut-rate contractors, will tell you that a few ripples are just the carpet ‘settling’ into its new home over time. That is a complete myth. In my experience, if a carpet isn’t drum-tight on day one, it’s never going to be. The Carpet and Rug Institute (CRI) 105 standard actually mandates power stretching for all residential installs precisely because manual ‘kicking’ simply cannot reach the required tension for modern synthetic backings. If a technician tells you your floor needs a few months to ‘relax’ into the corners, they likely skipped the mechanical advantage of a power stretcher and are hoping you won’t notice the slack until the check clears. This is one of the most common flooring installation mistakes to avoid for a seamless look.
Why ‘Settling’ is Just a Fancy Word for a Bad Job
The science of carpet tension is about more than just brute strength; it is about overcoming the friction of the pad and the subfloor. When you leave furniture in the room, you are essentially adding ‘anchor points’ that work against you. The contrarian truth here is that you shouldn’t try to pull the carpet away from the furniture; you should use the furniture’s weight to your advantage. By strategically placing the head of your power stretcher, you can use those heavy pieces as a ‘dead-man’ anchor, allowing you to achieve higher tension in the open lanes of the room than you ever could in an empty, slick-floored space. However, the ‘oops’ factor is real: if you don’t account for the carpet nap (the direction the fibers lean), you can accidentally create a permanent ‘tension line’ that looks like a shadow across the room. Always check the light reflecting off the pile before you lock the stretcher down.
Don’t Fall for the One-Way Stretch Trap
A common mistake is stretching the carpet in only one direction. If you have a ripple in the middle of a room, simply pulling it toward the North wall might fix the immediate bump, but it creates a secondary tension imbalance toward the East and West. You have to stretch in a ‘fanning’ motion. This is part of the carpet install secrets that professionals use to ensure the carpet doesn’t just buckle again three years later. When you are working around a heavy bed or armoire, you have to be meticulous about fanning the tension around the legs of the furniture, or you’ll end up with a ‘ghost ripple’ that reappears the moment you move that furniture six inches to the left for cleaning.
What Happens If You Pull Too Hard on an Old Backing?
This is a question I get from DIYers who find a vintage power stretcher at a garage sale. If you’re working on a carpet that is more than a decade old, the latex adhesive holding the primary and secondary backings together can become brittle. Applying 300 to 400 pounds of force—which a power stretcher easily does—can cause ‘delamination,’ where the carpet literally falls apart from the inside. Before you start, perform a ‘pinch test’ on a corner. If the backing feels crunchy or separates easily, you need to reconsider. In those cases, how to choose the right carpet for a cozy living space becomes a more relevant topic than trying to save a failing one.
The Critical Link Between Tension and Your Baseboards
Finally, we have to talk about the finish. One of the most sophisticated ‘traps’ involves the height of your trim. If your baseboards were installed too low, there isn’t enough of a ‘gulley’ between the tack strip and the wood to hide the excess carpet you’ve just stretched. I’ve seen people get frustrated and try to force the carpet down with a flathead screwdriver, only to scratch their beautiful paint job. If you’ve invested time into the inside corner cope for perfect baseboard installs, don’t ruin it with a sloppy carpet tuck. Use a dedicated stair tool or a wide-head tucker to ensure the pins of the tack strip have fully engaged the backing. If the carpet feels ‘bouncy’ at the edge, it’s not secure, and that ripple will be back in a month. Have you ever fallen into the ‘it just needs to settle’ trap? Let me know in the comments.
The Gear That Separates Amateurs From Pros
I’ve learned the hard way that a professional-grade tool is only as good as the person who knows how to maintain it. For my personal projects, that means keeping the teeth on my power stretcher head obsessively clean of old latex fibers and dust. If those teeth get clogged, they won’t bite into the primary backing, and all that mechanical force I’m applying just turns into a recipe for a shredded, ruined carpet surface. When I’m finishing the edges, I swear by a heavy-duty stair tool. It’s essentially a wide, dull-edged chisel that allows you to drive the carpet into the ‘gulley’ between the tack strip and the wall without slicing the face yarns. If you’re looking for carpet install secrets, it’s all in the marriage of consistent tension and a clean tuck.
Why You Need a Magnet in Your Pocket
Maintenance and longevity aren’t just about the carpet itself; it’s about the structural integrity of the elements surrounding it. I always use the magnet hack for finding wall studs behind thick baseboards when I’m securing my trim after a re-stretch. If your baseboards aren’t anchored properly into the framing, the carpet’s lateral tension can actually pull the trim away from the drywall over time, creating those ugly, dark gaps at the top of the wood. This is a crucial step for anyone aiming for a durable flooring installation for a stylish home that needs to withstand the rigors of heavy furniture and active pets. In the future, I expect we’ll see more ‘smart’ backings that use memory-shape polymers to maintain tension regardless of environmental changes, but for now, we rely on solid physics and mechanical advantage.
#IMAGE_PLACE_HOLDER_D#
How do I keep my floors from buckling again?
The secret to long-term success is humidity control and meticulous cleaning habits. High humidity can cause the natural and synthetic fibers in the backing to expand slightly, which is why how to choose the right carpet for a cozy living space often becomes a technical decision regarding fiber stability rather than just a color choice. Use a vacuum with adjustable height settings so you aren’t pulling too aggressively on the fibers near the transition strip move for carpet to bathroom tile. According to the CRI 105 Residential Installation Standard by the Carpet and Rug Institute, achieving a 1% to 1.5% stretch is the threshold for structural integrity. Ignoring this isn’t just an aesthetic mistake; it can lead to secondary issues like shower repairs when to fix vs replace for longevity if loose carpet begins to wick moisture from adjacent bathroom spills into the subfloor. Give that magnet hack a try next time you’re securing your trim; it’s a game-changer for finding solid wood to nail into without turning your baseboards into Swiss cheese.
The Truth About Tension That Most Contractors Won’t Share
After years of wrestling with ripples, I’ve realized that the ‘it’s just the carpet settling’ line is the biggest red flag in the industry. Real tension is physics, not patience. One of my biggest lightbulb moments was realizing that humidity is your silent enemy; a room at 70% humidity will have a completely different ‘feel’ than a dry room, which can lead to ripples even in a professional carpet install. Another lesson? Never underestimate the power of the wall. If your baseboard isn’t secure, your stretch won’t hold. I always use the magnet hack for finding wall studs behind thick baseboards to ensure I’m nailing into the frame, not just the drywall. Lastly, remember that some carpets aren’t worth the effort. If the backing is delaminating, it’s time to look into best carpet types for high traffic areas in 2025 rather than fighting a losing battle.
What’s in My Maintenance Bucket for the Long Haul
I don’t keep a lot of tools, but what I do have, I keep sharp. My primary toolkit includes a professional-grade power stretcher—renting one is fine, but make sure the teeth are clear of debris. I also swear by a magnetic stud finder and a high-quality stair tool for those tight tucks. If you’re worried about moisture affecting your work, a simple hygrometer to track room humidity is worth its weight in gold. I personally trust the Carpet and Rug Institute standards as my ‘north star’ for any repair. Following their guidelines is the difference between a floor that stays flat and one that needs to know how to fix a loose carpet transition that trips everyone six months later.
Take Back Your Floor and Stop the Trip Hazard for Good
Don’t let a few heavy pieces of furniture stop you from having a safe, beautiful home. Stretching a carpet without clearing the room isn’t just about saving time; it’s about proving that you can master your environment with the right tools and a bit of leverage. Every time you walk across a flat, ripple-free floor, you’ll feel that sense of accomplishment. Whether you are doing a full carpet install or just a quick tension fix, the effort pays off in the longevity of your home. Have you ever tried to move a California King bed just to fix a single ripple, or did you find a way to work around the heavy lifting? Let me know your furniture-moving horror stories in the comments below!