

I remember kneeling by my patio door three years ago, sweating through my shirt and staring at a frayed, ugly gap between my new carpet and the sliding door track. I had tried to shove the carpet edge down with a flathead screwdriver, thinking I was being clever. Instead, I shredded the backing and left a mess that looked like a DIY disaster. It was a classic flooring installation mistake that taught me a painful lesson: you cannot bully carpet into a professional finish. You have to use the right physics. Today, I am going to show you exactly how to execute the ‘Kick-and-Tuck’ so your transition looks seamless and stays put for a decade.
Why the Sliding Door Transition Always Breaks Your Heart
Sliding glass doors are arguably the toughest area for any carpet pro or weekend warrior. You have high-intensity foot traffic, the expansion and contraction of the metal track, and the constant threat of fibers catching on shoes. If you don’t lock that carpet down with the proper tension, you will eventually see it pull away, leaving a tripping hazard that ruins the vibe of your home. Whether you are choosing carpet for high-traffic areas or a plush bedroom style, the finish at the door is what determines the longevity of the install. I learned the hard way that without the ‘Kick-and-Tuck’ move, your carpet is basically just waiting to unravel.
Is this professional move actually worth the extra effort?
You might be tempted to just slap a transition strip over the gap and call it a day, but that usually looks bulky and cheap. The ‘Kick-and-Tuck’ is the gold standard because it hides the raw edge completely while maintaining the perimeter tension needed to prevent ripples. According to the Carpet and Rug Institute, improper stretching and finishing at transitions are the leading causes of premature carpet failure, often shortening the life of the material by nearly 50%. Mastering this one specific leg-and-hand coordination is how you achieve flawless results every time. It feels awkward at first, but once you see that clean line, you will never go back to the ‘shove and hope’ method. Have you ever finished a room only to have the carpet pop out of the track the very first time you vacuumed? Drop a comment and let me know—I need to know I wasn’t the only one who struggled with this!
Start with the Skeleton for Proper Placement
Before you even think about the carpet, you have to look at the subfloor. If you are working on a slab, choosing the right tack strip for concrete subfloors is non-negotiable. You want those strips about 3/8 of an inch away from the sliding door track. Think of this gap like the expansion joint you would leave when step-by-step flooring installation tasks go sideways. It is also similar to setting the proper slope for the dry pack secret for a perfectly sloped shower floor; if the foundation is not right, the top layer will never sit correctly. If the strip is too close, you will not have room to tuck; too far, and the carpet will sag like an old curtain.
Why the Half-Inch Gap is Your Best Friend
I once saw a guy try to nail the tack strip flush against the metal track. It looked okay for about an hour, then the first person stepped on it, and the carpet popped right off the pins. To avoid one of the most common flooring installation mistakes to avoid for a seamless look, you need that gully. It is exactly like leaving space for the back bevel secret for seamless baseboard corners; you are creating a hidden void where the raw parts of the material can be tucked away out of sight.
Execute the Kick Without Destroying Your Joints
Now, grab your knee kicker. This is where the physical part of the process comes in. You are not trying to break the door; you are trying to stretch the fabric until it is drum-tight. Following the tension-first rule for stretching carpet into a doorway, place the kicker about two inches back from the strip. Give it a firm, controlled strike with your knee. You should see the carpet move forward and the pins of the tack strip bite into the backing.
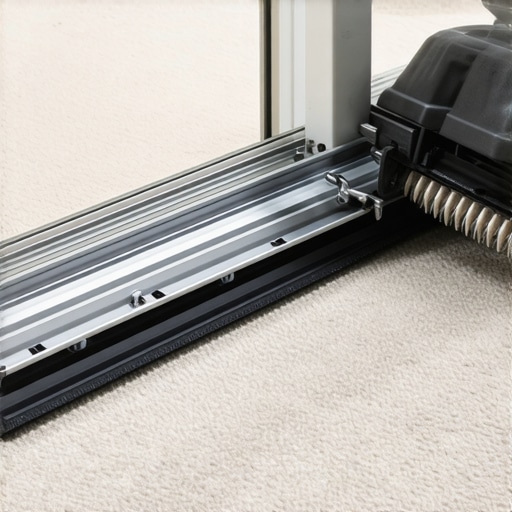
If you do not get enough tension here, you will end up with those ugly ripples six months down the line. I learned this lesson the hard way during a rush job in a sunroom. I was lazy with the kicker and thought the transition strip would hold it. A week later, the sun warmed up the room, the carpet expanded, and a massive hump appeared right in the doorway. I felt like a total amateur. Avoid the knee-kicker mistake that ruins carpet tension by checking the bounce—if the carpet feels like a trampoline, you are on the right track.
Pressure Secrets for a Permanent Lock
Once the carpet is hooked on the pins, you will have a flap of excess material leaning against the sliding door track. You want to trim this with a sharp blade, but the angle is everything. Hold your knife at a 45-degree angle pointing toward the door. This ensures that the top fibers are slightly longer than the backing, allowing them to roll over the edge of the tack strip for a rounded, finished look. Use a stair tool or a wide-head putty knife to drive that tongue down into the gully you left between the strip and the track. This is the kicker move for tucking carpet into tight corners that creates that high-end, professional edge. It is a similar level of precision to the scribing tool every diyer needs for tight baseboards. If you accidentally trimmed too much and can see the subfloor, do not panic; you might need to know how to fix a carpet seam that was cut too short, but if you followed the half-inch rule, it should slide right in and lock tight against the metal.
Stop over-trusting your transition strips
Let’s dig deeper into why these transitions fail even when you think you’ve done everything right. Most DIY tutorials tell you to buy the most expensive transition strips, but in my experience, a ‘hidden’ tuck is almost always superior for long-term durability. Why? Because metal and plastic strips expand and contract at a vastly different rate than your flooring materials. This is a common flooring installation mistake that leads to those annoying gaps that eventually collect pet hair and dirt. I once spent three days on a luxury install only to have the client call me back because the transition felt ‘crunchy’ underfoot. The culprit was the ‘Oops’ factor: I hadn’t accounted for the subfloor’s hidden moisture and skipped the concrete moisture test that saves your vinyl floor and carpet alike. I assumed the slab was dry just because it looked pale. Have you ever fallen into this trap of assuming a surface was ready when it wasn’t? Let me know in the comments.
Why does your carpet look like two different colors in the same room?
This isn’t a trick of your eyes or a bad batch of dye; it’s a technical phenomenon known as shading or pile reversal. According to the Carpet and Rug Institute (CRI) 104 standards, the direction the fibers lean—the nap—dictates how light reflects off the surface. If you do not align the nap toward the main entrance, you’ll find that your carpet looks different colors from different angles. It is the same level of attention to detail required for how to align tile patterns across a shower floor and wall. If you cross-grain your carpet at a doorway, that transition will always look like a mistake, no matter how tight the ‘Kick-and-Tuck’ is executed. Professionals always check the ‘grain’ of the carpet before the first cut is made to ensure the flow of the room remains consistent.
Respect the physical memory of your flooring materials
Another nuance that separates the pros from the DIYers is understanding ‘material memory.’ Carpet that has been rolled up in a warehouse for six months wants to stay rolled up. If you install it while it’s still cold or stiff, it will eventually relax and expand, leading to the exact ripples we are trying to avoid. This is exactly why your carpet is wrinkling two years after install. You have to let the material acclimate to the room’s temperature and humidity for at least 24 hours. This logic extends to your trim work as well. If you rush the baseboards, you’ll be hunting for how to fix baseboard gaps without replacing the trim within a single season. I always recommend using the magnet hack for finding wall studs behind thick baseboards to ensure your nails hit the framing. Many novices make the mistake to never nail baseboards into the bottom plate only, as the plate can shift during seasonal changes, pulling your beautiful miters apart. By hitting the studs directly, you anchor the trim to the skeleton of the house, ensuring your ‘Kick-and-Tuck’ transition stays locked against a solid, unmoving wall.
Grab the tools that prevent a mid-summer buckle
If you want to avoid the headache of seeing your hard work fail, you need to invest in more than just a knee kicker. While the kicker is great for that final ‘Kick-and-Tuck’ at the sliding door, it’s not meant for the heavy lifting. I used to think my legs were enough until I realized I was just creating temporary tension. For any room larger than a walk-in closet, I swear by the power stretcher. This tool uses a long pole system to brace against one wall and push the carpet toward the opposite side with thousands of pounds of force. According to the Carpet and Rug Institute (CRI) 104 installation standards, power stretching is actually mandatory for all residential installs to maintain the manufacturer’s warranty. If you skip this, you are almost guaranteed to be searching for how to fix a bubbling carpet without calling a professional in eighteen months.
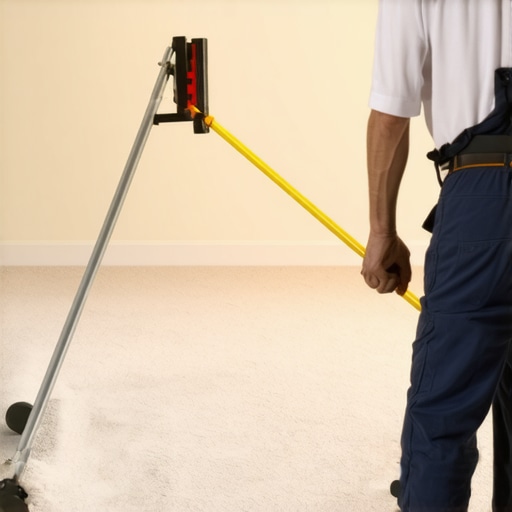
The power stretcher is my secret weapon for a stress-free install
I remember a job where the homeowner had already tried to DIY the stretch with a rented kicker. The carpet looked like a calm ocean on day one, but by day ninety, it had waves that would make a surfer proud. That is why your carpet is wrinkling two years after install—it was never truly stretched to its limit. When I use a power stretcher, I can feel the backing grow taut, ensuring that the ‘Kick-and-Tuck’ we did at the sliding door remains under permanent tension. This is one of the biggest carpet install secrets for longevity. It feels like a lot of gear to haul into a house, but it’s the difference between a floor that lasts twenty years and one that needs a restretch before the kids finish elementary school.
How do I maintain my flooring over the long haul?
Maintenance starts the moment you finish the step-by-step flooring installation. Beyond regular vacuuming, you need to inspect those high-traffic transitions monthly. If you notice the carpet starting to lift even a fraction of an inch from the sliding door track, you need to act fast. I always keep a professional-grade stair tool in my kit for exactly this reason. You can use it to stop carpet stair treads from slipping with the power tuck move, but it works just as well for re-seating a transition that has been loosened by heavy foot traffic or a rogue vacuum cleaner. I predict the future of flooring maintenance will involve smart sensors embedded in our subfloors to alert us to tension loss or moisture before we even see a ripple, but for now, your eyes and a good stair tool are your best defense. If you have questions about specific tools for your project, feel free to contact us for advice. Don’t wait for a trip hazard to develop; grab a stair tool this weekend and double-check your tucks!
The Hard Lessons I Learned After Ruining My First Threshold
Over years of handling carpet, I’ve realized that the transition at a sliding door is the ultimate test of patience. One lightbulb moment for me was realizing that tension is a living thing; if you don’t respect the physics of the stretch, the material will eventually rebel. Another hard truth? Your knee kicker is a finishing tool, not a stretching tool. I also learned that using a dull blade is the fastest way to turn a high-end project into a frayed mess. If you’ve ever wondered why your carpet is wrinkling two years after install, it almost always boils down to that final inch of tension right at the doorway. Lastly, I stopped viewing the tack strip as just a ‘gripper’ and started seeing it as the structural anchor for the entire room’s stability.
The Gear That Saves My Back and My Reputation
If you are serious about a professional finish, you cannot rely on a basic toolkit. I personally swear by the power stretcher because it ensures the tension is uniform across the entire floor, preventing future ripples. For the fine details, a heavy-duty stair tool is non-negotiable for the ‘power tuck’ move against the metal track. I also recommend keeping a digital copy of the CRI 104 installation standards handy; it is the source of the most reliable carpet install secrets that keep manufacturer warranties intact. Finally, never underestimate the power of a fresh box of trapezoid blades to ensure every cut against the sliding door track is surgical and clean.
Take the Leap and Finish Your Floor Like a Pro
There is a specific kind of satisfaction that comes from stepping onto a perfectly stretched carpet. By avoiding common flooring installation mistakes and focusing on the ‘Kick-and-Tuck’ method, you are creating a space that is as durable as it is beautiful. Don’t be intimidated by the tools or the physical effort required. Whether you are working on a bedroom or choosing the best carpet types for high-traffic areas, the attention you give to the transition today will pay off for years to come. Now that you have the blueprint, it’s time to grab your kicker and finish that edge! Have you ever struggled with a carpet edge that just wouldn’t stay tucked under the door track? Let me know your experience in the comments below!