

I’ll never forget the Tuesday evening I spent staring at a tiny, rhythmic drip-drip-drip echoing from inside my master bathroom wall. I’d just finished a long day, and all I wanted was a hot shower. Instead, I found a damp patch on the drywall in the hallway. My stomach did a slow roll. Most people think a leaky shower means a dripping faucet, but the real nightmare is the silent killer: the valve leaking behind the tile. It’s the kind of problem that stays hidden until your floorboards are mush and your wallet is empty. If you’re smelling mildew or seeing suspicious spots, you aren’t crazy. You’re catching a disaster in the making. Today, I’m going to walk you through exactly why this happens and how we’re going to get your bathroom back to being a sanctuary instead of a swamp. [image]
The Hidden Culprits Behind Your Wet Walls
It usually starts with a worn-out O-ring or a cracked cartridge. I remember my first DIY fix years ago; I thought if I just cranked the handle tighter, the leak would stop. Spoiler alert: it didn’t. I ended up stripping the valve and turning a $20 repair into a weekend-long ordeal. Sometimes the issue isn’t even the valve itself, but a failure in the waterproofing. If you suspect the bench, it’s worth looking into why your shower bench is leaking into the wall cavity because water has a funny way of traveling. When water sneaks behind that tile, it attacks your studs and subfloor. This isn’t just about a high water bill. According to the Environmental Protection Agency (EPA), a leak that drips once per second can waste more than 3,000 gallons per year—and when that water is going into your framing, it’s rotting your home’s bones. You might be at the stage of wondering about shower repairs and when to fix vs replace, and honestly, catching it early is the difference between a simple part swap and a full-blown renovation. Have you ever noticed that musty smell after a shower and just hoped it was poor ventilation?
Is fixing this myself actually worth the headache?
I get the skepticism. Plumbing feels like black magic sometimes, and the fear of making it worse is real. But here’s the truth: calling a pro for a simple cartridge swap can cost hundreds, while doing nothing costs thousands in mold remediation. If you can handle a screwdriver and a pair of pliers, you can likely stop the bleed. We aren’t just slapping a Band-Aid on this; we’re doing it right so you don’t end up needing a full bathroom upgrade prematurely. Don’t let a small drip turn into a structural catastrophe.Before you even touch your screwdriver, you have to kill the water at the main. I learned this the hard way during a late-night fix in a rental where I thought the ‘stop’ was fully engaged; the moment I pulled the retaining clip, a jet of cold water hit me square in the face, soaking the hallway carpet. Once your water is off, the first step is removing the handle. Most modern fixtures have a tiny set screw hidden under a decorative plastic cap. Pop that cap with a thin blade, unscrew it, and pull the handle toward you. Now you’re looking at the escutcheon plate. If this plate is glued to the tile with old caulk, don’t just pry it off—you’ll risk chipping your tile. Instead, use a utility knife to carefully slice the seal. You might want to remember the masking tape trick for clean silicone joints when you’re putting this back together to ensure a professional, watertight finish.
Wrestle the Old Cartridge Free Without a Disaster
Behind that decorative plate sits the cartridge, the literal brain of your shower. Over time, mineral deposits turn this plastic and rubber part into a fused mess inside the brass valve body. I remember a job in an old farmhouse where the cartridge was so encrusted with lime scale that it felt like it was part of the house’s foundation. I had to use a specialized cartridge puller—a $20 tool that saves you $200 in frustration. If you try to yank it with just pliers, you risk snapping the plastic stem, which turns a simple swap into a surgical extraction. 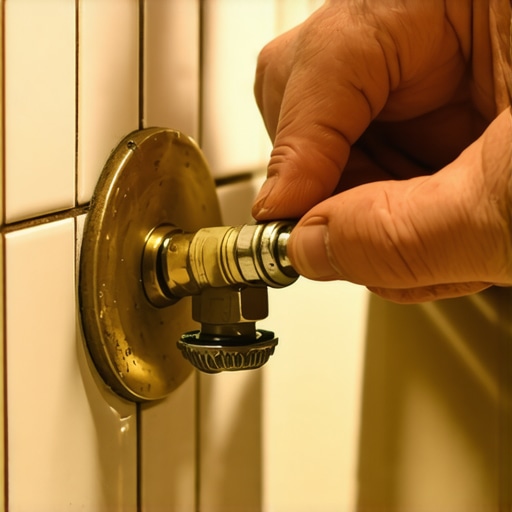
Clean the Inner Housing to Prevent Future Leaks
Once that cartridge is finally out, don’t just shove the new one in. This is where most DIYers fail. Take a small nylon brush or a rolled-up piece of fine-grit sandpaper and gently clean the inside of the brass valve body. If there’s even a microscopic bit of grit or old rubber left behind, your new O-rings won’t seal, and you’ll be right back to square one. This attention to detail is exactly why your shower grout is crumbling just months after install when people skip prep work—it’s always the foundation that matters.
Seal the Deal and Protect Your Subfloor
Apply a generous amount of heat-proof plumber’s grease to the new cartridge’s rubber seals. This prevents the rubber from tearing as you slide it into the brass housing. Slide the new unit in, replace the metal retaining clip, and reinstall the handle. While you have the wall opened up, it’s the perfect time to check for deeper issues. Sometimes a wet wall isn’t just a valve; it’s possible your shower bench is leaking into the wall cavity due to a failed membrane. If the damage looks extensive, you should weigh the cost of shower repairs and when to fix vs replace for longevity before you seal everything back up. To finish, use the bead and smooth strategy for shower corners on your escutcheon plate to ensure that no water from the shower head ever migrates behind your tile again.Now, here is the hard truth that many ‘handyman’ videos skip: your tile and grout are not actually waterproof. Most homeowners think that if the grout looks solid, the wall is safe. In reality, grout is porous by nature, and water will eventually find its way through. This is why your shower grout is crumbling just months after install when the substrate behind it starts to shift or swell. If you’re only focusing on the surface, you’re ignoring the real protector: the waterproof membrane. I’ve seen countless DIY jobs where the installer relied on ‘waterproof’ backer board but skipped the tape and liquid sealant on the corners. That’s a recipe for rot.
Does your shower pass a professional 24-hour flood test?
If you really want to graduate from ‘lucky amateur’ to ‘informed pro,’ you need to understand the stop shower pan leaks with the flood test requirement. According to the Tile Council of North America (TCNA) Handbook, a shower pan should be tested by plugging the drain and filling the basin with water for at least 24 hours before a single tile is laid. Most people skip this because they’re in a rush, but it’s the only way to know if your liner has a microscopic puncture. If the water level drops even a fraction of an inch, you have a problem that tile will never fix. #IMAGE_PLACE_HOLDER_C#
The wicking trap in baseboards and carpet
Another nuance people miss involves the transition between the bathroom and the hallway. If you’ve just dealt with a leak, you might think the carpet is fine once it ‘feels’ dry. But the real ‘oops’ factor is capillary action. Water travels up the back of your baseboards like a straw. If you don’t use carpet install secrets like replacing the pad entirely after a soak, you’re trapping mold against your sill plates. When you finally get around to how to choose the perfect baseboards for your home’s style, make sure you aren’t just nailing them into damp studs. I once worked on a home where the homeowner replaced the baseboards three times because they kept ‘warping’—turns out, the subfloor was still holding 20% moisture from a leak six months prior. It’s these hidden details that separate a quick fix from a lifetime solution. Have you ever fallen into this trap of thinking a dry surface meant a dry wall? Let me know in the comments below, and let’s make sure your next project is built to last.That trap of thinking a dry surface means a dry wall is exactly how a fifty-dollar repair turns into a five-thousand-dollar gut job. If you really want to protect your investment, you need to transition from the mindset of fixing to the discipline of preventing. I never walk onto a job site without my digital moisture meter. It is the only way to truly follow the moisture meter requirement for basement flooring jobs, even if you are just working in a ground-floor bathroom. If those studs are holding onto water, your new drywall and baseboards are just a buffet for mold.
Tools that stop you from guessing
I spent years trying to eyeball my layouts, and let me tell you, your eyes will lie to you every time. For the shower, I stopped relying on a traditional bubble level and switched to the laser level move for perfectly horizontal shower tiles. It ensures that every row is dead-on, which is critical when you are trying to create a spa-like shower experience. When it comes to your flooring, the same principle of precision applies. If you are cutting LVP, you have to follow the stay-sharp blade rule for cutting luxury vinyl. A dull blade does not just make your hands tired; it creates micro-frays in the wear layer that trap dirt and lead to premature delamination. 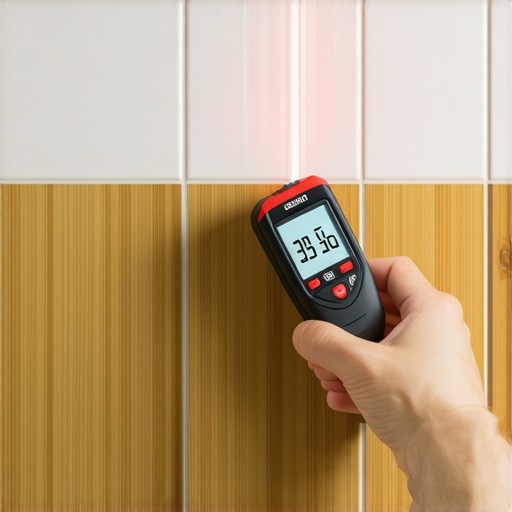
How do I maintain my shower and floors over the long haul?
Maintenance is not just about cleaning; it is about consistent inspection. For tile, you should always implement the pre-seal move to stop shower grout from staining before the first drop of water hits it. For your carpets, you need to be aware of the IICRC S100 Standard for Professional Carpet Cleaning, which emphasizes that dry soil is abrasive—essentially acting like sandpaper on your carpet fibers. If you do not vacuum regularly with a HEPA-filter machine, those fibers break down, leading to that crushed look in high-traffic zones. If you are wondering about the best carpet types for high traffic areas in 2025, look for triexta or high-denier nylon that can withstand the deep steam cleaning required by these industry standards. If you are looking at your baseboards and they seem off against a stone floor, do not just caulk the gap; use the scribe tool trick for baseboards against stone walls to get a fit that looks like the wood grew right out of the rock.
The future of smart home surfaces
Looking ahead to 2025 and beyond, I see a massive shift toward integrated leak detection. We are already seeing transform-your-flooring top trends in installation that include moisture-sensing underlayments. These systems can shut off your main water valve before you even see a damp spot on your ceiling. It might sound like overkill now, but people said the same about seatbelts decades ago. Until then, you are the sensor. My biggest piece of advice? Do not wait for a drip. Grab a moisture meter and check the base of your shower once a month. If you are ready to level up your DIY game, I challenge you to try the laser level method on your next backsplash or shower wall—it is a game-changer for layout precision and will save you hours of layout frustration.
The Hardest Lesson I Learned About Wet Drywall
If there is one thing a decade of home repairs has taught me, it is that water is patient and relentless. I have seen beautiful homes compromised because a homeowner assumed a surface was dry just because it did not feel damp to the touch. Here are the lightbulb moments that changed how I approach every project: First, the ‘Surface-Dry’ Trap is real. Just because the tile is dry does not mean the studs aren’t soaking. Always use a moisture meter before closing a wall. Second, gravity isn’t the only enemy. Capillary action can pull water up into baseboards and insulation, spreading damage vertically. Third, grout is a filter, not a shield. Never rely on grout alone; your waterproofing membrane is the real hero of your shower. Finally, the cost of delay is exponential. A $30 cartridge replacement today prevents a massive mold remediation next year.
The Gear That Keeps My Floors Bone Dry
I do not believe in guessing when it comes to structural integrity. To get professional results, I rely on a few specific tools that have never let me down. First, a high-quality moisture meter is non-negotiable for anyone serious about shower repairs and when to fix vs replace for longevity. It removes the guesswork and tells you exactly when it is safe to rebuild. For precision layouts, I swear by the laser level move for perfectly horizontal shower tiles; it ensures your lines are straight even if your floor isn’t. When transitioning to other rooms, I always keep my carpet install secrets handy to ensure the padding and tack strips are perfectly integrated with the new bathroom threshold. These tools aren’t just gadgets—they are your insurance policy against a failed renovation. #IMAGE_PLACEHOLDER_E#
Take Back Your Bathroom Sanctuary
Fixing a hidden leak or upgrading your flooring can feel like a daunting mountain to climb, but remember that every master craftsman started exactly where you are right now. You do not need a truckload of expensive equipment to protect your home; you just need the right sequence and a bit of patience. Whether you are picking out the best carpet types for high traffic areas in 2025 or learning how to choose the perfect baseboards for your home’s style, the care you put in today will pay dividends for years. Don’t let the fear of a DIY mishap stop you from pursuing a full bathroom upgrade that adds value and comfort to your life. You have the knowledge—now it is time to pick up the tools and get to work. Have you ever found a leak that turned out to be much worse than it looked on the surface? Let me know in the comments below!