

I stood there, staring at a twelve-foot length of primed MDF and a wall that looked more like a half-moon than a structural element. I thought, “If I just push hard enough and hit it with enough nails, it will stay.” Spoiler alert: it did not. There was a sickening crack that echoed through the empty living room, and suddenly I was looking at two jagged pieces of trash and a very expensive lesson in physics. I had spent hours choosing the perfect baseboards for my home’s style only to ruin them in three seconds. We have all been there, fighting with materials that just won’t cooperate with the unique quirks of our homes. Today, I am going to show you the vertical cut hack—the professional secret that makes stiff wood behave like a wet noodle so you can achieve a professional finish on any radius.
Stop Fighting Your Walls and Start Making Kerf Cuts
The failure of my first attempt led me down a rabbit hole of professional carpentry secrets. I tried everything from soaking the wood in the bathtub (do not do that; it swells and ruins the finish) to using a steam iron. None of it worked consistently until I discovered the vertical cut hack, technically known as kerfing. It is the process of making a series of shallow, vertical cuts on the back of the board. These cuts remove just enough material to allow the wood to compress or expand, letting it hug that curve like it was born there. It is one of those carpet install secrets or flooring tricks that separates the pros from the frustrated DIYers. If you have ever looked at a gap between your trim and the drywall and felt like crying, this is for you. We are going to fix those baseboard gaps on curved walls once and for all without needing a degree in engineering.
Will these cuts make my baseboards snap in half?
This is the number one fear I hear from homeowners. “If I cut into the back of my trim, won’t it just break?” The short answer is no—if you do it right. The key is depth and frequency. You are not cutting all the way through; you are creating flexibility. According to the Wood Database, wood is significantly more pliable when you reduce its thickness across the grain, as the longitudinal fibers are no longer fighting the bend. Early in my journey, I made the mistake of spacing my cuts too far apart. I ended up with “faceted” baseboards—they looked like a stop-sign instead of a smooth circle. It was one of those flooring installation mistakes to avoid for a seamless look. Have you ever tried to force a piece of trim around a corner only to have it pop back out and hit you in the shin? Tell me I am not the only one who has fought a losing battle with a piece of pine.
The Secret Sauce for a Gap-Free Finish
Once you master the kerf cut secret for wrapping baseboards around columns, you realize that the cut is only half the battle. You also need the right adhesive strategy. Because you have essentially turned your baseboard into a spring, standard nails alone often will not hold it against the tension. You need to use the flex glue move for baseboards on curved walls to ensure that once you press that board into place, it stays there forever. I used to think my walls were the problem. I blamed the builders, the drywallers, and the house itself. But the truth is, no wall is perfectly straight. Learning to adapt your materials to the reality of your home is what makes baseboard styles that elevate your interior design actually look high-end. In the next section, we will grab the miter saw and I will show you exactly how deep to set that blade so you can stop fighting and start finishing.
Dial in Your Blade Depth First
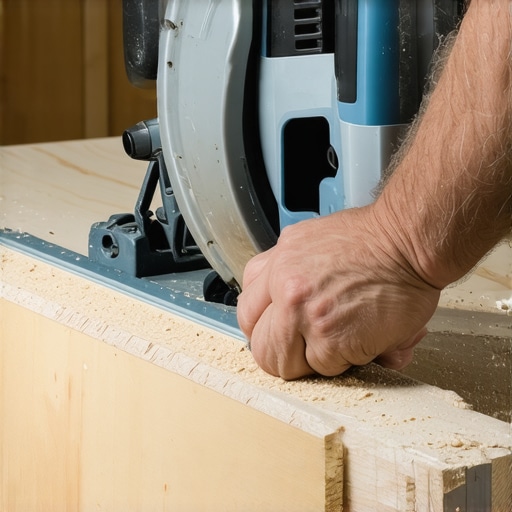
To start, you need to set your miter saw depth. This isn’t just about guessing; it’s about precision. If you go too shallow, the wood stays rigid. If you go too deep, you’re left with a pile of sawdust and a broken board. You want to leave about 1/8th of an inch of material intact on the face. Think of it like the spine of a book—it is the only thing keeping the whole thing together. I once worked on a job in a 1920s bungalow where I rushed this part and ended up with trim that flopped around like a wet noodle because I cut too deep. It was a disaster that looked nothing like a step-by-step flooring installation from planning to perfect finish. Use a scrap piece of the same material to test your depth before touching your actual trim piece.
How Many Cuts Do You Actually Need?
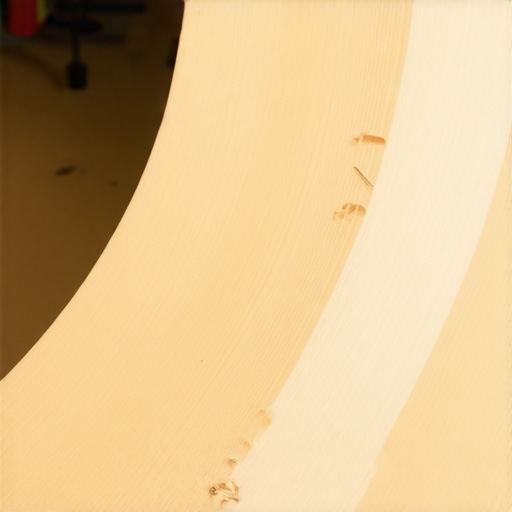
Spacing is the next variable that determines your success. For a gentle, sweeping curve, spacing your cuts an inch apart is usually plenty. However, if you are trying to wrap a tight column, you might need to move those cuts to every quarter-inch. A good rule of thumb is that more cuts equal a smoother radius. To avoid the wood splintering on the finished face as the blade exits, I always use the painters tape trick for splinter free baseboard cuts. Just run a strip of blue tape along the front of the board before you start your kerfs. This small step ensures the kerf cut trick for bending baseboards around curves actually looks professional rather than DIY.
The Glue Strategy That Stops the Snap-Back
Once the board is flexible, the real challenge begins: making it stay in place. Wood has physical memory, and even with kerf cuts, it naturally wants to return to its straight shape. This is where the flex glue move for baseboards on curved walls becomes your best friend. Standard construction adhesive is often too thick and will not allow the micro-movements needed as you press the board into the wall. You need an adhesive that grabs fast but stays slightly elastic. I remember a particularly stubborn plaster wall that was so bowed it looked like a sail in the wind. I applied my glue, pressed the board into the curve, and used the hollow wall anchor that actually holds baseboards to pin it while the adhesive set. Without that mechanical hold, the board would have popped off the wall before I could even grab my finish nails.
Finish with a Seamless Sand
After the glue is dry, you will likely notice tiny “facets” or flat spots on the top edge of your trim. This is perfectly normal and expected. Do not reach for the heavy wood filler yet. Instead, use the sanding block hack for seamless baseboard transitions. By sanding the top profile of the baseboard in a long, sweeping motion, you round off those flat spots and create a continuous, flowing curve that looks like it was custom-molded for the room. Finally, use the caulk and dab method for perfect baseboard joints to fill any remaining hairline gaps between the trim and the wall. This hides the fact that the wood is technically compromised on the back and makes the entire installation look like a solid piece of high-end craftsmanship.
Most DIYers assume that if a board is stubborn, the solution is more firepower. I used to be a nail-happy installer myself, thinking that a two-inch finish nail could solve any structural disagreement between wood and drywall. But here is the contrarian truth: over-nailing is actually a recipe for failure. According to the National Wood Flooring Association (NWFA), excessive mechanical fastening in high-tension areas creates localized stress points that can cause the wood to split as it naturally expands and contracts with the seasons. If you rely solely on nails to hold a curve, you are essentially creating a ticking time bomb that will eventually result in a loud pop and a ruined piece of trim.
One of the biggest traps I see involves where you actually drive those nails. You might be tempted to aim for the floor-level framing, but why you should never nail baseboards into the bottom plate only comes down to how houses settle over time. If you only hit the bottom plate, your trim cannot move with the vertical studs, leading to those ugly gaps we are trying to avoid. Have you ever fallen into this trap? Let me know in the comments.
Why do my kerf cuts still feel stiff after I have made them?
If you have made your cuts and the board still fights you, the culprit is usually the kerf width rather than the depth. Standard miter saw blades are about 1/8-inch wide. If you are dealing with a particularly tight radius, those gaps close up and the wood edges touch each other before the curve is complete. This is the oops factor most people miss. You might need to double-cut each kerf—essentially widening the gap—to give the wood more room to collapse into itself. It is a nuanced detail that separates a forced installation from a natural one. This level of precision is what defines baseboard styles that elevate your interior design.
To get that truly high-end look, do not forget the shimming secret for making mdf baseboards look custom. Even with perfect kerfs, your wall might have a slight tilt. Tiny cardboard shims tucked behind the top edge can align your curved section perfectly with the straight runs. This avoids one of the most common flooring installation mistakes to avoid for a seamless look. When you transition from the curve back to a straight wall, remember to use the back bevel secret for inside baseboard corners to ensure the joint stays tight even if the walls are out of square.
Finally, once everything is pinned and glued, you need to prep for paint. Standard primer often fails to hide the micro-distortions on the face of a bent board. I always use the high build primer secret for smooth baseboard paint. It acts like a liquid sander, filling in the tiny imperfections caused by the wood fibers stretching around the bend. This extra step ensures that your hard work looks like a single, solid piece of craftsmanship rather than a hacked-up piece of wood.
I have learned the hard way that no amount of technique can save you if your equipment is fighting you every step of the way. If you are still using a cheap, wobbly miter saw, your kerf cuts will vary in depth by 1/16th of an inch, which is more than enough to make an MDF board snap like a dry twig in your hands. I personally swear by my Bosch Axial Glide for this kind of work; the depth stop is actually repeatable, which is the only way to get through a 12-foot board without a heart attack. Beyond the saw, the most underrated piece of kit in my bag is the scribing tool every diyer needs for tight baseboards. It allows you to trace the exact undulations of your floor—because we both know that a truly flat subfloor is a myth. Before I even think about applying glue, I always run the moisture meter test every flooring pro uses. Wood moves based on the humidity in your home, and if you install a bone-dry board in a humid basement, that curve is going to expand and blow your miters apart within six months. According to the Titebond II Premium Wood Glue technical data sheet, it provides a bond strength of 3,750 psi, which is absolutely critical for resisting the constant outward tension of a bent board. If you use a lower-grade adhesive, you are basically asking for a structural failure. 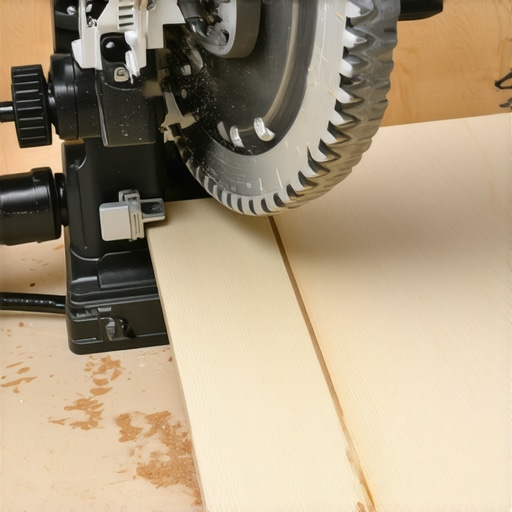
How do I maintain these curved sections as the house settles?
Maintenance is where most people drop the ball. A house is a living, breathing thing that shifts with the seasons, and those beautiful, tight curves you just worked so hard on will eventually develop hairline separations where the wood meets the drywall. Do not panic; it is just physics. Every year, usually in the spring, I do a walk-through of my main living areas to check for movement. If I see a gap, I do not reach for more nails. Instead, I investigate why your baseboard caulk is cracking and the flex fill fix. Using a high-stretch, elastomeric caulk allows the trim to move without the seal breaking. The same logic applies to your wet areas. Just like you need to know how to deep clean sanded grout without scuffing tile to keep a bathroom looking new, you need to keep your baseboards free of standing moisture from mopping. If water seeps into those kerf cuts from the bottom, the MDF will swell and your smooth curve will turn into a wavy mess.
Why 3D Printing and Composites are the Future of Trim
Looking ahead to 2025 and beyond, I see the industry moving away from hacking wood to fit curves. We are already seeing incredibly realistic 3D-printed flexible polymers that can be ordered to a specific radius. While I will always love the smell of sawdust, these new materials eliminate the tension and moisture issues entirely. But for now, we cut and we glue. I want you to go grab a scrap piece of trim right now and practice three different kerf depths; it is the only way to feel the sweet spot where the wood yields without breaking before you commit to the real thing.
Hard Lessons from My War with Curved Drywall
Over the years, I have realized that the biggest mistake is rushing the ‘relax’ phase. Wood is a natural fiber with a memory, and it takes time to accept its new shape. If you force it too fast, you lose that high-end look. I have also learned that why your baseboard paint is cracking at the joints often starts with the tension you leave in the board. Another lightbulb moment came when I stopped using standard nails; they just act as pivot points for the wood to pull away. Instead, focusing on the mechanical bond with adhesive changed everything. Finally, remember that even a perfect curve needs a good foundation, so always check the string line test for perfectly level subfloors before you pin your trim into place.
The Gear That Makes Bending Wood Possible
You do not need a shop full of industrial machinery, but you do need a few precision items. A high-quality miter saw with a micro-adjustable depth stop is non-negotiable for consistent kerf depths. I also swear by the scribing tool every diyer needs for tight baseboards to ensure the bottom edge of my curved piece sits flush against the floor. For the finish, never underestimate the power of the high-build primer secret for smooth baseboard paint. It is the only way to hide the ‘stress’ marks that naturally occur on the surface of the wood when it is bent. These three things combined will take your project from looking like a weekend DIY to a professional architectural feature.
#IMAGE_PLACEHOLDER_E#
Your Home Deserves a Custom Polish
Bending wood feels like magic the first time you get it right. It is about taking a rigid, stubborn material and making it flow with the architecture of your living space. Do not be intimidated by those round corners or columns anymore. By using the kerf cut trick for bending baseboards around curves, you are giving your home a level of detail that most people pay thousands for in custom millwork. Take your time, trust the process, and soon those awkward gaps will be a thing of the past. Have you ever had a piece of trim snap on you right when you thought you had it? Let me know in the comments below!