

I still remember the first time I felt that sinking feeling in my gut. I had just finished laying a beautiful porcelain floor in a master bathroom, feeling like a total rockstar. Then I looked down at the doorway. The tile was nearly three-quarters of an inch higher than the bedroom carpet. It wasn’t just a transition; it was a hazard. I tried to bridge the gap with a cheap, store-bought transition strip that ended up looking like a speed bump. My client tripped on it during the final walkthrough. It was a humbling moment that taught me one thing: the transition is just as important as the floor itself.
Fixing the Stubbed Toe Hazard at Your Doorway
Getting a flush transition between two completely different materials isn’t just about aesthetics—it’s about safety. When you are dealing with flooring installation mistakes to avoid for a seamless look, the vertical offset is usually the biggest culprit. Most people assume they can just slap a piece of metal over the gap and call it a day, but that’s how you end up with a house that feels like an obstacle course. Whether you are knee-deep in a full step-by-step flooring installation or just trying to fix a nagging issue, leveling that threshold is the secret sauce to a high-end feel. In my early days, I once made the mistake of thinking the carpet padding would fluff up enough to hide the height difference. It didn’t. In fact, it just made the carpet feel mushy right where it met the tile. You really need to address the subfloor height or use the right carpet transitions from tripping your guests. According to the 2010 ADA Standards for Accessible Design, vertical changes in level between 1/4 inch and 1/2 inch must be beveled with a slope no steeper than 1:2 to prevent tripping. If your height difference is more than half an inch, you aren’t just looking at a DIY project; you’re looking at a liability.
Can a DIYer really get a professional flush finish?
I hear this all the time. People worry they’ll need to rip up the whole subfloor just to get things level. The truth is, while it takes some patience, you can absolutely achieve a smooth transition without calling in a structural engineer. It often comes down to choosing the right reducer or using a feather edge tactic for smoothing subfloor seams before the carpet even goes down. Have you ever walked through your own house and caught your heel on a transition that wasn’t quite right? It’s a small detail that makes a massive impact on how you experience your home every single day. Today, we’re going to walk through the exact steps to bridge that gap so your floors look intentional and, most importantly, stay safe for everyone walking on them.
Stop Tripping and Start Prepping the Subfloor
The biggest mistake people make is trying to hide a height difference after the flooring is already down. Think of it like trying to fix a crooked house by painting the walls—the foundation is the real issue. If your subfloor is uneven, your transition will always look like an afterthought. I once worked on a job where the client wanted to avoid the self-leveler mistake that creates new high spots by just ‘eyeballing’ the pour. We ended up with a literal bump in the middle of the hallway that looked like a buried garden hose. Before you even think about the carpet or tile, you need to use a straightedge to find exactly where that vertical drop starts. If the difference is subtle, you can master the feather edge tactic for smoothing subfloor seams to create a gentle ramp that the eye (and the foot) won’t even notice. This involves using a high-quality floor patch compound and sweeping it out from the high side to the low side over a distance of at least 12 to 18 inches. This gradual slope is the difference between a high-end custom home and a rushed weekend flip.
Feathering the Edge for a Smooth Ramp
When you are applying that patch, don’t just dump it and hope for the best. Use a wide trowel and apply pressure to thin out the edges until they are translucent. The goal is a transition so smooth you could roll a marble over it without a click. I remember a project in a 1920s bungalow where the settling subfloor had created a one-inch dip. We used a series of thin layers, letting each dry, to build a stable, sloped foundation. It felt tedious at the time, but when the carpet went over it, the transition was invisible. This is one of the most overlooked carpet install secrets achieving flawless results every time. If you rush this, you’ll feel every ridge through the padding within a month.
The T-Bar Solution for Stubborn Height Gaps
Sometimes, no matter how much you ramp the subfloor, you still need a physical bridge between the two materials. This is where you utilize the t-bar tactic for transitions between flooring types. A T-bar is perfect because it allows both floors to expand and contract independently while covering that raw edge. To keep things looking sleek and professional, I always recommend you use the hidden screw method for metal transition strips. Nothing screams ‘amateur hour’ like shiny silver screw heads poking up through a threshold. 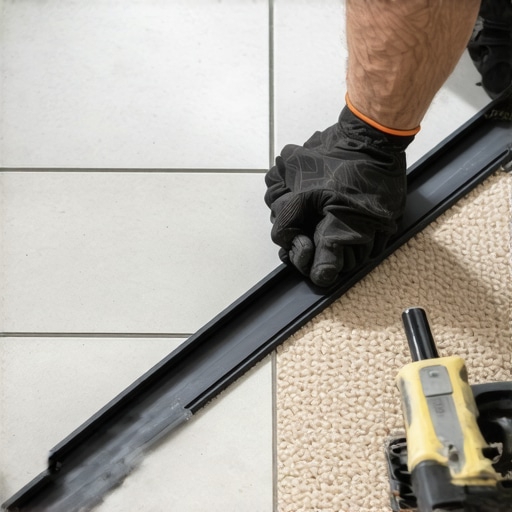 By hiding the fasteners, you maintain a clean line that draws the eye across the room rather than down to the floor. When I first started, I used the standard top-down screws on a brass reducer, and within six months, the screws had backed out just enough to snag a client’s wool socks. I never made that mistake again.
Locking the Carpet Down Tight
Once the transition strip or ramp is set, the final touch is how you handle the carpet edge. It needs to be taut—no exceptions. If there is any slack, the carpet will eventually bunch up and create a new trip hazard. You want to finish the install with the carpet tucker move for clean baseboard edges and threshold seams. This involves using a stair tool or a specialized tucker to fold the carpet deep into the gully of the transition strip or against the tack strip. It creates a crisp, rolled edge that looks like it was molded into place. In my experience, a loose carpet edge is a magnet for pet hair and dust, making even the most expensive step-by-step flooring installation look messy over time. Focus on that tension and the clean tuck to ensure the floor stays safe and beautiful for the long haul.
Stop Jamming Your Tack Strips Against the Tile
Most people—and even some contractors who should know better—think the secret to a tight transition is nailing the tack strip as close to the tile as possible. They think a smaller gap means a tighter fit. In my experience, that’s exactly how you end up with a frayed edge that pulls out within six months. You actually need a consistent gap—usually about two-thirds the thickness of the carpet—between the tack strip and the transition or baseboard. This creates a pocket where the carpet can be properly rolled and tucked. If you don’t leave that ‘gully,’ the carpet has nowhere to go but up, and that’s when you start seeing those ugly, fuzzy edges. It’s one of those carpet install secrets achieving flawless results every time that separates the pros from the weekend warriors.
Why is your high-end padding actually causing the transition to fail?
It sounds counterintuitive, but buying the thickest, plushest padding available can actually destroy your transition. While it feels great underfoot, excessive thickness creates a ‘trampoline effect’ at the threshold. According to the Carpet and Rug Institute (CRI 105 Standard), residential carpet padding should generally not exceed 7/16 of an inch in thickness. If your padding is too thick or too soft, the carpet will flex too much every time someone steps on the transition. This constant vertical movement puts immense stress on the tuck or the T-bar, eventually leading to the carpet popping out or, worse, why your carpet seam looks like a speed bump. I always tell clients: spend more on the density of the pad, not the height. High-density pads (8lbs or higher) provide that luxury feel without the structural instability that ruins your floor’s layout. 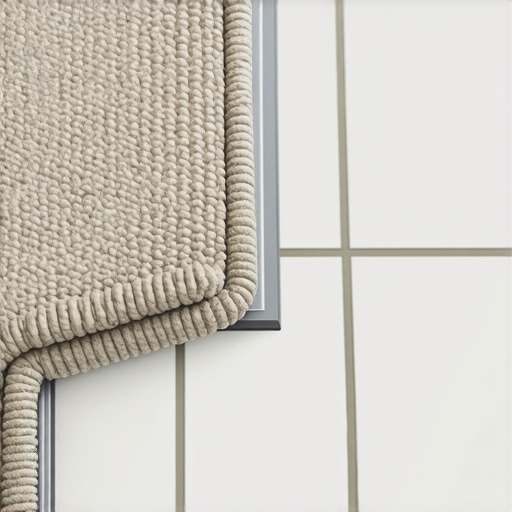
The Glue Mistake That Ruins Transitions in the Sun
Here is a trap I see all the time in modern homes with large floor-to-ceiling windows. People use standard hot-melt tape for their carpet seams near transitions that get direct afternoon sun. The glass acts like a magnifying glass, heating the floor to temperatures that can actually reactivate the adhesive. You’ll walk in one day and notice your once-perfect seam has shifted or opened up. For these high-heat areas, you need to master the iron temperature secret for flat carpet seams and use a high-temperature tape or a specialized epoxy-based adhesive at the transition point. If you’re worried about why your carpet pad is crushing down too fast or why your transitions aren’t holding up, it’s often these environmental factors that are to blame. Have you ever fallen into this trap? Let me know in the comments. If you’re planning a major renovation and want to avoid these headaches, feel free to contact us for expert advice.
Stop relying on your knees and trust the power stretcher
I’ve seen too many DIYers—and even some pros—try to muscle a carpet into place using only a knee kicker. That is a recipe for back pain and a floor that ripples within two years. If you want your carpet install to last, you need to engage in the power stretcher vs knee kicker debate by actually using the stretcher. A power stretcher uses leverage to pull the carpet taut across the entire span of the room, ensuring it stays hooked on those tack strips no matter how much foot traffic it gets. It is the absolute cornerstone of a professional finish. When I’m working on a durable flooring installation for a stylish home, I also never skip the moisture meter test for concrete subfloors. Your eyes might see a dry slab, but the National Wood Flooring Association (NWFA) technical standards suggest that for solid wood flooring, the moisture content difference between the flooring and the subfloor should be no more than 4 percent for strips under 3 inches wide. If you’re over that limit, you are effectively installing a ticking time bomb. 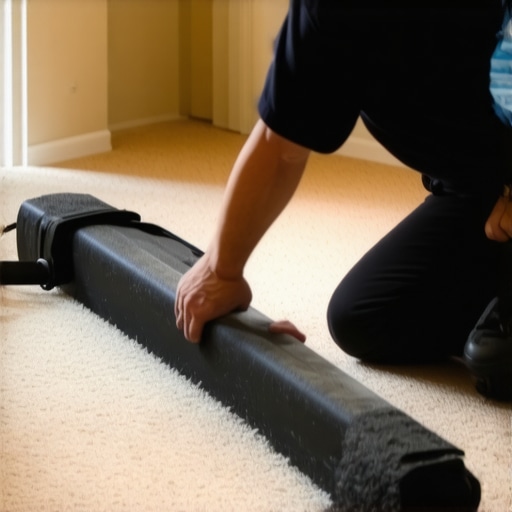
How do I maintain these high-traffic transitions over time?
Maintenance isn’t just about vacuuming; it’s about inspecting the structural integrity of your transitions. Every six months, I recommend doing a ‘tap test’ on your T-bars and reducers. If you hear a hollow click or feel movement, the fasteners are loosening. For wood-to-carpet transitions, keep an eye on the baseboards. If you used the scarf joint rule for long baseboard runs, check the seams for separation. In bathrooms, moisture is your biggest enemy. You need to know about shower repairs when to fix vs replace for longevity to prevent water from reaching the subfloor near your thresholds. A small bead of silicone at the base of the transition strip can act as a dam, preventing spills from seeping into the carpet padding and causing mold.
The future of floor prep is smarter than you think
Looking ahead at baseboard trends in 2025 fresh styles for every room, we’re seeing a shift toward integrated tech. I predict that within the next decade, we’ll see ‘smart’ subfloors with embedded moisture sensors that alert your phone before a leak becomes a catastrophe. For now, the best way to scale your skills is to invest in precision. Stop guessing your angles and start using a digital protractor for your trim. If you want to elevate your game today, my advanced tip is this: go buy a professional-grade moisture meter and use it on every single job. Knowing the exact state of your subfloor will save you thousands in potential rework and give you the confidence of a true craftsman.
Hard-Won Truths from a Decade in the Trenches
After thousands of square feet of flooring, I’ve realized that the ‘hidden’ work is what truly pays off. If you ignore the subfloor, the prettiest carpet in the world will look amateur within a year. Always prioritize the foundation over the finish. I once thought I could save time by skipping the power stretcher on small hallways. I was wrong. Ripples appeared by the next summer. Now, I never touch a carpet job without one. It’s about the integrity of the carpet install. The most expensive mistake is the one you have to do twice. Take the extra thirty minutes to let your patch dry properly. Your future self will thank you when those transitions remain rock-solid for a decade.
Gear That Actually Makes Your Life Easier
If you want to move beyond basic DIY, you need the right arsenal. First, a professional moisture meter is non-negotiable; it tells you things your eyes simply can’t see about a concrete slab. Second, I swear by a 12-inch wide stainless steel trowel for creating that perfect feather edge. Finally, don’t sleep on high-density padding. Choosing the best carpet types for high traffic areas in 2025 won’t matter if your padding collapses under the weight of everyday life. I trust high-density 8lb pads for their long-term resilience and stability at the threshold.
#IMAGE_PLACEHOLDER_E#
Elevate Your Home One Threshold at a Time
Building a home you’re proud of isn’t about perfection; it’s about persistence. Every time you tackle a tricky transition or carefully align a baseboard, you’re honing a craft. You’ve got the knowledge now to avoid the pitfalls that trip up even the pros. Whether you are looking for expert flooring installation tips for 2025 or just trying to fix a single doorway, remember that the details define the space. Go ahead and start that project—you’ve got this. If you ever feel stuck, you can always contact us for guidance on your specific renovation. Have you ever encountered a height difference that seemed impossible to bridge? Let me know in the comments below!