

I’ll never forget the sinking feeling I had exactly three months after I ‘finished’ the carpet in my sister’s nursery. I had spent a whole Saturday on my hands and knees, swinging a knee-kicker like a man possessed. I was proud. I was sweating. I was convinced I’d saved a fortune by skipping the big tool rental. Then the seasons changed, the humidity shifted, and suddenly the floor looked like a series of gentle ocean waves. It was an absolute disaster. I had to pull up the baseboards, rip out the transitions, and start over because I was too stubborn to use the right gear. That is the thing about flooring; if you cut corners on the tension, the carpet will eventually bite back. [IMAGE_PLACEHOLDER]
Stop Punishing Your Knees and Start Stretching Right
Most of us start out thinking the knee-kicker is the star of the show. It is small, it looks easy to use, and it makes you feel like you are really working hard. But I learned the hard way that a kicker is mostly for positioning and tucking tight corners, not for stretching the entire span of a room. If you want to avoid flooring installation mistakes that lead to premature wear and those annoying bubbles, you have to understand the physics of the power-stretcher. My early failure taught me that mechanical tension is the only thing standing between a floor that lasts twenty years and one that fails in twenty weeks. It is like trying to stretch a giant, stiff rubber band with just your thumbs versus using a winch. One works for a second; the other works for a decade. Today, I am going to show you exactly when to put the kicker down and how to master the ‘big guns’ to get that drum-tight finish that stays flat.
Is the extra tool rental really necessary?
Many DIYers ask me if they can just ‘kick harder’ to save forty bucks at the rental shop. The answer is a resounding no. According to the Carpet and Rug Institute, using a power-stretcher is a mandatory requirement for most residential carpet installations to ensure the backing does not delaminate or stretch out of shape over time. Without it, you are basically just laying a heavy blanket on the floor and hoping for the best. Have you ever noticed your floor starts to ripple specifically near the doorways or in high-traffic zones? This is usually why your carpet is coming loose in the hallway—a simple lack of mechanical tension from day one. I want to hear from you: Have you ever tried to ‘muscle’ a carpet into place only to have it fail later? It happens to the best of us, but we can fix it. Let us look at how to get those carpet install secrets right the first time so you can move on to the fun stuff, like picking out modern designs for your next bathroom remodel.
Set the Foundation Before You Stretch
You cannot achieve a professional finish without a solid foundation. Before the stretcher even comes out of its heavy plastic case, you need to ensure your tack strips are actually doing their job. I remember helping a buddy in a rush once; we didn’t check the existing strips in his guest room. Halfway through the stretch, an entire row of nails gave way under the pressure. The carpet snapped back like a giant, heavy rubber band, and we had to pull everything up—including the baseboard styles he’d just finished painting—to fix the subfloor. It was a three-hour setback for a five-minute check.
Check for rot, rust, or loose nails now, or you will pay for it later in labor. Ensure the gap between the tack strip and the wall is about two-thirds the thickness of the carpet. This creates a ‘gulley’ that allows the carpet to be tucked neatly. If the gap is too wide, your edges will look sloppy; if it’s too tight, you’ll never get the backing to stay put. This attention to detail is just as vital as following the soft joint rule in a bathroom—skipping the small stuff leads to structural failure. 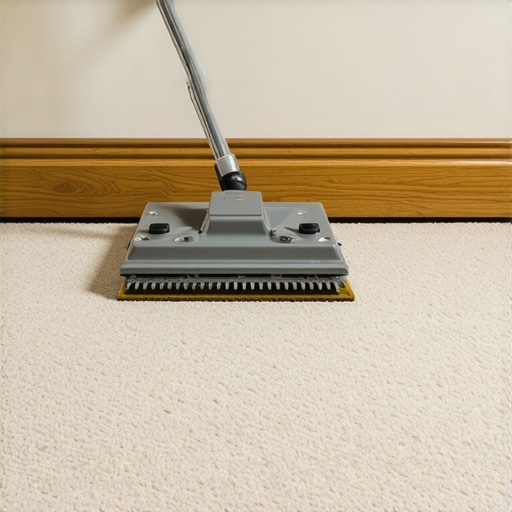
Engage the Power-Stretcher Properly
Once your pad is down and the carpet is roughly positioned, it is time for the heavy lifting. The power-stretcher works by using a long pole system to brace against one wall while the ‘head’ (the part with the teeth) grips the carpet and pulls it toward the opposite wall. It is like using a car jack to lift a vehicle; the mechanical advantage does all the work your knees can’t. If you don’t use this, you’re essentially committing one of those flooring installation mistakes that guarantees a call-back within six months.
Find a Solid Anchor Point
Your tail block—the padded end of the stretcher—must be braced against a solid wall, preferably against the bottom plate of the framing. Never brace it against a thin piece of trim or a flimsy shower enclosure base. I once saw an amateur DIYer brace the tail against a drywall patch that didn’t have a stud behind it. He pumped the handle, and the pole went right through the wall like a battering ram. If you have to brace against a long span of wall, use a ‘spreader’ board (a scrap piece of 2×4) to distribute the pressure and avoid a costly drywall repair. This is part of the carpet install secrets that pros rarely talk about but always practice.
The Corner-to-Corner Pull Sequence
Stretching is not a random act; it follows a specific geometry. You start by hooking the carpet onto the tack strips along one of the shorter walls using your knee-kicker for the initial ‘bite.’ Once that ‘anchor wall’ is set, you move the power-stretcher to the opposite wall. You should stretch at a slight angle—roughly 15 degrees—towards the corners. This ensures the tension is distributed diagonally across the room’s center. Think of it like tightening the lug nuts on a tire; you move in a pattern to ensure even pressure. If you just pull straight across, you will often find why your carpet is coming loose in the hallway later—you’ve left a pocket of slack in the middle that will eventually migrate into a ripple. For those moving from flooring to other projects, this same logic of even tension applies when you set a level shower base; if the weight isn’t distributed, the system fails.
Locking the Teeth
When you depress the handle of the stretcher, you should feel a firm resistance, but you shouldn’t have to jump on it with your full body weight. Over-stretching can actually tear the secondary backing of the carpet. You want to stretch the carpet roughly 1% to 1.5% of its total length. In a 12-foot room, that is only about an inch and a half of stretch. Once the carpet is pulled tight, use your knee-kicker to firmly seat the backing onto the tack strip pins before releasing the stretcher’s handle. This ‘hook and hold’ method is what separates a floppy, DIY look from a drum-tight professional finish.
While the basic mechanics of stretching a carpet are straightforward, most DIYers fall into the ‘more is better’ trap when it comes to materials. Everyone thinks thicker is better when it comes to carpet padding. Salespeople love to upsell the ‘cloud walk’ experience, but here is the truth: a pad that is too thick is actually a death sentence for your carpet’s backing. When the pad is too soft, the carpet flexes too much underfoot, which leads to the backing stretching and eventually delaminating. This is exactly why your carpet pad is too thick for the tack strip—it creates a leverage point that pulls the carpet right off the pins whenever you step near the wall. In my experience, a dense 7/16-inch pad outperforms a squishy 5/8-inch pad every single time because it provides the structural support the primary backing needs to stay taut.

Stop Smothering Your Expansion Gaps
Another nuance that separates the pros from the weekend warriors is the treatment of vertical surfaces. Many people assume that a tight fit is a sign of quality. I once thought that hammering my baseboard trends in 2025 tight against the floor was the only way to get a clean look. However, if you are working with any floating floor or even some hardwoods, you are essentially creating a ticking time bomb. According to the National Wood Flooring Association (NWFA), failing to leave a proper perimeter expansion gap is the leading cause of floor buckling and noisy joints. If you pin the floor down with your trim, it can’t breathe. This lack of movement is often the culprit behind why your shower pan is making a popping sound or why a hallway floor starts to lift in the humid summer months.
Does Your Trim Actually Need Room to Breathe?
The short answer is yes, but the ‘how’ is where people mess up. Beyond just the floor, your baseboards themselves need smart installation. I see people using butt joints on long walls, which inevitably open up when the house settles. You should always use the scarf joint rule for long baseboard runs to overlap the pieces. This prevents those unsightly gaps that lead to why your caulked baseboards are cracking within weeks. And here is a controversial take: stop caulking the bottom of your baseboards in high-moisture areas. In bathrooms or basements, that bead of caulk creates a ‘vapor trap.’ If moisture gets underneath, it can’t evaporate, leading to rot and mold. It’s the same logic behind the vapor trap mistake that peels your garage coating—you have to give moisture an exit strategy.
The hidden mistake I see most often involves furniture. We spend thousands on the install and then drag a heavy oak dresser across the room. This is why your carpet has a permanent furniture dent; the localized pressure crushes the pile and the pad beyond repair because the tension wasn’t high enough to distribute the weight. Have you ever fallen into the ‘extra thick padding’ trap? Let me know in the comments. I want to hear about the ‘oops’ moments that taught you the most about your home.
I’ve realized that the difference between a project that looks good on day one and one that still looks pristine on day one thousand is the data you collect before you even buy materials. One tool I refuse to work without now is a high-quality moisture meter. I used to think I could ‘feel’ if a subfloor was dry. I was wrong. If you aren’t performing a moisture meter test for concrete subfloors, you’re essentially gambling with your adhesive’s life. Even a slight elevation in humidity can cause a high-end vinyl or hardwood to fail.
Stop Guessing and Start Measuring
The data-driven approach is the future of home improvement. I recommend using a pinless meter like the Wagner MMC220; it doesn’t leave holes in your expensive wood but gives you a deep-depth reading of the core moisture content. If the readings are off, I don’t install. Period. This discipline is the core of a step-by-step flooring installation from planning to perfect finish. I predict that the next decade will bring smart sensors that live beneath our floors, alerting our phones to subfloor moisture spikes before they cause warping.
How can I prevent my floors from failing prematurely?
Maintenance starts with the right cleaning chemistry. Stop using generic ‘all-purpose’ cleaners that leave a waxy residue or acidic vinegar that can etch stone. Instead, I swear by the microfiber mist rule for cleaning matte floors. You want a pH-neutral cleaner that won’t eat away at your finishes or the grout in your shower. If you notice a leak or a loose tile, don’t wait; consult a guide on shower repairs when to fix vs replace for longevity before a small drip turns into a structural nightmare.
Ditch the String and Use a 360-Degree Laser Level
When it comes to tiling a shower, I’ve retired my old bubble levels and chalk lines. A 360-degree green beam laser is now my best friend. It allows you to project a perfect grid across three walls simultaneously, ensuring your horizontal lines wrap around the room without a fraction of an inch deviation. This is how you avoid the ‘stair-stepping’ effect that plagues amateur bathrooms and ensures your baseboard styles sit perfectly level against the floor.  According to the Tile Council of North America (TCNA) Handbook, maintaining layout tolerances is essential for the structural integrity of large-format tiles, especially when dealing with substrate deflection. For now, grab a laser and use it to check your vertical plumbing before you thin-set a single tile. My challenge to you: before your next project, rent or buy a pinless moisture meter and test three different areas of your home—you might be surprised at what that ‘dry’ floor is actually hiding. Always ensure your equipment is calibrated, or you’re just measuring with an expensive paperweight.
Three Carpet Installation Myths That Ruined My First Project
Over the years, I’ve realized that the tools don’t just make the job easier; they make the job permanent. My first major mistake was assuming that carpet was a static product. It isn’t—it’s a textile that reacts to your environment. One lightbulb moment for me was realizing that if I didn’t get the tension right on day one, the carpet install secrets I’d read about wouldn’t matter. Another realization? Your subfloor is the boss. If the subfloor isn’t perfect, your finished product never will be, whether you’re working on durable flooring installation for a stylish home or a simple bedroom refresh. Finally, I learned that ‘good enough’ is the enemy of ‘built to last.’ If a tack strip looks weak, replace it. Patience and preparation are the highest-ROI tools in your bag.
The Gear That Actually Saved My Budget
If you are serious about DIY, you need to look beyond the big-box store aisles. I always tell people to consult the Carpet and Rug Institute (CRI) standards before they even buy a roll; it’s the ultimate guide for the industry. For tools, I never start a step-by-step flooring installation without a reliable moisture meter and a rented Crain power stretcher. These aren’t just ‘pro’ toys—they are insurance policies for your bank account. I also recommend checking out specialized guides for the tricky parts, like knowing when to pivot to shower repairs when to fix vs replace for longevity if you discover water damage under your transition strips. These resources transform you from a weekend warrior into a craftsman who understands the mechanics of the home.
Build a Floor That Stands the Test of Time
There is an incredible sense of pride that comes from walking across a floor you installed yourself—one that doesn’t creak, ripple, or shift. Don’t let the fear of technical tools like power stretchers or moisture meters stop you. Every expert was once a beginner who decided to do things the right way instead of the easy way. Whether you are learning how to choose the right carpet or mastering the art of a perfectly level shower base, your commitment to quality will show in every corner of your home. If you run into a roadblock you can’t solve, don’t hesitate to contact us for expert advice. Your dream home is just one properly stretched floor away. Have you ever dealt with a carpet ripple that just wouldn’t go away no matter how many times you kicked it? Let me know your struggle in the comments below!