

I remember standing in the middle of my living room, staring down at what was supposed to be a ‘seamless’ transition. Instead, it looked like a hairy caterpillar had crawled under the pile and died. My wife politely called it a ‘fringe benefit,’ but we both knew it was a disaster. I had spent hours prepping, but the moment I walked across that joint, it felt like a tiny mountain range under my socks. That was the day I realized that why your carpet seam looks like a speed bump usually has nothing to do with your hands and everything to do with the dial on your seaming iron. I had it cranked to the max, thinking ‘hotter is better,’ only to learn I was actually warping the carpet backing and creating a permanent ridge. Today, I am going to share the exact temperature sweet spot that will finally give you those professional, invisible results you’ve been chasing.
My Expensive Mistake with the ‘Hotter is Faster’ Myth
Years ago, when I was first learning the ropes of a proper carpet install, I assumed the iron was just a glorified glue-melter. If the glue melted, the job was done, right? Wrong. I set my iron to its highest setting, dragged it along the tape, and watched as the smoke rolled off. I thought I was being efficient. In reality, I was scorched-earthing my subfloor and causing the synthetic fibers of the carpet to contract unevenly. This creates a ‘peak’ in the seam that no amount of kicking or stretching will ever flatten out. If you have ever felt a hard, crunchy line under your feet, you’ve felt the result of a burnt seam. According to the Carpet and Rug Institute (CRI), most hot-melt adhesives are designed to flow at specific temperatures, and exceeding these can actually degrade the adhesive’s strength while damaging the primary backing.
Is a professional seaming iron actually worth the hype?
You might be tempted to use a regular clothes iron or a cheap knock-off, but trust me, the thermal consistency is night and day. A pro-grade iron maintains a steady heat across the entire baseplate, which is crucial when you are trying to master the double cut method for invisible carpet seams. When I switched to a tool that actually told me the temperature, my seams went from ‘visible from space’ to ‘I can’t find where I started.’ Have you ever finished a room only to notice a weird bulge right in the doorway? It’s a frustrating feeling, but I promise it is a fixable one. Once you understand how heat interacts with the latex in the carpet backing, you stop fighting the material and start working with it. We are going to dive into the exact settings you need for different pile heights, but first, let’s talk about why most people fail before they even plug the iron in. If you are also dealing with other flooring issues, like why your caulked baseboards are cracking, you already know that the ‘little details’ are usually the biggest culprits.
Get the Temperature Right Before You Touch the Floor
Most irons have a dial from 1 to 5. If you’re working with a standard residential cut pile, setting that dial to 4 is like trying to fry an egg on a flamethrower. You want to stay in the 2.5 to 3 range. Think of the carpet backing like a grilled cheese sandwich; if the heat is too high, you char the outside before the ‘cheese’—the seaming adhesive—has even begun to flow. When the backing gets too hot, it undergoes a chemical change called ‘delamination,’ where the primary and secondary backings separate. This is exactly how you end up needing a new carpet patch later on because the seam won’t hold. I once worked on a high-end nylon install where I rushed the heat, and by the time I was halfway across the room, the first six feet had already buckled into a permanent wave. I had to pull the whole thing up and start over, which was a hit to my pride and my wallet.
How to master the slow glide
The secret isn’t just the heat; it’s the dwell time. You should be moving the iron at about two to three feet per minute. If you go faster, the glue doesn’t saturate the fibers. If you go slower, you’re back to the burnt-toast scenario. While you’re focusing on the iron, make sure you’ve already utilized the overlap and cut secret for perfect carpet joins to ensure the edges are factory-clean. 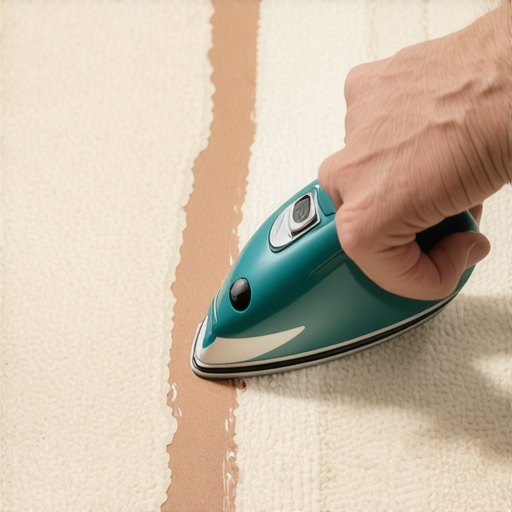
Press the seam like you mean it
Once the iron passes, the work isn’t done. You have a small window—maybe 30 seconds—to ‘set’ the seam. Use a star roller or a smooth seam roller to press the carpet fibers into the molten glue. Don’t just roll haphazardly; work the fibers together in a zig-zag motion to blend the pile. If you’re dealing with high traffic areas, this step is non-negotiable for durability. I always keep a heavy tool box or a dedicated seam weight nearby to follow behind my roller. This keeps the backing flat while the adhesive cools and hardens. Without that weight, the natural tension of the carpet—especially if you’ve already started using the power stretcher—can pull the seam apart before it’s fully bonded.
Watch out for the hinge effect
A common mistake during a step-by-step flooring installation is letting the carpet edges ‘hinge’ or fold upward. This happens when the tape isn’t centered perfectly. I remember a job where I was distracted talking to the homeowner and I let the iron drift half an inch off-center. The result was a seam that looked great for a week, but as soon as the kids started running over it, one side dipped while the other stayed firm. It looked like a tiny, fabric-covered cliff. If you want to avoid flooring installation mistakes that scream ‘amateur,’ take the extra five seconds to verify your tape placement every three feet. Even if you are focused on the floor, remember that how the carpet meets the wall matters too. If you are also planning a baseboards makeover, ensure your tack strips are spaced about a quarter-inch from the baseboard to allow the carpet to tuck neatly. A messy transition at the wall can make even the best seam look like an afterthought.Everyone tells you that a sharp blade is the end-all-be-all of a successful carpet install. In my experience, you can have the sharpest knife in the world and still end up with a seam that glows like a neon sign under the right light. The hidden nuance isn’t the cut; it’s the ‘nap direction’ relative to your home’s primary light source. If you run a seam perpendicular to a large window, the light will hit the tiny microscopic gap of the seam and create a shadow. This is why you should always try to run your seams parallel to the main light source. It’s a professional-level detail that separates a ‘good’ job from one that looks like a single piece of fabric was custom-woven for the room. Have you ever fallen into this trap where the room looks great at night but terrible at noon? Let me know in the comments.
Why does my seam look different at 10 AM versus 4 PM?
This phenomenon is known as ‘shading’ or ‘telegraphing.’ It happens because carpet fibers have a natural lean. If the two pieces you are joining aren’t oriented in the exact same direction—even by a few degrees—they will reflect light differently. This is also why why your new carpet has visible rows of lines sometimes; the factory pile hasn’t settled yet. To combat this, I always do a ‘dry fit’ and check the seam with a high-intensity flashlight at floor level before I even think about plugging in the iron. If the light catches a ridge, the seam isn’t ready.
Stop Buying the Thickest Pad You Can Find
Here is a contrarian view: more cushion is actually worse for your seams. Homeowners often think they are doing themselves a favor by buying the thickest, softest pad available. However, a pad that is too thick creates a ‘trampoline effect’ every time you step. This constant vertical movement puts immense stress on the seaming tape. According to the Carpet and Rug Institute’s CRI-105 standard, residential cut-pile carpet should generally have a pad no thicker than 7/16 of an inch with a minimum density of 6 pounds. If you ignore this, you’ll find why your carpet pad is too thick for the tack strip and why your seams eventually split under the strain. 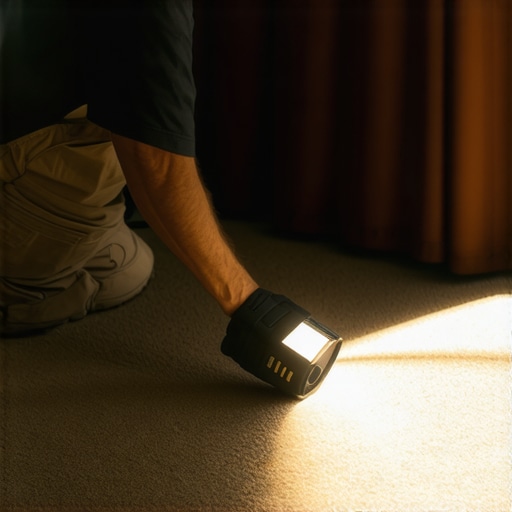
The Moisture Trap That Liquefies Your Hard Work
One ‘oops’ factor that kills even the best step-by-step flooring installation is subfloor moisture. We talk about it constantly with hardwood, but it’s just as vital for carpet. High alkalinity or moisture vapor coming up through a slab can actually break down the thermoplastic in seaming tape over several years, leading to ‘seam peak’ or total failure. This is why I always recommend why your concrete subfloor needs a calcium chloride test before starting any major project. If you are also dealing with bathroom transitions, remember that moisture doesn’t just come from below. If you don’t use the correct baseboard styles that elevate your interior design while providing a tight seal against the floor, you’re inviting humidity to creep under the edges and ruin the bond. It’s these tiny, invisible chemical battles that usually determine if your floor lasts five years or twenty. Avoid these flooring installation mistakes by slowing down and testing your environment first. If your pad starts failing early, you might also want to investigate why your carpet pad is crushing down too fast, as it usually points back to an incorrect pairing of carpet type and traffic levels.
I personally use a four-inch wide seaming tape, like the Orcon K-40, because the extra surface area provides a margin of error that standard three-inch tapes simply cannot match. It is the difference between a seam that holds through a decade of heavy foot traffic and one that starts to ‘grin’ after only two years. In my experience, the wider tape distributes the tension of a stretched carpet more evenly, preventing the edges from curling up over time. If you are also working on your trim, I have completely ditched standard wood filler in favor of the hot glue hack for holding baseboard miters. By tacking the corners together before they ever touch the wall, you ensure a tight bond that survives the natural expansion and contraction of your home’s framing.
How do I keep my seams and transitions looking new for a decade?
Maintenance is where most homeowners drop the ball. It is not just about vacuuming; it is about protecting the structural integrity of the joins. For example, when running long lengths of trim, I always utilize the scarf joint rule for long baseboard runs to make sure the seam is virtually invisible and doesn’t separate. If you notice a tiny gap opening between your carpet and the wall, do not ignore it. This is usually a sign that the your guide to durable flooring installation you invested in is losing its grip on the tack strip. I recommend a yearly check of all transitions, especially where the carpet meets the bathroom tile. According to the Tile Council of North America (TCNA) Handbook, specifically the B415 method for shower receptors, the transition area is the most common point of moisture failure. If you see signs of dampness near the door, it is time to look into shower repairs: when to fix vs replace for longevity before the subfloor rot reaches your bedroom carpet.
For those of you tackling baseboards for the first time, I cannot stress enough the value of the inside cope method for beginners. It is a bit more work than a simple miter cut, but it allows for walls that are not perfectly square—which, let’s be honest, is every wall in existence. I have spent countless hours with a coping saw in hand, and the results are always worth the extra five minutes per corner. If you are planning a full room overhaul, check out this ultimate shower renovation guide to see how these small trim details tie into a larger aesthetic.
The Digital Revolution is Hitting the Subfloor Next
Looking toward the future, I see the industry moving rapidly toward digital layout tools. I am already seeing professionals use LIDAR-based smartphone apps to map out complex floor plans with millimeter accuracy before the first roll of carpet is even ordered. This technology eliminates the ‘oops’ factor in material estimates and allows for perfect seam placement relative to light sources. However, no matter how high-tech the planning gets, the execution still relies on the fundamentals. I want you to try one specific thing on your next project: use a wider profile seaming tape and a dedicated seam weight for at least 60 seconds after the iron passes. You will be amazed at how much flatter the finish stays. If you find yourself stuck or unsure about a specific transition, don’t hesitate to contact us for expert advice on getting that professional finish.
What Manuals Never Mention About Seam Mastery
Over the years, I have realized that the perfect seam is less about the tool and more about the feeling of the material. One big lightbulb moment for me was discovering that carpet isn’t a dead product; it responds to the climate of your home. If you are rushing a carpet install on a humid day without acclimating the roll, those fibers will fight your adhesive every step of the way. Another secret? Don’t trust the dial on the iron blindly. Always test a scrap piece first. If the backing smells like burnt plastic, back off the heat immediately. Finally, remember that the subfloor is your foundation. If you see flooring installation mistakes like uneven seams, it is often because the transition between the pad and the tack strip wasn’t handled with precision. #IMAGE_PLACE_HOLDER_E#
Gear That Actually Makes a Difference Underfoot
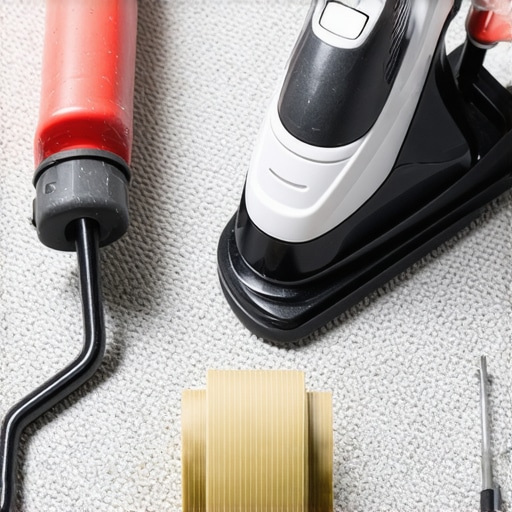
I don’t believe in buying every gadget on the shelf, but three items are non-negotiable for my toolkit. First, a digital infrared thermometer—it takes the guesswork out of knowing if your iron is actually at the right temp. Second, professional-grade seam weights. I used to use old toolboxes, but actual weights apply the pressure more evenly to ensure the backing stays flat while the glue sets. Third, for those looking to expand their skills, I always suggest diving into a guide to durable flooring installation to understand how different materials react to heat. These tools don’t just make the job faster; they make the results permanent.
Ready to Take on the Living Room Floor
Installing carpet can be intimidating, especially when you’re staring at a $2,000 roll of fabric with a knife in your hand. But once you master the temperature and the timing, that fear turns into a massive sense of accomplishment. Whether you are doing a small bedroom or a full ultimate shower renovation guide, the principles of patience and preparation remain the same. Take your time, trust the process, and don’t be afraid to ask for help if you hit a snag. If you find yourself over your head, you can always contact us for a bit of professional guidance. Now, grab that iron and make those seams disappear!
Have you ever had a carpet seam that looked perfect at night but stood out like a sore thumb the next morning? Let me know your experiences in the comments below!