

I’ll never forget the morning I realized my “masterpiece” was a soggy mess. I was cleaning the bathroom when I noticed the baseboard near the shower felt… soft. I gave it a little poke with my finger, and it didn’t just dent; it crumbled. When I finally pulled the trim away, the smell of wet, decaying wood hit me like a ton of bricks. My expensive tile job was sitting on top of a rotting sponge. It’s a gut-wrenching feeling knowing you have to tear out something you spent weeks building just because you missed one tiny detail in the waterproofing stage. This is why your shower curb is always the first part to fail—it’s the busiest intersection for water in your entire home. Today, I’m going to show you exactly how to avoid my $2,000 mistake by using the ‘Sill-Plate’ Shield technique. We are going to stop the rot before it starts and give your bathroom the longevity it deserves.
The Day My Shower Curb Turned Into Mush
Back when I started doing my own renovations, I had this naive idea that more caulk equaled more protection. I figured if I just slathered enough silicone around the edges, the water would stay where it belonged. I was wrong. Water is patient, and it’s persistent. It finds the tiny pinholes in grout and the microscopic gaps in sealant. If you haven’t looked at an ultimate shower renovation guide lately, you might miss the fact that curbs are notorious for “wicking” moisture from the pan. In my early days, I didn’t understand the “capillary effect.” I thought a few layers of thinset would block the moisture, but I ended up with a structural nightmare. That’s where the ‘Sill-Plate’ Shield comes in—it’s a physical barrier that breaks the connection between your wet zone and your dry framing.
Is this Sill-Plate Shield actually worth the extra effort?
I know what you’re thinking: “Is this just another layer of expensive plastic I don’t really need?” I used to be a skeptic too. I thought that a good liquid membrane move for fail-proof shower pans was enough to handle anything. But here’s the reality: curbs take a beating. You step on them, the glass door pivots on them, and they are constantly submerged during a long soak. According to the Tile Council of North America (TCNA), moisture intrusion at transition points like curbs is a leading cause of residential shower failures, often requiring a full “fix vs. replace” decision much sooner than expected. If you’re wondering about shower repairs and when to fix vs. replace, the answer usually depends on how much rot is hiding under that curb. By installing a dedicated shield, you aren’t just waterproofing; you’re creating a permanent “no-go” zone for moisture. Have you ever noticed your bathroom baseboards looking a little swollen or discolored near the shower? Tell me about your “oh no” moments in the comments below! We’re about to dive into the step-by-step process of installing this shield so you never have to smell that damp rot again.Building a curb that outlasts your mortgage isn’t about luck; it’s about physics. Most people slap a couple of 2x4s together, nail them to the subfloor, and call it a day. That’s a recipe for a sponge. Instead, we use the ‘Sill-Plate’ Shield. Think of this as the pressure-treated barrier used in home foundations, but for your shower. I remember a project in Livonia where I tried to ‘save time’ by just using standard lumber. Within two years, that curb had expanded so much it cracked the grout and started a slow leak into the hallway carpet. It was a mess that required a full step-by-step flooring installation from planning to perfect finish to fix. Now, I never skip the physical barrier.
Ditch the Wood and Build with Solid Backer
If you want a curb that never moves, stop using dimensional lumber. Wood breathes, expands, and shrinks. Instead, stack strips of cement backer board or use a high-density foam curb. These materials won’t ‘wick’ water like a straw. When you’re setting these, you need a rock-solid foundation. This is where the dry pack secret for rock-solid shower subbases comes into play. You want the curb to be part of the floor, not just sitting on it. I use a modified thinset to ‘glue’ my foam curb to the subfloor, ensuring there are zero mechanical fasteners—because every nail is a potential leak path.
Why the Inward Slope is Non-Negotiable
Here is the ‘Sill-Plate’ Shield’s best friend: gravity. If your curb is perfectly level, water sits on it. If it slopes outward, you’re flooding your bathroom floor. I always aim for a 1/8-inch to 1/4-inch pitch toward the drain. I once saw a guy try to fix a flat curb by just piling on more grout—it didn’t work. The water just found a way under the grout. To get this right, use the laser level move for perfectly horizontal shower tiles to mark your high point on the outside and shave the inside down. It’s like a roof for your shower entrance; the water needs a clear path to run off.
Seal Every Corner Like Your Life Depends on It
The ‘shield’ part of this method is the membrane. Whether you prefer a sheet membrane or the liquid membrane move for fail-proof shower pans, the key is the ‘pre-formed’ corners. Don’t try to fold a flat piece of plastic into a three-way corner; it’ll bunch up and create a ‘hump’ that makes tiling a nightmare. I use pre-made ‘outside corners’ that glue directly to the curb. One time, I tried to ‘origami’ a corner out of a scrap piece of liner. It looked okay until I tried to set the tile and realized the corner was a half-inch thicker than the rest of the wall. I had to rip it all out and start over. Now, I use the right tools to keep everything slim and waterproof.
Protecting the Transition to Your Main Floor
The curb is the border between your wet oasis and your dry home. If you have carpet in the bedroom leading to the bath, you need to think about the transition strip move for carpet to bathroom tile. Water shouldn’t just be blocked from the wood framing; it needs to be prevented from migrating into the subfloor under the carpet. This is also where your trim choices matter. To keep things looking sharp and modern, check out baseboard trends in 2025 fresh styles for every room. A well-installed baseboard that is properly caulked at the curb transition prevents that ‘swollen wood’ look I mentioned earlier. Use the masking tape trick for clean silicone joints where the tile meets the baseboard to ensure a watertight and professional-looking finish.Building a great shower is just the start; the real danger lurks where the tile meets the rest of your home. Most DIYers believe that buying ‘waterproof’ flooring makes them immune to subfloor issues. Everyone says ‘waterproof’ means you’re safe, but in my experience, the product is only as good as the slab it sits on. If you skip why we never skip the subfloor moisture test on concrete, you are gambling with your investment. Moisture trapped under a vapor-tight floor has nowhere to go but out through your baseboards, leading to that ‘swollen’ look I mentioned earlier. I’ve seen $10,000 installs ruined because the installer ignored a simple moisture meter reading. This is one of those flooring installation mistakes to avoid for a seamless look that professionals won’t tell you about until it’s too late. According to data from the National Wood Flooring Association (NWFA), nearly 75% of residential flooring failures are directly linked to moisture imbalances in the subfloor or environment.
The Invisible Danger of Subfloor Telegraphing
Most people think a little dip in the subfloor is no big deal once the flooring goes over it. That’s a trap. A common belief is that a thick underlayment will ‘smooth out’ an uneven floor. This is a mistake; underlayment provides cushion, not structural leveling.
Why does your expensive floor still flex when you walk?
This usually happens because of ‘telegraphing.’ If your subfloor isn’t perfectly flat, the rigid planks will eventually mirror every dip and bump underneath. I once worked on a job where the homeowner thought thicker padding would fix a wavy subfloor. It didn’t. It just made the joints flex until they snapped under the weight of furniture. You need to understand why your vinyl plank floor is telegraphing subfloor bumps before you lay the first plank.
Master the Transition from Tile to Carpet
Then there is the carpet trap. Many installers still rely on a knee-kicker for the whole room, but that’s a shortcut that leads to ripples and buckling in three years. For a professional finish, carpet install secrets for achieving flawless results dictate using a power stretcher to properly tension the backing from wall to wall. If you’ve seen the knee-kicker mistake that ruins luxury carpets, you know exactly how it destroys the long-term integrity of the weave. Finally, don’t just ‘butt’ your baseboards in the corners and fill the gap with caulk. Even the most expensive trim looks cheap if the gaps open up during seasonal shifts. I always use the coping saw technique for flawless inside baseboard corners. It allows the wood to move slightly without ever showing a visible gap. Have you ever fallen into this trap where you thought the material would fix a bad subfloor? Let me know in the comments below!You’ve done the hard work of building a ‘Sill-Plate’ Shield and leveling your subfloor, but the job isn’t finished until you’ve secured the long-term future of your home. If there is one piece of equipment that changed my career, it is a professional-grade non-destructive moisture meter. I don’t care if the concrete ‘looks’ dry. I’ve seen slabs in Livonia that were decades old still throwing off enough vapor to delaminate a vinyl floor in weeks. This is why the moisture meter requirement for basement flooring jobs is my number one rule. I personally use the Tramex CME5 because it gives me an instant reading without poking holes in my expensive underlayment. It’s the difference between guessing and knowing your floor won’t fail in six months.
How do I maintain my bathroom and flooring for the next decade?
Maintenance isn’t about deep cleaning once a year; it’s about preventing the bond-breaking chemistry that happens when dirt and moisture combine. For showers, your best defense is the stop shower grout from staining with the pre-seal move. If you seal the grout before you ever turn on the water, you create a microscopic shield that prevents soap scum from etching into the cement. For your living areas, if you chose a soft surface, you have to fight the dreaded ‘ripples.’ The IICRC S100 standard for professional carpet installation explicitly states that a power stretcher must be used, yet I see ‘pros’ using knee-kickers every day. If you want to avoid why your carpet is buckling only three years later, verify that your installer is actually using the power stretcher rule for large living room carpets. Tension is the only thing keeping those fibers from bunching up.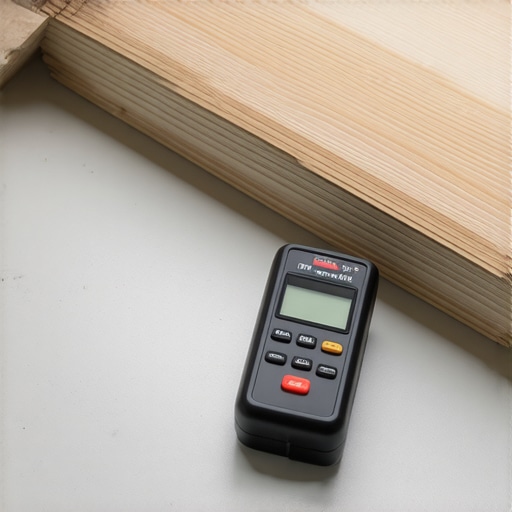 Beyond the big tools, the little things like the iron and towel trick for fixing carpet dents or the the iron and towel trick for dented hardwood planks can save you from a full board replacement when furniture moves. Looking toward the future, I predict we will see smart-home sensors integrated directly into the ‘Sill-Plate’ Shield and subfloors, alerting homeowners to microscopic leaks before they ever reach the baseboards. For now, we rely on the the finger test for checking thinset moisture in a shower and our trusted meters. My challenge to you: before you lay your next plank, go buy a $40 moisture meter. It is the cheapest insurance policy you will ever own. For more advanced techniques, check out expert flooring installation tips for 2025 to stay ahead of the curve.
Lessons from the Trenches: What Actually Keeps Your Subfloor Dry
After years of tearing out failed systems, I’ve realized that the most expensive materials can’t save a bad process. First, remember that waterproof does not always mean vapor-proof. Even if your tile is perfectly sealed, moisture can migrate through a concrete slab and cause luxury vinyl to bubble or gap. Second, silence is golden—if your floor clicks or squeaks today, you likely missed a subfloor dip, and no amount of expensive padding will fix that ‘hollow’ sound later. Finally, the best way to handle shower repairs and when to fix vs. replace is to build it right the first time so you never have to ask that question. I used to think I could outsmart physics with better caulk, but physics always wins in the end. I’ve learned that taking twenty minutes to double-check the slope is better than spending twenty hours on a demolition later.
The Gear That Separates Amateurs from Professionals
If you are serious about your home, you need to stop guessing. I always keep my moisture meter handy, but for the actual finish work, there are specific tools that have never let me down. The TCNA Handbook is my go-to for every tile technicality—it is the industry standard for a reason and worth every penny. For trim, using the coping saw technique for flawless inside baseboard corners is the only way to get a joint that won’t open up during seasonal humidity shifts. And for anyone tackling a carpet project, please, for the sake of your knees and your wallet, ensure you have a power stretcher. It is the absolute difference between a floor that looks good for six months and one that looks flawless for twenty years.
Start Your Build with Confidence and Clear Thinking
It is easy to feel overwhelmed when you see a pile of lumber and a bucket of thinset. But remember, every expert started exactly where you are—staring at a messy subfloor and wondering if they were in over their heads. By following these expert flooring installation tips for 2025, you are already ahead of 90% of the DIYers out there. Your home is your biggest investment, and taking the extra hour to test moisture or slope a curb correctly is the best gift you can give your future self. Don’t be afraid to take your time; the quality is in the details that no one will ever see. Now, get out there and start a flooring installation project you can be proud of for decades. Have you ever discovered a hidden leak only after your bathroom floor started to feel soft? Let me know your renovation horror stories in the comments below!