

I’ll never forget the sinking feeling in my gut when I finished my first master bathroom remodel. I had spent a small fortune on beautiful, large-format porcelain tiles, and by the time I was wiping off the last bit of grout, I thought I was a genius. Then, the morning sun hit that floor at a low angle. My ‘perfect’ floor looked like a topographical map of the Andes. Every single tile had a slight edge sticking up, creating those dreaded ‘toe-stubbers’ we call lippage. It was heartbreaking, and honestly, a bit embarrassing. I’d followed the instructions on the bag, but I had missed the physics of the mortar bed entirely. Since then, I’ve learned that the difference between a pro-grade finish and a DIY disaster isn’t just about being careful; it’s about a specific technique I like to call the thinset-comb secret.
I am Done Stubbing My Toes on Bad Tile Jobs
We have all been there, or at least we fear being there—the moment you realize your new floor is a tripping hazard. When I started out, I made the classic rookie mistake of ‘swirling’ my trowel. I thought those pretty circles of mortar would provide better suction. I was wrong. Swirling actually traps air pockets, which prevents the tile from settling flat and leads to the very flooring installation mistakes to avoid for a seamless look that keep homeowners up at night. If you want a floor that feels like a single sheet of glass, you have to master the art of the comb. By combing the thinset in straight, parallel lines, you allow the air to escape as you set the tile, ensuring a much more even collapse of the mortar ridges. This is especially vital when you are working on an ultimate shower renovation guide project where water drainage depends on a perfectly sloped, flat surface. Have you ever finished a tiling project only to realize the shadows from your vanity lights make the floor look like a series of mini-steps? I want to hear about your most frustrating ‘lippage’ moments in the comments!
Is a specific trowel pattern really worth the extra effort?
You might be skeptical. After all, if the tile is stuck to the floor, does the pattern of the mud underneath really matter? According to the Tile Council of North America (TCNA), directional troweling is actually the industry standard because it provides the necessary coverage to prevent both lippage and tile cracking. In fact, improper troweling is a leading cause of bond failure. When you use the trowel notch secret for better tile adhesion, you aren’t just making it look pretty; you are ensuring that the tile has 100% contact with the mortar. This technique, combined with knowing how to stop tile lippage with this leveling system move, creates a foundation that is rock solid. I used to think I could ‘eye-ball’ the flatness, but the comb method takes the guesswork out of the equation. It turns a stressful guessing game into a predictable, repeatable process. Let’s get into the nitty-gritty of how you can start using this today.
[image_placeholder]
Flatten Your Subfloor Before You Touch a Trowel
Your tile is only as good as the ground it sits on. Think of your subfloor like the foundation of a house; if the foundation is slanted, the windows won’t open. When I was working on a kitchen remodel last summer, I thought I could compensate for a 1/4-inch dip in the plywood with extra mortar. I was wrong. The mortar shrunk as it cured, pulling the tile down and creating a valley that caught every crumb. Now, I never start without checking for flatness. If you find a low spot, you need to learn how to level a subfloor dip without removing the old subfloor to save yourself hours of frustration. For concrete slabs, I always recommend the self-leveler move for perfectly flat vinyl installs or tile projects alike. If the base isn’t flat, your ‘comb’ will be uneven from the start, and no amount of fancy footwork will save it.
Comb Straight Lines Like a Pro
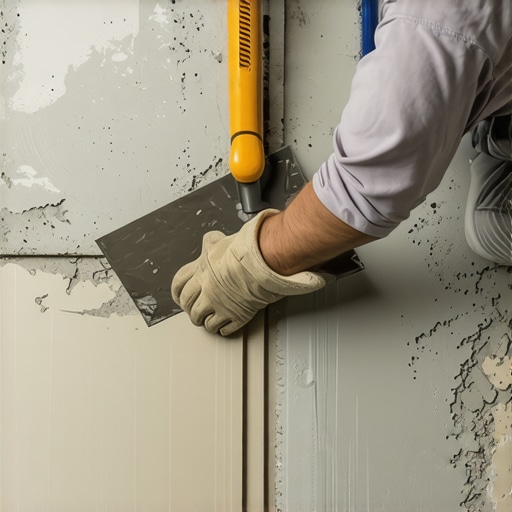
The secret is all in the ridges. When you spread your thinset, you must drag the trowel in one direction—straight lines only. Think of it like a plowed field. When you place a heavy tile onto these straight ridges, the air has a clear path to escape through the valleys. If you ‘swirl’ the mud, you create little air-trapping pockets. When you press the tile down, those pockets act like tiny balloons, pushing back and preventing the tile from seating fully. This is the foundation of the trowel notch secret for better tile adhesion. I remember a job where I switched to this method mid-way through, and the difference in how ‘grabby’ the tiles felt was instant. It felt like the tile was being sucked into the floor rather than just floating on top of it.
Don’t Guess Your Trowel Size
Size matters more than most DIYers realize. If you are working with ‘large format’ tiles (anything over 15 inches on one side), a standard 1/4-inch trowel won’t cut it. You need deeper ridges to ensure the mortar actually touches the back of the tile. This is non-negotiable for a professional finish. You should always follow the full bed mortar rule for large format shower tiles to prevent hollow spots that eventually crack. To verify your coverage, occasionally pull up a tile you just set. If the back isn’t fully covered in gray mud, you need a bigger notch or a heavier hand. It is better to waste a bit of mortar than to have a tile pop loose six months from now because of flooring installation mistakes to avoid for a seamless look that are easily corrected at the start.
Use Leveling Clips as Your Insurance Policy
Even with perfect troweling, tiles can ‘slump’ or shift as the thinset dries. This is where leveling systems come in. I used to think they were ‘cheating’ until I used them on a high-gloss marble floor. Those little plastic wedges act like a mechanical bridge, locking the edges of adjacent tiles into the same plane. You simply must stop tile lippage with this leveling system move if you want a floor that looks like it was installed by a robot. For vertical surfaces, I combine this with the laser level move for perfectly horizontal shower tiles to ensure that not only is the floor flat, but the walls are perfectly square. It takes a few extra minutes, but the peace of mind knowing you won’t stub your toe at 2 AM is worth every penny.
Why your custom shower floor might be a ticking time bomb
Let’s dig deeper into the stuff that separates a ‘good enough’ DIYer from a master craftsman. For example, most people today are obsessed with pre-sloped foam pans. Everyone says they are foolproof, but in my experience, they can actually limit you. If you are dealing with an irregular space, you need to master the dry pack secret for a perfectly sloped shower floor. A traditional mud bed allows you to manipulate the pitch for complex drainage, especially when integrating the linear drain secret for modern walk-in showers. The trap here is ‘feathering’ the mud too thin at the edges—that’s where the structure fails. Have you ever fallen into the trap of thinking a kit could solve a custom problem? Let me know in the comments!
Are you still relying on a knee kicker for your living room?
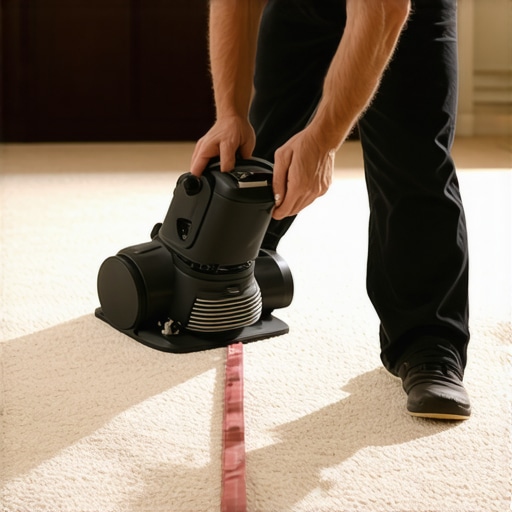
If you’re installing carpet and you aren’t using a power stretcher, you’re doing it wrong. It’s a bold claim, but the Carpet and Rug Institute (CRI) Standard 105 explicitly states that power stretching is required for all residential carpet installations. Most people think a knee kicker is enough to get the wrinkles out, but that’s the knee kicker mistake that ruins luxury carpets. Without the mechanical leverage of a power stretcher, the carpet will eventually relax and buckle. To truly unlock carpet install secrets for achieving flawless results, you must follow the power stretcher rule for large living room carpets. This ensures the tension is uniform across the entire subfloor, preventing those unsightly waves from appearing two years down the line.
Forget the level and follow the floor for better baseboards
Here is a nuance that drives perfectionists crazy: your level is sometimes your worst enemy. Most homeowners assume baseboards must be perfectly level. However, if your floor has a slight slope (which most do), a level baseboard will create a tapering gap that the human eye picks up instantly. It makes the floor look like it’s sinking. Instead, you need to understand why your baseboards look crooked on perfectly level floors and learn to scribe them to the floor’s actual profile. To get those corners to stay tight even when the walls aren’t square, I always use the back-cut secret for tight baseboard outside corners. This advanced carpentry trick allows the front edge of the miter to touch first, hiding any slight discrepancies in the wall angle. It’s these tiny, counter-intuitive adjustments that lead to step-by-step flooring installation from planning to perfect finish that actually looks professional.
Maintenance is where most DIY dreams go to die. You spend three weekends tiling a shower, and then three months later, the corners turn black with mildew. To avoid this, I live by the rule of sealing everything early. You must stop shower grout from staining with the pre-seal move before you even think about using that bathroom. If you have gone for a high-end look, learn how to seal a marble shower without changing the color to keep it looking pristine. For your hardwood and vinyl, forget those supermarket ‘shine’ sprays that build up a waxy, sticky residue. I strictly follow the NWFA (National Wood Flooring Association) guidelines, which suggest using only pH-neutral cleaners and never using a steam mop on wood or laminate. To protect your hard-earned finish, you should stop hardwood scratches with the felt pad routine on every single piece of furniture that touches the floor. If you already have minor damage, use the iron and towel trick for fixing carpet dents or similar wood compressions before they become permanent eyesores. 
How do I keep my home looking newly renovated for years?
It comes down to the specialized gear you use for daily upkeep. I always use the vacuum seal trick for cleaning dust out of floor grooves because standard sweeping just pushes grit into the seams. For carpets, if you see ripples appearing, it is a clear sign why your carpet is buckling only three years later—usually due to poor initial stretching or extreme swings in humidity. My professional advice? Invest in a digital hygrometer to monitor your home’s humidity; keeping it between 30% and 50% is the absolute secret to preventing hardwood gaps and baseboard separation. In the next few years, I predict we will see smart flooring sensors becoming standard in luxury builds to detect moisture behind baseboards before mold even starts. For now, I want you to try this today: go grab a pack of heavy-duty felt pads and replace the worn-out ones on your dining chairs. It is the cheapest insurance you can buy for a beautiful floor.I’ll never forget the sinking feeling in my gut when I finished my first master bathroom remodel. I had spent a small fortune on beautiful, large-format porcelain tiles, and by the time I was wiping off the last bit of grout, I thought I was a genius. Then, the morning sun hit that floor at a low angle. My ‘perfect’ floor looked like a topographical map of the Andes. Every single tile had a slight edge sticking up, creating those dreaded ‘toe-stubbers’ we call lippage. It was heartbreaking, and honestly, a bit embarrassing. I’d followed the instructions on the bag, but I had missed the physics of the mortar bed entirely. Since then, I’ve learned that the difference between a pro-grade finish and a DIY disaster isn’t just about being careful; it’s about a specific technique I like to call the thinset-comb secret.
I am Done Stubbing My Toes on Bad Tile Jobs
We have all been there, or at least we fear being there—the moment you realize your new floor is a tripping hazard. When I started out, I made the classic rookie mistake of ‘swirling’ my trowel. I thought those pretty circles of mortar would provide better suction. I was wrong. Swirling actually traps air pockets, which prevents the tile from settling flat and leads to the very flooring installation mistakes to avoid for a seamless look that keep homeowners up at night. If you want a floor that feels like a single sheet of glass, you have to master the art of the comb. By combing the thinset in straight, parallel lines, you allow the air to escape as you set the tile, ensuring a much more even collapse of the mortar ridges. This is especially vital when you are working on an ultimate shower renovation guide project where water drainage depends on a perfectly sloped, flat surface. Have you ever finished a tiling project only to realize the shadows from your vanity lights make the floor look like a series of mini-steps? I want to hear about your most frustrating ‘lippage’ moments in the comments!
Is a specific trowel pattern really worth the extra effort?
You might be skeptical. After all, if the tile is stuck to the floor, does the pattern of the mud underneath really matter? According to the Tile Council of North America (TCNA), directional troweling is actually the industry standard because it provides the necessary coverage to prevent both lippage and tile cracking. In fact, improper troweling is a leading cause of bond failure. When you use the trowel notch secret for better tile adhesion, you aren’t just making it look pretty; you are ensuring that the tile has 100% contact with the mortar. This technique, combined with knowing how to stop tile lippage with this leveling system move, creates a foundation that is rock solid. I used to think I could ‘eye-ball’ the flatness, but the comb method takes the guesswork out of the equation. It turns a stressful guessing game into a predictable, repeatable process. Let’s get into the nitty-gritty of how you can start using this today.
[image_placeholder]
Flatten Your Subfloor Before You Touch a Trowel
Your tile is only as good as the ground it sits on. Think of your subfloor like the foundation of a house; if the foundation is slanted, the windows won’t open. When I was working on a kitchen remodel last summer, I thought I could compensate for a 1/4-inch dip in the plywood with extra mortar. I was wrong. The mortar shrunk as it cured, pulling the tile down and creating a valley that caught every crumb. Now, I never start without checking for flatness. If you find a low spot, you need to learn how to level a subfloor dip without removing the old subfloor to save yourself hours of frustration. For concrete slabs, I always recommend the self-leveler move for perfectly flat vinyl installs or tile projects alike. If the base isn’t flat, your ‘comb’ will be uneven from the start, and no amount of fancy footwork will save it.
Comb Straight Lines Like a Pro
The secret is all in the ridges. When you spread your thinset, you must drag the trowel in one direction—straight lines only. Think of it like a plowed field. When you place a heavy tile onto these straight ridges, the air has a clear path to escape through the valleys. If you ‘swirl’ the mud, you create little air-trapping pockets. When you press the tile down, those pockets act like tiny balloons, pushing back and preventing the tile from seating fully. This is the foundation of the trowel notch secret for better tile adhesion. I remember a job where I switched to this method mid-way through, and the difference in how ‘grabby’ the tiles felt was instant. It felt like the tile was being sucked into the floor rather than just floating on top of it.
Don’t Guess Your Trowel Size
Size matters more than most DIYers realize. If you are working with ‘large format’ tiles (anything over 15 inches on one side), a standard 1/4-inch trowel won’t cut it. You need deeper ridges to ensure the mortar actually touches the back of the tile. This is non-negotiable for a professional finish. You should always follow the full bed mortar rule for large format shower tiles to prevent hollow spots that eventually crack. To verify your coverage, occasionally pull up a tile you just set. If the back isn’t fully covered in gray mud, you need a bigger notch or a heavier hand. It is better to waste a bit of mortar than to have a tile pop loose six months from now because of flooring installation mistakes to avoid for a seamless look that are easily corrected at the start.
Use Leveling Clips as Your Insurance Policy
Even with perfect troweling, tiles can ‘slump’ or shift as the thinset dries. This is where leveling systems come in. I used to think they were ‘cheating’ until I used them on a high-gloss marble floor. Those little plastic wedges act like a mechanical bridge, locking the edges of adjacent tiles into the same plane. You simply must stop tile lippage with this leveling system move if you want a floor that looks like it was installed by a robot. For vertical surfaces, I combine this with the laser level move for perfectly horizontal shower tiles to ensure that not only is the floor flat, but the walls are perfectly square. It takes a few extra minutes, but the peace of mind knowing you won’t stub your toe at 2 AM is worth every penny.
Why your custom shower floor might be a ticking time bomb
Let’s dig deeper into the stuff that separates a ‘good enough’ DIYer from a master craftsman. For example, most people today are obsessed with pre-sloped foam pans. Everyone says they are foolproof, but in my experience, they can actually limit you. If you are dealing with an irregular space, you need to master the dry pack secret for a perfectly sloped shower floor. A traditional mud bed allows you to manipulate the pitch for complex drainage, especially when integrating the linear drain secret for modern walk-in showers. The trap here is ‘feathering’ the mud too thin at the edges—that’s where the structure fails. Have you ever fallen into the trap of thinking a kit could solve a custom problem? Let me know in the comments!
Are you still relying on a knee kicker for your living room?
If you’re installing carpet and you aren’t using a power stretcher, you’re doing it wrong. It’s a bold claim, but the Carpet and Rug Institute (CRI) Standard 105 explicitly states that power stretching is required for all residential carpet installations. Most people think a knee kicker is enough to get the wrinkles out, but that’s the knee kicker mistake that ruins luxury carpets. Without the mechanical leverage of a power stretcher, the carpet will eventually relax and buckle. To truly unlock carpet install secrets for achieving flawless results, you must follow the power stretcher rule for large living room carpets. This ensures the tension is uniform across the entire subfloor, preventing those unsightly waves from appearing two years down the line.
Forget the level and follow the floor for better baseboards
Here is a nuance that drives perfectionists crazy: your level is sometimes your worst enemy. Most homeowners assume baseboards must be perfectly level. However, if your floor has a slight slope (which most do), a level baseboard will create a tapering gap that the human eye picks up instantly. It makes the floor look like it’s sinking. Instead, you need to understand why your baseboards look crooked on perfectly level floors and learn to scribe them to the floor’s actual profile. To get those corners to stay tight even when the walls aren’t square, I always use the back-cut secret for tight baseboard outside corners. This advanced carpentry trick allows the front edge of the miter to touch first, hiding any slight discrepancies in the wall angle. It’s these tiny, counter-intuitive adjustments that lead to step-by-step flooring installation from planning to perfect finish that actually looks professional.
Maintenance is where most DIY dreams go to die. You spend three weekends tiling a shower, and then three months later, the corners turn black with mildew. To avoid this, I live by the rule of sealing everything early. You must stop shower grout from staining with the pre-seal move before you even think about using that bathroom. If you have gone for a high-end look, learn how to seal a marble shower without changing the color to keep it looking pristine. For your hardwood and vinyl, forget those supermarket ‘shine’ sprays that build up a waxy, sticky residue. I strictly follow the NWFA (National Wood Flooring Association) guidelines, which suggest using only pH-neutral cleaners and never using a steam mop on wood or laminate. To protect your hard-earned finish, you should stop hardwood scratches with the felt pad routine on every single piece of furniture that touches the floor. If you already have minor damage, use the iron and towel trick for fixing carpet dents or similar wood compressions before they become permanent eyesores.
How do I keep my home looking newly renovated for years?
It comes down to the specialized gear you use for daily upkeep. I always use the vacuum seal trick for cleaning dust out of floor grooves because standard sweeping just pushes grit into the seams. For carpets, if you see ripples appearing, it is a clear sign why your carpet is buckling only three years later—usually due to poor initial stretching or extreme swings in humidity. My professional advice? Invest in a digital hygrometer to monitor your home’s humidity; keeping it between 30% and 50% is the absolute secret to preventing hardwood gaps and baseboard separation. In the next few years, I predict we will see smart flooring sensors becoming standard in luxury builds to detect moisture behind baseboards before mold even starts. For now, I want you to try this today: go grab a pack of heavy-duty felt pads and replace the worn-out ones on your dining chairs. It is the cheapest insurance you can buy for a beautiful floor.
The Expensive Lessons I Learned While Taming Custom Floors
Early in my career, I assumed that if a floor looked flat to the naked eye, it was ready for tile. I was wrong. I eventually realized that flooring installation mistakes to avoid for a seamless look usually start with ignoring the subfloor’s moisture content. Now, I never set a single plank without a moisture meter. Another ‘lightbulb’ moment was realizing that ‘good enough’ grout cleanup leaves a haze that is nearly impossible to remove later. Precision is the only way to achieve that high-end look.
I’ve also learned that the most expensive materials won’t save a poor installation. Whether you are following a step-by-step flooring installation from planning to perfect finish or just winging a small repair, the transition points are where pros separate themselves from amateurs. I used to rush the baseboards, but now I know that the inside corner cope for perfect baseboard installs is the only way to handle walls that aren’t square.
#IMAGE_PLACEHOLDER_E#
My Essential Gear for a Professional Finish
If you are serious about DIY, stop renting the cheap tools and invest in the ones that actually work. For any bedroom or living room project, mastering carpet install secrets for achieving flawless results starts with owning a proper power stretcher. I also never start a bathroom project without checking shower renovation ideas for modern designs to ensure my layout matches contemporary standards. My toolkit always includes a high-quality laser level and a set of heavy-duty leveling clips.
Take the Leap and Start Your Next Project Today
Flooring is one of the most rewarding home improvements you can tackle because it completely changes the energy of a room. Don’t let the fear of a few ‘toe-stubbers’ stop you from trying. With the right technique and a bit of patience, your next flooring installation can be the one you’re proud to show off to every guest. Ready to get started? Have you ever struggled with getting your tile rows perfectly straight, or did your carpet seams give you trouble? Let me know in the comments below!