

I remember the exact moment I realized I was doing it all wrong. I was kneeling on a cold subfloor, sweat dripping off my nose, staring at a massive gap in an outside corner that was supposed to be my masterpiece. I had spent forty bucks on a premium piece of trim and somehow, my perfect 45-degree miter looked like a botched jigsaw puzzle. I tried to squeeze it tight with my hands, but the moment I let go, it sprang back open, mocking me. That is the frustrating reality of trim work; the walls are rarely square, the drywall mud creates a hump at every corner, and your miter saw is only as smart as the person swinging the blade. According to the National Association of Home Builders, most square corners in modern residential construction can actually vary by up to two degrees, which is why your perfect geometry fails in the real world. That day, I ended up wasting three boards before I swallowed my pride and called a buddy who had been swinging a hammer since the eighties. He didn’t tell me to buy a new saw; he told me to change how I looked at the wood.
Today, I am going to share that specific lightbulb moment with you: the back-cut secret for tight baseboard outside corners. It is the single most effective way to get those surgical seams that look like they were carved from a single piece of wood. We are going to solve the mystery of why your miters open up and how to fix them without using a gallon of caulk. Whether you are dealing with baseboard styles that elevate your interior design or just standard builder-grade trim, this technique is your new best friend. If you have already struggled with sloppy joints, you might also want to check out how to fix baseboard gaps without replacing the trim, but let us focus on getting it right the first time.
Stop Blaming Your Miter Saw for Those Gaps
Most of us start a project by setting our saw to a crisp 45-degree angle. It seems logical. But houses are built by humans, not robots. Drywallers often build up extra layers of mud at the corners to hide the tape, creating a slight bulge. When you press a flat piece of baseboard against that bulge, it pushes the back of the board out, forcing the front of your miter to yawn open. Early in my DIY journey, I made the mistake of thinking I could just drive a 2-inch nail through the face to force the wood to behave. All I got for my trouble was a split board and a headache. You might even be using the 45-degree trick for perfect baseboard outside corners, but if you do not account for the wall’s imperfections, you are fighting a losing battle. The real secret is removing the material that is in the way—the hidden wood on the back side of the cut that is hitting the wall hump.
Is this just an extra step that wastes time?
You might be skeptical about adding more complexity to your cuts. I get it. When you are in the middle of a whole-house install, you just want to get the trim on the wall. But think about the time you spend later trying to smear wood filler into a gap that won’t stay closed. Have you ever spent an hour trying to get a single corner to sit flush, only to have it fail the moment you fire the nail gun? Tell me I am not the only one who has felt that defeat! By slightly over-cutting the angle on the hidden side—essentially using the back-bevel secret for seamless baseboard corners—you ensure that the very front edges of the wood meet first. This creates a pivot point at the most visible part of the joint. If the wall is particularly stubborn, I often combine this with the cardboard shim hack for flush baseboard miters to get that perfect, professional snap.
Tilt Your Blade Two Degrees to Save Your Sanity
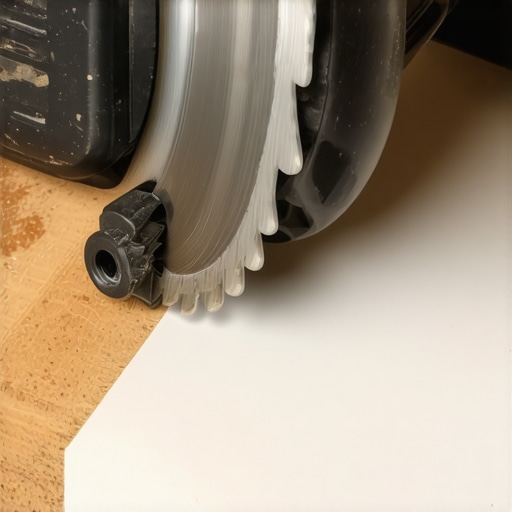
The biggest mistake I see DIYers make is treating a 90-degree corner like a mathematical law. In reality, you aren’t just cutting an angle; you are fitting two pieces of wood against a wall that is likely bulging with layers of paint and joint compound. To beat this, you need to introduce a back-bevel. Instead of just setting your miter saw to 45 degrees, you also need to tilt the head of the saw—the bevel—about 1 to 2 degrees. This ensures that the very tip of the miter touches first, while the back side of the board has a small hollow space. It is a bit like the the under-cut move for fitting flooring perfectly under door casings; you are removing material that nobody will ever see to make the visible part look perfect.
Shave the Back Side Not the Face
I remember a townhouse project back in 2018 where the drywallers had gone absolutely wild with the mud. Every outside corner felt like a soft curve. My 45-degree cuts were leaving half-inch gaps at the tip because the back of the baseboard was hitting the ‘hump’ of the wall. I spent twenty minutes fighting one corner before I grabbed my saw and tilted the bevel. By shaving off that extra 1/8th of an inch from the rear of the trim, the two pieces snapped together like a magnet. If you find that the wood is still resisting, you might need the scribing tool every diyerv needs for tight baseboards to really hug the wall’s contour. This technique is far more effective than trying to bridge the gap with caulk later, which eventually shrinks and cracks anyway.
Prevent Split Ends When Nailing Tight Miters
Once you have that back-cut dialed in and your dry-fit looks like a single piece of wood, the danger isn’t over. I have seen many people get the perfect fit only to have the wood shatter the moment they fire the nail gun. Because the back-cut makes the edge thinner, it is more delicate. To avoid a disaster, you should stop baseboard splitting with this simple pre-drilling tactic, especially near the very tip of the miter. I also like to apply a tiny bead of wood glue to the face of the miter before joining them. It acts as a permanent bond so that when the house settles, the joint stays tight. If you are dealing with old trim you’re trying to save, remember the pry bar secret for removing baseboards without damaging the drywall so you have a clean surface to work with. These small technical adjustments are what separate a ‘good enough’ weekend project from a professional-grade finish that avoids common flooring installation mistakes to avoid for a seamless look.
Test the Fit with Off-Cuts First
Before you commit to a 12-foot piece of expensive molding, grab two small scraps. Perform your 45-degree miter with a 2-degree back-bevel on both and hold them against the corner. This ‘test-and-trim’ method allows you to see exactly how the wall is behaving. If the top of the miter is tight but the bottom is open, you know you need to adjust your miter angle slightly beyond 45. It’s all about trial and error on the small pieces so the big pieces go on perfectly the first time.
We often obsess over that zero-clearance miter, but there is a nuance most DIY guides overlook: wood is a living material. A common contrarian view I hold is that a ‘perfectly’ tight joint in July might be a cracked disaster by January. According to the National Wood Flooring Association (NWFA), timber is hygroscopic, meaning it constantly gains or loses moisture to match its environment. If you jam your trim into a corner without a hair of breathing room, the natural expansion can force the miter to buckle or pull away from the wall. This is a classic case of flooring installation mistakes to avoid for a seamless look. You want it snug, but you cannot fight physics. Often, people see a tiny hair-line gap and panic, immediately reaching for caulk. But understanding why your baseboard caulk is cracking and the flex-fill fix can save you from a cycle of endless repairs.
Tight Joints Fail When Humidity Hits
The biggest trap for intermediate renovators is the ‘over-tight’ install. When you use the back-bevel method, you are creating a surgical point of contact. However, if you do not account for the subfloor’s movement, the baseboard can actually serve as a clamp that prevents your floor from expanding. This is especially dangerous with floating floors. I have seen beautiful projects ruined because the installer nailed the baseboard too tightly against the planks, leading to buckling in the center of the room. Always ensure you are following a step-by-step flooring installation from planning to perfect finish to ensure the floor remains truly floating. If the wood cannot move, it will find a way to move your trim instead.
Does your floor sound hollow despite a perfect cut?
You might have nailed the corners, but if you hear a ‘clack’ every time you walk near the wall, you likely fell victim to the subfloor-leveling myth. Many believe that the baseboard will hide a slightly uneven subfloor. In reality, the trim acts as a straightedge that highlights every dip. If the floor drops away under the trim, you get that annoying hollow sound. This is why addressing 4 subfloor prep mistakes that make new vinyl planks sound hollow is more important than the trim itself. If you are already past that stage, you might need to use how to fix baseboard gaps without replacing the trim by adding a shoe molding or quarter round to bridge that vertical gap without stressing the main miter.
Avoid the Trap of Pinning Your Floating Floors
The ‘Oops’ factor often happens right at the end. You have spent hours on your miters, and you fire your 18-gauge brad nailer with reckless abandon. If one of those nails passes through the trim and catches the edge of a laminate or LVP plank, you have pinned the floor. This prevents the entire floor system from shifting during temperature changes, leading to the dreaded ‘stair-step’ separation. Avoid the stair-step pattern mistake that weakens vinyl joints by keeping your nails high enough to hit the wall studs but low enough to be covered by the baseboard’s profile. This nuance is what separates a professional finish from a DIY job that starts gapping six months later. Have you ever fallen into this trap of making a joint too tight only to see it buckle later? Let me know in the comments.
Stop Your Carpet From Rippling With a Power Stretcher
If there is one tool that separates the weekend warriors from the pros who get called back for the high-end jobs, it is the power stretcher. I have lost count of how many times I have walked into a home only to see ‘waves’ in the middle of a two-year-old living room carpet. This happens because someone relied solely on a knee kicker. According to the Carpet and Rug Institute (CRI) Standard 105, power stretching is a mandatory requirement for residential carpet installations to ensure the backing is properly tensioned. Using the power stretcher rule for large living room carpets is the only way to guarantee that your floor won’t eventually require you to learn how to fix a bubbling carpet without calling a professional. It is an extra twenty minutes of setup, but it saves twenty years of frustration.
How do I maintain my flooring and trim over the long haul?
Maintenance is where most homeowners accidentally destroy their hard work. For instance, I see people using heavy steam mops on luxury vinyl plank all the time. The heat can actually compromise the wear layer or the adhesive in why vinyl flooring separates near vents and the glue fix. Instead, stick to a pH-neutral cleaner and use the vacuum seal trick for cleaning dust out of floor grooves to keep the debris from acting like sandpaper on your finish. If you have solid wood, you must watch your home’s humidity levels like a hawk. Failing to do so is exactly why your hardwood floors are crowning in the summer. A simple hygrometer in your hallway can tell you when to kick on the dehumidifier before your expensive planks start to cup or buckle.

Don’t Let Your Shower Silicone Turn Into a Mess
Moving from the living room to the bathroom, maintenance takes on a more ‘waterproof’ meaning. I’ve seen beautiful shower renovation ideas modern designs for a luxury feel ruined by a moldy, peeling bead of caulk. To keep your shower pristine, you need to master the blue tape secret for professional shower silicone lines every time. By creating a clean border before you even open the tube, you ensure the silicone stays exactly where it’s meant to be—sealing the joint, not smeared across the tile face. If you’re already seeing issues, remember that shower repairs when to fix vs replace for longevity is often a question of how deep the moisture has penetrated. In the future, I predict we will see more ‘smart’ shower pans with built-in moisture sensors that alert your phone the second a leak starts behind the wall, effectively ending the era of the ‘hidden rot’ nightmare.
Your Next Project Needs a Scribing Tool
Finally, if you want your baseboards to look like they grew out of the wall, put down the tape measure and pick up a compass or a dedicated scriber. Even with my back-cut trick, some walls are just too wavy for a straight board to follow. Using the scribing tool every diyer needs for tight baseboards allows you to trace the exact profile of the wall onto your wood. It’s the ultimate way to scale your skills from ‘DIY level’ to ‘bespoke craftsman.’ I challenge you on your next room: don’t just cut and nail. Take one corner and use the stay put glue strategy for carpet on stairs or the scribing method on your trim to see the difference it makes. You won’t go back to the old way once you see that seamless fit.
The One Thing My Mentor Taught Me About Chasing Perfection
Looking back at that cold subfloor moment, I realized the biggest hurdle wasn’t my saw—it was my expectation that a house should be mathematically perfect. After thousands of feet of trim, I’ve learned that the best installers aren’t the ones who measure best, but the ones who anticipate movement. Remember that wood is a living material; ignoring seasonal shifts is exactly why your hardwood floors are crowning in the summer or why your miters might yawn in the winter. Another lightbulb moment for me was realizing that glue is just as important as nails; a miter that is glued together behaves as one piece, even when the house settles. Finally, never underestimate the power of the ‘dry fit.’ If it doesn’t look perfect without nails, no amount of force from a brad nailer will fix it later. I always use stop baseboard splitting with this simple pre-drilling tactic to ensure my final fasteners don’t ruin a beautiful dry-fit.
My Must-Have Gear for a Pro-Level Finish
If you are serious about moving beyond the ‘DIY look,’ your toolbox needs a few specialized upgrades. I personally never start a trim job without the scribing tool every diyerv needs for tight baseboards; it is the only way to beat a wavy wall. For flooring, skip the rental-grade knee kickers and follow the power stretcher rule for large living room carpets to prevent ripples five years down the road. I also recommend a high-tooth-count miter blade (at least 80 teeth) to ensure those back-cuts are buttery smooth. These aren’t just tools; they are your insurance policy against wasted material and frustration. If you are planning a bigger project, check out these carpet install secrets achieving flawless results every time to round out your renovation skills.
Build a Home That Stands the Test of Time
You now have the technical secrets to tackle the trickiest corners in your home. From the surgical precision of a back-cut miter to the long-term stability of a properly stretched carpet, these details are what create a professional atmosphere. Whether you are diving into an upgrade your bathroom the ultimate shower renovation guide or simply finishing a hallway, take your time and trust the process. Using transform your home expert flooring installation tips for 2025 will ensure your work stays modern and durable. You’ve got the knowledge—now it’s time to go make that first cut. Have you ever had an outside corner that just refused to close no matter what you tried? Let me know in the comments below!