

I remember the day I finally had enough of the vibration. I was carrying a full tray of coffee—cream and sugar, just how my wife likes it—when my toddler decided to do a victory lap across the room. Every step he took sent a shudder through the floorboards. The coffee didn’t just ripple; it launched. By the time I reached the couch, the tray was a lake of caffeine and regret. That ‘springy’ feeling wasn’t a cool feature of an old house; it was a structural cry for help. If you’ve ever felt your china cabinet rattle when you walk by, you know exactly the sinking feeling I’m talking about. My first instinct was a total disaster. I spent an entire Saturday trying to stop hardwood squeaks with a drill and a handful of deck screws, thinking I could just cinch the floor down. I was wrong. I was treating the symptom, not the disease. The real culprit was hidden in the crawlspace, and no amount of surface-level screwing was going to fix a joist that was simply too thin for the job. Today, I’m going to share how you can identify exactly why your new floor is bouncing and the joist fix that actually works long-term.
Get Rid of That Unsettling Trampoline Feeling Underfoot
We often spend weeks obsessing over baseboard trends in 2025 or selecting the perfect plank, but the subfloor is where the magic (or the nightmare) happens. A bouncy floor occurs when your joists deflect—basically bending under weight—more than they should. This isn’t just about comfort, either. Excessive movement is one of the most common flooring installation mistakes to avoid because it eventually cracks grout and separates joints. According to the American Wood Council, floor stiffness is a factor of the wood species, the span length, and the spacing between those joists. If any of those are out of whack, you get a trampoline. I learned the hard way that jumping straight into a step-by-step flooring installation without checking the structural integrity of the joists is just asking for a rebuild in two years. [IMAGE_PLACEHOLDER]
Is This Fix Actually Worth the Extra Effort?
You might be skeptical. Crawling under the house to sister joists or install blocking sounds like a lot of sweat for something no one will ever see. But think of it this way: your floor is the foundation for every other upgrade in your home. If you want to dive into modern bathroom makeovers or heavy tile work, you cannot have a floor that bows like a diving board. Have you ever walked across your living room only to hear the plates in the kitchen rattle like a minor earthquake just hit? Let me know in the comments below—I want to know I’m not the only one who has dealt with a shaky foundation. Fixing it now saves your sanity and your future flooring investment.
Double Up Your Joists to Kill the Deflection
To fix the bounce, we have to address the span. Imagine a single thin ruler held at both ends; it bows easily in the middle under even light pressure. But if you glue and screw a second ruler to its side, the resistance to bending doesn’t just double—it triples. In the construction world, this is called sistering. You aren’t just adding wood; you’re increasing the moment of inertia. When I first tried this on my old farmhouse, I just slapped a 2×6 against a sagging 2×8. It was a total waste of time because the new board wasn’t actually bearing weight at the ends. To make this work, your sistered joist must sit directly on the sill plate or the load-bearing center beam. It has to transfer the load to the ground, not just hang off the old, weak board.
Why You Need a String Line Before You Start Nailing
Before you drive a single nail or even buy your lumber, run the string line test for perfectly level subfloors across the bottom of your joists. If you see a gap between the string and the wood, you’ve found a sag. You’ll need to use a hydraulic jack and a temporary post to slowly—and I mean very slowly—push that joist back to level. If you sister a new board to a sagging one without jacking it up first, you’re just reinforcing a curve. I once ignored this and ended up with a floor that was rock-solid but felt like walking on a gentle hill. It made my baseboard gaps look like Grand Canyons. 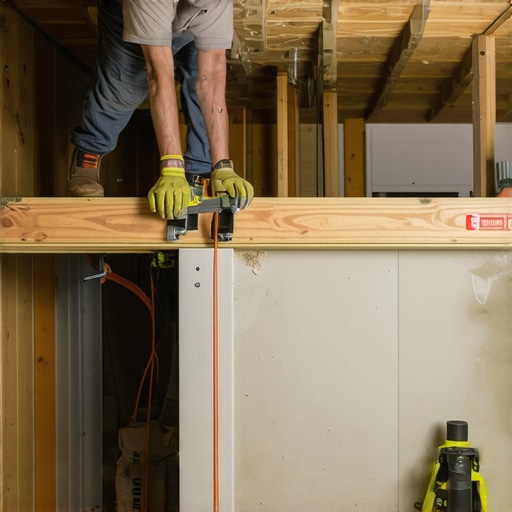
Lock Your Joists Together with Solid Blocking
If your joists are structurally sound but the floor still feels nervous—that annoying vibration when the dog runs by—you likely have a lateral stability problem. Think of your joists like the ribs of a ship. If they aren’t tied together, they can twist or lean under pressure. This is where solid blocking or bridging comes in. You cut short pieces of the same joist material and wedge them perpendicularly between the joists in a staggered line. This forces the joists to act as a single, rigid unit. Without this, you often run into 4 subfloor prep mistakes that make new vinyl planks sound hollow because the subfloor panels are flexing too much in the gaps between supports.
Avoid the Wet Lumber Trap
I learned a painful lesson about lumber quality during a rush job on my kitchen. I grabbed bright 2x10s from the local yard and didn’t bother with the moisture meter test every flooring pro uses. Three months later, as the wood dried out in the climate-controlled house, the lumber twisted. It actually pulled the subfloor down with it, causing my perfectly laid floor to develop a nasty lip. Now, I always let my structural lumber acclimate for at least a week inside the house. For the absolute strongest bond, I apply a thick bead of subfloor adhesive to the existing joist before clamping the sister board. It’s essentially the glue assist trick for wide plank hardwood floors but applied to your home’s skeleton. This prevents any wood-on-wood rubbing that leads to those phantom squeaks later on. If you’re doing a step-by-step flooring installation, this prep work is what separates a DIY job from a professional-grade renovation.
Most homeowners believe that once the tile is up and the grout is dry, the job is done. But here is the contrarian truth: tile and grout are not waterproof. They are aesthetic finishes that actually act like a filter, letting moisture pass through to whatever lies beneath. If you haven’t mastered why most DIY shower waterproofing fails at the drain, you are essentially building a slow-motion flood inside your walls. In my early days, I assumed a thick layer of mortar was enough of a barrier. I was wrong. The Tile Council of North America (TCNA) explicitly states in their handbook that the waterproofing layer must be continuous and integrated perfectly with the drain flange to prevent capillary action from wicking moisture into the subfloor.
The Critical Drain Mistake Most Pros Won’t Admit
One of the biggest ‘oops’ factors I see in bathroom renovations is the accidental clogging of weep holes. If you are using a traditional liner, those tiny holes in the drain assembly are designed to let moisture that seeps through the mud bed escape into the pipe. When you pack mortar too tightly around them without a gravel guard, that water gets trapped. Over time, it turns stagnant, leading to why your new shower smells like hardboiled eggs. It’s a nuance that separates a ten-year shower from a fifty-year shower. Have you ever noticed a weird musty smell in a bathroom that looks brand new? Let me know in the comments—I’ve found it’s almost always a drainage issue disguised as a cleaning problem.
Does Your Subfloor Deflection Meet the Standard for Large Format Tile?
If you’re upgrading to those beautiful, massive 24×48 porcelain slabs, your standard joist spacing might not be enough. Large tiles have zero tolerance for movement. While a floor might be structurally ‘safe,’ if it flexes even a millimeter more than the L/720 standard required for stone, your grout will crack and your tiles will tent. This is why the back-buttering secret for large-format shower tiles is non-negotiable; you need 100% coverage to ensure the tile acts as a monolithic unit with the floor. I always recommend the mud bed secret for rock-solid shower floors to create that perfectly unyielding base. 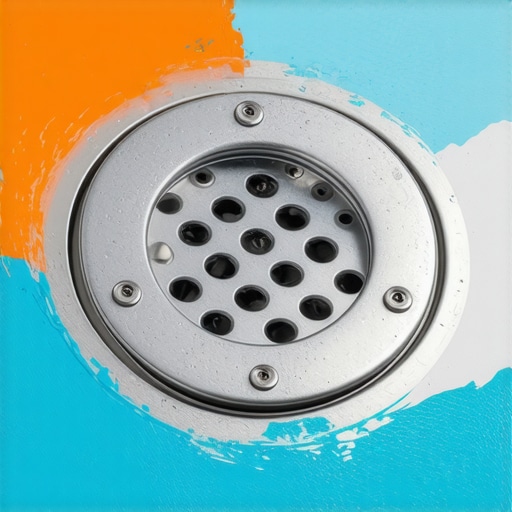
Stop Treating Baseboards Like an Afterthought
People often rush the trim because they are excited to be finished, but poor baseboard execution can ruin a high-end durable flooring installation. The most common trap is nailing only into the bottom plate of the wall. Because wood expands and contracts at different rates, a baseboard that isn’t secured to the wall studs will eventually pull away, leaving a gap that looks like a DIY disaster. I’ve found that using the back-bevel secret for inside baseboard corners is the only way to get a tight fit in houses where the walls aren’t perfectly square. If you’re dealing with transitions, don’t forget the best way to transition hardwood to a tiled shower to keep the expansion gaps functional yet invisible. It’s these small, technical wins that define flooring installation mistakes to avoid for a truly professional result.
Why I Never Trust a Tape Measure for Complex Baseboards
I used to think my eyes were good enough to eyeball a cut, but a house is a living thing that settles and shifts. When you’re trying to figure out how to install baseboards over uneven slate flooring, a standard measuring tape is actually your worst enemy. It gives you a straight-line dimension for a world that isn’t straight. Now, I swear by the scribing tool every diyer needs for tight baseboards. It allows me to transfer the exact undulations of a wavy floor or a bowed wall directly onto the wood. This is how you achieve that ‘built-in’ look where the trim seems to grow out of the floor rather than just sitting on top of it. If you’re perfectionist like me, pair this with the high build primer secret for smooth baseboard paint to hide any micro-imperfections in the wood grain before the final coat goes on.
Stop Relying on the Knee Kicker for Your Entire Living Room
In the world of soft flooring, there is a dangerous myth that a knee kicker is all you need for a tight fit. I’ve seen countless DIYers (and some lazy pros) walk away from a job that looks great on day one, only to see it look like a rolling sea by month twelve. The Carpet and Rug Institute (CRI) Standard 105 explicitly states that a power stretcher is mandatory for residential installations to prevent delamination and buckling. If you ignore this, you’re basically inviting why your carpet is wrinkling two years after install. I personally use a power stretcher to put the room under tension before I even think about the kicker move for tucking carpet into tight corners. It’s the difference between a floor that stays flat for a decade and one that needs a costly re-stretch in two years. Also, pay attention to your seams; using 5 carpet seaming errors that show up in bright daylight as a checklist will save you from that dreaded visible line across the room. 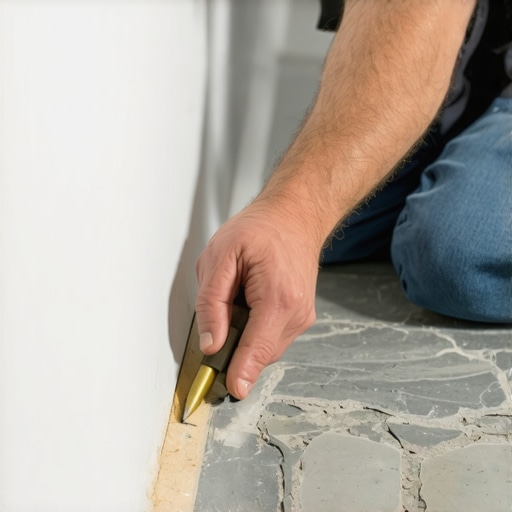
How do I maintain my flooring and trim over the long haul?
Maintenance isn’t just about a vacuum and a mop; it’s about monitoring the joints and seals. For your baseboards, expect the house to breathe with the seasons. Instead of fighting it with rigid wood filler that will just pop out, I use stop baseboard hairline cracks with this flexible filler to allow for that natural movement without losing the aesthetic. For your wet areas, you need to be proactive about shower repairs when to fix vs replace for longevity. Once a year, I do a ‘silicone audit’—checking the corners of the shower for any peeling. If it’s compromised, water will find its way to that joist-fix we worked so hard on earlier. Looking ahead, I predict we will see more ‘smart’ moisture sensors integrated into subfloors that can alert your phone to a leak before you even see a stain on the ceiling. For now, your best bet is a solid routine and your guide to durable flooring installation for a stylish home to ensure your materials are up to the task. I challenge you to go into your crawlspace or basement today and just look up—spotting one loose shim or a damp spot now is the ultimate pro move that saves you thousands later.
The Most Expensive Mistakes I Made So You Don’t Have To
I used to think that a little bit of floor bounce was just ‘character’ in an old house, but after seeing cracked tile, I realized it was a structural failure in the making. The biggest lightbulb moment for me was realizing that just because a joist isn’t broken doesn’t mean it’s doing its job. Stiffness and strength are two very different things. If you are prepping for a step-by-step flooring installation, don’t assume the wood beneath you is ready for the weight of modern materials. Another hard-earned lesson: never skip the moisture meter test every flooring pro uses. Wood is a sponge, and if you lock moisture into your joists with a new subfloor, they will eventually twist and pull your finish work apart. Finally, remember that waterproofing is an ecosystem; one tiny gap in the triple point seal for leak proof shower corners can render weeks of hard work useless by slowly rotting the very joists you just reinforced.
The Gear That Separates Amateurs From Pros
Over the years, I’ve learned that the right tool doesn’t just make the job easier; it makes the results permanent. For baseboards, I stopped guessing and started relying on the scribing tool every diyer needs for tight baseboards to handle those wavy walls that every house seems to have. When it comes to carpet, I’ve seen far too many people skip the power stretcher, but that is exactly why your carpet is wrinkling two years after install. [IMAGE_PLACEHOLDER_E]
How to Ensure Your House Stays Silent for Decades
At the end of the day, a successful project is one you can walk across without a second thought. Investing time in your home’s skeleton—the joists, the blocking, and the moisture barriers—is the ultimate pro move. It turns a simple cosmetic update into a legacy renovation. Your flooring installation is only as good as the foundation it rests on, so take the extra day to double those joists or level that subfloor. Your future self will thank you every time you walk across a silent, rock-solid room.
Have you ever found a surprising structural ‘surprise’ under your old flooring or dealt with a floor that felt more like a trampoline? Let me know in the comments below—I’d love to hear your survival stories!