

I will never forget the sound of my first major mistake. It wasn’t a crash, but a slow, agonizing groan that happened every time I stepped into my newly installed cast iron bathtub. I had spent days hauling that three-hundred-pound beast up a flight of stairs, bruising my shins and nearly losing a toe in the process. I thought the hard part was over once the tub was in the room. I simply leveled the feet, hooked up the drain, and called it a day. Two weeks later, the ‘ghost creaks’ started. Every time the tub filled with water, it settled just a fraction of an inch, putting immense pressure on the plumbing and making the whole floor feel unstable. I realized too late that I had ignored the golden rule of heavy fixtures: the mortar bed. If you have ever felt your bathtub shift or heard it protest under your weight, you know exactly why we need to talk about this today. I’m going to show you how to create a foundation so solid it feels like your tub was carved directly out of the house’s bedrock.
Make Your Cast Iron Tub Feel Like Part of the Foundation
The secret to a quiet, high-end bathroom isn’t just the tile or the fixtures; it is what lies hidden beneath the surface. When you are dealing with the sheer mass of cast iron, you aren’t just installing a basin; you are installing a structural element. Without a proper mortar bed, that weight is concentrated on tiny points—the feet or the thin edges of the apron. This creates ‘point loading’ that can actually crack your subfloor or lead to the exact same issues homeowners face when they realize why your shower pan is sinking due to poor support. In my early DIY days, I thought a thick piece of plywood was enough. I was wrong. I ended up with a tub that rocked like a boat in a storm. Using a mortar bed ensures that the entire weight of the tub, the water, and the person inside is distributed evenly across the floor joists. It is a critical step in any ultimate shower renovation where longevity is the goal. I’ve found that using the mud bed secret usually reserved for shower floors is the only way to get that ‘rock-solid’ feeling. Have you ever stepped into a tub and felt it move just enough to make your heart skip a beat? Let me know in the comments if that ‘sinking’ feeling is what brought you here today.
Does This Extra Mud Make the Floor Too Heavy?
This is the number one question I get from neighbors worried about their older homes. It is a valid fear. You’re adding a hundred pounds of wet mortar on top of an already heavy tub. However, the reality is quite the opposite. According to the Kohler Installation Guide for Cast Iron Baths, a properly spread mortar bed actually protects the floor by preventing the localized deflection that causes wood to fatigue over time. You aren’t just adding weight; you are adding rigidity. Think of it like a snowshoe—it spreads the load so you don’t sink. To get this right, many pros use the cardboard trick for leveling to keep the mortar from sticking to the tub while it sets, ensuring a perfect custom-molded fit. Taking this extra step is what separates a basic utility room from creating a spa-like shower experience that lasts for decades. Now, let’s get into the nitty-gritty of the mix and the method.
Get the Alignment Right Before the Mud Goes Down
Before you even think about opening a bag of cement, you need to perform a dry fit. I cannot stress this enough. I once skipped this step, thinking the plumbing was ‘close enough,’ only to find out the drain assembly hit a joist after I had already spread fifty pounds of wet mortar. It was a nightmare. You must set the tub in place, check your clearances, and ensure the drain lines up perfectly. This is where you apply the dry-fit rule for no-mistake shower drain alignment. Mark the exact perimeter of the tub on the subfloor with a heavy carpenter’s pencil. Once you have your outline, remove the tub. This is also the time to check your subfloor for any major issues, as flooring installation mistakes to avoid for a seamless look often start with an unlevel or weak base. If the floor bounces now, it will definitely bounce under 400 pounds of iron and water.
Mix Your Mortar for Support Not Soup
The consistency of your mortar is the difference between a rock-solid base and a messy failure. You aren’t looking for a pourable slurry; you want a ‘dry-pack’ consistency. It should feel like damp sand that holds its shape when you squeeze it in your fist. I use a standard 4-to-1 ratio of sharp sand to Portland cement, which is essentially the sand mix secret for a level shower curb repurposed for your tub. 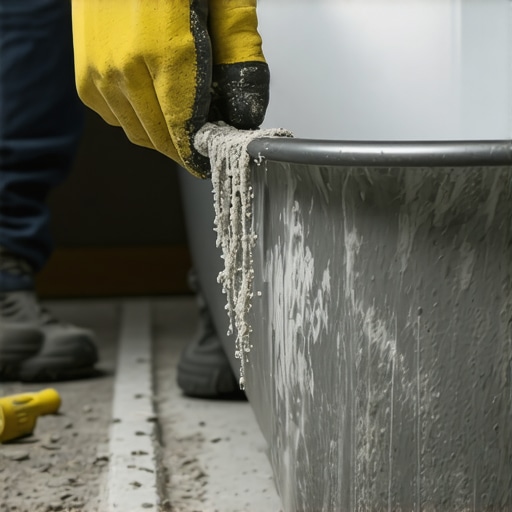 I remember my third tub install where I made the mix way too wet. I dropped the tub, and the mortar just oozed out the sides like a crushed jelly donut, providing zero actual support. Now, I keep it lean and stiff. This ensures the mortar stays where I put it and supports the tub’s weight immediately without sagging.
The Strategic Mound Technique That Actually Works
Instead of spreading the mortar flat like you are tiling a floor, you want to create several ‘mounds’ or thick ridges within your traced perimeter. Focus these mounds where the tub’s floor will actually make contact. By creating peaks, you allow the weight of the tub to compress the mortar into a custom-fitted cradle. This is the same principle used in the mud bed secret for rock-solid shower floors. To prevent the mortar from bonding permanently to the tub (which makes future repairs impossible), lay a sheet of 6-mil plastic or a layer of roofing felt over the mounds. This creates a barrier while still allowing the mortar to mold to every curve of the iron. If you find the tub is still slightly uneven, you can use the cardboard trick for leveling to fine-tune the height before the mortar begins to hydrate and harden.
Drop the Tub and Check Your Work
With your mounds prepped and your plastic barrier in place, it is time for the heavy lift. Lower the tub straight down—no sliding, or you’ll ruin the mortar mounds. Once it’s seated, get your long level out. Check the length and the width. You want the tub to be perfectly level so the water drains toward the overflow correctly. Stand inside the tub. You should feel absolutely zero movement. If you hear a crunch or feel a slight shift, you likely have a void. Professionals know that learning how to avoid hollow spots under your new tile starts with this very foundation. A solid tub doesn’t just feel better; it prevents the seal from breaking, which is why why your shower pan is sinking is such a common complaint when these steps are ignored. Let the mortar cure for at least 24 hours before you even think about connecting the final plumbing or tiling the walls. Patience here is what guarantees a ultimate shower renovation success story.Once that tub is set and the foundation is rock-solid, most people rush to the finish line, but this is where the most ‘invisible’ errors occur. We need to talk about the relationship between your walls and your floor. A common myth is that baseboards should be smashed tight against the flooring to create a perfect seal. In reality, that is a recipe for disaster. If you pin a floating floor down with heavy trim, you are essentially creating a pressure cooker. When the humidity changes, that floor wants to expand, but it can’t. This is exactly why your vinyl plank floor is buckling at the windows or in the center of the room. Let’s dig deeper into the mechanics of trim.
Can Your Baseboards Actually Destroy Your Subfloor?
The short answer is yes. When you nail trim too low, you risk hitting the floor itself or pinning it so tightly that the natural movement of the house causes the baseboards to pull away from the wall. I always recommend using the penny gap rule for installing laminate near drywall, and the same logic applies to your baseboards. The National Wood Flooring Association (NWFA) emphasizes that wood and many synthetics are hygroscopic, meaning they expand and contract with the air. If you don’t respect that space, your floor will ‘peak’ at the joints. 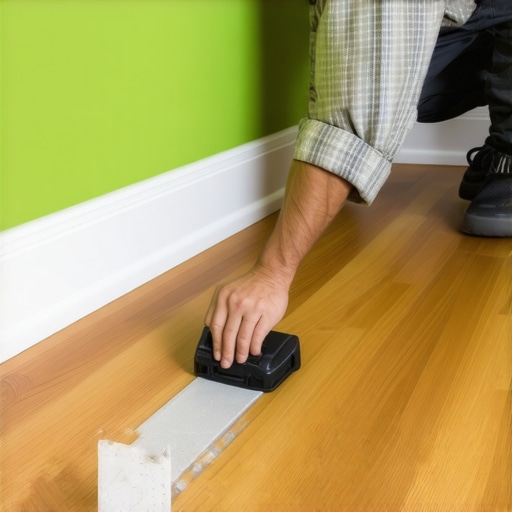
Stop Pinning Your Floor to the Bottom Plate
One mistake I see even seasoned installers make is driving nails straight down into the floor joists or the bottom plate at an angle that catches the flooring. You should never nail baseboards into the bottom plate only because it doesn’t provide enough vertical stability and often traps the flooring material. Instead, aim for the studs. To get those corners to look seamless without forcing them, I use the back-bevel secret for inside baseboard corners. It allows the visible edge to touch perfectly while leaving room for the walls to be slightly out of square.
The Subtle Art of Seamless Floor Transitions
Many DIYers treat the transition between the bathroom tile and the hallway carpet as an afterthought. This is where flooring installation mistakes to avoid for a seamless look truly manifest. If you don’t leave enough room for a proper transition strip, you’ll end up with frayed carpet or cracked tile edges. Have you ever fallen into this trap where your trim looked great on day one but started popping off a month later? Let me know in the comments. We’ve all been there, and usually, it’s because we tried to fight the house’s natural movement instead of working with it.
To keep everything moving in the right direction long after the tools are put away, you have to invest in the ‘invisible’ side of the job: precision measurement and proactive maintenance. I’ve seen beautiful homes fall apart in three years because the owner skipped a forty-dollar tool during the install. If you want your bathroom and hallways to survive the changing seasons, you need to stop guessing and start measuring.
The One Tool That Actually Prevents Floor Failure
If you ask me what the single most important tool in my kit is, it isn’t the hammer or the saw—it’s the moisture meter. Before I lay a single plank, I perform the moisture meter test every flooring pro uses. Wood and even some high-end vinyls are sensitive to the humidity in your subfloor. If you trap moisture beneath your new floor, it will eventually push its way out, causing peaks and valleys that no amount of heavy furniture can flatten. This is especially true after a ultimate shower renovation where the humidity levels in the room are naturally higher. I personally use a pinless meter because it doesn’t mar the surface of my expensive materials, giving me peace of mind that the environment is stable enough for a permanent install.
How do I keep my shower and floors looking brand new for years?
Maintenance isn’t just about cleaning; it’s about inspecting the critical junctions of your home. For your shower, this means keeping an eye on the grout and silicone. According to the Tile Council of North America (TCNA) Handbook, cementitious grout should be sealed at least every six months to a year in high-moisture environments to prevent water from wicking into the substrate. If you notice the edges of your trim pulling away, it’s likely why your baseboard caulk is cracking. Don’t just layer more caulk over the old stuff. Remove the dried-out bead and use a high-flexibility acrylic with silicone to allow for that natural house movement we discussed earlier. In the world of carpet install secrets, longevity comes down to vacuuming with the right pile height setting and addressing wrinkles the moment they appear by understanding the knee kicker mistake that ruins carpet tension.

Stop Guessing and Start Scribing for Better Trim
One of the hardest things for DIYers to master is the wavy wall. No wall is perfectly straight, and if you try to force a straight baseboard against a curved wall, you’ll end up with massive gaps. This is why the scribing tool every diy tool every diyer needs for tight baseboards is a non-negotiable for me. It allows you to trace the exact profile of your wall onto the wood, so you can plane it down for a hand-in-glove fit. This level of detail is what separates a DIY project from expert flooring installation tips for 2025. When you combine this with the back-bevel secret for inside baseboard corners, your trim will stay tight even as the house settles.
Looking toward the future, I predict we are going to see a massive shift toward ‘smart’ subfloors equipped with leak-detection sensors built directly into the underlayment. Until then, we rely on our craftsmanship and the right prep work. Don’t let your hard work go to waste by rushing the final 10%. My challenge to you: Before your next room transition, grab a moisture meter and verify your subfloor levels—it is the only way to guarantee your floor stays as quiet as the day you installed it.
The Lessons I Learned the Hard Way About House Movement
Over the years, I’ve realized that a house isn’t a static object; it’s more like a living thing that breathes with the seasons. If you try to fight its natural expansion and contraction, you will lose every single time. My biggest lightbulb moment came when I stopped trying to make things perfectly tight and started giving them room to move. For instance, using the back-bevel secret for seamless baseboard corners was a game-changer for me because it allowed for a perfect look without pinning the wood against a shifting wall. I also learned that if a floor feels soft, it’s never just the surface material; usually, it’s why your new floor is bouncing and the joist fix that needs your attention. Don’t just cover up a problem—solve the structural root first to ensure your hard work lasts for decades.
The Gear That Saves My Sanity on Every Job
I don’t believe in buying every gadget on the shelf, but there are three things I never start a project without. First, a high-quality 4-foot spirit level—because eyeing it is how my first tub ended up slanted and draining poorly. Second, I always keep a specific moisture meter on hand to perform the moisture meter test every flooring pro uses. It’s the only way to be certain that the subfloor is ready for a permanent install without risking future buckling. Finally, I’ve switched entirely to high-flexibility fillers for my trim work to stop baseboard hairline cracks with this flexible filler. #IMAGE_PLACE_HOLDER_E# These tools aren’t just about speed; they are about building something that looks as good in ten years as it does on day one.
Your Foundation for a Lifetime of DIY Success
Building a home you’re proud of isn’t about being perfect from the start; it’s about the care you put into the parts no one will ever see. Whether you are tackling a cast iron tub or a complex expert flooring installation, remember that the prep work is your greatest ally. Take your time, trust your measurements, and don’t be afraid to redo a step if it doesn’t feel right. You aren’t just fixing a room; you are mastering a craft and creating a legacy of quality in your own home. Have you ever had a ghost creak in your bathroom that drove you crazy before you realized it was a support issue? Let me know your DIY horror stories in the comments below!