

I’ll never forget the morning I realized I’d sabotaged my own home renovation. I had just finished laying down a gorgeous wide-plank oak in the dining room, but where it met the original maple in the kitchen, I’d taken the easy way out. I’d screwed down one of those generic, bulky T-moldings. It looked like a giant band-aid. Every time I walked over it, that slight click-clack sound reminded me of my laziness. It wasn’t just an eyesore; it was a trip hazard that broke the visual harmony I’d worked so hard to create during the flooring installation. Today, I’m going to show you how to ditch those metal strips and create a transition that actually looks like it belongs there. We are going to move past the flooring installation mistakes that scream amateur and finally get that high-end, continuous look you see in magazines. [image_placeholder] Have you ever spent a fortune on wood only to have a five-dollar strip of plastic ruin the entire vibe?
Stop Letting Ugly Seams Ruin Your Floor Flow
When I first started out, I made the mistake of thinking transitions were just meant to cover gaps. I ignored the spacer block rule and ended up with a seam so wide I could have lost a remote in it. Professional installers know that the secret to hiding a strip isn’t just about the strip itself—it’s about the preparation of the two meeting surfaces. According to the National Wood Flooring Association, wood floors can expand and contract up to 1/16th of an inch depending on local humidity levels, which is why most people default to bulky strips. But we can do better. We’ll look at how to use flush reducers and custom-stained wood splines to bridge the gap without the mountain in the middle of your doorway.
Is a perfectly flush transition really worth the extra elbow grease?
You might be wondering if it’s simpler to just live with the bump. But think about your cleaning routine. Dirt and pet hair love those little crevices under a standard T-molding. By creating a seamless transition, you’re not just helping your eyes; you’re making your home easier to maintain. Have you ever tried to sweep a floor only to have the dust pile up against a metal strip? It’s infuriating. We’re going to solve that today by looking at advanced techniques like the glue-assist for those tricky border planks to ensure everything stays rock solid for years to come.
Ditch the T-Molding for a Custom Wood Spline
To get that high-end look, you need to think of your floor as a single piece of furniture rather than a collection of separate rooms. Instead of a bulky, store-bought cover-up, use a custom-made spline. This is essentially a thin strip of wood that fits precisely into the grooves of both meeting floors. It acts like a zipper for your home, pulling two distinct surfaces into one cohesive unit. When I worked on a century-old Victorian, the transition from the foyer to the parlor was a disaster of mismatched heights. I used the glue-assist trick for wide plank hardwood floors to lock the boards in place near the seam, then crafted a spline that bridged the two. The result was so smooth you could slide a credit card across it without a hitch. If you are moving from a hallway into a bathroom, check out the best way to transition hardwood to a tiled shower to ensure moisture doesn’t ruin your hard work. 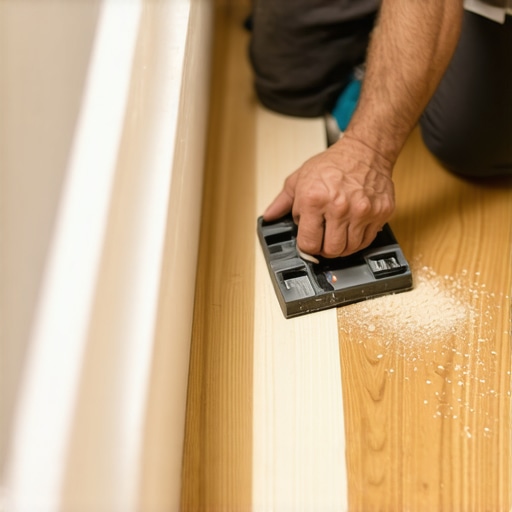
How to Bridge the Gap Between Different Floor Heights
Not every floor is level, and that’s where most DIYers panic. If your tile is higher than your hardwood, do not just slope it with a cheap piece of plastic. You can create a ‘flush reducer.’ This involves back-planing a piece of matching hardwood so it sits on the subfloor but overlaps the higher surface at a gentle, almost invisible angle. I once spent four hours hand-sanding a reducer for a client who was obsessed with her robot vacuum getting stuck. It felt like overkill until I saw the vacuum glide over it without a single bump. To keep things tight during this process, I always rely on the dead blow hammer secret for flat floor seams. It gives you the force you need to seat the transition without marring the finish of your expensive planks.
The Secret to Undercutting Your Way to a Professional Look
One of the biggest giveaways of an amateur job is when the flooring is cut around the door casing instead of under it. It looks sloppy and leaves gaps that no amount of caulk can truly fix. You need to use the under-cut move for fitting flooring perfectly under door casings. Take a scrap piece of your new flooring, lay it against the casing, and use a pull saw to cut a slot. This allows the floor to slide right underneath, creating a clean, professional edge that looks like the house was built around the floor. While you are at it, do not forget the spacer block rule for consistent gaps around the rest of the perimeter. This ensures that while your transitions are tight, your floor still has room to breathe as the seasons change. If you are also refreshing the trim, using the cardboard shim hack for flush baseboard miters will make your new transitions look even more intentional and high-end.Let’s dig deeper into the mechanics of why these transitions often fail. Most homeowners assume that if they have a knee kicker, they’re ready for a DIY carpet project. But here’s the cold, hard truth: the knee kicker is responsible for more failed installs than almost any other tool. While it’s great for nudging a corner, relying on it for the main stretch is a massive mistake. In my experience, a power stretcher isn’t optional equipment—it’s the only way to prevent those ugly ripples from appearing six months down the line. The Carpet and Rug Institute (CRI) 104 standard actually mandates power stretching for all residential installations to ensure the longevity of the carpet backing. If your installer doesn’t bring one in, you’ll likely end up searching for why your carpet is wrinkling two years after install within the first season. Beyond the tools, you need to know the carpet install secrets that professionals use to hide seams in high-traffic areas.
Stop Relying on the Knee Kicker Alone
Many people underestimate the importance of how trim interacts with the floor. Everyone says to nail into the studs, but if you only hit the bottom plate, you’re asking for trouble. You should never nail baseboards into the bottom plate only because the drywall often tapers at the floor, creating a pivot point that causes the trim to pull away over time. This leads to gaps that even the caulk and dab method for perfect baseboard joints can’t permanently fix.
How do you handle the tension when a carpet seam meets a doorway?
This is a sophisticated challenge because the doorway acts as a fulcrum for the carpet’s tension. You can’t just tuck it and hope for the best. You need to use the tension-first rule for stretching carpet into a doorway to ensure the seam doesn’t pull apart under the stress of foot traffic. Without this, the carpet will eventually pull away from the transition strip, leaving the backing exposed and looking like a frayed mess. 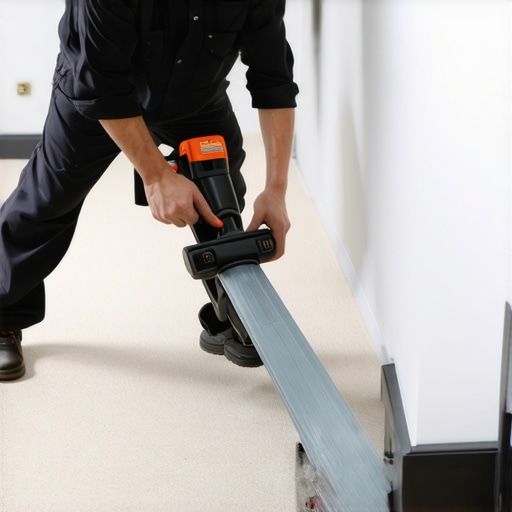
Why Thinset Coverage Is the Unsung Hero of Your Shower
When it comes to wet areas, the nuance is often invisible until it’s too late. Many believe that ‘enough’ glue is all you need for tile. However, learning how to avoid hollow spots under your new tile isn’t just about aesthetics; it’s about structural integrity. In a shower, a hollow spot is a reservoir for moisture and a prime location for tile to crack. You have to stop shower floor tiles from popping with the proper thinset coverage by using the correct trowel notch size and back-buttering larger tiles to ensure 95% coverage in wet environments. Finally, don’t overlook the foundation. If you’re working on a concrete slab, the concrete moisture test that saves your vinyl floor is non-negotiable. High pH and moisture levels in concrete will emulsify adhesives and buckle your beautiful new floor within months. Have you ever fallen into this trap? Let me know in the comments.One thing I’ve learned after years of getting my hands dirty is that the job isn’t over when the last plank clicks into place. It’s about the long game. To ensure that your hard work survives the first humid summer or a houseful of guests, you need to rely on more than just visual checks. This is where the moisture meter test every flooring pro uses becomes your best friend. I personally use a pinless meter because it doesn’t mar the finish of my expensive oak, and it tells me exactly if the subfloor is ready to accept the adhesive or if we’re headed for a buckling disaster. Without this tool, you’re just guessing, and in the world of flooring installation, guessing is an expensive hobby.
Why I never step onto a job site without my moisture meter
Moisture is the invisible enemy of every home renovation. According to the IICRC S100 standard for professional maintenance of textile floor coverings, even carpets are affected by the ambient environment, but for wood and LVP, it is the difference between a floor that lasts thirty years and one that fails in three. If you’re tackling a bathroom, you need to be even more vigilant. I always recommend shower repairs when to fix vs replace for longevity as a guide to determine if your foundation is actually sound enough for new tile. If the substrate is damp, no amount of expensive tile will save you.
How to stop your carpet from becoming a wavy mess in three years
Maintenance starts with the tools you use on day one. If you’re finishing up a bedroom, don’t just rely on your hands. You need the kicker move for tucking carpet into tight corners to get that crisp, professional edge. But remember, the kicker is for the perimeter; the power stretcher is for the room. If you skip the stretcher, those ripples are inevitable. If you do run into a snag and find a gap at the door, check out how to fix a carpet seam that was cut too short instead of trying to stretch it past its limit.
How do I keep my new shower and floors looking showroom-fresh for a decade?
The secret to longevity isn’t a magic cleaner; it’s the integrity of the seals. For showers, that means refreshing your silicone once it shows signs of wear. I always use the blue tape secret for professional shower silicone lines every time to ensure the new bead looks perfect and creates a watertight barrier. For your floors, keeping the grit off the surface is key. As we look toward baseboard trends in 2025, we’re seeing a shift toward more integrated, easy-to-clean profiles that don’t trap dust. [image_placeholder] I predict that within the next few years, we will see a massive rise in hydrophobic grout and self-healing wood finishes that make our current maintenance routines look like the Stone Age. For now, my best advice is to try the ‘blue tape’ trick on your next silicone project—it’s a small step that makes a massive difference in how your bathroom ages. Have you ever tried a professional-grade moisture meter, or are you still relying on the ‘touch and pray’ method?
You have worked hard to get your home to this stage, and it is the final details that will determine if the project looks like a weekend hack or a professional masterpiece. I have spent years on my knees in hallways and bathrooms, and I want to share the final pieces of the puzzle that often get overlooked in the rush to finish.
Hard-Earned Lessons from a Lifetime of Dusty Knees
One of the most profound shifts in my work happened when I stopped viewing the floor as a static object. Wood and even tile move. The real secret to a transition that lasts is allowing for that movement while keeping the aesthetics tight. I used to panic at the sight of a 1/16th inch gap, but now I know that breathing room is what prevents your planks from peaking in July. Another lightbulb moment was realizing that your eyes don’t just see the floor; they see the shadows. If your trim is tight, the whole room feels expensive. I never start a finishing job without a scribing tool every DIYer needs for tight baseboards because walls are never as straight as we want them to be. Finally, remember that lighting is your harshest critic. Always check your seams with a flashlight held low to the floor; if it looks good under a spotlight, it will look flawless in natural light.
My Personal Shortlist of Non-Negotiable Tools
If you want to move from amateur to expert, you have to stop fighting your tools. Here is what I always keep in my kit:
- The Pinless Moisture Meter: As we discussed, the moisture meter test every flooring pro uses is the only way to be certain your subfloor is ready for action.
- A 2-lb Dead Blow Hammer: This gives you the force to seat a plank without the rebound or the risk of marring the surface.
- Professional Grade Silicone: Do not settle for the cheap stuff in the shower. Combine it with the blue tape secret for professional shower silicone lines every time to get those crisp, watertight beads that define a luxury bathroom.
- A Reference Guide for Trim: Before you nail anything down, consult a guide on how to choose the perfect baseboards for your homes style to ensure your finish matches the architecture of the space.
[image_placeholder]
Your Vision is Only One Weekend Away
The transition from a construction zone to a finished home is an emotional journey. It is easy to get burnt out right at the finish line, but these small details—the flush transitions, the perfectly caulked baseboards, and the properly stretched carpet—are what you will appreciate every single day. Whether you are starting a fresh flooring installation or just refreshing a guest bath, take it one step at a time and do not be afraid to redo a small section if it doesn’t meet your standards. You are building something that lasts, so give it the attention it deserves. Have you ever felt stuck on that one tricky transition between the hallway and the bathroom?