

I’ll never forget the sound of my wife’s voice calling from the bathroom, “Hey, why is there a lake in the corner of the shower?” I had just finished what I thought was a masterpiece of a renovation. The tiles were straight, the grout was clean, but I had committed one of the most common flooring installation mistakes to avoid: I didn’t get the slope right. I had used a sloppy, wet mortar mix thinking it would be easier to spread. Instead, it slumped under its own weight, leaving me with a flat spot that collected hair and soap scum like a magnet. That was the day I realized that if I wanted a professional result, I had to stop acting like an amateur and learn the “dry-pack” method. Today, I’m going to share exactly how this old-school technique can save your bathroom from drainage disasters.
Forget the Wet Stuff and Embrace the Damp Sand
Most people think mortar should look like peanut butter. For a shower floor, that’s a recipe for disaster. You want “dry-pack”—a mixture of sand and cement that is only as damp as a beach castle. It’s the only way to get a rock-solid, perfectly pitched floor that won’t shrink or sag as it cures. When I first tried it, I was terrified it wouldn’t bond, but once I saw how easily I could screed it to a perfect 1/4-inch-per-foot fall, I was hooked. It’s the foundation of any modern shower design, ensuring that water actually goes where it’s supposed to. If you’ve ever wondered why your shower pan is sinking or why the tiles are cracking, it usually starts right here with a poorly compacted bed. Dry-pack allows you to walk on the surface almost immediately to set your drain height, which is a game-changer for speed.
Is Dry-Pack Really Strong Enough for Heavy Stone?
You might be skeptical. I certainly was. How can something that feels like dry sand support the weight of a person and heavy porcelain? The magic is in the compaction. When you pack that “damp sand” down with a wood float, it becomes incredibly dense. According to the Tile Council of North America (TCNA) handbook, a properly installed mortar bed can reach a compressive strength of over 3,000 PSI, which is more than enough for any residential application. I once made the mistake of not tamping it down hard enough, and the floor felt “hollow” later on—a mistake I’ll make sure you avoid today. We are going to solve the “puddle problem” once and for all by mastering the mix and the pitch. Have you ever dealt with a shower that just won’t drain right no matter how much you clean the hair trap? It’s a nightmare, isn’t it? Let’s get into the specifics of the mix ratio and the tools you’ll need to finally get that perfect, professional slope.
Hit the Perfect 4:1 Ratio Every Time
You need to think of your mortar mix not as a liquid, but as a moldable medium. Professional installers swear by the 4-to-1 ratio—four parts clean, sharp sand to one part Portland cement. When you add water, do it slowly. The goal is “clumpable” sand. If you squeeze a handful in your fist, it should hold its shape without dripping a single drop of water. This is where most people fail; they treat it like concrete for a sidewalk. If it’s too wet, it shrinks, and that’s why your shower pan is sinking later on. I once helped a buddy who used a “just add water” bag mix without measuring. Two weeks later, his beautiful marble floor sounded like he was walking on potato chips because the mortar had pulled away from the subfloor as it dried.
Lock in Your Drain Height First
Before a single grain of sand hits the floor, you must establish your finish height. This starts at the drain. I always use the dry-fit rule for no-mistake shower drain alignment to ensure my plumbing isn’t fighting my tile layout. Set your drain assembly so the top of the throat sits exactly the thickness of your tile plus 1/8 inch above the subfloor. This gives you a fixed point to slope toward. If you skip this, you’ll find yourself trying to “ramp” the tile at the last minute, which looks amateur and feels terrible underfoot.
Screeding Your Way to a Perfect Slope
This is the part that intimidates people, but it’s actually the most satisfying. You’re going to create “guides” out of the mortar itself. Dump a perimeter of dry-pack around the walls and use a level to mark a line 1/4-inch higher for every foot of distance from the drain. Then, use a straightedge—a scrap piece of 2×4 works wonders—to pull the excess material from the walls toward the drain. It’s like leveling a sandbox, just with much higher stakes. If you’re worried about a pre-sloped base, sometimes you need the cardboard trick for leveling a wobbly shower base before the mortar sets to get things stabilized.
Pack it Down Like Your Floor Depends on It
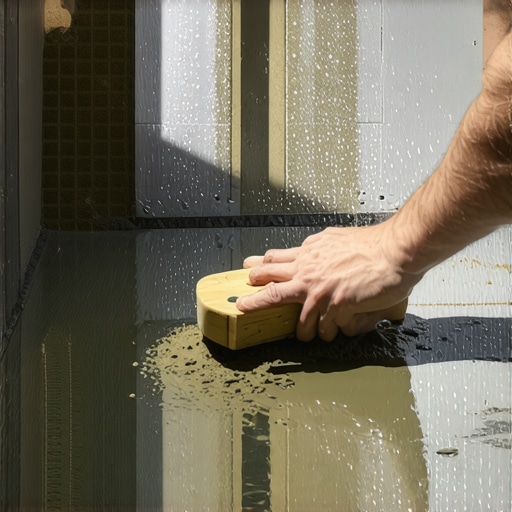
Once the shape is there, you have to compact it. This isn’t a gentle pat; it’s a workout. Take a wood or magnesium float and pound that sand until it feels like a rock. If you leave it loose, the air pockets will cause the tiles to shift, and you’ll be searching for how to avoid hollow spots under your new tile. I remember a job in an old Victorian home where I spent three hours just tamping the curb. Using the sand mix secret for a level shower curb, I made sure that entry point was as solid as the foundation itself. When I finally set the tile, the bond was so tight I couldn’t have pried a piece up with a crowbar if I tried. This density is also your best defense against moisture; it prevents the bed from becoming a giant sponge for stagnant water.
Most DIY guides suggest that as long as you apply a thick layer of liquid waterproofing, your shower is a fortress. In my experience, that’s the biggest lie in the industry. If your mortar bed is flat, water will sit on top of that membrane forever. It turns into a slimy, stagnant mess that eventually degrades the thinset and leads to foul odors. You must treat the dry-pack slope as your primary line of defense. Even the most expensive modern shower designs will fail if you ignore the basic physics of gravity. I’ve seen ‘waterproofed’ showers that needed a full gut-job after two years because the installer assumed the membrane replaced the need for a perfect 1/4-inch pitch.
The Secret to Keeping Your Weep Holes Clear
Here is the ‘oops’ factor that ruins even professional-looking jobs: the weep holes. These tiny channels in your drain assembly are designed to let moisture that seeps through the grout escape into the plumbing. If you pack your dry-pack right up against the drain without protection, you will plug them. I always put a small ring of pea gravel or even some plastic spacers around the drain base before the mortar goes in. Failing this simple step is why most DIY shower waterproofing fails at the drain. You might think you’ve won because the surface looks pretty, but underneath, you’re building a hidden swamp. 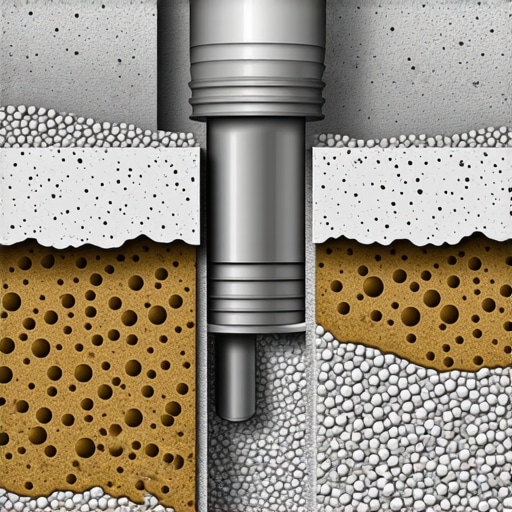
Does a Thicker Mortar Bed Lead to Cracking Over Time?
A common question I get is whether you can just keep adding mortar to fix a massive subfloor dip. The short answer is: only if you reinforce it. The National Tile Contractors Association (NTCA) Reference Manual specifies that mortar beds exceeding two inches in thickness generally require wire reinforcement or lath to prevent internal shearing and structural cracking. If you just pile up three inches of ‘mud’ without a bridge, it will crack under its own weight as it cures. This leads to those frustrating moments where you have to stop shower floor tiles from popping with the proper thinset coverage because the substrate itself is moving. This instability often radiates outward, affecting the room’s perimeter and making it impossible to get a flush finish.
Finish Strong with Better Transitions
Once the floor is set, the challenge shifts to the edges. If you don’t account for the height of your new mortar bed early on, you’ll struggle with the best way to transition hardwood to a tiled shower at the doorway. I’ve seen installers try to hide a massive height difference with thick layers of caulk, but that’s a temporary fix at best. Instead, use the scribing tool every diyerr needs for tight baseboards to ensure your trim follows the actual floor line rather than a theoretical level one. When you finally install your trim, use the caulk and dab method for perfect baseboard joints to keep everything watertight. Have you ever fallen into this trap of ignoring the secondary drainage or blocking those vital weep holes? Let me know in the comments below.Once that mortar is dry and the tiles are set, the real work of longevity begins. I used to think a shower was ‘done’ when the grout dried, but that is just the start of the relationship you have with your bathroom floor. If you want to avoid a full-scale remodel every five years, we have to talk about the ‘boring’ side of things: maintenance. Grout is naturally porous, and even the best install needs a high-quality sealant. More importantly, you need to master the art of the expansion joint. I never finish a job without using the blue tape secret for professional shower silicone lines every time. It ensures a watertight seal at the corners that doesn’t look like a messy glob of toothpaste, which is where most leaks actually start.
How do I keep my shower and floors looking new for years?
The secret isn’t just heavy scrubbing; it is consistent inspection. Every six months, I take a flashlight and check the perimeter where the tile meets the trim. If you notice the seal is cracking, it is time to scrape and re-caulk immediately. For those of you with painted trim, you might eventually wonder why your baseboard paint is peeling off at the bottom. This usually happens because moisture wicks up from the floor during cleaning. To prevent this, I’ve started using the high build primer secret for smooth baseboard paint, which creates a significantly tougher moisture barrier than standard latex primers. According to the National Tile Contractors Association (NTCA) Reference Manual, ‘sealants in movement joints must be maintained to prevent water migration into the substrate,’ a technical way of saying that if your caulk fails, your dry-pack will eventually rot.
The One Tool That Stopped My Guesswork
I spent years fighting with a standard bubble level before I finally invested in a 360-degree self-leveling cross-line laser. It changed everything. Whether I am trying to align a complex shower niche or ensuring my baseboards stay perfectly level across a 20-foot room, the laser removes all human error. It is the only way to avoid those visible slants that scream ‘amateur hour’ when you walk into a room. 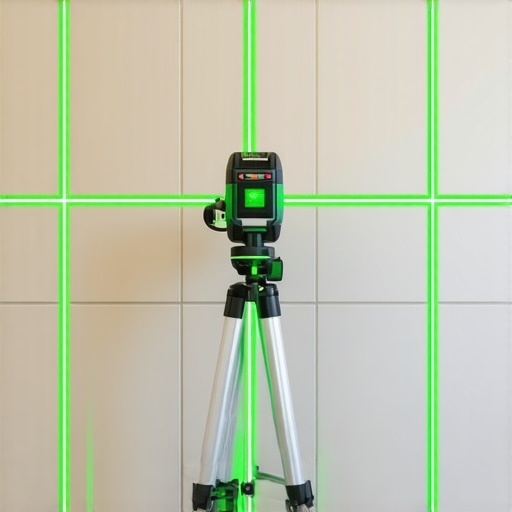
Stop Relying on Your Knees for Carpet Jobs
If your project moves from the bathroom into the hallway or bedroom, do not bring the same ‘close enough’ attitude to your carpet. Many DIYers try to save money by renting a simple knee kicker, but that is the knee kicker mistake that ruins carpet tension. If you are serious about carpet install secrets—achieving flawless results every time, you need a power stretcher. A knee kicker is meant for positioning and minor adjustments; a power stretcher is what gives the carpet the structural tension it needs to last twenty years. Without that tension, your beautiful new carpet will be a wavy, wrinkled mess before the second anniversary of the install. Looking toward the future, I expect to see even more focus on waterproof ‘hybrid’ flooring materials that combine the look of wood with the resilience of tile, but no matter how advanced the material gets, the physics of a flat, stable subfloor remains the same. My advice? Stop taking shortcuts with your tools. Go rent a power stretcher for your next carpet project or try the blue tape method for your next silicone bead—your future self will thank you for the lack of repairs.
What Pro Tilers Know About Dry-Pack That Amateurs Ignore
After years of getting my hands dirty, I have realized that the ‘mud’ is more about chemistry than just mixing sand and water. If you want a floor that never cracks, you have to respect the cure time; rushing to tile over a fresh bed is a recipe for disaster. I have also learned that the perimeter is where most leaks start, so I always double-down on compaction at the walls. When you get the 4:1 ratio right, you are not just making a base; you are carving a stone foundation that will outlast the house itself. This level of detail is exactly what separates a standard remodel from creating a spa-like shower experience that stands the test of time.
My Personal Must-Haves for a Flawless Finish
You do not need a truck full of expensive gadgets, but you do need the right ones for the job. I never walk onto a job site without my 360-degree laser level; it is the only way to ensure your drain and your wall tiles are in perfect harmony. For the actual mud work, a magnesium float is a total game-changer because it does not ‘drag’ the sand as much as wood does. If your project extends beyond the bathroom, having a solid step-by-step flooring installation checklist is vital for consistency. For the woodwork, I swear by the back-bevel secret for seamless baseboard corners to get those tight miters that do not open up over time. If you run into issues with your existing rugs during the process, knowing how to fix a bubbling carpet can save you a fortune in repair costs.
#IMAGE_PLACEHOLDER_E#
Build It Right the First Time
The satisfaction of watching water disappear perfectly down a drain you sloped yourself is hard to beat. It represents more than just a finished chore; it is a true mastery of your environment. Whether you are tackling a full bathroom gut-job or just updating your trim, take pride in the hidden layers. A successful flooring installation is 10% what people see and 90% what lies beneath the surface. Trust your tools, follow the ratios, and do not be afraid to get your hands a little sandy. Your future self will thank you for the lack of repairs and the beautiful, functional space you have created.
Have you ever had to redo a project because of a tiny mistake in the subfloor slope? Let me know in the comments below!