

I spent three long days prepping that guest bathroom. New backer board, waterproofed seams, the works. Then, I made the classic rookie move: I slapped my first row of subway tile directly onto the tub flange. It looked fine for the first three feet. But as I worked my way toward the shower head, I noticed a tiny gap growing. By the second wall, that gap was a half-inch wide, and my vertical grout lines were leaning like the Tower of Pisa. I had to rip it all down, wasting a hundred bucks in thinset and tile. It was the painful moment I realized that in a shower, the floor is almost always lying to you. Today, I am going to show you exactly how to avoid my early failures by using the level-line rule to ensure your project looks professional from the very first piece.
Why Your Tub is Actually Lying to You
Most folks think the tub is level because, well, it should be. But between house settling and sloppy framing, your tub is likely tilted. If you start your tile there, you are baking failure into the foundation of your design. This is why the level-line rule is the holy grail of shower renovation ideas. Instead of trusting the base, we create a temporary ledger or a chalk line that is perfectly level, regardless of how crooked the floor is. I learned this the hard way after a week of frustration, and I want to help you avoid these common flooring installation mistakes that can haunt a bathroom for years. Planning for a successful step-by-step flooring installation involves more than just buying the prettiest tile; it requires setting a benchmark that ignores the uneven surfaces below it.
Will a Little Bit of Sloppiness Really Show?
You might be thinking that a tiny slope in the tub rim is easy to hide with a bit of extra grout. Trust me, it is not. The level-line rule is not just about aesthetics; it is about structural integrity and perfect grout line alignment across the entire room. According to the Tile Council of North America (TCNA) handbook, industry standards require substrates to be level within 1/8 inch over 10 feet for large format tiles. That is a precision you simply will not get by following a sloped tub. If you do not start level, you will end up with hollow spots under your new tile because you are fighting the physics of the wall the whole time. I have seen even seasoned pros try to eyeball it, only to end up with shower enclosures that look amateurish because the corner cuts are jagged and uneven. Any serious upgrade your bathroom project hinges on this one measurement. Have you ever started a project only to find out your walls were totally out of square? Let me know in the comments below.
Locate the Low Spot Before You Touch a Trowel
To beat a crooked tub, you first have to find out exactly how much it is lying to you. Take a four-foot level and rest it across the rim of the tub or the shower floor. Move it around until you find the lowest point on the perimeter. This is your zero-point. If you start tiling from the highest point, your tiles will eventually ‘run out of room’ as you move toward the low side, leaving you with a wedge-shaped gap that looks like a mistake. I remember a project in an old Victorian where the floor sloped two full inches; I ignored the low spot and ended up with hollow spots under your new tile because I was shimmying every piece just to keep them straight. It was a disaster. Instead, measure up from that low spot the height of one full tile minus about a quarter inch. This mark is where your first perfectly level row will sit. 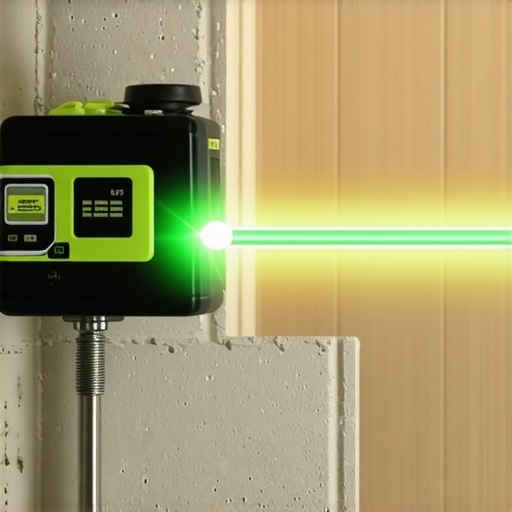
Build a False Floor with a Temporary Ledger
You cannot trust gravity to hold your tiles in place while the thinset cures, especially if the tub rim is slanted. This is where the temporary ledger comes in. Screw a straight 1×3 piece of lumber directly into the studs, aligned perfectly with that level mark you just made. Think of this board as a ‘false floor.’ It provides a solid, unmoving shelf for your second row of tile to sit on. This prevents the ‘sliding’ effect that often leads to the trowel size mistake that ruins your shower tile bond. By starting with the second row, you ensure every tile above it is square, plumb, and level. On one guest bath remodel, I skipped the ledger because I was ‘in a hurry.’ Halfway up the wall, the weight of the tiles caused the bottom row to compress, and my grout lines became wavy lines. I had to pull forty tiles off the wall before they set. Using a ledger is a non-negotiable step in your guide to durable flooring installation for a stylish home.
Laser Lines Are Your Best Friend
While a bubble level works, a cross-line laser level is the ultimate cheat code for upgrade your bathroom projects. It projects a glowing green or red crosshair onto all three walls simultaneously. This allows you to wrap your tile patterns around corners without them drifting up or down. If you are trying to how to align tile patterns across a shower floor and wall, the laser ensures the horizontal grout line on the back wall matches the side walls to the millimeter. Even if you are dealing with a the cardboard trick for leveling a wobbly shower base before the mortar sets, the laser stays true.
Scribing the Bottom Row for a Perfect Fit
Once the rest of the wall is tiled and the ledger is removed, you are left with that bottom gap. This is the only row that follows the slope of the tub. You will need to ‘scribe’ each tile. This means measuring the distance from the bottom of your level row to the tub surface at both the left and right side of each individual tile. Cut the tiles to those specific heights. This creates a custom-fit row that hides the tub’s slant while keeping the rest of the wall perfectly straight. This technique is similar to how pros use the scribing tool every diyer needs for tight baseboards to fit trim against wavy floors. Once these are set, you can finish with a professional bead of caulk to stop shower mold where the tile meets the tub with this fix.Once you have mastered the level-line rule in the shower, you might think you are ready to tackle the rest of the house with the same ‘tight-fit’ mentality. However, this is where most intermediate DIYers fall into a trap. We are taught that gaps are bad, but in the world of professional flooring installation mistakes to avoid for a seamless look, a lack of ‘breathing room’ is the number one cause of long-term failure. Everyone says you want your planks or tiles to butt up perfectly against the perimeter, but in my experience, if you don’t respect the expansion gap, your floor will eventually buckle or ‘peak’ at the seams. This is why I swear by the penny gap rule for installing laminate near drywall. It feels counterintuitive to leave a hole, but that quarter-inch of space is what keeps your floor from exploding when the humidity hits 80 percent in July.
Why is your ‘perfectly tight’ carpet already starting to ripple?
If you have ever seen a carpet that looks like a calm ocean wave two years after it was installed, it is usually because the installer relied on a knee kicker instead of a power stretcher. There is a common myth that a knee kicker is enough for small rooms. It isn’t. The Carpet and Rug Institute (CRI) Standard 105 explicitly states that power stretching is mandatory for all residential carpet installations to ensure the backing is properly tensioned. Failing to do this is one of those carpet install secrets achieving flawless results every time that separates the pros from the amateurs. If you ignore the the knee kicker mistake that ruins carpet tension, you are essentially guaranteeing a re-stretch job in twenty-four months. 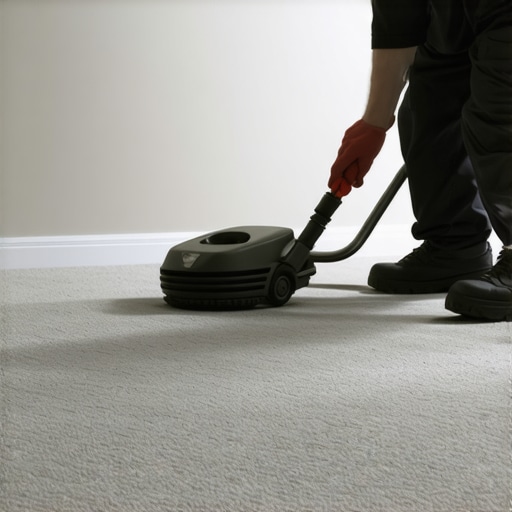
Stop Nailing Your Baseboards Into the Void
When you move from the floor to the trim, the nuances get even more granular. Most people grab a 2-inch finish nail and fire it straight through the baseboard into the bottom of the wall. This is a massive mistake. You are often hitting the ‘bottom plate’ of the framing, which can shift, or worse, you are missing the studs entirely because you’re too low. I always tell my students why you should never nail baseboards into the bottom plate only. Instead, aim for the studs higher up and use the back-bevel secret for inside baseboard corners to get those miters to lock together. If your walls are wavy, a straight cut will never close properly. You have to angle the back of the wood away to let the front edges kiss. For those working with wide-plank wood, don’t just rely on nails; the glue assist trick for wide plank hardwood floors is the only way to prevent the dreaded ‘cupping’ effect in humid climates. It is these invisible details—the gaps you leave and the extra glue you hide—that define your guide to durable flooring installation for a stylish home. Have you ever fallen into the ‘tighter is better’ trap only to have a floor buckle on you? Let me know in the comments below.Once you have nailed the layout and the expansion gaps, the difference between a floor that lasts five years and one that lasts fifty comes down to the data you collect before the first plank hits the subfloor. I never start a job without my pinless moisture meter. I personally use the Lignomat Scanner D because it lets me check the subfloor without leaving pinholes in a client’s expensive plywood. According to the National Wood Flooring Association (NWFA) Technical Manual, the moisture content between your wood flooring and your subfloor should be within 4 percent of each other for strip flooring. If you ignore this, you are inviting cupping and crowning that no amount of sanding can fix. This is why the concrete moisture test that saves your vinyl floor is the most important ten minutes of your entire project. 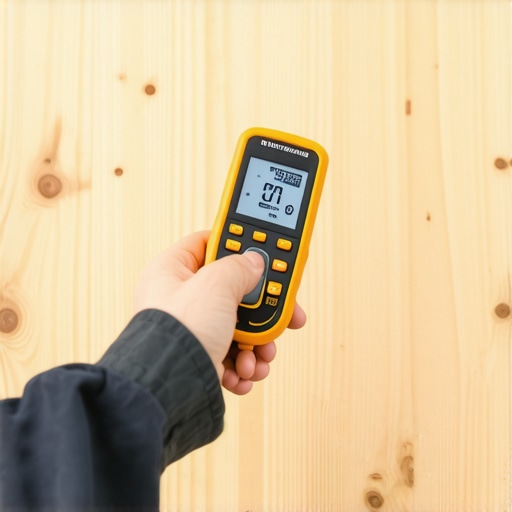
How do I keep my shower and floors looking new for a decade?
Maintenance is not just about mopping; it is about monitoring the ‘give’ in your home’s joints. Every six months, I do a ‘flashlight walk.’ I dim the lights and run a high-lumen beam across the baseboards and shower corners. If I see a hairline fracture in the caulk, I do not just smear more on top. I dig it out. This prevents moisture from reaching the framing, helping you avoid shower repairs when to fix vs replace for longevity. If you notice discoloration, you might be dealing with bacteria; understanding why your shower grout is turning pink or orange early can save you from a full regrout later. For those with carpet, forget the cheap retail vacuums. You need something with an adjustable brush roll height so you don’t shred the fibers, a tip I always include in my carpet install secrets achieving flawless results every time.
Don’t Let Your Baseboards Become a Dust Trap
I have a weird obsession with the finish on trim. If you used a flat paint on your baseboards, you have already lost the war against dust. I always recommend a high-quality semi-gloss or a specific trim enamel. This makes the wood slick so dust slides off rather than sticking. When you are looking at baseboard styles that elevate your interior design, consider the profile’s ‘dust-ability.’ A complex Victorian profile looks great but requires ten times the cleaning of a modern flat-stock board. To get that perfect seal where the wood meets the wall, I use the blue tape secret for professional shower silicone lines every time—it works just as well for latex caulk on baseboards to give you that razor-sharp paint line.
The Future of Flooring is Smart and Self-Healing
Looking ahead, I predict we are going to see a massive shift toward ‘smart’ substrates. We are already seeing the beginning of this with transform your flooring top trends in installation for 2025, including underlayments with built-in moisture sensors that can alert your phone if a pipe leaks under your luxury vinyl plank. We are moving away from passive materials to active systems that protect the home’s envelope. My best advice for you right now? Go buy a basic $30 moisture meter before your next project. Test your subfloor, test your new wood, and don’t install a thing until those numbers align. It is the single easiest way to level up from a DIYer to a craftsman. Have you ever checked the moisture levels in your home? Tell me what you found in the comments.
What 15 Years of Crooked Walls Taught Me About Real Craftsmanship
After a decade and a half of fixing DIY disasters, I have realized that the difference between a pro and an amateur isn’t speed—it is patience. First, never underestimate the power of a fresh set of eyes. If you find yourself fighting a tile for more than ten minutes, step back and check your level again; usually, the house moved and you did not adjust. Second, your substrate is your destiny. If you spend three days on prep, the tile will practically lay itself. I have seen too many flooring installation mistakes to avoid for a seamless look that stemmed from rushing the underlayment. Finally, remember that every material has a memory. Carpet wants to return to its roll shape, and wood wants to expand. If you do not use a power stretcher to unlock those carpet install secrets achieving flawless results every time, the floor will eventually ripple.
The Gear That Never Leaves My Truck
I do not believe in buying every gadget on the shelf, but these three tools are non-negotiable for my workflow. I always carry a pinless moisture meter because guessing at subfloor humidity is a recipe for a buckling floor later. For any trim work, the scribing tool every diyer needs for tight baseboards is the only way to get a professional fit against uneven or wavy drywall. I also swear by a self-leveling cross-line laser; it is far more accurate than any bubble level when you need to wrap tile patterns around a room. Lastly, I always keep a high-quality silicone finishing kit handy to execute the blue tape secret for professional shower silicone lines every time. These tools turn a frustrating weekend project into a precision-engineered masterpiece.
Turning Your House Into a Lasting Sanctuary
At the end of the day, a successful your guide to durable flooring installation for a stylish home is about more than just aesthetics; it is about the peace of mind that comes from knowing your home is watertight and stable. Whether you are picking out baseboard styles that elevate your interior design or wrestling with a heavy cast iron tub, focus on the fundamentals. The specific transform your flooring top trends in installation for 2025 will change over time, but a level line and a proper expansion gap are timeless. Don’t be afraid to take your time—your home deserves the extra effort. Which part of your bathroom renovation is giving you the most trouble right now—getting the first row level or tackling the plumbing layout? Let me know in the comments below!