

I stood there, staring at a $5,000 floor that looked like a topographical map of the Andes. The luxury vinyl planks, which I had promised were ‘bulletproof,’ were peaking and warping at every single joint. It was a absolute nightmare. Just months prior, I had skipped the one step that felt like a total waste of time on an old, dusty slab: the moisture test. I thought I knew better because the concrete looked bone dry to the touch and the house had been standing for thirty years. That hubris cost me a full week of unpaid labor and a very awkward conversation with a homeowner. Today, I’m going to show you exactly why that little plastic puck or digital meter is the most important tool in your kit so you don’t end up like I did, wondering how to fix a hollow sound under your vinyl plank floor while the whole thing fails beneath your feet.
The Day I Realized Concrete Is a Liar
When I was first starting out, I figured a mature house was ‘safe.’ I mean, if the concrete was going to off-gas or sweat, surely it would have done it by now, right? Wrong. Concrete is naturally porous, much like a hard sponge. Even if the surface is dry, vapor is constantly migrating from the soil through the slab. This is why we always use the concrete moisture test that saves your vinyl floor. In my early career, I neglected it because I was in a rush to get the baseboard styles that elevate your interior design installed and finish the job. According to the ASTM F2170 standard, even ‘old’ slabs can exhibit high relative humidity levels that fluctuate with the seasons, meaning your floor is a ticking time bomb without a proper barrier.
Do those cheap moisture tests actually work?
You might be thinking that you need a thousand-dollar piece of equipment to get this right. I used to think the same thing, or worse, that it was just a gimmick sold by flooring manufacturers to avoid paying out warranties. But here is the reality: even a simple calcium chloride test or a basic pinless meter can tell you more than your eyes ever will. If you’re following a step-by-step flooring installation from planning to perfect finish, the moisture check isn’t an ‘extra’—it’s the foundation. Skipping it is like building a house on quicksand. Have you ever had a floor start acting up months after the ‘perfect’ install? I want to hear your horror stories in the comments.
Why Ground Vapor Is Your Floor’s Secret Enemy
The problem isn’t usually a puddle; it’s the invisible gas. When you trap that vapor under a non-porous layer like vinyl or a heavy pad during a carpet install, it has nowhere to go. It collects, turns back into liquid, and starts eating your adhesive or swelling your planks. It’s the same reason people see why your floor transitions keep popping loose on concrete slabs. I’ve spent more hours than I’d like to admit fixing flooring installation mistakes to avoid for a seamless look that all started because the subfloor was ‘mostly’ dry. We’re going to dive into the specific ways you can protect your investment and ensure your durable flooring installation actually lasts a lifetime.
The Easiest Way to Catch Moisture in the Act
Before you even think about laying your first plank, you need to verify what is happening underneath. I learned this lesson the hard way during a renovation in a damp basement where the concrete looked dusty but felt cold. I used a scrap piece of 6-mil poly film, taped it down tight on all four sides with duct tape, and left it for two days. When I peeled it back, the concrete was dark with dampness. This simple the concrete moisture test that saves your vinyl floor proved that vapor was rising through the slab. If I had ignored that, the floor would have buckled within a month.
Tape Down Your Own Poly Test
If you do not have a digital meter, the plastic sheet test is your best friend. Cut several 2×2 foot squares of clear plastic and tape them down in different areas—especially near exterior walls or where the sun hits the floor. If the plastic is foggy or the concrete is darker after 48-72 hours, you have a moisture problem. This is a critical part of a step-by-step flooring installation from planning to perfect finish. 
Stop Guessing with a Digital Meter
For a more professional approach, I always carry a pinless moisture meter. It is like a stud finder but for water. You just glide it over the surface, and it gives you a digital reading of the relative humidity. It helps me spot hot spots that the plastic test might miss. This is how you avoid common flooring installation mistakes to avoid for a seamless look.
Lay Down the Shield Your Floor Deserves
Once you know the moisture levels, you cannot just ignore them if they are high. You need a vapor barrier. Think of it like a raincoat for your subfloor. Even if you are doing a carpet install, moisture can wreck the pad and create that musty smell. For vinyl, a 6-mil poly sheet is the industry standard. Overlap the seams by six inches and tape them with moisture-resistant tape. This ensures a durable flooring installation that will not fail when the seasons change.
Why T-Moldings Are More Than Just Trim
People often try to run floors through doorways without a break, but on concrete, that is a recipe for disaster. Different rooms have different humidity levels. Use the t-molding secret for long runs of laminate flooring to allow each section to expand and contract independently. If you do not, you will end up seeing why your floor transitions keep popping loose on concrete slabs. It is about giving the floor room to breathe.
Clean Your Slab Like Your Warranty Depends on It
Any pebble or bit of dried drywall mud will telegraph through your vinyl. I use a floor scraper first, then a high-powered vacuum. I once missed a tiny glob of paint in a hallway, and after the baseboard styles that elevate your interior design were installed, you could see a pimple in the floor every time the light hit it. Use the vacuum seal trick for cleaning dust out of floor grooves to ensure the surface is pristine before the underlayment goes down.
Tile Is Not a Raincoat
The most dangerous myth in the remodeling world is that tile and grout are waterproof. I see it every week: homeowners and even some pros assume that if the tile is glazed and the grout is sealed, the shower is a fortress. This mindset is exactly why people end up looking for shower repairs: when to fix vs. replace for longevity sooner than they expected. Tile is the decorative skin, not the skeleton. Moisture will migrate through grout lines. If your waterproofing membrane behind the board is flawed, that moisture sits against your studs and rots your house from the inside out. You have to ensure the triple point seal for leak proof shower corners is perfect before a single tile is set. If you are guessing on the coverage, you are likely making the trowel size mistake that ruins your shower tile bond, leaving voids where water can pool and fester.
Stop Relying on the Knee Kicker
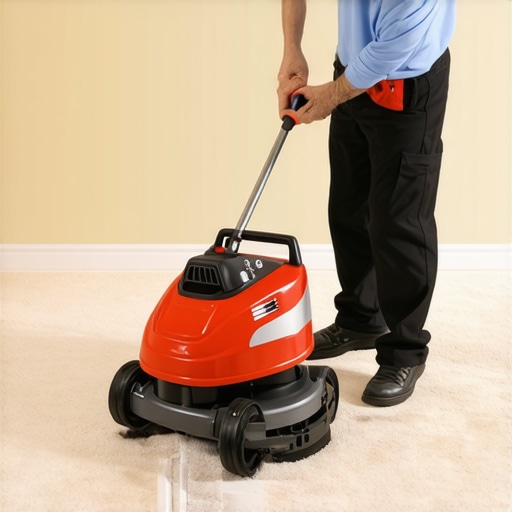
When it comes to carpet, I’m going to go against the grain of what you see in many DIY videos. A knee kicker is a positioning tool, not a stretching tool. One of the most common carpet install secrets is that if you don’t use a power stretcher, your carpet will develop ripples within two years. The Carpet and Rug Institute (CRI) Standard 105 explicitly states that a power stretcher is mandatory for residential installations to achieve the proper tension. I’ve seen $10,000 carpets ruined because someone fell for the knee kicker mistake that ruins luxury carpets. You need to follow the power stretcher rule for large living room carpets to ensure the backing is under enough tension to stay flat through humidity changes. Have you ever fallen into this trap of thinking a few good kicks would do the job? Let me know in the comments.
Why does your shower grout crack in the corners every single time?
This is the question I get asked at every dinner party once people find out I do floors. The answer is simple but often ignored: physics. Houses move, and different planes—like where two walls meet—move at different rates. If you put hard grout in a corner, it will crack. Professionals know that any change of plane requires a flexible sealant, not grout. I’ve documented how we fixed the grout crack in the shower corner for good by switching to a color-matched 100% silicone. It’s a nuanced detail that separates a ‘weekend warrior’ job from a durable flooring installation that survives the settling of a home.
Flexible Solutions for Rigid Baseboards
Finally, let’s talk about that finished look. People often fight with baseboards, trying to force a straight piece of wood against a wavy wall. If you nail it too hard to close a gap, you’ll likely end up needing to stop baseboard splitting with this simple pre-drilling tactic. The pro move isn’t more nails; it’s better prep and knowing when to use caulk versus when to scribe the wood. High-end baseboard styles that elevate your interior design require a level of patience that most rush through. By slowing down and addressing these hidden nuances, you move from just ‘covering the floor’ to truly mastering the craft. Don’t let a rush to finish lead to flooring installation mistakes to avoid for a seamless look.
Precision Tools for a High-End Finish
After years of fighting with a dull blade and a shaky miter saw, I finally realized that my time is worth more than the equipment cost. I started using a high-tooth-count carbide blade for every baseboard style that elevates your interior design I install. If you are still seeing splinters on your miters, you are likely using a general-purpose blade that is chewing the wood rather than slicing it. For flooring, I have moved away from the basic pull-bar to a dedicated laminate floor cutter for cleaner, dust-free edges inside the house. According to the National Wood Flooring Association (NWFA) Technical Manual Section C100, the precision of your perimeter cuts and expansion gaps directly correlates to the total lifespan of the installation. This level of accuracy is a core part of a step-by-step flooring installation from planning to perfect finish. 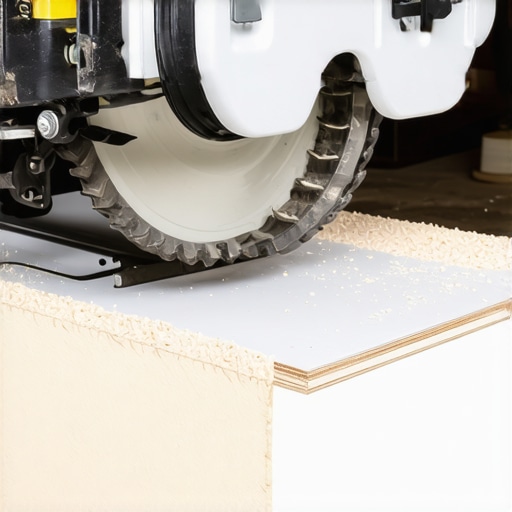
How do I maintain my flooring and showers over the long haul?
Maintenance is not just about mopping; it is about environment control. For any durable flooring installation, you need to keep your home’s relative humidity between 30% and 50%. Anything outside that range, and your hardwood or vinyl will start to gap or crown as the materials struggle to adapt. In the bathroom, do not wait for the caulk to fail and cause structural rot. I recommend refreshing your silicone lines every few years using the blue tape secret for professional shower silicone lines every time to prevent deep-seated mold and water migration. For those with soft surfaces, choosing the best carpet types for high traffic areas in 2025 will save you from the inevitable traffic lane look that kills the vibe of a modern living room. Regular steam cleaning is a must, but ensure you do not over-saturate the backing or you will be calling someone for shower repairs: when to fix vs. replace for longevity of the subfloor underneath.
Smart Materials Are the Next Big Thing
Looking ahead, I see a massive shift toward waterproof hybrid cores and breathable underlayments. We are moving past the days of heavy, messy glues and toward high-tech locking systems that can withstand a minor flood without needing a full tear-out. You can see some of these emerging technologies in the top trends in installation for 2025. Manufacturers are finally prioritizing the DIYer’s success by building ‘forgiveness’ into the product design itself. My best advice for your next project? Try the penny gap rule for installing laminate near drywall to guarantee your floor stays flat through every season. It is a simple, low-tech trick that ensures your floor has the room it needs to live and breathe. Give it a shot and let me know if it didn’t make your transition to the baseboards ten times easier.
Lessons My Toughest Flooring Failures Taught Me
Over the years, I’ve realized that the difference between a floor that lasts twenty years and one that fails in twenty months often comes down to the things you can’t see once the job is finished. First, respect the expansion gap like your life depends on it. I’ve seen entire levels of flooring peak because someone didn’t leave that crucial 1/4-inch space under the drywall. Second, never trust your eyes when it comes to levelness; always use a long straightedge to find those hidden dips that cause flooring installation mistakes to avoid for a seamless look later. Finally, remember that lighting is your harshest critic. I always keep a high-lumen work light at floor level during the final stages to catch any minor lippage or gaps before the furniture is moved in.
Tools That Make the Difference Between Amateur and Pro
If you want to move beyond basic DIY, you need to invest in a few specific items that provide peace of mind. I never start a job on concrete without my digital moisture meter to perform the concrete moisture test that saves your vinyl floor. It’s a small investment that prevents a $5,000 catastrophe. For anyone tackling carpet, don’t even think about skipping the rental of a power stretcher; following the power stretcher rule for large living room carpets is the only way to ensure you aren’t dealing with ripples in two years. I also swear by 100% silicone for every bathroom transition—it’s the secret to a durable flooring installation that resists mold and movement.
#IMAGE_PLACEHOLDER_E#
Build a Floor That Stands the Test of Time
You now have the technical roadmap to transform your space with confidence. Flooring is one of the few home projects where the quality of the preparation is directly visible in the quality of the finish. By slowing down, testing your subfloor, and using the right tools, you are creating a foundation that will serve your home for decades. Take these expert flooring installation tips for 2025 and put them into practice on your next project. There is a deep satisfaction in walking across a floor you laid yourself, knowing it was done right from the slab up. Which part of the prep process do you find the most tedious or challenging? Let’s swap tips in the comments!