

There I was, standing in my newly finished guest room, admiring the way the light hit those wood-look planks. I took one confident step toward the window and—click-clack—it happened. Not a solid, satisfying thump, but a hollow, echoey sound that screamed “beginner mistake.” It was gut-wrenching. I had followed the step-by-step flooring installation guides I found online, yet every time I walked near the door, it sounded like I was strolling across a hollow plastic stage. It turns out, I had fallen into one of those classic flooring installation mistakes to avoid that most people don’t talk about until it’s too late. I am here to tell you that you aren’t crazy, and more importantly, you don’t have to live with a floor that sounds like a drum. Today, we are going to silence those hollow spots for good using a few tricks I learned the hard way.
Stop the Drumming Under Your Feet
The culprit is almost always a gap between your subfloor and the vinyl plank. When I first started doing these projects, I made the huge mistake of thinking thick underlayment would “absorb” the dips in my concrete slab. Boy, was I wrong. If the floor isn’t perfectly flat, the vinyl plank will bridge over the low spots, creating a pocket of air. The National Wood Flooring Association (NWFA) notes that for a successful install, subfloors must be flat within 3/16 of an inch over a 10-foot span. If you didn’t check that, you likely ended up with subfloor prep mistakes that lead to that annoying resonance. When you walk, the plank deflects into the void, hitting the subfloor and echoing. It can even lead to more visible issues, like why your vinyl plank floor is gapping at the short ends due to the constant vertical movement.
Can you really fix this without a total teardown?
You might be tempted to just toss a rug over the spot and call it a day, but that won’t save your floor’s locking system from wearing out over time. Fixing it doesn’t always mean ripping everything up to the baseboards. I’ve found that you can often inject floor-leveling adhesives through tiny, inconspicuous holes or use localized pressure to reset the planks if the issue is minor. Have you ever felt that sinking feeling when your foot hits a “floating” plank in your own home? I’d love to hear if you are dealing with a clicky hallway or a bouncy kitchen right now. Before you go buying all new material, let’s look at how we can stabilize what you already have.
Inject Stability Directly into the Problem
If you’ve got a localized click-clack sound, you can often perform what I call flooring surgery. Think of your floor like a loose drumhead—you need to dampen the vibration. I once spent three hours in my own hallway with a 1/8-inch drill bit and a tube of specialized pressure-sensitive adhesive. By drilling a tiny hole into the groove of the plank—not the face—you can inject the adhesive directly into the void. It’s a bit like filling a cavity. Once the glue settles, that air pocket is gone. I learned the hard way to put heavy weights, like a stack of heavy books or a tool kit, over the spot for 24 hours. Without the weight, the glue can actually lift the plank, making the problem worse. If you are worried about the drill hole, a simple dab of matching floor putty makes it disappear completely. 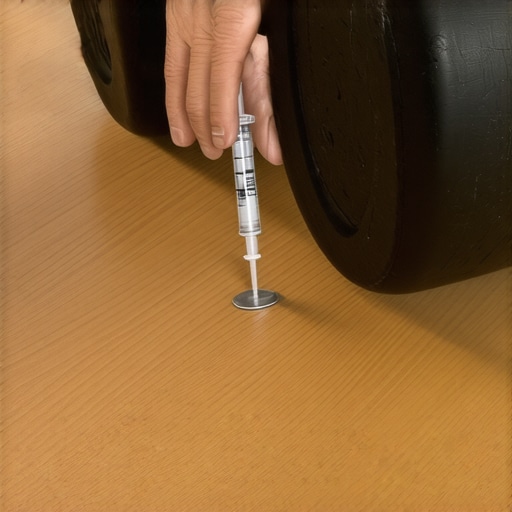
The Surgical Board Swap Strategy
When the hollow spot is too big for a simple injection, you might need to actually pull up a section. If the issue is near a wall, you’re in luck. You can use the pry bar secret for removing baseboards without damaging the drywall to get access to the edge. From there, you can unzip the floor and address the real enemy: the low spot in the concrete or wood subfloor. Use a self-leveling compound or even some roofing shingles for minor dips to shim the area. If you’re stuck in the middle of the room, you don’t have to pull up everything. You can learn how to remove a single damaged floor board without ripping up the room by cutting out the center and using a fresh board with the locking lips trimmed off.
Stop the Bounce Before it Breaks Your Locks
A bouncy floor isn’t just an annoyance; it’s a death sentence for your floor’s integrity. Every time that plank dips, the tongue and groove system is under stress. Eventually, they will snap, leading to why your vinyl plank floor is gapping at the short ends. If the bounce feels deep, it might not be the subfloor prep at all. Sometimes why your new floor is bouncing and the joist fix is the conversation you need to have, especially in older homes where the structural support has sagged over decades. I remember helping a neighbor who thought his vinyl was defective, but it turned out the previous owner had cut a joist to fit a drain pipe. We had to sister the joist before the floor would ever be truly quiet.
The Block and Hammer Move for Better Seams
Sometimes that hollow sound is actually a loose joint vibrating rather than a subfloor dip. If you can see even the tiniest gap between planks, they aren’t fully locked, and they will rattle. Use the block and hammer move for tight vinyl floor joints to snug them together. For planks already installed and far from a wall, the suction cup hack for adjusting gapped laminate planks is a lifesaver. You stick the cup to the plank and tap the side of the cup with a mallet to slide the plank back into its neighbor. It feels like magic when that gap closes and the hollow tick disappears instantly.While most tutorials focus on the click-lock mechanism, they often miss the physics of floor deflection. In my experience, the biggest myth in the DIY community is that adding a thicker underlayment will make a cheap floor feel like a million bucks. In reality, too much cushion is the primary reason why locking systems fail. The Resilient Floor Covering Institute (RFCI) explicitly warns that excessive vertical movement from soft underlayment puts lethal stress on the tongues and grooves of your planks. If you want that high-end feel, you don’t need more foam; you need a rock-solid, flat base. Applying carpet install secrets to a rigid vinyl project by over-padding is a recipe for a bouncy disaster.
Stop Trusting the Soft Underlayment Trap
The ‘Oops’ factor I see most often involves people ignoring the subfloor’s moisture content because they think a plastic vapor barrier is a catch-all. I once ignored a slight dampness in a basement slab, thinking the underlayment would shield the vinyl. Six months later, the seams were peaking like mountain ranges. Now, I never start a job without performing the concrete moisture test that saves your vinyl floor. If you skip this, no amount of adhesive or repair tricks will save the installation from the inevitable mold and warping that follows. It is much easier to address the slab now than to tear up a finished room later.
Is your subfloor moisture actually the silent killer of your warranty?
Most manufacturers will void your warranty the second they detect high moisture levels that weren’t mitigated. This is where advanced installers separate themselves from the weekend warriors. It’s not just about the floor; it’s about how that floor interacts with the walls. When you transition to the finishing touches, don’t just slap the trim on. I’ve seen beautiful floors ruined by poor trim work. You should understand why you should never nail baseboards into the bottom plate only, as it restricts the natural expansion and contraction of the house framing, which can actually pull your baseboard joints apart over time. Instead, aim for the studs. 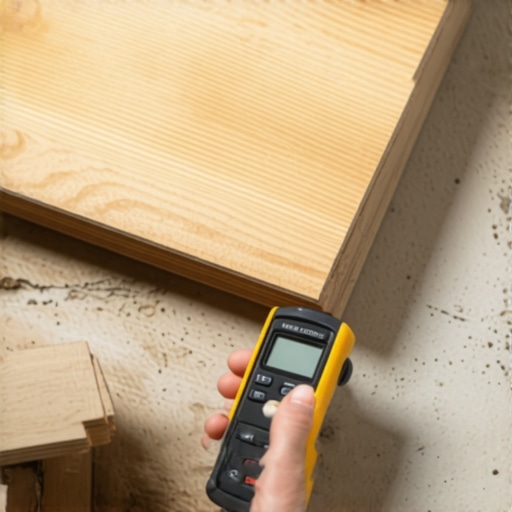
Master the Expansion Gap or Watch Your Seams Pop
We are often told to leave a quarter-inch gap around the perimeter, but in large open-concept spaces, that simply isn’t enough. I’ve transitioned to the ‘rule of thumb’—if the run is longer than 25 feet, I’m leaving at least 3/8 of an inch. To make those wide gaps look professional, you need to master the back-bevel secret for seamless baseboard corners. This technique allows the face of the trim to meet perfectly even if the wall isn’t a perfect 90 degrees. Even in wet areas, the same precision applies. Whether you are tiling or laying vinyl, the trowel size mistake that ruins your shower tile bond is a cousin to the hollow flooring issue—it’s all about the contact area. If you don’t have 95% coverage in a wet area, you’re just waiting for a leak. Have you ever fallen into one of these ‘advanced’ traps where the basics just weren’t enough? Let me know in the comments, and let’s troubleshoot that bounce together.I used to think my standard toolkit was enough until I realized that precision is the only thing standing between a ‘DIY look’ and a professional result. For me, the game-changer was a high-end laser level for my shower walls and a power stretcher for my guest rooms. If you’re working with textiles, you absolutely cannot skip the power stretcher rule for large living room carpets; a knee kicker alone will leave you with wrinkles in three years. When it comes to trim, stop trying to ‘eye’ the fit against wonky drywall. I swear by the scribing tool every diyer needs for tight baseboards because it allows you to trace the literal imperfections of your house onto the wood before you even make a cut. This isn’t just about making things look good; it’s about making them fit so tightly that they don’t move when the seasons change and the humidity spikes. 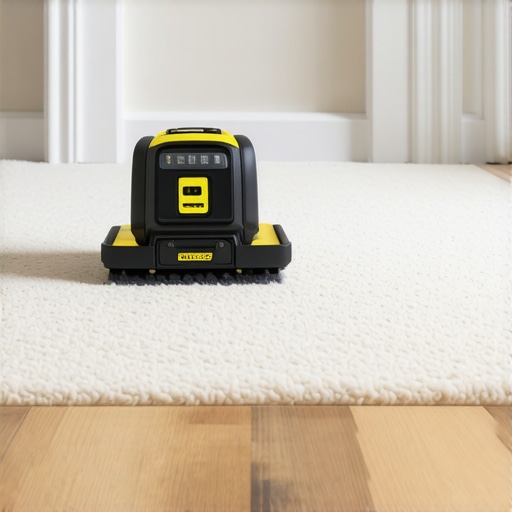
How do I keep my new flooring and trim looking flawless over time?
The secret isn’t in a magic cleaner, but in proactive sealing and inspection. For those of you who just finished a bathroom, you need to be realistic about shower repairs: when to fix vs replace for longevity. According to the Tile Council of North America (TCNA) Handbook, maintenance of movement joints in showers is critical because failing to replace old sealant can lead to structural rot that remains hidden for years. I check my baseboard joints every spring. If you notice a gap, don’t just paint over it; learn why your baseboard caulk is cracking and the flex fill fix to use high-stretch acrylics that move with your home’s natural settling. For the flooring itself, skip the heavy wet mops that can seep into joints. I’ve started using the vacuum seal trick for cleaning dust out of floor grooves to ensure grit doesn’t act like sandpaper in the locking joints. Looking ahead, I suspect we are moving toward ‘active’ subfloors that do the hard work for us. We are already seeing transform your flooring: top trends in installation for 2025 leaning toward hybrid materials that self-heal minor scratches. In the next few years, I predict we’ll see moisture-sensing underlayment that pings your phone if a pipe starts leaking under your vinyl. Until then, you have to be the sensor yourself. I challenge you to go back to your most recent project and try the concrete moisture test today—it’s the only way to truly know if your investment is safe for the long haul.
What Pro Installers Won’t Tell You About Floating Floors
I used to think that hearing the ‘click’ meant the job was done, but the real wisdom lies in the layout you choose before the first plank even hits the subfloor. One of the biggest lightbulb moments for me was realizing that symmetry is more than just aesthetics; it is about structural balance. I once ruined an entire hallway because I didn’t plan for the far wall, leaving me with a half-inch sliver that wouldn’t stay locked. Now, I always employ the row start tactic for balanced flooring layouts in narrow hallways to ensure every piece has enough mass to stay put. Another hard-earned lesson: ‘waterproof’ is a marketing term for the material, not the installation. Moisture can still ruin your subfloor if you don’t seal the perimeter. Finally, the way you stagger your joints dictates the floor’s lifespan. Avoiding the stair-step pattern mistake that weakens vinyl joints is the only way to ensure the locking mechanisms don’t unzip under heavy foot traffic over the years.
The Gear That Separates Rookies from Masters
If you want your home to look like a showroom, you have to stop ‘eyeballing’ the difficult cuts. I never walk onto a job site without the scribing tool every diyer needs for tight baseboards; it is the only way to account for the fact that no wall in history is perfectly straight. For those of you branching out into textiles, remember that a knee-kicker is for corners, but the power stretcher rule for large living room carpets is what actually prevents those embarrassing ripples three years down the line. I also swear by a high-quality moisture meter. It might feel like an extra expense, but knowing the humidity of your slab is the ultimate insurance policy against the peaking and gapping that haunts so many DIY projects. These tools don’t just make the work easier—they make the results permanent.
Build Something That Doesn’t Squeak Back
The most rewarding part of any home project isn’t just the final look, but the feeling of walking across a room and hearing nothing but silence. That quiet is the sound of a job done right. Don’t let the fear of a small mistake stop you from starting; even if you run into trouble, you can always learn how to fix baseboard gaps without replacing the trim to polish those final details. Your next flooring installation is an opportunity to prove that a DIYer can match any professional’s precision with enough patience and the right tricks. Have you ever found a mysterious hollow spot after you already moved the furniture back in? Let me know your ‘oops’ moments in the comments below!