

I remember standing in my guest bathroom three years ago, sweating over a freshly installed tub. The tile work was pristine—straight lines, level rows, the works. Then came the caulk. I thought I could ‘finger-swipe’ it like the pros on TV. Big mistake. Within ten seconds, I had sticky white goo smeared across four inches of expensive subway tile. It looked amateur, it stayed tacky forever, and I eventually had to scrape it all off and start over. That’s when I discovered the blue tape secret. It felt like a lightbulb moment that made all my previous struggles feel so unnecessary. Today, I am going to walk you through how to achieve that flawless, high-end look without the stress of a messy cleanup. Whether you are finishing up some shower renovation ideas or just doing a quick refresh, this is the one skill that separates the DIYers from the experts. We are going to solve the problem of the messy bead once and for all. Have you ever tried to wing it with a tube of sealant only to end up with more on your jeans than on the wall?
Your Silicone Lines Do Not Have to Look Like a Mess
Silicone is a different beast than your standard painter’s caulk. It is stubborn, waterproof, and incredibly sticky. My early mistake was using my bare finger—often with a bit of saliva, which I later learned introduces bacteria—to smooth the bead. Not only did it look wavy, but the moisture actually trapped tiny spores behind the seal. To truly stop shower mold where the tile meets the tub, you need a seal that is consistent and tight. The masking tape trick provides a mechanical boundary that prevents the silicone from wandering. This isn’t just about bathrooms, either. I’ve used this same logic when learning how to fix baseboard gaps without replacing the trim, ensuring that every transition in the house looks intentional and sharp. According to the Tile Council of North America (TCNA), the longevity of a sealant joint depends heavily on its profile—the specific shape and depth of the bead—and masking tape is the easiest way for a homeowner to control that profile without years of trade experience.
Is Masking Tape Really Worth the Extra Prep Time?
It’s the question I get every time I suggest this to a friend. Won’t it take longer to tape it off? The short answer is yes, the prep takes longer. But the cleanup? It takes zero time. When you pull that tape at a 45-degree angle while the silicone is still wet, you are left with a line so sharp it looks like it was molded in a factory. If you’ve ever spent hours with a razor blade trying to remove caulk haze from your beautiful new floor, you know that the extra ten minutes of taping is a bargain. It’s about working smarter, not harder. We’re aiming for that pro-finish that makes your home feel high-end, similar to how baseboard styles that elevate your interior design rely on clean, crisp junctions to really pop. If you’re skeptical, I challenge you to try it on just one corner. You’ll never go back to the finger-swipe method again.
Get Your Surfaces Ready for a Long-Term Bond
Before you even touch that caulk gun, you have to realize that silicone is only as good as the surface it is clinging to. If there is soap scum, old residue, or moisture lingering in the cracks, your new bead will eventually peel off like a bad sunburn. I learned this the hard way during a guest bathroom upgrade where I rushed the cleaning phase. Two months later, I noticed water was seeping behind the tile because the silicone didn’t actually ‘bite’ into the tub surface. To avoid this, you need to treat the prep work with the same precision as carpet install secrets where every subfloor detail matters.
Clean the Joint Until It Squeaks
Use denatured alcohol or a high-strength silicone remover to wipe down the area until it is bone dry and grease-free. This is the same level of focus you would use when investigating shower repairs: when to fix vs replace for longevity. You want a sterile environment. If you are working on a bathtub, here is a pro tip: fill it with water first. This weights the tub down, mimicking the pressure of a person standing in it, and opens the gap to its maximum width. If you caulk a dry, light tub, the first time you take a bath, the weight will pull the tub down and potentially tear your fresh seal.
Tape It Like You Mean It
This is where the magic happens. Apply two parallel lines of blue painter’s tape—one on the wall and one on the tub or floor. You want the gap between them to be about 1/8th to 1/4 of an inch. Think of it like the penny gap rule for installing laminate near drywall; consistency is your best friend here. If the tape is wavy, your caulk line will be wavy. Spend the time to ensure those lines are laser-straight.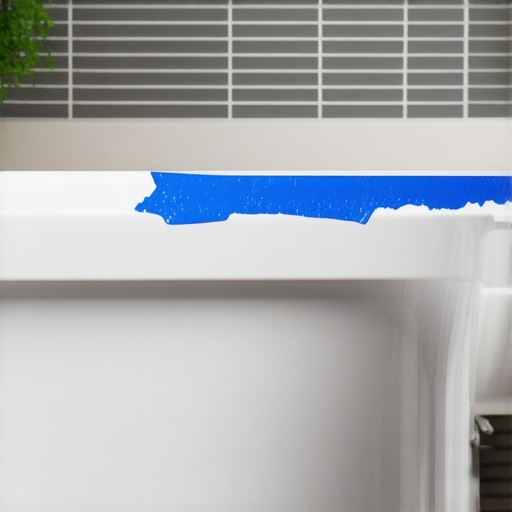
The Magic of the Wet-Finger and Immediate Pull
Now, cut the tip of your silicone tube at a 45-degree angle. The opening should be slightly smaller than the gap you taped off. When you start squeezing the trigger, move with a steady, slow hand. Do not try to rush it. It is very much like a step-by-step flooring installation—precision in the early stages saves you from massive structural headaches later.
Don’t Be Afraid of a Little Dish Soap
Here is the part that feels like a cheat code: fill a spray bottle with water and a few drops of liquid dish soap. Once you have laid your bead, lightly mist the silicone and your gloved finger. I remember a specific time I was working on a shower niche and I forgot the soap. The silicone stuck to my skin, then back to the tile, creating a sticky spiderweb of mess that forced me to restart the whole section. With the soap, your finger glides over the surface like a skate on ice, compressing the silicone into the joint without pulling it out. After you smooth it, pull the tape immediately while the silicone is still wet. Pulling the tape back at a sharp 45-degree angle ensures that the ‘lip’ of the silicone settles down flat, creating a watertight ramp that prevents water from pooling on top of the seal. It turns a stressful DIY chore into a factory-grade finish.
Once you have mastered the art of the perfect silicone bead, you might feel like you are ready to tackle the rest of the house. But here is the thing: the transition from bathroom sealant to full-room flooring is where most people hit a wall of frustration. Let’s dig deeper into the nuances that separate a project that looks good for a month from one that lasts a decade. I have seen countless homeowners invest thousands into high-end materials only to realize they ignored the ‘hidden’ mechanics of their home. For instance, if you are noticing a weird trampoline effect in your living room, you are likely dealing with structural deflection that no amount of expensive underlayment can fix. It is a classic case of treating the symptom rather than the disease. To avoid long-term structural headaches, you must address the subfloor stability before the first plank is ever laid.
The Knee-Kicker Myth That Destroys Your Carpet
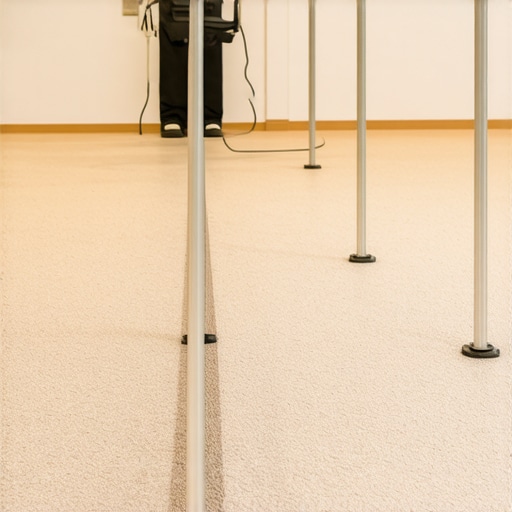
Everyone says the knee-kicker is the ultimate tool for carpet installation. In my experience, that is one of the most dangerous myths in the DIY world. While a kicker is great for tight corners or small closets, using it to stretch a whole room is a recipe for disaster. I once watched a friend ‘kick’ a beautiful frieze carpet into place, only to see huge ripples develop across the center of the room six months later. The problem? He didn’t have the leverage to reach the proper tension. According to the Carpet and Rug Institute (CRI) Standard 104, a power stretcher is mandatory for all residential carpet installations. Without it, you are literally fighting a losing battle against the natural elasticity of the backing. If you are aiming for carpet install secrets that actually work, stop relying on your knees and rent the right equipment. This is the exact kind of knee-kicker mistake that ruins luxury carpets by causing the secondary backing to delaminate over time.
Is Your Carpet Installer Skipping the Most Important Tool?
If you hire a pro and they show up with only a small metal tool and a hammer, ask them where the power stretcher is. A true expert knows that without mechanical tension, the carpet will eventually bunch up near the baseboards. This isn’t just an aesthetic issue; those ripples become trip hazards and wear down the carpet fibers unevenly. It is the same level of precision required when you are deciding on shower repairs: when to fix vs replace for longevity. You have to look at the foundation. If the foundation—or in this case, the tension—isn’t right, the surface will fail prematurely. Have you ever fallen into this trap and ended up with ripples a year later? Let me know in the comments.
The Silent Killer of Luxury Vinyl Planks
Another area where I see ‘experienced’ DIYers fail is in the layout of luxury vinyl plank (LVP). We often talk about the ‘oops’ factor of choosing the wrong color, but the real trap is the stair-step pattern. Most instructions tell you to stagger joints by six inches, but if you create a repeating pattern that looks like a set of stairs across the room, you are creating a structural weakness. These aligned joints allow the floor to shift as a single unit when the house settles or the temperature changes. This leads to the dreaded ‘gapping’ at the short ends of the boards. I’ve found that the stair-step pattern mistake is the primary reason why high-end floors start to pull apart in high-sun areas. To fix this, you need to use a truly random stagger, ensuring no two joints are within three rows of each other in the same vertical line. If you are already seeing gaps, you might need to investigate a glue-down fix for sun-heavy rooms to keep those planks locked together. Every transition, from the tub to the hallway, requires this level of analytical thinking to ensure a seamless flooring look that stands the test of time.
Even with the best silicone lines and the tightest carpet stretch, the long-term success of your renovation depends on the tools you keep in your kit and the way you treat the surfaces after the tools are put away. I’ve realized that most DIY disasters don’t happen during the install—they happen six months later when the house settles or the humidity spikes. To prevent this, you need to stop guessing and start measuring. For instance, when I’m working on trim, I’ve stopped relying solely on a tape measure. I now swear by the scribing tool every diyer needs for tight baseboards. It allows you to trace the literal imperfections of your drywall onto the wood, ensuring a fit so tight you won’t even need that painter’s caulk we talked about earlier.
Stop Trusting Your Walls and Start Scribing
For anyone working with wood or LVP, the most important tool you can own isn’t a saw—it’s a moisture meter. I personally use a pinless Wagner meter because it doesn’t leave holes in my expensive planks. According to the National Wood Flooring Association (NWFA), wood flooring must be within a specific percentage of the subfloor’s moisture content—typically within 4% for strip flooring—to prevent crowning or cupping. If you skip the concrete moisture test that saves your vinyl floor, you are essentially gambling with your investment. I’ve seen beautiful floors buckle because the installer didn’t realize the slab was still ‘breathing’ moisture from a rainy season two months prior. Taking that one reading takes thirty seconds, but it saves you a decade of headaches. 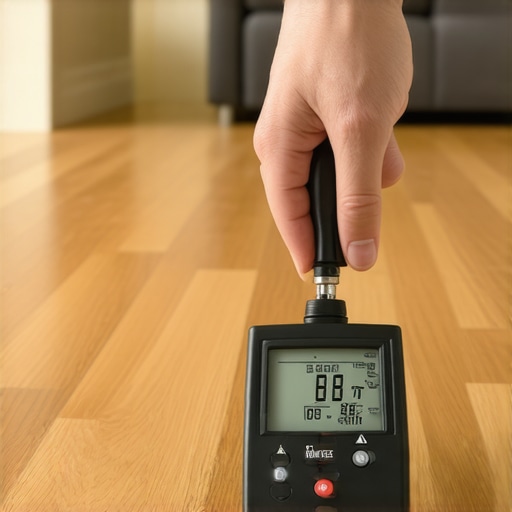
How do I keep my floors and shower pristine over time?
Maintenance is the part of homeownership that nobody finds sexy, but it is the difference between a house that ages gracefully and one that falls apart. For your bathroom, maintenance starts with the grout. Even if you did a perfect job, the house will move. I always keep a small tub of matching pre-mixed grout on hand to address tiny hairline cracks the moment they appear. This is a key part of shower repairs: when to fix vs replace for longevity. If you catch a crack early, you stop the water from reaching the substrate. For your baseboards, avoid the temptation to use a soaking wet mop. Excessive water is what causes why your baseboard paint is peeling off at the bottom. Use a damp microfiber cloth and a pH-neutral cleaner to keep those baseboard styles that elevate your interior design looking fresh without warping the wood.
The 2025 Vision for Smarter Home Maintenance
As we look toward baseboard trends in 2025 and beyond, I predict we are going to see a massive shift toward ‘smart’ integration. We are already seeing underlayments with built-in sensors that can alert your phone if they detect moisture under your kitchen floor. It sounds like sci-fi, but it is the logical next step for homeowners who want to protect their work. In the meantime, you have to be your own sensor. Use the back-bevel secret for inside baseboard corners to allow for natural expansion, and always leave those expansion gaps. My challenge to you today: go buy a $30 moisture meter before your next flooring project. It is the single most ‘pro’ move you can make to ensure your work actually lasts.
The Hardest Lessons My Scuffed Knees Taught Me
Looking back at my first few attempts at home renovation, I realize I was often too focused on the “finish” and not the “foundation.” One major lightbulb moment was realizing that every material has a memory; carpet wants to curl, wood wants to breathe, and silicone wants to stick to everything but the gap. I also learned that “good enough” is the enemy of a professional result. If you see a small gap or a slight wobble now, you will see it every single day for the next ten years. It is always faster to avoid hollow spots under your new tile by checking your coverage early than to rip up a set floor later.
Another hard truth: your house is alive. It expands in the summer and shrinks in the winter. If you don’t account for this with expansion gaps or the back-bevel secret for inside baseboard corners, your beautiful work will eventually tear itself apart. Precision isn’t about being a perfectionist; it’s about respecting the physics of your home and its environment.
The Gear That Saved My Sanity
You don’t need a warehouse full of tools, but you do need the right ones for the critical moments. I never step onto a job site without my Wagner pinless moisture meter. It is the only reliable way to ensure you aren’t about to experience why your hardwood floors are crowning in the summer. For anyone tackling a carpet install, please rent a power stretcher; your knees and your carpet’s longevity will thank you. Lastly, a simple scribing tool is what separates an amateur gap from a baseboards makeover that looks like it was done by a master carpenter. These aren’t just gadgets; they are insurance policies for your hard work and your wallet.
Build the Home You Actually Deserve
DIY work can be intimidating, especially when you are staring at a gutted bathroom or a bare subfloor. But remember, every expert started with a messy caulk bead and a miscut plank. By following your guide to durable flooring installation for a stylish home and taking the time to prep your showers, flooring installation, and baseboards correctly, you are building more than just a room—you are building confidence. Don’t be afraid to make a mistake; just be sure you have the patience to fix it right the first time. Have you ever had a “quick” project turn into a multi-day ordeal because of a missing tool or a skipped step? Let me know your DIY survival stories in the comments below!