

I will never forget the sound of my wife’s favorite wool socks snagging on a poorly installed metal transition strip. It was 6:00 AM, the house was quiet, and then—rip. That jagged piece of aluminum I had ‘temporarily’ installed between our bedroom carpet and the master bath had finally claimed a victim. It wasn’t just about the socks, though. Every time I walked into that bathroom, I saw the gap, the exposed tack strip, and the uneven height that screamed ‘amateur hour.’ I had spent thousands on high-end tile, but I’d ignored the one thing that actually connects the rooms. We often focus so much on the main surface that we forget the margins, but the margins are where the real craftsmanship lives. If you have ever stubbed your toe on a loose metal bar or seen your carpet start to fray at the bathroom door, you know exactly what I’m talking about. Today, I am going to share the exact transition-strip move for carpet to bathroom tile that saved my toes and my reputation as the family handyman. We are moving past those cheap, silver bars and looking at how to create a flush, professional finish that feels as good as it looks. Have you ever felt like your flooring project was 99% done but that last 1% was driving you crazy? You aren’t alone, and it’s a lot easier to fix than you think if you avoid a few common flooring installation mistakes.
Stop the Stubbed Toes and Fix Your Uneven Thresholds
I’ll be honest with you: my biggest mistake early on was thinking that one transition strip fits every scenario. I bought a standard T-molding for a transition where the tile was nearly half an inch higher than the subfloor. It sat at a ridiculous angle and wobbled every time someone stepped on it. It was a classic case of not understanding how to transition from thick carpet to thin surfaces properly. The secret to a successful ‘move’ here is all about managing the height difference before the first piece of trim even touches the floor. When you’re dealing with bathroom tile, you’re usually working with a layer of thinset and backer board that raises the profile significantly. If you just stretch the carpet and hope for the best, you’re going to end up with a trip hazard. According to the International Association of Certified Home Inspectors, improper floor transitions are among the most frequently cited ‘trip hazards’ in residential safety reports. By mastering the right tucking technique and choosing the correct reducer or Z-bar, you turn a potential danger into a seamless design element. This is where carpet install secrets like using a shim or a specific tucking tool come into play to ensure the transition remains rock-solid for years.
Does a Professional Transition Really Make a Difference?
Many homeowners ask me if they can just ‘tuck and staple’ the carpet against the tile and call it a day. While that might work for a week, the constant foot traffic into a high-use area like a bathroom will eventually pull that carpet loose. Without a proper transition strip or a dedicated ‘move’ to lock those fibers down, you’ll see fraying and gapping within months. If you have a loose carpet transition that trips everyone, it’s usually because the mechanical bond between the two floors was never established. Taking the time to install a proper oak or marble threshold, or even a well-fitted metal Z-bar, provides a finished edge that protects both the tile grout and the carpet backing. It’s the difference between a house that feels ‘DIY’ and one that feels ‘Architectural.’ Let’s get into the actual steps to make this happen.
Set the Stage with a Rock Solid Subfloor
Before you even touch a piece of carpet, you have to treat your subfloor like a canvas. If the subfloor is uneven or damp, your transition will eventually fail, no matter how much adhesive you use. I remember a job in a damp basement where I skipped the moisture check; three months later, the transition strip literally popped off because the concrete was ‘sweating.’ That is why we never skip the subfloor moisture test on concrete anymore. If you’re working over wood, check for any bounce. A bouncy floor will rub the carpet against the tile edge like sandpaper, wearing out the fibers prematurely. High-quality flooring installation starts under the surface, so ensure everything is flat and dry before moving forward.
Nail the Tack Strip Distance
The most common mistake is putting the tack strip right against the tile. Don’t do it. You need a ‘gulley’—a small gap about 1/4 inch wide—between the edge of the tile and the tack strip. This gap is where the magic happens. It’s where you’ll tuck the raw edge of the carpet to hide the cut. To get the tension right, you need to follow the tension-first rule for stretching carpet into a doorway. Without that tension, the carpet will eventually pull out of the gulley, leaving you with a frayed, ugly mess that catches every piece of lint in the house. 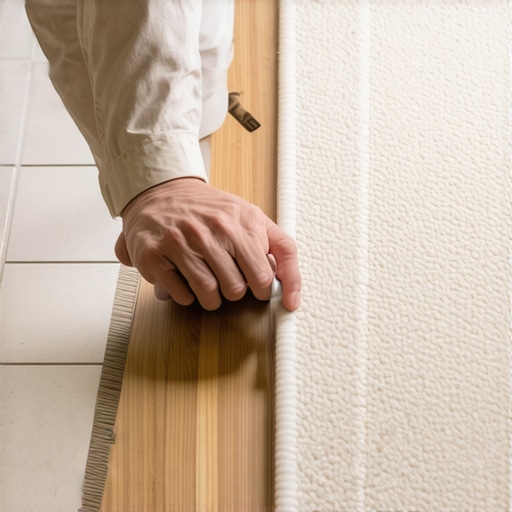
The Secret to the Tension First Tuck
Once your strip is down and your carpet is trimmed, it’s time for the tuck. I used to think I could just jam it in with a flathead screwdriver, but that often ruins the backing or chips the tile grout. I once tried to force a thick frieze carpet into a tight bathroom transition using only a knee kicker and sheer willpower. I ended up with a massive ripple in the middle of the hallway because I didn’t have the side-to-side tension balanced. Avoid the knee-kicker mistake that ruins luxury carpets by using a proper power stretcher for the bulk of the room and saving the kicker move for tucking carpet into tight corners. This ensure the transition is tight enough to resist the vacuum but flexible enough to expand and contract.
Choose the Right Hardware for the Height Gap
If your bathroom tile is significantly higher than your bedroom floor, a simple tuck won’t cut it. You’ll need a reducer. Think of a reducer like a ramp for your feet. Choosing the wrong one is the same logic as how to transition from thick carpet to thin vinyl without a lip. Metal Z-bars are a fantastic option because they get tucked under the carpet and provide a hidden metal edge that the carpet hooks onto, then folds over. It’s invisible, incredibly durable, and protects the fragile edge of your porcelain or ceramic tile from chipping.
Finish with the Door Casing Trick
The transition isn’t just about the floor; it’s about where the floor meets the walls. If you just butt the carpet up against the door trim, it looks unfinished. You need the under-cut move for fitting flooring perfectly under door casings. Use an oscillatory saw to cut a tiny sliver out of the bottom of the door jamb so the carpet and the transition strip can slide underneath. Finally, knowing how to choose the perfect baseboards for your homes style will determine if that transition looks like a finished architectural thought or a weekend afterthought. A slightly thicker baseboard can hide the ends of your transition strip and give the whole room a grounded, custom feel.Let’s dig deeper into why some transitions look like a million bucks while others fail by the second season. I often see homeowners obsess over the carpet quality but then choose the thickest, mushiest padding available, thinking it adds luxury. In my experience, this is the first step toward a ruined installation. While it feels soft, excessive padding thickness causes the carpet backing to flex too much underfoot, leading to premature delamination and those annoying ripples. The Carpet and Rug Institute (CRI) actually recommends a maximum thickness of 7/16 of an inch for residential installations because anything more compromises the mechanical bond. If you have ever wondered why your carpet pad feels crunchy under your feet, it is often because the wrong density was used for the traffic level. When you are moving from that carpet into a bathroom, that extra ‘give’ in the padding makes it impossible to get a flush transition with the tile, leading to the exact tripping hazards we are trying to avoid.
Why Does Your Grout Always Crack at the Threshold?
This is a question I get from people who have done everything ‘by the book’ but still see hair-line fractures where the tile meets the bedroom floor. The hidden nuance here isn’t the grout itself; it is the lack of a movement joint. Most people think they should jam grout into every gap, but where two different types of flooring meet, you need flexibility. Instead of grout, use a color-matched 100% silicone caulk for that final sliver of space. This allows the subfloor to expand and contract without shattering the brittle grout line. If you are working on a full bathroom overhaul, mastering the dry pack secret for a perfectly sloped shower floor will ensure that moisture stays in the drain and doesn’t migrate toward your delicate carpet transitions.
The Dangerous Mistake You Are Making with Your Nail Gun
When you are finishing those transitions with baseboards, there is a trap that even seasoned pros fall into: the ‘blind’ nail. We get so focused on hitting the studs that we forget what else lives inside those walls. I have seen more than one beautiful master suite flooded because a 2-inch finish nail pierced a PEX line or a copper pipe hidden right behind the floor plate. Knowing how to fix a baseboard nail that hit a water pipe immediately is a skill you hope you never need, but you should always use a magnet to find the drywall screws first—this tells you exactly where the studs are and, more importantly, where the utilities are likely running. 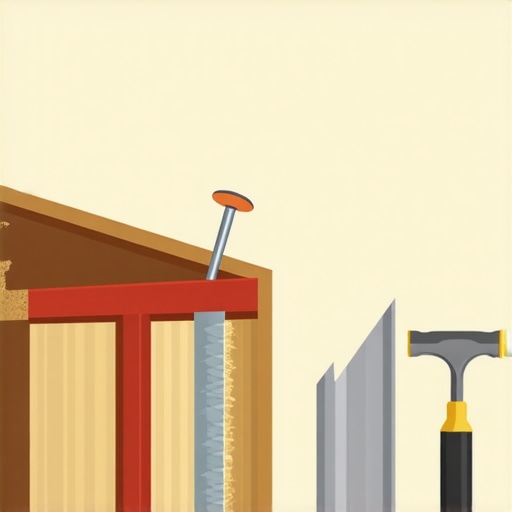 To get that high-end look without the risk, I always recommend using the back-cut secret for tight baseboard outside corners. This ensures your miters stay closed even if the house settles. Also, be careful with the ‘caulk everything’ mentality. In bathrooms, never caulk the very bottom of the baseboard where it meets the tile; if a leak occurs, that caulk will trap the water against your drywall and subfloor, turning a small drip into a mold catastrophe. By leaving a microscopic ‘weep’ gap, you allow the floor to breathe and give yourself a chance to spot moisture before it destroys your carpet install secrets. Choosing the right baseboard styles that elevate your interior design is only half the battle; the rest is in the defensive installation. Have you ever fallen into the ‘thicker is better’ padding trap or accidentally hit a pipe? Let me know in the comments.If you want to avoid those heart-stopping moments with your plumbing or your patience, you need to invest in a few ‘non-negotiable’ tools. I’m not talking about the standard hammer and tape measure; I’m talking about the gear that separates the weekend warrior from the pro. For instance, I used to struggle with baseboards meeting uneven tile until I realized that the scribing tool every DIYer needs for tight baseboards is actually the key to a high-end look. It’s a simple compass-like device, but it allows you to trace the exact undulations of your floor onto the wood. When you cut that line, the baseboard sits flush, making those gaps vanish without a gallon of caulk. It’s the same logic for showers; if you don’t use the level line rule, your vertical tiles will look like they are leaning by the time you reach the ceiling.
How do I keep these transitions looking sharp for years?
The secret to longevity isn’t just the install; it’s the maintenance. Carpet and tile are two different animals. According to the Carpet and Rug Institute’s (CRI) 104/105 Standards, residential carpet should be professionally deep-cleaned every 12 to 18 months to prevent abrasive soil from grinding down the fibers at the transition points. If you see the carpet start to lift or ripple near the bathroom door, don’t wait. Learning how to fix a bubbling carpet without calling a professional can save you from a full replacement. For the tile side, check the silicone joints every season. If you used the masking tape trick for clean silicone joints, your edges should stay waterproof, but even the best silicone can peel over time. Catching these small issues during a routine check is the core of shower repairs when to fix vs replace for longevity.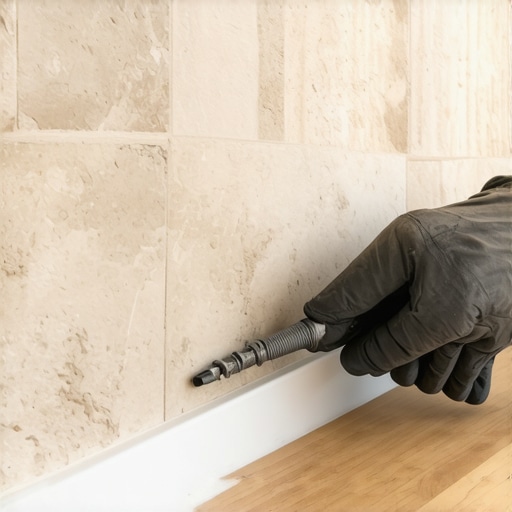 Looking ahead to 2025 and beyond, we are seeing a massive shift toward ‘seamless’ thresholds. The industry is moving away from visible metal strips altogether in favor of custom-milled wood reducers and laser-cut tile transitions. If you want to future-proof your home, look into transform your flooring top trends in installation for 2025. The ‘flush-mount’ look is no longer just for luxury hotels; it’s becoming the standard for modern residential design. My best advice? Try using a professional scribe on your next piece of trim. It takes five extra minutes but removes the need for chunky quarter-rounds or ‘gap-filler’ putty. You can even use the blue tape secret for professional shower silicone lines every time to ensure your bathroom-to-carpet transition looks like it was done by a master craftsman. Don’t settle for ‘good enough’ when the tools to make it ‘perfect’ are already available.
Lessons Bought with Sweat and Scrapped Carpet
After decades of fitting floors, I’ve realized that the most important tool isn’t in my belt—it’s in my ears. You can actually hear the ‘click’ of the carpet backing locking into the Z-bar when the tension is perfect. If you don’t hear it, it is going to fail eventually. Another lightbulb moment for me was accepting that carpet isn’t static; it expands and contracts with the humidity of your bathroom. If you’ve accidentally cut too close during the process, don’t panic; I’ve had to fix a carpet seam that was cut too short more times than I’d like to admit early in my career. I also learned that complex layouts, like transitions near curved areas, require special techniques like the pencil roll trick for measuring carpet on spiral stairs to ensure you don’t waste expensive material. The biggest myth is that you can ‘wing it’ with a standard utility knife; precision is the only way to avoid that amateur look.
The Gear That Saves My Sanity on Every Job
If you are serious about a professional finish, you need to look beyond the basic toolkit. First, the scribing tool every DIYer needs for tight baseboards is non-negotiable for making your trim sit flush against uneven tile. I trust this tool because it removes the guesswork that caulk simply can’t hide. Second, a high-quality stair tool—not a flathead screwdriver—is essential for tucking that carpet into the gulley without damaging the tile grout. Finally, never underestimate a professional-grade power stretcher. While the knee-kicker gets the glory, the stretcher ensures your carpet install secrets remain hidden for a decade, not just a week. For more ideas on how to modernize your space, check out a baseboards makeover to elevate your interior. #IMAGE_PLACEHOLDER_E#
Take the Leap and Finish Your Floor Like a Pro
Creating a flawless transition between your cozy bedroom and your sleek bathroom is one of the most rewarding parts of home renovation. It’s the final handshake between two different worlds in your home. Don’t be intimidated by the technicality of it. With the right tension, the right tools, and a little bit of patience, your flooring installation will look like it was handled by a high-end contractor. You have the knowledge now to transform your home with expert flooring installation tips for 2025. Go ahead, get that carpet tucked, and enjoy the feeling of a job well done every time you step into your bathroom. Have you ever struggled with a transition that just wouldn’t stay tucked? Let me know below.