

I stood there with a scrub brush in my hand, staring at a nickel-sized hole where my pristine grout used to be. It had only been ninety days since I finished the ‘perfect’ bathroom remodel. My heart sank. I’d spent weeks researching the best tiles and the fanciest fixtures, but here I was, watching my hard work literally flake away and vanish down the drain. It’s a gut-punching feeling, especially when you’ve followed the instructions on the back of the bag to the letter—or so you thought. If you’re seeing sandy grit on your shower floor every time you step in for a rinse, you aren’t alone, and you aren’t crazy. I’ve been in those soggy shoes, and I know exactly why it’s happening to you.
Your Grout Isn’t Just ‘Bad’—Something Went Wrong During the Mix
The truth is, grout is a finicky beast that requires more respect than most DIYers (including myself, once upon a time) realize. Early in my journey, I made the classic rookie mistake: I used the ‘glug-glug’ method of adding water. I’d pour a bit of water into the bucket, dump in some powder, and stir until it looked like peanut butter. If it felt too stiff, I’d just splash in more water. That was my first big lesson in failure. Over-watering destroys the chemical bond of the cement. When that excess water eventually evaporates, it leaves behind microscopic air pockets. Those pockets turn your grout into a brittle sponge that can’t handle the vibration of your footsteps or the thermal expansion of hot water. It’s a structural failure that often mirrors the trowel size mistake that ruins your shower tile bond; if the foundation is weak, the finish will never hold. We often focus so much on the ultimate shower renovation guide steps like choosing the right tile that we treat the grout as an afterthought. But grout is the glue of the entire aesthetic. According to the Tile Council of North America (TCNA), the ratio of water to powder is the single most critical factor in determining the final compressive strength and density of cementitious grout. Another thing I learned the hard way? The sponge. I used to think a soaking wet sponge was the key to a clean tile face. In reality, I was just drowning the top layer of my grout joints. That excess water dilutes the dye and the binder right at the surface. It looks great while it’s wet, but once it dries, that top layer is as soft as chalk. It’s no wonder it starts flaking off the moment you hit it with a showerhead or a squeegee.
Is professional-grade epoxy grout actually worth the extra hassle?
You might be wondering if you should just rip it all out and start over with some expensive epoxy. Before you go nuclear, let’s look at why your specific install hit the skids so fast. Did you notice if the color was off before it started falling out? Often, why your shower grout looks patchy and uneven in color is the first warning sign that the mix was compromised by too much moisture or improper slaking. If it’s already crumbling, you might need to learn how to match old grout color when repairing a shower floor so the fix doesn’t look like a patchwork quilt. I want to help you stop the cycle of ‘rinse and repeat’ repairs. Have you ever noticed a fine white powder on your tiles after a shower, even though you just cleaned? That’s the sound of your grout screaming for help. This usually happens in high-stress areas, which is why your shower curb is always the first part to fail when the moisture levels aren’t perfect. Today, I’m going to break down the three hidden reasons your grout is failing and how a simple finger test for checking moisture can save your next project from the same fate. We aren’t just going to patch it; we’re going to understand the science of the cure so you never have to deal with a ‘crunchy’ shower floor again.
Get the Slaking Right or Watch Your Grout Crumble
Mixing grout isn’t like mixing a protein shake; it’s a chemical reaction that requires patience. The biggest mistake I see—and one I’m guilty of from my early days—is skipping the ‘slake.’ After you mix your powder and water to that perfect peanut butter consistency, you have to let it sit for ten minutes. This allows the water to fully permeate the polymer additives. I once rushed a guest bathroom floor because I wanted to finish before a football game started. I skipped the slake, kept stirring, and spread it immediately. Three months later, the grout was turning into white dust. If you don’t let it sit, the chemicals won’t bond, and you’ll end up researching shower repairs when to fix vs replace for longevity sooner than you think. After the ten-minute wait, give it one final manual stir—no power drills here, as they whip air into the mix—and you’re ready to go. 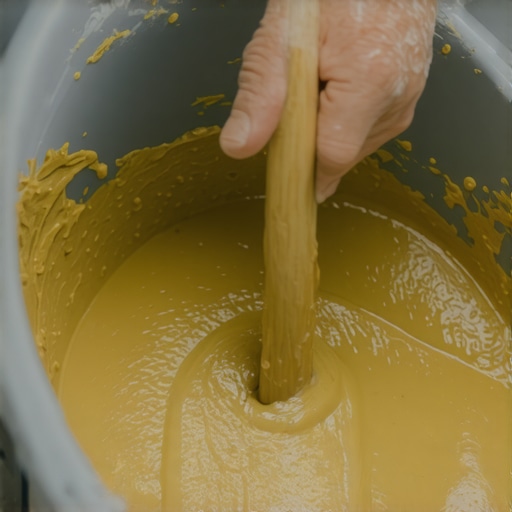
Stop Drowning Your Joints with a Wet Sponge
The ‘wash’ is where most DIY grout jobs go to die. You want to remove the haze from the tile, but if your sponge is dripping, you are effectively diluting the cement right out of the joint. Think of it like making a sandcastle; if you pour a bucket of water over it, the structure collapses. You want a damp sponge, not a soaked one. Squeeze it until no more drops fall out. When you wipe, do it at a 45-degree angle to the joints so you don’t ‘dig’ the grout out. I’ve seen beautiful installations ruined because someone was too aggressive with the water, leading to a finish that looks like why your shower grout looks patchy and uneven in color. If the water in your bucket looks like chocolate milk, change it. Clean water is the only way to keep the pigment consistent across the floor.
The Foundation Must Be Rock Solid
Sometimes, the grout is failing because the floor beneath it is moving. Grout has zero structural strength; it’s just a filler. If your subfloor flexes when you step on it, the grout will crack and flake regardless of how well you mixed it. This is why we often use the dry pack secret for a perfectly sloped shower floor to ensure a rigid base that doesn’t budge. Before you even think about the aesthetic finish, you need to ensure the substrate is sealed and stable using the liquid membrane move for fail-proof shower pans. A waterproof, stiff foundation prevents the micro-movements that turn grout into powder. Finally, once the grout is cured, don’t forget the corners. Never use grout where two planes meet, like the floor and the wall. Use color-matched caulk and the blue tape secret for professional shower silicone lines every time to handle the natural expansion of the house.
It’s a common misconception that if your grout is solid, the rest of the room is safe. I used to fall into that trap too, thinking the finish work was just a victory lap. But the deeper I got into this trade, the more I realized that the most expensive mistakes happen when you assume the basics cover everything. Take baseboards, for example. Most DIYers think a level floor guarantees a straight line, but that is rarely the case. In reality, walls are almost never perfectly flat. If you just nail your trim tight to a wavy wall, you’ll end up with gaps that make the whole room look amateur. This is why your baseboards look crooked on perfectly level floors even when you’ve used a laser level. Professionals solve this by using the scribe tool trick for baseboards against stone walls or uneven drywall, essentially ‘mapping’ the wall’s imperfections onto the wood before cutting.
The Thick Carpet Pad Myth That Costs You Thousands
Everyone wants their bedroom to feel like a cloud, so they buy the thickest, softest carpet pad available. Here’s the contrarian truth: a pad that is too thick can actually destroy your carpet’s backing. When a pad has too much ‘give,’ the carpet’s primary and secondary backings are forced to stretch and flex excessively every time you step. This leads to delamination—the fancy word for your carpet falling apart from the inside out. This is a classic ‘oops’ factor where your search for comfort creates a structural failure. It’s also why your carpet pad feels crunchy under your feet after just a few years of use. According to the Carpet and Rug Institute (CRI) 105 Residential Installation Standard, the maximum thickness for a residential carpet pad should generally not exceed 7/16 of an inch. Anything more, and you are effectively voiding your warranty while inviting early wear. Have you ever fallen into this trap of choosing ‘cushion’ over durability? Let me know in the comments.
Does a power stretcher really make a difference for small rooms?
I hear this question constantly from weekend warriors. They think a knee kicker is enough for a 12×12 bedroom. It isn’t. A knee kicker is for positioning, not for stretching. If you don’t use the power stretcher rule for large living room carpets—and even small ones—you will see wrinkles within three years. This is why your carpet is buckling only three years later. It’s an advanced nuance that separated the pros from the ‘splash and dash’ crews I used to see. 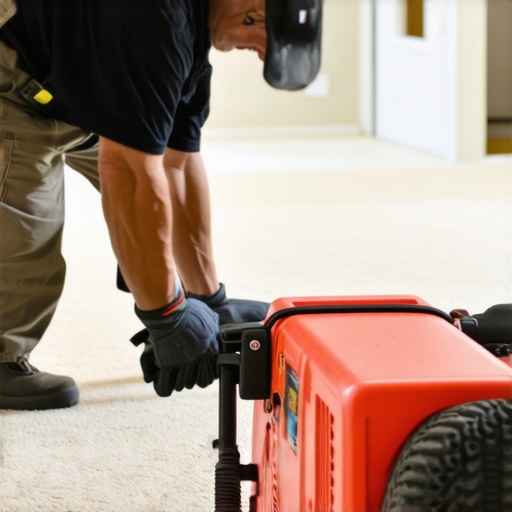
The Invisible Moisture Barrier That Ruins Luxury Vinyl
Another major mistake I see involves the rise of Luxury Vinyl Plank (LVP). Because it’s ‘waterproof,’ people assume they can skip the prep work. But waterproof on the top doesn’t mean it’s immune to what’s underneath. If you are installing over a concrete slab, hydrostatic pressure can build up and cause the joints to fail or mold to grow in the underlayment. This is why we never skip the subfloor moisture test on concrete. If you ignore the vapor emissions, you’ll eventually notice why your vinyl plank floors are making a clicking sound or, worse, gapping at the ends. Much like the grout issues we discussed, the failure starts with what you can’t see. Before you lay your first plank, ensure you’ve accounted for flooring installation mistakes to avoid for a seamless look by checking the moisture levels of your substrate. True expertise isn’t just in the layout; it’s in the science of the environment you’re building in.
The oscillating multi-tool is the secret weapon for any flooring pro. I remember my first job, trying to use a pull saw to cut through solid oak door casings. My knuckles were bleeding, and the cut was jagged. Now, I never start a project without my multi-tool and the stay-sharp blade rule for cutting luxury vinyl. This tool allows for the under-cut move for fitting flooring perfectly under door casings, ensuring your planks slide right under for a professional, seamless look. Without it, you’re forced to cut around the casing, leaving ugly gaps that even the best caulk can’t hide. It’s about precision and saving your back. 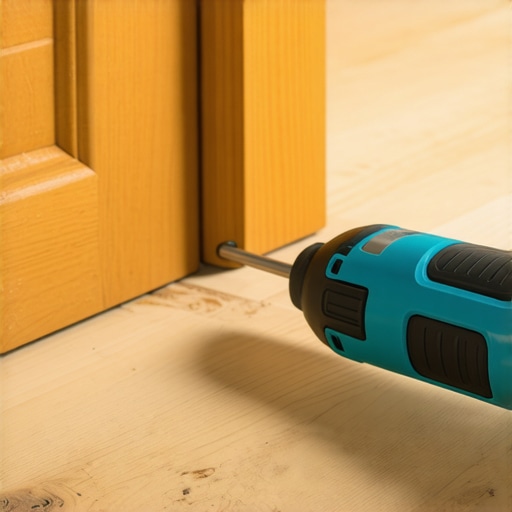
How do I keep my bathroom and floors looking new for a decade?
Maintenance is where most homeowners drop the ball because they think ‘installed’ means ‘finished.’ If you’ve invested in high-end materials, you have to treat them with respect. For showers, that means a proactive re-sealing schedule. I personally use a high-quality penetrating sealer every 18 months, and I always teach my clients how to seal a marble shower without changing the color to protect that porous stone from body oils and soap scum. According to the Tile Council of North America (TCNA) Handbook, the maintenance of flexible sealants in movement joints is non-negotiable; if that silicone starts to peel or mold, water will find a way behind your tile and rot your studs. On the flooring side, tiny particles of grit act like sandpaper under your feet, slowly grinding away the wear layer. This is why I swear by the vacuum seal trick for cleaning dust out of floor grooves. It pulls up the abrasive debris that standard mops just push deeper into the joints. If you do catch a minor scratch on your wood, don’t panic and rent a heavy-duty drum sander. Often, you can use the no-sanding fix for scuffed hardwood floor finishes to restore the luster without the mess of a full remodel. For your carpets, the secret isn’t just regular vacuuming—it’s periodic professional stretching to prevent those dangerous ripples. Use these carpet install secrets achieving flawless results every time to ensure that your investment stays taut for years.
Stop Scuffs Before They Ruin the Finish
Beyond cleaning, long-term results depend on the small things, like the quality of your furniture pads. I’ve seen $10,000 floors ruined by a $5 chair from a thrift store with no protection. Always check your transitions too; if they feel loose, address them immediately with how to fix a loose carpet transition that trips everyone before the edge of the carpet starts to fray. To get a full overview of the process, check my step-by-step flooring installation from planning to perfect finish guide.
The Future of Flooring is Smarter Than You Think
In the next few years, I predict we will see smart moisture sensors integrated directly into the subfloor underlayment as a standard. These thin-film sensors will sync with your home network to alert you to a pipe leak or a failing shower pan before you ever see a water spot on the ceiling or smell mildew. It’s an exciting time for home tech, but until then, your best defense is a good set of tools and a strict maintenance schedule. My challenge to you: buy an oscillating multi-tool before your next project. It will change the way you work forever.
Hard Truths from My Years in the Mud and Sawdust
Looking back at that crumbling grout from my first bathroom remodel, the biggest realization I had was that flooring installation is 90% preparation and only 10% actually laying the material. If you rush the prep, the finish will fail every single time. One lightbulb moment for me was discovering that even the most expensive tile can’t hide a subfloor that bounces; you must solve the structural movement before you ever open a bag of mortar. Another lesson? Humidity is your invisible enemy. Whether you are letting grout slake or waiting for carpet to acclimate, the environment dictates the timeline, not your weekend schedule. Finally, I learned that a clean job site isn’t just about aesthetics—it is about accuracy. A single pebble under a vinyl plank or a bit of dust in a grout joint can create a failure point that haunts your home for years.
The Gear I Carry to Every Job Site
I have cycled through dozens of tools, but these are the items I refuse to work without. First, a high-quality oscillating multi-tool is non-negotiable for making those precise undercuts at door casings. Second, I always keep a reliable moisture meter in my bag; testing concrete before laying LVP has saved me from thousands of dollars in warranty claims. Third, for carpet projects, I never rely on a knee-kicker alone; a power stretcher is essential for preventing the ripples that lead to premature wear. These tools, combined with expert flooring installation tips for 2025, are what separate a DIY project from a professional-grade renovation that lasts. I also highly recommend keeping a copy of the TCNA Handbook nearby—it is the industry standard for tile and grout chemistry.
Stop Planning and Start Your Transformation Today
It is easy to get paralyzed by the technical details, but remember that every pro started with a single, messy project. By paying attention to the slaking process, checking your subfloor moisture, and using the right tools, you are already ahead of the pack. You now have the knowledge to avoid the crumbling grout and the crunchy carpet pads that plague so many homes. Take these carpet install secrets achieving flawless results every time and apply them to your own space with confidence. Your home deserves a foundation that is as durable as it is beautiful. Don’t be afraid to get your hands dirty—the satisfaction of a job done right is worth every minute of research. For more guidance on specific materials, explore your guide to durable flooring installation for a stylish home. Have you ever run into a transition problem between different rooms that felt impossible to fix? Let me know in the comments below!