

I remember standing there, coffee in hand, staring at my brand-new tile work as the morning sun hit the bathroom. Instead of the uniform, sleek gray I had envisioned for my spa retreat, I saw a chaotic map of light and dark patches. It looked like I’d used three different bags of grout, even though I knew I’d only bought one. It was a punch to the gut. If you’re currently squinting at your shower floor wondering why it looks like a camouflage pattern gone wrong, I’ve been in your shoes. You spend hours on your knees, scrubbing and praying it’s just a drying issue, only to realize the blotchiness is here to stay. Most people think they just bought a bad batch, but the reality is usually much more manageable—and preventable. [image_placeholder_1]
The Morning I Realized My Shower Looked Like a Mess
The frustration of patchy grout is real. You put in the work, or you paid someone else a lot of money to do it, and yet the finish looks dirty before you’ve even used the soap. When I first started DIYing, I made the classic mistake of using way too much water during the cleanup phase. I thought more water meant a cleaner tile surface. In reality, I was just washing the pigment right out of the joints. Today, we are going to dive into the science of why this happens and how you can actually get that uniform look back without a total demo. Whether you are dealing with a botched shower renovation or just trying to freshen up an old space, I promise there is a way forward that doesn’t involve crying on the bathroom floor.
Is my brand-new tile job already ruined beyond repair?
That is the fear that keeps us up at night, isn’t it? You worry that the only fix is to scrape it all out and start over. I used to think the same thing. But here is the good news: most color shading issues are superficial. According to the Tile Council of North America (TCNA), grout shading variations are frequently caused by environmental factors like humidity or improper mixing rather than a defective product. You aren’t necessarily looking at a structural failure, just an aesthetic hiccup.
Water Is the Secret Villain in Your Mixing Bucket
The biggest culprit for uneven color is the water-to-powder ratio. If you or your contractor eyeballed the mix, you’re asking for trouble. Grout is a Portland cement-based product, and it’s finicky. If the mix is too thin, the pigment floats to the top or sinks, leaving you with those dreaded dark and light spots. Even if the mix is perfect, the moisture level of your thinset matters too. I learned the hard way that if you don’t use the finger test for checking thinset moisture before grouting, that trapped water will migrate into the grout and change its color as it dries. It’s also worth looking at how you handled the cleanup. Have you ever noticed how a sponge can hold a surprising amount of water? If that sponge is dripping when you swipe across the joints, you are essentially diluting the dye in the grout. This leads to efflorescence—that chalky white residue that makes dark grout look like it’s fading. If you’re seeing this, you might need to look into shower repairs to see if a simple colorant can save the day. The goal is a spa-like shower experience, not a constant reminder of a DIY disaster. Have you noticed your grout changing colors specifically near the drain or the corners? Tell me about your grout nightmares—I’ve probably made the same mistake twice. Before you go buying a grout saw, let’s talk about how to diagnose the specific type of patchiness you’re seeing. Sometimes you can match old grout color or use a penetrating sealer to even things out.
Identify if You Are Fighting Salt or Missing Dye
Before you reach for the heavy-duty chemicals, you need to know what you are looking at. I once spent three hours scrubbing a client’s dark charcoal shower floor because I thought it was just dirty. It turned out to be efflorescence—minerals from the water and cement rising to the surface as it dried. If your grout looks like it has a white, chalky film, it is likely mineral buildup. If the color is simply lighter in some spots but the texture is consistent, you are dealing with pigment washout. Just as flooring installation mistakes to avoid often involve rushing the drying process, grout issues usually stem from water management.
Test with a Damp Rag
Take a wet rag and wipe a dark patch and a light patch. If the light patch matches the dark patch while wet but fades back to white once dry, it’s almost certainly efflorescence or high porosity. If it stays light even when damp, the pigment is gone. This simple check saves you from buying the wrong products. If you find the grout is actually crumbling, you might need to investigate shower repairs before moving to aesthetic fixes.
The Grout Colorant Solution for Permanent Uniformity
When cleaning doesn’t work, don’t panic. You don’t have to rip out the tile. Grout colorant is essentially an epoxy-based paint designed specifically for joints. I used this on a botched guest bath three years ago; I applied a ‘warm gray’ colorant over a splotchy mess, and to this day, it looks brand new. It seals the grout while it colors it, making it much easier to maintain than a spa-like shower experience that requires constant scrubbing. 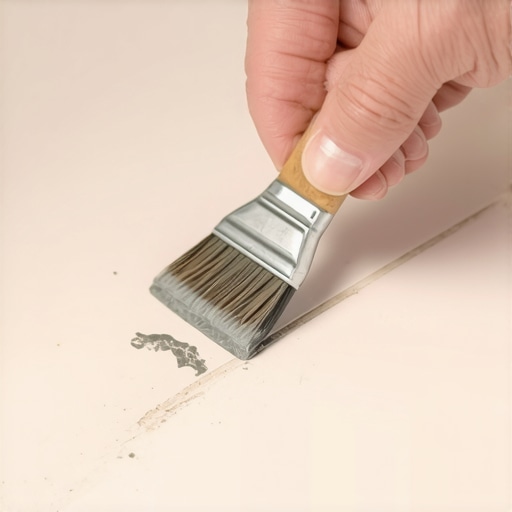
How to Apply Colorant Without Making a Mess
Use a toothbrush or a specialized applicator to paint the colorant onto the dry, clean grout lines. Work in small sections, about two square feet at a time. Let it sit for the time recommended on the bottle—usually about 10 minutes—and then wipe the excess off the tile face with a damp (not dripping!) microfiber cloth. If you struggle with the edges, you can use the blue tape secret to mask off the tile, though most pros find that a steady hand and a quick wipe are sufficient.
Avoid the ‘Wringing the Sponge’ Trap Next Time
If you are planning a new project or fixing a section, remember that the sponge is your greatest tool and your worst enemy. Most DIYers leave the sponge too wet. Think of it like a damp paper towel, not a soaking washcloth. When you swipe across the grout, you should see a faint haze, not a trail of water. If you see water pooling in the joint, you are diluting the cement and the color. This is as critical as the the finger test for checking thinset moisture; moisture levels must be controlled at every stage.
Mix the Entire Bag at Once
Many people make the mistake of mixing small batches of grout. Even a tiny variation in the amount of water between two buckets will lead to two different shades of gray on your floor. For a step-by-step flooring installation, consistency is king. Use a measuring cup for the water—never ‘eyeball it’ with a garden hose. If you must mix multiple batches, ‘dry-pot’ them by mixing the dry powders together first to ensure the pigment is evenly distributed throughout the entire project.Most people assume that once the grout is in and the tile is wiped, the job is done. I see so many DIYers rush to apply a sealer the very next day. They think they’re protecting their work, but in reality, they’re trapping residual moisture inside the cement. This is a huge mistake. According to the Tile Council of North America (TCNA), grout needs significant time to cure before it can be effectively sealed. If you seal it too early, you’re basically suffocating the material, which leads to that weird, cloudy haze or even structural softening. Patience is your best friend here. Beyond grout, I often see people obsessing over the tile itself while ignoring the foundation. They think any mortar will stick, but the reality is that the trowel size mistake is what actually causes tiles to pop or crack over time. If you don’t have enough coverage, it doesn’t matter how expensive the porcelain was. And it isn’t just tile where ‘faster’ isn’t better. Let’s talk about carpet. There is a common belief that a thicker, fluffier pad always equals a more luxurious feel. I used to believe that too until I saw a high-end carpet job ruined in three years. A pad that is too thick or too soft allows for too much vertical movement, which eventually snaps the latex backing of the carpet. This leads to those ugly ripples you see in the middle of a room. If you want to avoid this, you need to understand the nuances of achieving flawless results every time.
Why is my carpet bubbling even though I paid for a pro install?
The answer usually lies in a tool called the power stretcher. Many installers rely solely on a knee-kicker to save time. While a kicker is great for positioning, it doesn’t provide the mechanical tension required by the Carpet and Rug Institute (CRI) 104/105 standards, which mandate power stretching for residential carpet. Without it, your carpet is just ‘laying’ there, waiting for a humid day to expand and buckle. I’ve fixed dozens of rooms where the knee-kicker mistake was the sole reason the homeowner was tripping over floor-waves.  Another ‘expert’ nuance people miss is in the finishing touches—the baseboards. It seems simple, right? Just nail them to the wall. But if you are nailing baseboards into the bottom plate only, you’re setting yourself up for gaps as the house settles. You need to hit the wall studs for a permanent hold. If you’re struggling with those pesky corners where the walls aren’t quite square, remember the back-bevel secret to get a tight, professional fit every time. Finally, the ‘Oops’ factor often hits when we ignore what we can’t see. I once saw a beautiful vinyl plank floor fail within six months because the installer skipped the concrete moisture test. Vapor pressure from the slab literally pushed the joints apart. Similarly, when laying planks, watch out for the ‘stair-step’ pattern. I always warn folks about the stair-step pattern mistake because it creates a weak line that eventually separates under foot traffic. Have you ever fallen into this trap or noticed your carpet starting to wave? Let me know in the comments—I love troubleshooting these weird floor gremlins. If you’re feeling overwhelmed, looking into step-by-step flooring installation can help simplify the process.Once the immediate fires are out, I usually shift my focus to the long game. You didn’t just build a bathroom; you built a system that has to survive humidity, gravity, and foot traffic. I’ve found that the difference between a floor that lasts five years and one that lasts fifty comes down to three specific tools that most people ignore.
The Gear That Separates Beginners from Craftsmen
If you are serious about DIY, you need to stop buying the generic all-in-one kits at the big box stores. I learned this the hard way after my third vinyl floor started separating at the seams. I realized I wasn’t getting enough force on the locking mechanisms. That’s when I discovered the dead blow hammer secret for flat floor seaming. Unlike a standard rubber mallet that bounces back, a dead blow hammer is filled with steel shot. This means 100% of the energy is transferred into the plank, clicking it into place without damaging the delicate tongue and groove. It’s the difference between a seam that looks okay today and one that stays tight for a decade.
Trade Your Mallet for a Dead Blow and Save Your Joints
I use a 16-ounce dead blow for almost every durable flooring installation I tackle now. It saves my wrists and ensures those vinyl joints won’t fail when the house settles. But maintenance isn’t just about the tools; it’s about the prep work we do to prevent future failures. For instance, in a wet environment, I never rely on just a single bead of silicone. I always implement the triple point seal for leak-proof shower corners. This involves a primary waterproof seal behind the tile, the grout itself, and then a high-quality flexible sealant on top. 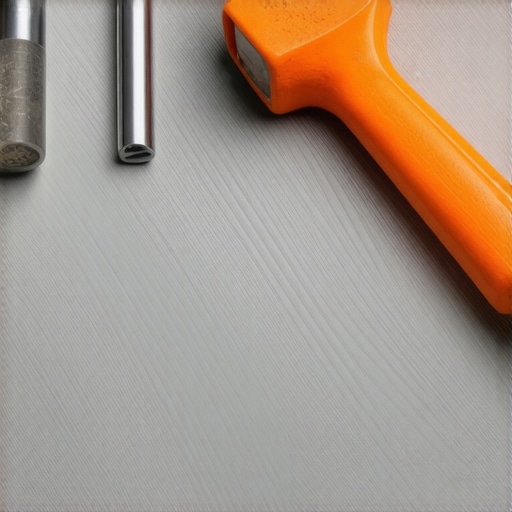
How can I maintain a professional finish over the long haul?
Maintaining that just-finished look requires a shift in how you clean. Most homeowners use harsh acidic cleaners that slowly eat away at grout and carpet fibers. For my own home, I use pH-neutral cleaners exclusively. If you’ve completed a high-quality carpet install, regular vacuuming with a height-adjustable beater bar is non-negotiable to prevent fiber crushing. If you find sections of carpet starting to lift, especially on steps, don’t wait for it to trip someone. I use the stay-put glue strategy for carpet on stairs to ensure the padding and the fabric never shift.
Stop Using Caulk to Hide Bad Cuts
If you are working on trim, please stop using half a tube of caulk to hide a gap. It eventually shrinks, cracks, and looks terrible. Instead, learn how to use the scribing tool every DIYer needs for tight baseboards. Scribing allows you to follow the exact contour of a wavy floor or wall perfectly. When you combine a scribed cut with the caulk and dab method, you get a joint that looks like it was grown in place. According to the ANSI A108.02-3.8 technical guidelines, the subfloor must be perfectly dry and level to a specific tolerance, and while we can’t always fix the slab, we can always scribe our trim to match it. I truly believe the future of home renovation is in high-performance materials like moisture-reactive adhesives. We are moving toward a world where the materials themselves compensate for minor human errors. My challenge to you: pick one of these pro tools—whether it’s a scribe or a dead blow hammer—and use it on your next small repair. You’ll never go back to the basic hardware store aisle again.I remember standing there, coffee in hand, staring at my brand-new tile work as the morning sun hit the bathroom. Instead of the uniform, sleek gray I had envisioned for my spa retreat, I saw a chaotic map of light and dark patches. It looked like I’d used three different bags of grout, even though I knew I’d only bought one. It was a punch to the gut. If you’re currently squinting at your shower floor wondering why it looks like a camouflage pattern gone wrong, I’ve been in your shoes. You spend hours on your knees, scrubbing and praying it’s just a drying issue, only to realize the blotchiness is here to stay. Most people think they just bought a bad batch, but the reality is usually much more manageable—and preventable. [image_placeholder_1]
The Morning I Realized My Shower Looked Like a Mess
The frustration of patchy grout is real. You put in the work, or you paid someone else a lot of money to do it, and yet the finish looks dirty before you’ve even used the soap. When I first started DIYing, I made the mistake of using way too much water during the cleanup phase. I thought more water meant a cleaner tile surface. In reality, I was just washing the pigment right out of the joints. Today, we are going to dive into the science of why this happens and how you can actually get that uniform look back without a total demo. Whether you are dealing with a botched shower renovation or just trying to freshen up an old space, I promise there is a way forward that doesn’t involve crying on the bathroom floor.
Is my brand-new tile job already ruined beyond repair?
That is the fear that keeps us up at night, isn’t it? You worry that the only fix is to scrape it all out and start over. I used to think the same thing. But here is the good news: most color shading issues are superficial. According to the Tile Council of North America (TCNA), grout shading variations are frequently caused by environmental factors like humidity or improper mixing rather than a defective product. You aren’t necessarily looking at a structural failure, just an aesthetic hiccup.
Water Is the Secret Villain in Your Mixing Bucket
The biggest culprit for uneven color is the water-to-powder ratio. If you or your contractor eyeballed the mix, you’re asking for trouble. Grout is a Portland cement-based product, and it’s finicky. If the mix is too thin, the pigment floats to the top or sinks, leaving you with those dreaded dark and light spots. Even if the mix is perfect, the moisture level of your thinset matters too. I learned the hard way that if you don’t use the finger test for checking thinset moisture before grouting, that trapped water will migrate into the grout and change its color as it dries. It’s also worth looking at how you handled the cleanup. Have you ever noticed how a sponge can hold a surprising amount of water? If that sponge is dripping when you swipe across the joints, you are essentially diluting the dye in the grout. This leads to efflorescence—that chalky white residue that makes dark grout look like it’s fading. If you’re seeing this, you might need to look into shower repairs to see if a simple colorant can save the day. The goal is a spa-like shower experience, not a constant reminder of a DIY disaster. Have you noticed your grout changing colors specifically near the drain or the corners? Tell me about your grout nightmares—I’ve probably made the same mistake twice. Before you go buying a grout saw, let’s talk about how to diagnose the specific type of patchiness you’re seeing. Sometimes you can match old grout color or use a penetrating sealer to even things out.
Identify if You Are Fighting Salt or Missing Dye
Before you reach for the heavy-duty chemicals, you need to know what you are looking at. I once spent three hours scrubbing a client’s dark charcoal shower floor because I thought it was just dirty. It turned out to be efflorescence—minerals from the water and cement rising to the surface as it dried. If your grout looks like it has a white, chalky film, it is likely mineral buildup. If the color is simply lighter in some spots but the texture is consistent, you are dealing with pigment washout. Just as flooring installation mistakes to avoid often involve rushing the drying process, grout issues usually stem from water management.
Test with a Damp Rag
Take a wet rag and wipe a dark patch and a light patch. If the light patch matches the dark patch while wet but fades back to white once dry, it’s almost certainly efflorescence or high porosity. If it stays light even when damp, the pigment is gone. This simple check saves you from buying the wrong products. If you find the grout is actually crumbling, you might need to investigate shower repairs before moving to aesthetic fixes.
The Grout Colorant Solution for Permanent Uniformity
When cleaning doesn’t work, don’t panic. You don’t have to rip out the tile. Grout colorant is essentially an epoxy-based paint designed specifically for joints. I used this on a botched guest bath three years ago; I applied a ‘warm gray’ colorant over a splotchy mess, and to this day, it looks brand new. It seals the grout while it colors it, making it much easier to maintain than a spa-like shower experience that requires constant scrubbing.
How to Apply Colorant Without Making a Mess
Use a toothbrush or a specialized applicator to paint the colorant onto the dry, clean grout lines. Work in small sections, about two square feet at a time. Let it sit for the time recommended on the bottle—usually about 10 minutes—and then wipe the excess off the tile face with a damp (not dripping!) microfiber cloth. If you struggle with the edges, you can use the blue tape secret to mask off the tile, though most pros find that a steady hand and a quick wipe are sufficient.
Avoid the ‘Wringing the Sponge’ Trap Next Time
If you are planning a new project or fixing a section, remember that the sponge is your greatest tool and your worst enemy. Most DIYers leave the sponge too wet. Think of it like a damp paper towel, not a soaking washcloth. When you swipe across the grout, you should see a faint haze, not a trail of water. If you see water pooling in the joint, you are diluting the cement and the color. This is as critical as the the finger test for checking thinset moisture; moisture levels must be controlled at every stage.
Mix the Entire Bag at Once
Many people make the mistake of mixing small batches of grout. Even a tiny variation in the amount of water between two buckets will lead to two different shades of gray on your floor. For a step-by-step flooring installation, consistency is king. Use a measuring cup for the water—never ‘eyeball it’ with a garden hose. If you must mix multiple batches, ‘dry-pot’ them by mixing the dry powders together first to ensure the pigment is evenly distributed throughout the entire project.Most people assume that once the grout is in and the tile is wiped, the job is done. I see so many DIYers rush to apply a sealer the very next day. They think they’re protecting their work, but in reality, they’re trapping residual moisture inside the cement. This is a huge mistake. According to the Tile Council of North America (TCNA), grout needs significant time to cure before it can be effectively sealed. If you seal it too early, you’re basically suffocating the material, which leads to that weird, cloudy haze or even structural softening. Patience is your best friend here. Beyond grout, I often see people obsessing over the tile itself while ignoring the foundation. They think any mortar will stick, but the reality is that the trowel size mistake is what actually causes tiles to pop or crack over time. If you don’t have enough coverage, it doesn’t matter how expensive the porcelain was. And it isn’t just tile where ‘faster’ isn’t better. Let’s talk about carpet. There is a common belief that a thicker, fluffier pad always equals a more luxurious feel. I used to believe that too until I saw a high-end carpet job ruined in three years. A pad that is too thick or too soft allows for too much vertical movement, which eventually snaps the latex backing of the carpet. This leads to those ugly ripples you see in the middle of a room. If you want to avoid this, you need to understand the nuances of achieving flawless results every time.
Why is my carpet bubbling even though I paid for a pro install?
The answer usually lies in a tool called the power stretcher. Many installers rely solely on a knee-kicker to save time. While a kicker is great for positioning, it doesn’t provide the mechanical tension required by the Carpet and Rug Institute (CRI) 104/105 standards, which mandate power stretching for residential carpet. Without it, your carpet is just ‘laying’ there, waiting for a humid day to expand and buckle. I’ve fixed dozens of rooms where the knee-kicker mistake was the sole reason the homeowner was tripping over floor-waves. Another ‘expert’ nuance people miss is in the finishing touches—the baseboards. It seems simple, right? Just nail them to the wall. But if you are nailing baseboards into the bottom plate only, you’re setting yourself up for gaps as the house settles. You need to hit the wall studs for a permanent hold. If you’re struggling with those pesky corners where the walls aren’t quite square, remember the back-bevel secret to get a tight, professional fit every time. Finally, the ‘Oops’ factor often hits when we ignore what we can’t see. I once saw a beautiful vinyl plank floor fail within six months because the installer skipped the concrete moisture test. Vapor pressure from the slab literally pushed the joints apart. Similarly, when laying planks, watch out for the ‘stair-step’ pattern. I always warn folks about the stair-step pattern mistake because it creates a weak line that eventually separates under foot traffic. Have you ever fallen into this trap or noticed your carpet starting to wave? Let me know in the comments—I love troubleshooting these weird floor gremlins. If you’re feeling overwhelmed, looking into step-by-step flooring installation can help simplify the process.Once the immediate fires are out, I usually shift my focus to the long game. You didn’t just build a bathroom; you built a system that has to survive humidity, gravity, and foot traffic. I’ve found that the difference between a floor that lasts five years and one that lasts fifty comes down to three specific tools that most people ignore.
The Gear That Separates Beginners from Craftsmen
If you are serious about DIY, you need to stop buying the generic all-in-one kits at the big box stores. I learned this the hard way after my third vinyl floor started separating at the seams. I realized I wasn’t getting enough force on the locking mechanisms. That’s when I discovered the dead blow hammer secret for flat floor seaming. Unlike a standard rubber mallet that bounces back, a dead blow hammer is filled with steel shot. This means 100% of the energy is transferred into the plank, clicking it into place without damaging the delicate tongue and groove. It’s the difference between a seam that looks okay today and one that stays tight for a decade.
Trade Your Mallet for a Dead Blow and Save Your Joints
I use a 16-ounce dead blow for almost every durable flooring installation I tackle now. It saves my wrists and ensures those vinyl joints won’t fail when the house settles. But maintenance isn’t just about the tools; it’s about the prep work we do to prevent future failures. For instance, in a wet environment, I never rely on just a single bead of silicone. I always implement the triple point seal for leak-proof shower corners. This involves a primary waterproof seal behind the tile, the grout itself, and then a high-quality flexible sealant on top.
How can I maintain a professional finish over the long haul?
Maintaining that just-finished look requires a shift in how you clean. Most homeowners use harsh acidic cleaners that slowly eat away at grout and carpet fibers. For my own home, I use pH-neutral cleaners exclusively. If you’ve completed a high-quality carpet install, regular vacuuming with a height-adjustable beater bar is non-negotiable to prevent fiber crushing. If you find sections of carpet starting to lift, especially on steps, don’t wait for it to trip someone. I use the stay-put glue strategy for carpet on stairs to ensure the padding and the fabric never shift.
Stop Using Caulk to Hide Bad Cuts
If you are working on trim, please stop using half a tube of caulk to hide a gap. It eventually shrinks, cracks, and looks terrible. Instead, learn how to use the scribing tool every DIYer needs for tight baseboards. Scribing allows you to follow the exact contour of a wavy floor or wall perfectly. When you combine a scribed cut with the caulk and dab method, you get a joint that looks like it was grown in place. According to the ANSI A108.02-3.8 technical guidelines, the subfloor must be perfectly dry and level to a specific tolerance, and while we can’t always fix the slab, we can always scribe our trim to match it. I truly believe the future of home renovation is in high-performance materials like moisture-reactive adhesives. We are moving toward a world where the materials themselves compensate for minor human errors. My challenge to you: pick one of these pro tools—whether it’s a scribe or a dead blow hammer—and use it on your next small repair. You’ll never go back to the basic hardware store aisle again.
The One Hard Lesson I Learned While Kneeling on Tile
Looking back at years of projects, I’ve realized that the most expensive tool in your kit is actually patience. We often treat home improvement like a race, but the best shower renovation projects are won in the pauses. I used to think that a ‘finished’ floor meant I could walk on it immediately, but giving materials time to breathe and settle is the real secret to a spa-like shower experience. Don’t underestimate the power of a test patch; I’ve saved hundreds of dollars by testing a small area of grout before committing to the whole floor. Also, remember that your subfloor is the boss. If you ignore why your new floor is bouncing, no amount of expensive hardwood will fix that hollow feeling underfoot. Lastly, always keep a small emergency kit of leftover grout and a few spare planks—you’ll thank yourself five years from now when a heavy pot chips the floor.
Building a Toolkit That Actually Saves You Money
If I had to narrow my garage down to just three items for expert flooring installation, I’d start with a high-quality scribe. Using the scribing tool every DIYer needs is the only way to make generic trim look like custom carpentry. Next, I never tackle a bedroom without a power stretcher; it’s the only way to avoid the knee-kicker mistake that ruins so many carpet jobs. Finally, invest in a dedicated moisture meter. Whether you are checking concrete for a vinyl install or checking thinset moisture in a wet area, knowing the data beats guessing every time. These aren’t just gadgets; they are the difference between a DIY look and a professional result.
It Is Finally Time to Take the Plunge
Transforming your home doesn’t require a degree in architecture; it just requires the willingness to learn from a few blotchy grout lines along the way. Whether you are fixing shower repairs or planning a full-scale flooring installation, you now have the insider knowledge to avoid the most common pitfalls. Your home is a canvas, and every tight baseboard miter is a stroke of success. Don’t be afraid to get your hands dirty—the satisfaction of a floor that doesn’t squeak is worth every minute of prep work. Have you ever spent hours on a project only to notice a tiny mistake the next morning? Let me know your biggest ‘oops’ moment in the comments below!