

I still remember the first time I tried to be the hero of my own living room. A cup of coffee met my cream-colored rug, and I went to war with a bottle of dish soap and a scrub brush. I thought I won because the stain disappeared, but by the next morning, walking across that spot felt like stepping on a bowl of dried cereal. It was brittle, stiff, and honestly, a little embarrassing when guests came over. If you’ve ever touched a spot on your floor and heard that dreaded crackle, you aren’t alone. We all want to save a buck and skip the professional cleaners, but often our “quick fixes” leave behind a residue that makes the fibers feel like plastic. Today, I’m going to show you exactly why that happens and how we can bring the softness back without calling in a professional crew.
The Real Reason Your Carpet Turned Into Sandpaper
When we rush to blot up a spill, our instinct is to pour on the cleaner. I made the classic mistake of thinking “more soap equals more clean” early in my homeowner journey. In reality, carpet fibers are like little sponges for chemicals. According to the IICRC (Institute of Inspection Cleaning and Restoration Certification), residue left behind by improper cleaning agents actually attracts more dirt over time, a phenomenon known as re-soiling. This is why that crunchy spot often turns dark and dingy a week later. You might have followed all the advice for a cozy living space, but one bad spill fix can ruin the entire vibe. Usually, the “crunch” is just dried soap or minerals from your tap water that have crystallized around the yarn. It’s a common hurdle, much like why your carpet pad feels crunchy under your feet due to age or moisture, but when it’s on the surface, it’s almost always a chemistry problem.
Is my carpet permanently ruined from the soap?
I get this question all the time from neighbors who think they’ve literally melted their flooring. The good news is that 90% of the time, the fibers are just “glued” together by a thin soap film. Even if you used the baking soda vacuum trick to handle smells, if you didn’t rinse the area properly, you’re going to have texture issues. It’s not a lost cause, but you do need to stop scrubbing and start thinking about extraction. Have you ever felt that stiff patch and wondered if you just made things ten times worse? Drop a comment and tell me what you used to clean it—I’ve probably made the same mistake myself!
Stop Scrubbing and Start Rinsing
To get back to that soft feel, we have to talk about the pH balance of your flooring. Most household cleaners are highly alkaline, and if they aren’t neutralized, they stay sticky forever. When I was learning carpet install secrets, I realized that the way we treat the fibers during the first few hours of a spill determines their lifespan. If you’ve just finished a big flooring installation from planning to finish, the last thing you want is a crunchy eyesore in the middle of the room.
Break the Soap Bond with Kitchen Staples
To fix that sandpaper feel, we need to talk about chemistry. Think of your carpet fibers like your own hair; if you don’t rinse out the shampoo, your hair becomes a sticky, matted mess. Most carpet cleaners are alkaline. To neutralize them, you need a mild acid. My secret weapon is a simple mixture of one part white distilled vinegar to three parts lukewarm water. I remember a hallway spill where I used so much Dawn dish soap that I could have hosted a foam party. Every time I stepped there, it felt like dried glue. I sprayed the vinegar solution over the spot, let it sit for ten minutes, and the ‘crunch’ literally dissolved. The vinegar breaks down the alkaline salts in the soap, making them water-soluble again. It’s a similar logic to how we use specific cleaners during a flooring installation from planning to perfect finish to avoid haze.
Get the Gunk Out Without Soaking the Subfloor
Once you’ve neutralized the soap, you can’t just let it air dry, or the minerals will just settle back down. You need to extract. If you don’t have a professional carpet extractor, a wet-dry shop vac is your best friend. Press the nozzle firmly into the fibers and pull slowly. You want to see the moisture being sucked through the clear nozzle. Be careful not to over-saturate the area, as moisture can seep through to the padding. If you are working near a doorway, make sure you know how to transition from thick carpet to thin vinyl without a lip so you don’t accidentally drench the adjacent flooring. Excessive water is the enemy of any floor, much like how the tape and seal strategy for protecting carpet is vital during home renovations to keep debris and liquids away from the backing. 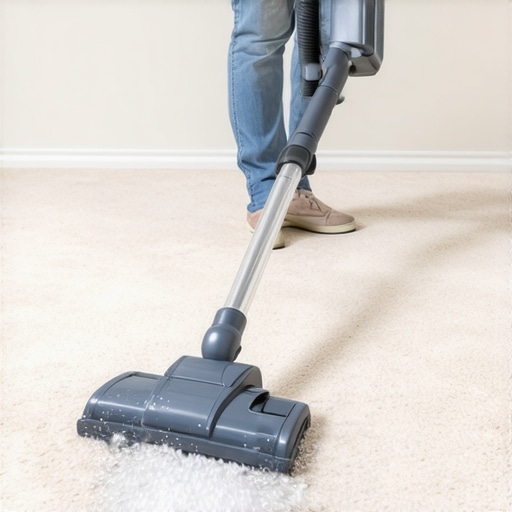
Bring Back the Fluff with Mechanical Agitation
After you’ve extracted as much liquid as possible, the fibers will likely be lying flat and sad. This is where most people stop, and it’s why the carpet still feels a bit stiff once dry. While the carpet is still slightly damp, take a soft-bristled nylon brush or even a clean white towel and gently ‘groom’ the fibers. You want to lift them up so air can circulate around each individual strand. When I was first learning carpet install secrets, I realized that the way the pile is set during drying dictates the final texture. If you leave it compressed, it dries compressed.
Avoid the Heat Trap
A common mistake is bringing in a hair dryer or a space heater to speed things up. High heat can actually heat-set some synthetic fibers, making the stiffness permanent. Instead, use a simple floor fan directed at the spot. This mimics the airflow used in professional expert flooring installation tips for 2025 to ensure materials acclimate and dry naturally. If the spot is near a wall, be careful not to knock your trim; if you’re also refreshing your room, check out these baseboard styles that elevate your interior design to complete the look once the floor is soft again. You’ll know you’ve succeeded when you can run your hand across the spot and it feels indistinguishable from the rest of the room.
The Knee Kicker Is Not Your Primary Tool
Most DIY enthusiasts and even some budget contractors believe that a knee kicker is all you need to get a carpet tight. This is a massive misconception that I see ruining high-end installs every year. While it’s great for positioning, relying solely on it for the final stretch is a recipe for ripples within 24 months. I’ve seen homeowners invest in the best carpet types for high-traffic areas in 2025, only to have the look destroyed because the installer skipped the power stretcher. The real pros know that the power stretcher rule for large living room carpets isn’t just a suggestion; it’s a requirement for structural integrity. If you only use a kicker, you aren’t actually stretching the backing—you’re just temporary tensioning it. This leads to the knee kicker mistake that ruins luxury carpets, where the fibers eventually relax and create unsightly waves. The Carpet and Rug Institute (CRI) specifically states in their S100 standards that power stretching is mandatory for all residential carpet installations to prevent premature failure.
Why do my carpet seams show even after a professional install?
It’s a frustrating sight: you’ve paid for a top-tier service, but there’s a visible line cutting through your room. The hidden nuance here is often ‘peaking,’ where the seam is physically pulled upward. This happens when the tension isn’t balanced across the room or when the installer didn’t use a seam sealer. Learning how to hide a carpet seam in the middle of a room requires more than just tape; it requires understanding the direction of the light and the ‘nap’ of the carpet. If the installer didn’t align the pile direction perfectly, that seam will look like two different colors forever. It’s these small, technical details that separate a ‘flooring guy’ from a true craftsman. 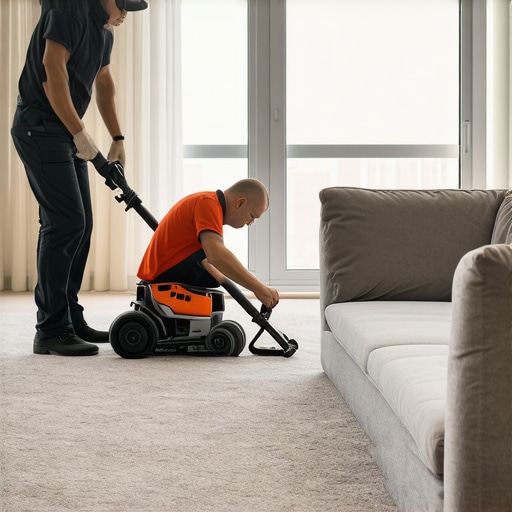
The Invisible Enemy Under Your Subfloor
The ‘Oops’ factor that catches almost everyone off guard is the subfloor moisture trap. Everyone focuses on the surface, but what’s happening underneath is what dictates the life of your floor. I once worked on a project where the homeowner had perfectly soft carpet, but the room always smelled slightly musty. We pulled it back to find that they had skipped a simple test. This is why we never skip the subfloor moisture test on concrete. If you trap moisture under a pad, you’re creating a petri dish. This is especially critical if you are transitioning between different zones, like moving from a bedroom to a master bath. If you’re currently planning a shower renovation, remember that the humidity from that room will seek out any nearby porous material. Even your trim needs protection; the wrong installation can lead to why your baseboard paint is peeling off at the bottom due to ‘wicking’ from damp floors. To prevent these headaches, I always recommend the back-cut secret for tight baseboard outside corners to ensure that even as the house shifts and breathes, your joints stay invisible. Have you ever fallen into this trap where a ‘finished’ floor started failing after just a few months? Let me know in the comments!If you’re serious about the ‘forever home’ vibe, you need to stop borrowing tools from your neighbor’s dusty garage and invest in the gear that actually prevents failure. My absolute non-negotiable is a high-quality moisture meter, like the Tramex CME4. I’ve seen $10,000 floors fail because someone guessed the concrete was dry. This is especially true with modern materials; check out these expert flooring installation tips for 2025 to see how precision is becoming the baseline. When I’m doing a click-lock job, I never use the ‘off-the-shelf’ plastic tapping blocks found in kits. I prefer a heavy-duty nylon block because it doesn’t shatter when you apply real pressure. If you’ve ever wondered why your vinyl plank floor is telegraphing subfloor bumps, it’s usually because the preparation tools weren’t used to flatten the surface before the first plank hit the floor. Using the block and hammer move for tight vinyl floor joints ensures those seams never separate, even as the house settles.
How do I maintain my flooring and shower investments over time?
The secret isn’t a special chemical; it’s a schedule. For showers, I tell everyone to treat the grout like a living thing. The Tile Council of North America (TCNA) recommends in their Handbook (Standard EJ171) that movement joints—like where the wall meets the floor or where tile meets a tub—must be filled with a flexible sealant (silicone), not rigid grout. If you don’t do this, you’ll be looking for shower repairs: when to fix vs. replace for longevity sooner than you think. For carpets, maintenance is all about the transitions. If you notice a gap opening, learn how to fix a loose carpet transition that trips everyone before the backing starts to fray. It’s much easier to tuck a loose edge today than to replace a whole hallway tomorrow. 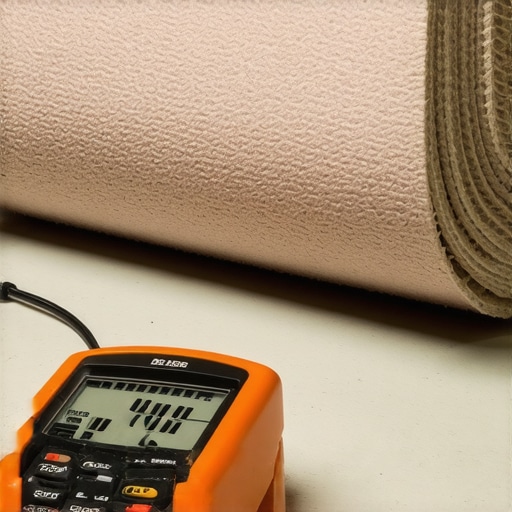
Why Smart Surfaces are the Next Big Home Upgrade
I genuinely believe we are heading toward ‘smart floors.’ We are already seeing the rise of the liquid membrane move for fail-proof shower pans, but within the next few years, I expect to see moisture sensors embedded in the subfloor that alert your phone to a leak before you even see a damp spot on your walls. When you’re researching how to choose the perfect baseboards for your homes style, think about the cavity behind the trim as a potential highway for these low-voltage smart home wires. We are also seeing the development of ultra-hydrophobic carpet coatings that make the ‘crunchy soap’ problem I mentioned earlier a thing of the past. If you’re planning a remodel, check out these shower renovation ideas: modern designs for a luxury feel to see how high-end materials are evolving. My challenge for you is simple: go grab a basic moisture meter before your next project. It is the single best way to move from ‘hopeful DIY-er’ to ‘confident craftsman.’
The Hard Truth About Why Some DIY Floors Fail Early
After years in the trade, I’ve realized that the difference between a floor that lasts decades and one that buckles in months is often just thirty minutes of extra prep work. I’ve seen homeowners skip the ‘boring’ steps like checking the subfloor’s levelness because they were too excited to see the final color. One major lightbulb moment for me was realizing that your flooring is only as good as the surface beneath it. If you’re worried about long-term durability, I recommend reading your guide to durable flooring installation for a stylish home to see how the pros handle structural longevity. Another lesson? Don’t fight the materials. Wood and carpet need to acclimate to your home’s humidity before you ever pick up a tool. If you rush the process, you’re essentially gambling with your investment.
The Non-Negotiables in My Flooring Arsenal
You don’t need a warehouse full of tools, but you do need the right ones for the specific job at hand. I always tell my neighbors to invest in a real moisture meter; it’s the only way to bypass common flooring installation mistakes to avoid for a seamless look. For those finishing their walls, I swear by the magnet hack for finding wall studs behind thick baseboards—it saves you from turning your drywall into swiss cheese. To keep your aesthetic current while you have the tools out, stay ahead of the curve by looking at the latest baseboard trends in 2025. These small upgrades change the entire character of a room without a massive price tag or a month of construction. #IMAGE_PLACEHOLDER_E#
Turn Your Flooring Vision Into a Reality
It’s easy to feel overwhelmed by the technical details, but remember that every expert started with their first crooked cut or crunchy carpet spot. The goal isn’t just a floor that looks good—it’s a home that feels like a sanctuary under your feet. Whether you are fixing a soap-damaged rug or installing fresh planks, take it one step at a time and trust the process. Success in flooring installation comes down to patience and the willingness to learn from each mistake. You’ve got the knowledge now, so why wait to start your transformation? Have you ever had a flooring project take an unexpected turn that taught you a valuable lesson? I’d love to hear your stories in the comments below!