

I’ll never forget the sinking feeling in my gut when I moved my favorite armchair away from the patio door last spring. Underneath was the rich, deep honey-brown vinyl I’d fallen in love with, but everywhere else? A dusty, pale shadow of its former self. It looked like the floor had aged twenty years in just twenty months. I felt like a failure because I pride myself on knowing the flooring installation mistakes to avoid for a seamless look, yet I completely ignored the giant ball of fire in the sky. My mistake was simple: I assumed that because my floor was waterproof and ‘durable,’ it was also invincible against the sun. It wasn’t. Today, I want to share exactly why your vinyl is losing its luster and the simple ways you can protect your home from this ‘bleach effect.’ [IMAGE_PLACEHOLDER]
The Day the Sun Stole My Living Room Color
It starts slowly. You don’t notice it week to week, but the UV rays hitting that specific patch in front of your sliding door are working overtime. I learned the hard way that even if you followed your guide to durable flooring installation for a stylish home, the environment can still win. When I was first starting out, I even skipped the the acclimation test for avoiding hardwood floor gaps on a project because I thought vinyl didn’t react to temperature. Man, was I wrong. Sunlight doesn’t just fade color; it creates localized heat pockets that can make planks buckle or gap. Fading is actually a chemical reaction called photodegradation. The UV light breaks down the chemical bonds in the flooring’s wear layer and the printed decorative film.
Is high-end vinyl actually prone to UV damage?
You might think that spending $6 per square foot protects you, but even luxury planks have limits. Most people assume ‘luxury’ means ‘maintenance-free,’ but the reality is that the sun is a powerful bleaching agent. According to the International Window Film Association, UV radiation is responsible for roughly 40% of the fading process in home furnishings and flooring. Have you ever pulled back a rug only to find a ‘tan line’ on your floors? It’s a common frustration, but it doesn’t mean you need to replace everything. When you are using the stay sharp blade rule for cutting luxury vinyl during your next project, remember that the prep work doesn’t end when the last plank clicks into place. You have to consider the light.
Stop the Bleach Effect Before it Ruins Your Investment
The solution isn’t to live in a dark cave. It’s about balance. If I had known then what I know now, I would have treated my patio door like a gateway for damage rather than just a source of light. We spend so much time worrying about the kick and tuck move for finishing carpet at a sliding door or making sure the transitions are perfect, but the aftercare is where the longevity lives. In the next section, we’ll dive into the specific films, curtains, and flooring types that can actually handle the heat without losing their soul. Drop a comment below: Have you noticed your floors looking a bit ‘tired’ in the sunny spots, or is it just me?
Treat Your Windows Like Sunglasses for Your Flooring
The first line of defense isn’t actually on the floor; it is on the glass. Think of UV-blocking window film as high-SPF sunscreen for your home. I remember a job in a south-facing sunroom where the temperature at floor level hit 110 degrees by noon. The vinyl was literally cooking. By applying a ceramic-tinted window film, we dropped that surface temperature by fifteen degrees and cut UV exposure by 99%. If you are worried about the aesthetics, modern films are nearly invisible. If you prefer a softer look, knowing how to choose the right carpet for a cozy living space can be an alternative for those high-sun areas, as some fibers handle light better than hard plastics. But for vinyl lovers, film is your best friend. 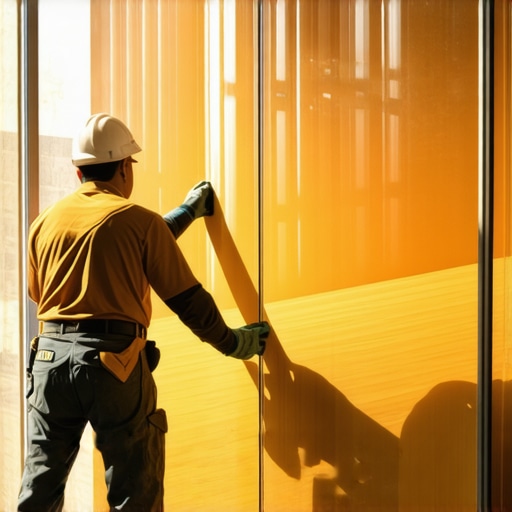
Give Your Planks More Room to Breathe
When vinyl gets hot, it grows. It is like a sponge soaking up heat instead of water. If you installed your floor tight against the walls, that sun-drenched patch has nowhere to go but up. I once had to tear out three rows of a brand-new install because the homeowner didn’t leave enough space at the perimeter. Now, I always follow the expansion gap rule for heavy kitchen islands on laminate even when working with vinyl near glass doors. You need at least a quarter-inch of breathing room. If the sun is hitting a specific transition point, like where the floor meets a sliding door, I use the double glue method for high traffic vinyl plank transitions. This ensures that even when the planks expand and contract daily, the transition strip stays locked in place rather than popping loose and becoming a trip hazard.
The Subfloor Connection to Heat Resistance
A common mistake is thinking the surface damage is the only issue. High heat can actually cause the adhesive in some vinyl types to fail or react with the subfloor. This is why I obsess over the foundation. Using the self-leveler move for perfectly flat vinyl installs creates a dense, stable base that doesn’t hold onto pockets of hot air. If your subfloor is uneven, the heat-softened vinyl will eventually ‘telegraph’ every bump and dip underneath. I’ve seen beautiful floors look like a topographical map after one hot summer because the subfloor wasn’t prepped. If you are transitioning to other rooms, make sure the transition strip move for carpet to bathroom tile is executed with high-quality adhesives that won’t get brittle under constant UV exposure.
Switch Up Your Rug Strategy
Rugs are great, but they are a double-edged sword. If you leave a rug in the same sunny spot for three years, you will eventually find a ‘ghost’ of the rug burned into the floor color. My trick is to rotate the rug or slightly shift its position every few months. This allows the flooring to age or ‘tan’ evenly across the entire room rather than creating sharp, ugly lines. Also, be careful with rubber-backed mats. The heat from the sun can cause a chemical reaction between the rubber and the vinyl’s wear layer, leading to permanent yellowing. I always suggest felt or natural fiber pads instead. If you find the sun is just too intense for hard surfaces, you might consider carpet install secrets achieving flawless results every time to create a zone that is naturally more resilient to heat-induced buckling. Always remember to use the kick and tuck move for finishing carpet at a sliding door to keep everything tight where the sun hits hardest.But let’s take it a step further. It isn’t just about the sun; it’s about the hidden mechanics of the materials we use every day. One of the biggest ‘experts-only’ secrets I’ve learned involves the stuff you never even see once the job is done: the padding and the prep. Most homeowners—and even some pros—fall into the trap of thinking ‘more is better.’
Thick Padding Is Often Your Carpet’s Worst Enemy
It sounds counterintuitive, right? You’d think a thicker, squishier pad would make for a more luxurious feel. But in reality, the wrong density is a death sentence for your flooring. The Carpet and Rug Institute (CRI) warns that using a cushion that is too soft or too thick can lead to excessive flexing, which eventually breaks down the carpet’s primary and secondary backings. This is the root cause of those ugly ripples you see after just a few years. If you want results that last, you have to look past the ‘pillowy’ marketing and focus on high-density materials. I always tell my clients that carpet install secrets achieving flawless results every time start with a pad that offers support, not just bounce. And please, for the love of your budget, avoid the knee kicker mistake that ruins luxury carpets. Professionals use power stretchers for a reason—anything else is just a temporary fix.
The Hidden Math Behind Baseboards That Actually Stay Tight
Another area where ‘common sense’ fails is in finish carpentry. Most people assume that if their walls look straight, they can just slap on the trim and call it a day. But walls are almost never perfectly flat, and corners are rarely a true 90 degrees. If you’ve ever fought with a corner that just won’t close, you know the frustration. I used to spend hours with caulk trying to hide my crimes until I mastered the back cut secret for tight baseboard outside corners. It’s a nuanced shift in how you angle the blade that accounts for the build-up of drywall mud in the corners. It’s these tiny, invisible adjustments that separate a DIY look from a custom home finish. 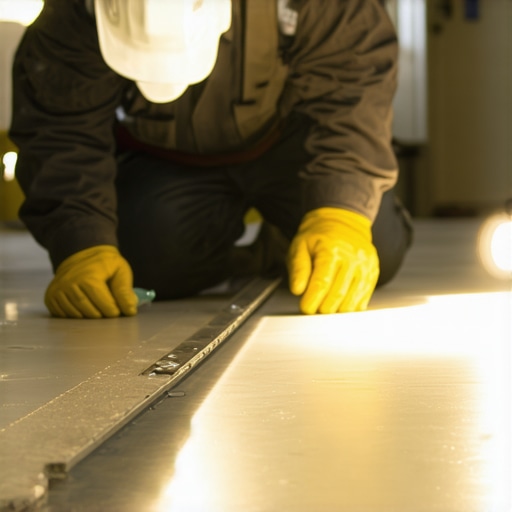
How do you stop a shower niche from becoming a leak factory?
This is the question that keeps many homeowners up at night during a renovation. The nuance here is that water doesn’t just sit on your tiles; it migrates through the grout. If your niche isn’t built as a monolithic, waterproof box, you’re just waiting for a disaster. I’ve transitioned away from traditional wood-framed niches entirely. Instead, I rely on the foam wall secret for waterproof shower niches. These pre-manufactured components eliminate the seams where leaks typically start. When you combine that with a solid understanding of how we fixed the grout crack in the shower corner for good—which usually involves switching to high-quality silicone in change-of-plane joints—you create a bathroom that is actually ‘bulletproof.’
Stop Chasing Level and Start Seeking Flat
The ultimate nuance that beginners miss is the difference between ‘level’ and ‘flat.’ Your floor can be tilted at a two-degree angle (level) and still be perfectly fine for vinyl. But if it has a 1/8-inch dip over six feet (flatness), your planks will click, groan, and eventually snap. I’ve seen homeowners spend thousands on materials only to have them fail because they ignored why your vinyl plank floor is telegraphing subfloor bumps. This is where the self-leveler move for perfectly flat vinyl installs becomes your best friend. It’s not just a fancy extra step; it’s the insurance policy for your entire investment. Have you ever fallen into this trap or noticed a ‘phantom’ sound when walking across your floor? Let me know in the comments.I used to think that finishing a job meant I was done, but the real test of a professional is how that floor looks three years later. If you want to move from amateur to expert, you have to stop looking at the install as the finish line and start looking at it as the birth of a long-term asset. This requires the right gear and a maintenance mindset. I’ve found that the biggest difference-maker in my toolkit isn’t a fancy saw; it’s my laser.
Ditch the Tape Measure and Trust the Red Line
When I’m setting up, the laser level move for perfectly horizontal shower tiles is my absolute non-negotiable. Using a traditional bubble level for a 60-inch shower wall is just asking for a cumulative error. By the time you reach the third row, you’re off by an eighth of an inch, and your niche looks crooked. I use a 360-degree green beam laser because it’s easier to see in bright rooms. This tool is also a lifesaver when you need to know how to choose baseboard heights for high ceilings, as it helps you visualize exactly where the top of that trim will sit across a thirty-foot expanse. 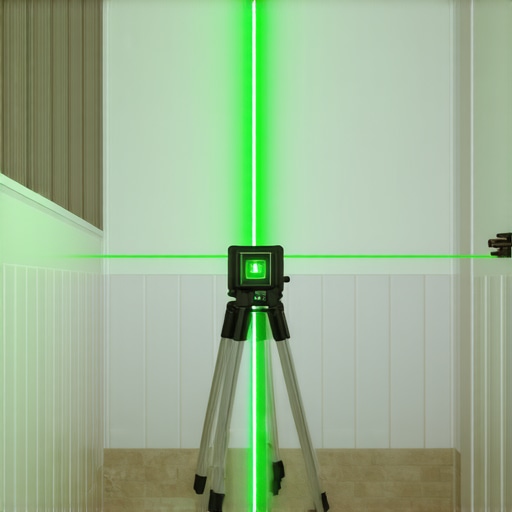
Why My Moisture Meter Never Leaves My Truck
The most expensive mistake you can make is installing over a wet subfloor. According to the Tile Council of North America (TCNA), moisture vapor emission rates (MVER) must be within specific limits (usually under 3 lbs per 1,000 sq. ft.) before you even think about thinset or planks. I never start a job without a pinless moisture meter. If I’m working in a basement, I always implement the moisture barrier move for concrete slabs in livonia kitchen remodels because I know that vapor is coming for my floors eventually. It’s better to spend $100 on a barrier today than $5,000 on a mold remediation next year. If you aren’t sure if your floor is ready, why we never skip the subfloor moisture test on concrete is a must-read to protect your investment.
How do I maintain my tile and grout so it stays white for years?
Maintenance isn’t about scrubbing harder; it’s about sealing smarter. Most people wait until they see stains to act, but you should be resealing your grout every 12 to 18 months. I recommend using a high-quality penetrating sealer that doesn’t change the finish of the stone or tile. If you’ve already noticed issues, check out shower repairs when to fix vs replace for longevity to see if a simple deep clean and reseal will save you. For those with carpeted areas, remember that best carpet types for high traffic areas in 2025 are designed for easier cleaning, but only if you stick to a vacuuming schedule that prevents dirt from acting like sandpaper on the fibers.
The Smart Flooring Revolution is Just Beginning
Looking ahead, the trend for 2025 and beyond is ‘intelligent resilience.’ We are seeing more baseboard designs that incorporate hidden cable channels—check out baseboard trends in 2025 fresh styles for every room for a glimpse at how trim is becoming functional. We’re also seeing a shift toward ‘wet-room’ concepts where the entire bathroom is waterproofed from floor to ceiling. This is where the liquid membrane move for fail-proof shower pans becomes standard practice rather than an upgrade. My advice? Try the ‘laser-first’ approach on your next baseboard or tile project. You’ll be shocked at how much stress disappears when you stop guessing and start measuring with light.
After years of working with everything from luxury vinyl to intricate shower pans, I’ve realized that the ‘hidden’ steps are usually the most important. For instance, I used to ignore the way light bounces off a wall until I saw how it highlights every tiny gap in a baseboard. Now, I use the coping saw technique for flawless inside baseboard corners to ensure those joints stay tight even when the house settles. Another lightbulb moment was realizing that ‘waterproof’ doesn’t mean ‘vapor-proof.’ You can have the best planks in the world, but if the slab is breathing moisture, you’ll have a failure. Always check expert flooring installation tips for 2025 to see how modern barriers have changed the game. Finally, never underestimate the power of a clean workspace; a single grain of sand under a vinyl plank will feel like a mountain once the floor is down.
[IMAGE_PLACEHOLDER]
The Toolkit Every Pro Secretly Obsesses Over
If you want your home to look like a showroom, you need to stop guessing. I personally trust the TCNA Handbook for every tile project—it is the industry standard for a reason. Beyond the books, a 360-degree green laser is the most valuable tool I own for aligning modern designs for a luxury feel in a shower. For finishing touches, I suggest looking into baseboard styles that elevate your interior design to find a profile that complements your floor’s thickness. I also highly recommend a high-quality pinless moisture meter; it’s the only way to be 100% sure your subfloor is ready for its new life.
Step Into Your Next Project With Confidence
Your home is your biggest investment, and the floor is literally the foundation of its beauty. Don’t let the fear of a mistake stop you from starting. Whether you are tackling a complex shower niche or a simple hallway, remember that patience is your best tool. A successful flooring installation isn’t about speed; it’s about the precision of the prep work and the quality of the finish. You’ve got the knowledge—now it’s time to put it into practice. What’s the one flooring mistake you’re most afraid of making? Let me know in the comments below!