

I’ll never forget the sound of my first major DIY disaster. It wasn’t a loud bang; it was a slow, agonizing pop that happened every time the afternoon sun hit the kitchen floor. I had just finished installing a beautiful new walnut laminate and, being the overachiever I am, I decided to bolt a massive, granite-topped kitchen island directly through the planks and into the subfloor. I thought I was making it sturdy. Instead, I had just created a ticking time bomb. Within weeks, the floor started to buckle around the island, looking like a miniature mountain range right where my guests were supposed to stand. Today, I’m going to show you how to navigate the expansion-gap rule so your island doesn’t turn your flooring into a mess.
The Reason Your Island is Killing Your Floor
Most of us treat laminate like it’s solid wood, but it’s actually a floating system. It needs to breathe, expand, and contract with the seasons. When you pin it down with a 500-pound island, you’re essentially putting a giant paperweight on a moving rug. This is exactly why your laminate floor is making a popping sound—the planks are trying to move, but they’ve got nowhere to go. I learned the hard way that you can’t just ignore physics because you want a heavy breakfast bar. Whether you are doing a full step-by-step flooring installation or just a kitchen refresh, the island footprint is the most critical area of your layout.
Is the Expansion Gap Really That Important?
I get it. You’re skeptical. You think, ‘It’s just a few planks, surely they won’t move that much.’ But according to industry data from the North American Laminate Flooring Association, laminate can expand or contract significantly depending on humidity and temperature shifts. That might sound small, but when that energy has no exit, it forces the joints to fail. Today, I’m going to walk you through the ‘workaround’—how to get that heavy island look without the flooring installation mistakes that usually follow.
Don’t Make My Multi-Thousand Dollar Mistake
Early in my career, I ignored the t-molding secret for long runs and tried to run a continuous floor under a heavy pantry. It looked seamless for exactly one season. Then, the gap between the planks opened up so wide you could lose a credit card in it. The fix involved ripping up half the kitchen. Have you ever stood in your kitchen and felt the floor give or heard a weird creak near your cabinets? Tell me about your experience in the comments, because chances are, we’re dealing with the same ghost in the machine. We’re going to fix that today by learning how to cut around the island footprint correctly and ensuring your home stays as durable as it is stylish.
Stop Treating Your Floor Like a Permanent Fixture
Think of your laminate floor as a giant, interlocking ice sheet. If you build a house on top of that ice, the ice is going to crack when the tide shifts. Laminate is a floating system that needs to slide ever so slightly as humidity changes. This is why you should never install a heavy island on top of the planks. Instead, you install the island directly to the subfloor and bring the flooring to the perimeter of the island base. If you’ve already made the mistake of pinning it down, you can learn how to remove a single damaged floor board without ripping up the room to create that necessary space without a total teardown.
The Proper Way to Frame Your Island
The best approach is to treat the kitchen island exactly like a wall. You want to maintain a consistent expansion space around the entire footprint. I use the penny gap rule for installing laminate near drywall, applying that same 1/4-inch logic to the island base. If you are starting fresh, follow a step-by-step flooring installation plan that marks out the island’s location before a single plank hits the ground. This prevents you from accidentally running planks under where the heavy cabinets will sit.
Leave Space for the Floor to Breathe
I worked on a cramped galley kitchen last summer where the homeowner wanted a custom island moved six inches to the left. Since the floor was already down and pinned under the old cabinets, the boards were actually bowing upward in the center of the room. We had to use a plunge saw to cut a clean perimeter around the island’s new footprint, effectively liberating the rest of the floor. You could practically hear the planks sigh with relief as the tension released. If you don’t provide this breathing room, you’ll encounter common flooring installation mistakes like peaked joints that eventually chip and fail.
Hide the Gaps with Stylish Trim
Once you have your expansion gap, the next challenge is aesthetics. You aren’t going to leave a raw 1/4-inch hole around your beautiful island. This is where baseboard styles that elevate your interior design come into play. You can use shoe molding or small baseboards attached only to the island base, never to the floor itself. This allows the floor to slide underneath the trim as it expands. If the island has an uneven decorative stone base, you might need the scribe tool trick for baseboards against stone walls to get a tight, professional fit.
Handle the Layout Like a Pro
If your island is positioned at an angle or has complex corners, you need a precise plan. Much like the box cut method for installing flooring around floor vents, you need to measure the distance from the last full row to the island edge at multiple points. I once rushed a cut around a circular island end and ended up with a gap so large no molding could cover it. I had to rebuild that entire section. Now, I always create a cardboard template first. This ensures that even in high-traffic kitchens, your floor remains a floating success rather than a pinned-down disaster.
The Vapor Barrier Myth That Costs Thousands
Many DIYers think they can just throw a sheet of plastic over a concrete slab and call it a day. The common belief is that a barrier ‘stops’ moisture, but in my experience, it often just traps it. If you haven’t performed a proper check, you’re just creating a greenhouse for mold. This is why we never skip the subfloor moisture test on concrete. If that moisture is trapped with nowhere to go, it will eventually force its way into your planks, which is exactly why your hardwood floors are crowning in the summer. It is not just about the humidity in the air; it is the moisture coming from the earth through your slab.
Can a Vapor Barrier Actually Rot Your Subfloor?
It sounds counterintuitive, but yes. According to the National Wood Flooring Association (NWFA), using the wrong perm-rated barrier on a subfloor that has not fully cured can lead to osmotic blistering. I once saw a job where the homeowner used a heavy-duty plastic on a ‘fresh’ six-month-old slab. Within a year, the subfloor was a literal swamp. Instead of a ‘barrier,’ you often need a ‘retarder’ that allows the floor to breathe at a controlled rate. This is one of those flooring installation mistakes that pros avoid by testing the internal relative humidity of the concrete. 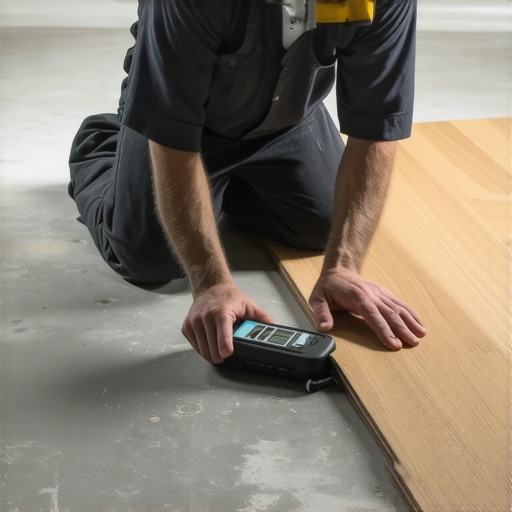
The Real Trap in Wet Areas
When it comes to showers, the mistake isn’t just about the tile; it is about the invisible layers beneath. People obsess over the grout color but ignore the triple point seal for leak-proof shower corners. I’ve seen beautiful $10,000 tile jobs ripped out because someone forgot that water is a master of finding the smallest path of resistance. If you are planning an upgrade your bathroom project, remember that the waterproofing membrane is your real floor; the tile is just the jewelry. Have you ever fallen into the trap of thinking ‘waterproof grout’ was enough? Let me know in the comments.
Finish with Precision or Don’t Finish at All
Even if you get the floor and the shower right, sloppy trim will scream ‘amateur.’ I used to struggle with gaps in my moldings until I learned the back-cut secret for tight baseboard outside corners. Most people just cut a 45-degree angle and hope for the best, but wood is rarely perfectly square. By slightly over-cutting the back of the miter, you ensure the visible front edge meets perfectly every time. Whether you are choosing baseboard styles that elevate your interior design or just doing a quick repair, these nuances separate a true renovation from a temporary fix. It is about looking at the project as a system, not just a series of independent tasks.
My Knees Hate the Kicker But Love the Stretcher
I used to think that being a ‘real’ installer meant relying on brute force and a knee kicker for every room. I was wrong, and my orthopedic surgeon would agree. When you are dealing with large spaces, following the power stretcher rule for large living room carpets is not just a suggestion; it is a requirement for longevity. A knee kicker is great for tight corners, but it cannot provide the uniform tension needed to prevent those ugly ripples that appear two years down the line. If you want to master carpet install secrets, you have to invest in a power stretcher. It uses a long pole system to push against the opposite wall, stretching the backing to its limit so it never bunches up again. 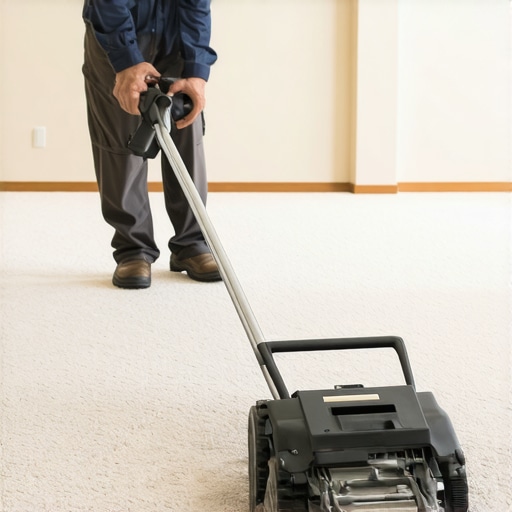
How do I maintain my flooring and shower over the long haul?
Maintenance is not about cleaning once a week; it is about monitoring the ‘moving parts’ of your home. For showers, this means inspecting the transitions where the wall meets the floor. According to the Tile Council of North America (TCNA) Handbook, thinset coverage in wet areas must reach 95% to ensure a permanent bond and prevent water from getting trapped behind the tiles. If you see a hairline fracture in your grout, do not ignore it. Knowing how we fixed the grout crack in the shower corner for good can save you from a full-blown mold remediation later. For floors, it is all about checking your expansion gaps. If your baseboards seem to be pinching the floor because the planks have expanded, it is time for a quick trim before the boards start to peak or pop.
Precision Scribing Is the Ultimate Cheat Code
If you want to truly elevate your interior with simple updates, you need to stop guessing your cuts. Most walls are as straight as a wet noodle. This is where the scribing tool every diyer needs for tight baseboards comes into play. Instead of cutting a straight line and filling the gaps with a gallon of caulk, you use the scribe to trace the exact contour of the wall onto your wood. It is the difference between a project that looks ‘DIY’ and one that looks like a high-end custom build. Looking ahead, I suspect we will see more top trends in installation for 2025 involving modular, repairable systems and smartphone-integrated moisture sensors that make it even easier to swap out damaged sections. My challenge to you: Don’t just settle for ‘close enough’ on your next room. Buy a dedicated scribing tool and use it on your trickiest corner. The result will speak for itself.
Fix it before it breaks
Longevity is built in the prep, but it is sustained through vigilance. I’ve transitioned many clients from ‘fix’ mode to ‘maintenance’ mode by teaching them to spot early signs of failure. For example, knowing when to fix vs replace for longevity depends entirely on whether the waterproof membrane is intact. If the bones are good, a simple surface refresh is all you need to keep the space looking professional.
The Hardest Lessons I Learned on the Job
I’ve spent years fixing mistakes that could have been avoided with ten minutes of extra planning. First, never underestimate the power of the seasons. A floor that fits perfectly in the dry winter will likely swell and buckle by mid-July if you didn’t leave that expansion gap. This is why following expert flooring installation tips for 2025 is so vital; the materials are changing, but the physics remains the same. Second, subfloor prep is not a suggestion—it is the foundation of your success. If the ground isn’t level, your high-end vinyl will sound like a bag of potato chips every time you walk on it. Finally, remember that aesthetic beauty is secondary to structural integrity. A gorgeous shower is worthless if the water is slowly rotting your wall studs. If you are ready for a change, check out this upgrade your bathroom guide to ensure your project lasts for decades, not just months.
My Essential Gear for a Professional Finish
Achieving a high-end look requires the right tools, and I never step onto a job site without a few specific items. I always recommend the scribing tool every diyer needs for tight baseboards because it eliminates the need for messy caulk and creates that ‘built-in’ look everyone wants. For anyone tackling carpet, a power stretcher is non-negotiable; your knees will thank you, and your carpet will stay flat and wrinkle-free for years. I also suggest keeping a high-quality moisture meter in your kit to test subfloors before any planks are laid. For those finishing their space, looking into a baseboards makeover can provide the perfect frame for your hard work.
Stop Planning and Start Building
Renovation can feel overwhelming, but the secret is to focus on one transition at a time. Whether you are cutting around a complex island or sealing a shower corner, precision is your best friend. Don’t be afraid to make a mistake—just be ready to fix it the right way instead of hiding it. Your home is an investment in your comfort, and with the right techniques, you can achieve a result that looks like you hired a premier crew. If you ever feel stuck or need professional guidance, don’t hesitate to contact us for expert advice. You have the knowledge; now it is time to put it to work. Have you ever dealt with a floor that started popping or a shower that leaked? Let me know your biggest DIY challenge in the comments below!