

I’ll never forget the first time I walked into my newly renovated hallway and felt my heart sink. I’d spent a fortune on high-end slate and a plush, cloud-like carpet, but right there in the middle of the doorway was a glaring, shiny aluminum strip that looked like it belonged in a 1980s office building. It wasn’t just an eyesore; it was a ‘toe-stubber’ of the highest order. I had worked so hard on durable flooring installation plans only to have the finish line look like a cheap DIY project. If you’re tired of that metal bridge screaming for attention every time you enter a room, I’ve got some good news for you. You don’t have to live with it. Today, I’m going to share the tricks I’ve learned—mostly the hard way—to make those transitions virtually disappear or at least blend in so well you’ll forget they’re even there.
Ditch the Metal and Embrace the Tuck and Turn Method
Early in my DIY journey, I made the classic blunder of thinking ‘more glue equals more better.’ I actually tried to liquid-nail a piece of carpet directly to the subfloor near the tile. Spoiler alert: it was a disaster. Not only did it look lumpy, but the lack of tension meant the carpet started fraying almost immediately. This is one of those flooring installation mistakes to avoid if you want a professional finish. The real secret isn’t more adhesive; it’s about using the right hardware, like a Z-bar, to create a ‘tuck’ that hides the raw edge of the carpet beneath the tile’s height. Have you ever spent an afternoon tripping over a loose strip and wondered if there was a better way? You aren’t alone.
Is a ‘Hidden’ Transition Really Durable Enough for Kids and Pets?
I get it—skepticism is healthy. You might be worried that without a heavy-duty metal plate, your carpet is going to pull up the first time the dog gets a case of the zoomies. But when you master carpet install secrets like the ‘turn-and-tuck’ method, the tension actually holds the edge more securely than those cheap nails ever could. According to the experts at the Carpet and Rug Institute (CRI), proper stretching and tucking are essential to prevent ripples that can lead to premature wear and trip hazards. By using a Z-bar or a hidden tack strip, you’re creating a mechanical bond that looks sleek and stays put. If your current setup is already failing, you might need to check out how to fix a loose carpet transition before you try to hide it completely. We’re moving away from the ‘cover it up’ mentality and toward a ‘build it right’ philosophy. In the next section, I’ll walk you through the specific tools you need to pull off the transition strip move for carpet to bathroom tile that will leave your guests asking who your professional installer was.
Get Your Z-Bar and Tack Strips in Position
To pull off a transition that looks like it was done by a master craftsman, you have to think about the ‘sandwich’ of materials. Before the carpet even touches the floor, your tile needs to be fully cured and grouted. I always start by installing a Z-bar—a thin, Z-shaped metal strip—right against the edge of the tile. Think of the Z-bar as a protective pocket. The bottom flange goes under the carpet padding, and the top lip will eventually hold the tucked carpet edge. If you are dealing with a subfloor that isn’t perfectly flat, you might need to learn how to reinforce a bouncy subfloor before tiling to ensure the tile edge doesn’t crack under the pressure of the transition. You want the Z-bar about a quarter-inch away from the tile edge to give the carpet somewhere to ‘dive’ into. Once the bar is down, install your tack strips about a half-inch away from the Z-bar. This gap is your workspace. 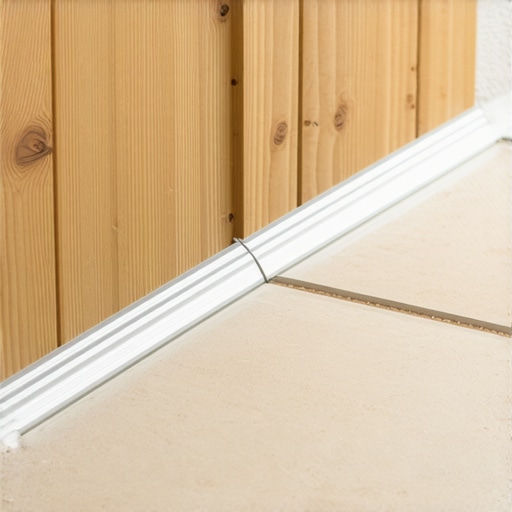
The Cut That Makes or Breaks Your Hallway
This is where most DIYers get nervous, and for good reason. I remember a humid Saturday morning in a cramped guest bathroom where I was so eager to finish that I didn’t double-check my measurements. I took my utility knife and made a bold, confident swipe, only to realize I’d cut the carpet a quarter-inch too short. I was left staring at a strip of bare plywood and felt a pit in my stomach. I ended up having to use a power stretcher to manipulate the carpet until it practically screamed, just to cover my tracks. To avoid this, always follow a step-by-step flooring installation from planning to perfect finish approach. Leave about an inch of extra carpet overlapping the tile. You can always trim more off, but you can’t put it back once it’s gone. Use a sharp blade—and I mean brand new—to trim the carpet so it perfectly meets the ‘valley’ between the tack strip and the tile.
Why You Should Never Skip the Tension Check
The secret to a transition that doesn’t pull up when you vacuum is tension. You aren’t just laying the carpet down; you are hooking it. This is where the knee-kicker comes in, but be careful. There is a specific knee-kicker mistake that ruins luxury carpets by over-stretching the primary backing, leading to permanent ripples. You want just enough force to hook the carpet onto the tack strip pins. Once it’s hooked, use a stair tool or a wide-head screwdriver to firmly tuck the raw edge into the Z-bar channel. As you tuck, the metal lip of the Z-bar should be hammered down slightly—gently!—to lock the carpet in place. This creates a flush, professional look that mimics how to transition from thick carpet to thin vinyl without a lip. Finally, don’t forget the walls. If your transition meets a door frame, you might need the back-bevel move for tight baseboard miters to ensure your trim sits flush against the new, slightly elevated carpet edge. It’s these tiny mechanical details that separate a ‘good enough’ job from one that adds real value to your home.
Once you’ve mastered the physical act of tucking a carpet, it’s tempting to think the hard part is over. However, I’ve seen more high-end remodels ruined by ‘edge-case’ neglect than by poor carpet stretching. Most people view baseboards as simple decorative trim, but they are actually a functional ‘shoe’ for your flooring. A common contrarian view I hold is that you shouldn’t just nail baseboards blindly. If you are choosing baseboard styles that elevate your interior design, you must account for the expansion gap left by your installer. If you pin the baseboard too tightly against the flooring, you effectively lock the floor in place, which can lead to buckling when humidity rises. Even worse, blindly firing a 2-inch finish nail into the wall is the fastest way to learn how to fix a baseboard nail that hit a water pipe immediately. Always map your studs and keep your nails high enough to clear the sole plate but low enough to catch the framing.
The Dangerous Myth of the ‘Waterproof’ Tile
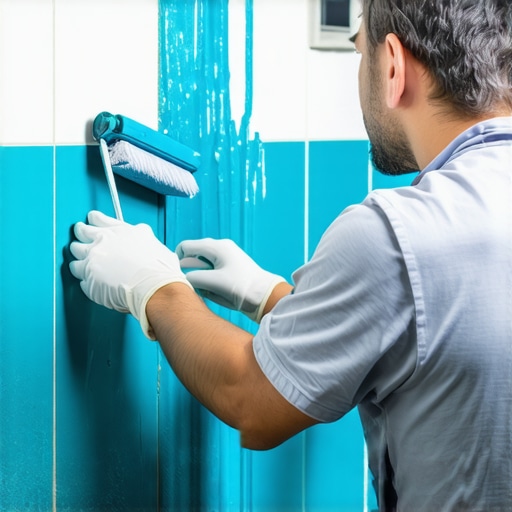
Let’s shift gears to the bathroom, where the stakes are even higher. I often hear DIYers say they don’t need a heavy-duty liner because they are using ‘waterproof’ porcelain. Here is the truth: tile and grout are not waterproof. They are water-resistant. Grout is porous, and moisture will eventually migrate through it to the substrate. This is why your shower grout is crumbling just months after install if the framing behind it is flexing from moisture absorption. To prevent this, I always advocate for the liquid membrane move for fail-proof shower pans. This creates a monolithic, rubberized barrier that stops water before it touches your wood. The Tile Council of North America (TCNA) emphasizes that for large format tiles, you must adhere to the full-bed mortar rule for large format shower tiles, requiring at least 95% coverage in wet areas to avoid hollow spots where water can collect and stagnate.
Why does my shower grout look patchy even after sealing?
This is an advanced question I get all the time. Often, it isn’t the sealer’s fault; it’s the ‘dry-pack’ underneath. If you didn’t use the dry pack secret for a perfectly sloped shower floor, you might have pockets of standing water beneath the tile that are wicking up through the grout lines from the bottom. This ‘efflorescence’ or mineral staining makes the grout look uneven no matter how many times you scrub it. To ensure a professional finish that lasts decades, you need the inside-corner-cope for perfect baseboard installs in the dry areas and a rock-solid moisture management system in the wet ones. These nuances are what separate a ‘flip’ from a forever home. Have you ever fallen into the trap of thinking your tile was doing all the waterproofing work? Let me know in the comments!
If you want results that look as good in five years as they do on day one, you need to stop treating your tools like optional accessories. Take the power stretcher, for instance. I see so many DIYers relying solely on a knee-kicker, but that is a recipe for a sagging floor. Following the power stretcher rule for large living room carpets is the only way to guarantee you won’t be dealing with ripples by next summer. I personally use a Crain power stretcher because its head grip is aggressive enough to hold without damaging the primary backing. It is the only way to ensure you aren’t wondering why your carpet is buckling only three years later. It’s bulky, yes, but it’s the difference between a floor that stays taut and one that looks like a wrinkled bedsheet.
The Moisture Meter is the Only Tool You Can’t Skip
Whether you are laying vinyl or tile, your biggest enemy isn’t a dull blade; it’s invisible water. Before I even open a box of planks, I pull out my Wagner moisture meter. This isn’t just me being paranoid. According to the National Wood Flooring Association (NWFA) Technical Manual, moisture testing is the single most important step in any flooring installation. If you ignore the moisture meter requirement for basement flooring jobs, you are basically gambling with your bank account. I prefer non-destructive pinless meters because they don’t leave holes in your subfloor, yet they tell you exactly if the concrete is ready to be sealed. 
How do I maintain my flooring and shower for the long haul?
Maintenance is where the real work begins. For showers, don’t wait for the grout to turn black to act. I always recommend a proactive approach like the pre-seal move to stop shower grout from staining. This makes weekly cleaning a breeze rather than a chore involving harsh chemicals. When it comes to your floors, keep a sharp eye on high-traffic areas. If you notice a single plank lifting or a tile cracking, consult a guide on shower repairs: when to fix vs replace for longevity to prevent minor issues from becoming structural failures. Looking ahead, I predict we’ll see ‘self-healing’ flooring finishes and smart baseboards with integrated moisture-sensing technology becoming the new standard in luxury builds. For now, focus on the basics: use the stay-sharp blade rule for cutting luxury vinyl to keep edges clean and prevent dirt-trapping gaps. My best advice? Buy a high-quality moisture meter today and use it on every single room you renovate—it’s the one tool that will pay for itself ten times over by preventing a total floor failure.
The Hard Lessons I Learned While Chasing a Flawless Finish
After years of trial and error, I’ve realized that the difference between a DIY job and a pro install isn’t just the tools—it’s the patience. One lightbulb moment for me was realizing that you should never rush the ‘tuck.’ If you can feel the pins of the tack strip through the carpet, you haven’t tucked it deep enough into the Z-bar. This subtle detail is what keeps your toes safe and your floors looking sharp. I also learned that carpet install secrets often boil down to how you handle the corners. If you aren’t careful with your utility knife at the door jamb, you’ll end up with a gap that no amount of stretching can fix. Finally, remember that your home is a living thing; it expands and contracts. Giving your materials time to acclimate to your home’s specific humidity levels is the only way to prevent those frustrating ripples six months down the line.
The Tools That Saved My Sanity and My Subfloor
If you’re serious about your home’s longevity, there are a few items I consider non-negotiable. First is the Wagner Moisture Meter. I trust it because it removes the guesswork—knowing the subfloor is dry gives me the confidence to lay down any material without fear of mold or warping. For the carpet side of things, the Crain Power Stretcher is my go-to. While a knee-kicker is fine for small closets, a power stretcher ensures the carpet is drum-tight, which is essential when choosing the best carpet types for high traffic areas in 2025. Lastly, I always keep a copy of the TCNA Handbook nearby for tile questions. It’s the industry gold standard and helps me avoid costly structural mistakes.
#IMAGE_PLACE_HOLDER_E#
Take the Leap into Your Next Home Transformation
You’ve got the knowledge, the tool list, and the step-by-step plan to turn those awkward floor transitions into a seamless work of art. Renovating your home is about more than just increasing property value; it’s about creating a space that functions perfectly for your lifestyle. Whether you are planning a upgrade your bathroom the ultimate shower renovation guide or just refreshing a hallway, the key is to stay focused on the details. A successful durable flooring installation starts with a single, well-placed tack strip. Don’t let the fear of a small mistake stop you from starting. If you find yourself stuck, a simple baseboards makeover can often be the quick win you need to regain your DIY momentum. Have you ever had a transition strip that just wouldn’t stay down? Let me know in the comments below!