

I remember standing in my socks in my brand-new master bathroom, feeling a cold, damp squish coming from the hallway carpet. It was only three weeks after I finished the tile work. I’d spent thousands on beautiful marble, but I’d missed one tiny, crucial detail: the curb wasn’t sloped inward. That one mistake cost me a full week of teardown and a very expensive lesson in physics. Gravity doesn’t care how much you paid for your grout; if water has a flat surface to sit on, it’s going to find a way out. It’s a visceral kind of frustration when you realize your hard work is literally rotting from the inside out. I had to rip out the bottom two rows of wall tile and the entire curb assembly just to fix a quarter-inch mistake. It wasn’t just about the moisture on the surface; the water was soaking through the thinset and sitting on the wood framing. Wood and water are like fire and ice—they don’t mix. The subfloor started to swell, and suddenly my beautiful tiles were popping off. It was a domino effect of failure that started because I didn’t want the curb to “look crooked.” Reality check: a 2-degree slope isn’t visible to the naked eye, but it’s the difference between a 20-year shower and a 2-year disaster. Don’t be like me. [image]
Stop the Puddles Before They Start
The “Curb-Slope” requirement is often the most overlooked step in a DIY bathroom project, yet it’s exactly why your shower curb is always the first part to fail if handled poorly. When I first started out, I honestly thought a perfectly level, flat curb looked more “professional” and “clean.” I was dead wrong. In the world of waterproofing, flat is an invitation for disaster. Every horizontal surface inside that wet zone—the bench, the niche, and especially the curb—needs a positive pitch toward the drain. If you don’t nail this, you’re essentially inviting mold to set up shop under your tiles, which leads to those expensive shower repairs we all want to avoid. Today, I’m going to walk you through exactly how to set that pitch so you never have to deal with the heartbreak of a “weeping” curb. We are going to look at the mechanics of the slope and why the liquid membrane move for fail-proof shower pans won’t save you if the framing underneath is level instead of sloped. You have to build the solution into the skeleton of the shower.
Is a Sloped Curb Actually Worth the Extra Effort?
You might be thinking, “It’s only a few inches wide, does a 1/4-inch slope really matter?” The answer is a resounding yes. According to the TCNA (Tile Council of North America) Handbook, every horizontal surface in a shower must slope toward the drain at a minimum of 1/4″ per foot to prevent standing water. Even a tiny amount of moisture sitting on a flat curb will eventually migrate through the grout lines and capillary into the drywall or the subfloor outside the shower. This is the primary reason I always advocate for a flood test requirement before the final tile goes down. I learned this the hard way after my first guest bathroom renovation turned into a petri dish of mildew because I prioritized aesthetics over drainage. Have you ever noticed water pooling on your curb or dripping onto the floor even with the door closed? I’d love to hear your “wet floor” horror stories—did you realize it was a slope issue at the time, or did you blame the door seals like I did? Once you see the water traveling uphill against your best intentions, you never forget it.
Pitch the Curb Before the First Tile Hits the Mortar
Setting the pitch starts long before you mix your first bag of thinset. Think of your shower curb like the roof of a house; if it is perfectly flat, the water just sits there and rots the shingles. To avoid this, you need to ensure the top of the curb is actually angled inward toward the drain. I remember a job where I used a 4-foot level on a 3-foot curb and missed the fact that the lumber was slightly crowned. I ended up with a valley in the middle of the curb where water pooled for days. Now, I never trust the lumber straight out of the yard. I use a wood rasp to manually shave the top 2x4s at a slight angle—about an eighth to a quarter of an inch—before I ever wrap them in cement board. This simple prep work is the best way to stop shower curb rot with the sill plate shield because it forces gravity to work for you, not against you.
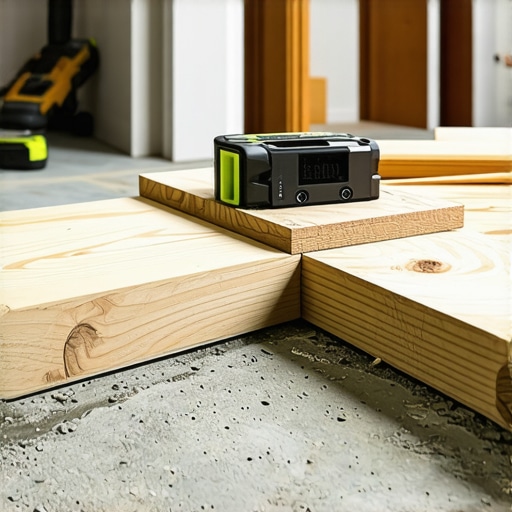
Shave Your Framing for a Natural Slide
Once your wood is prepped, you have to consider how the waterproofing sits. If you are using a traditional liner, you need a pre-slope underneath it. The reason why we use pre-sloped pans for custom tile showers is that they come with the drainage geometry already baked into the product. But if you are doing a mud bed, you are the architect of that slope. I prefer the dry pack secret for rock solid shower subbases because it stays exactly where you put it. It does not slump or move, allowing you to screed a perfect 1/4-inch pitch across the curb. When I am screeding, I treat it like I am buttering a piece of toast—firm, even pressure to ensure there are no air pockets that could lead to a hollow sound later.
The Laser Level Move for Perfectly Horizontal Tiles
Here is where many DIYers get tripped up: they try to make the wall tile follow the slope of the curb. If you do that, your whole first row of wall tile will look like it is sliding downhill. Instead, you must follow the level line rule for starting your first row of shower tile. You keep the wall tiles perfectly level and let the wedge happen at the bottom where the wall meets the curb. Using the laser level move for perfectly horizontal shower tiles ensures your eyes see a straight line at eye level, while the invisible slope at your feet does the dirty work of drainage. I once spent four hours trying to fudge a grout line to hide a slope error, only to realize that a clean, level line is always more professional than a crooked attempt at being flush with a sloped floor.
Let’s dig deeper into a hard truth that many DIYers and even some ‘pros’ refuse to accept: grout is not waterproof. In fact, most people treat grout like a sealant, but in reality, it acts more like a filter. Even the most expensive epoxy grout is technically a secondary defense. The real battle against rot is won or lost in the geometry of the substrate. If you rely on a sealer to keep your subfloor dry, you have already lost. This is often why your shower grout is crumbling just months after install—water is sitting underneath the tiles, softening the bond and creating hydrostatic pressure that pushes the grout out from below. You have to assume water will get behind the tile and design a path for it to leave.
The Invisible Wicking Path Beneath Your Feet
The most dangerous ‘trap’ in bathroom renovations isn’t the plumbing; it’s the thinset bridge. When you use a notched trowel, you create channels. If those channels aren’t collapsed properly, they become tiny highways for water to travel horizontally across your curb and into your drywall. I once saw a bathroom where the shower was bone-dry, but the baseboards in the adjacent bedroom were rotting. The water was ‘wicking’ through the mortar bed, jumping the curb, and soaking the carpet. To prevent this, you must master the full bed mortar rule for large format shower tiles. By collapsing the ridges, you eliminate those water highways and ensure that any moisture that penetrates the grout stays on the waterproof membrane where it belongs. This is also where the trowel notch secret for better tile adhesion becomes a structural necessity rather than just an aesthetic choice.
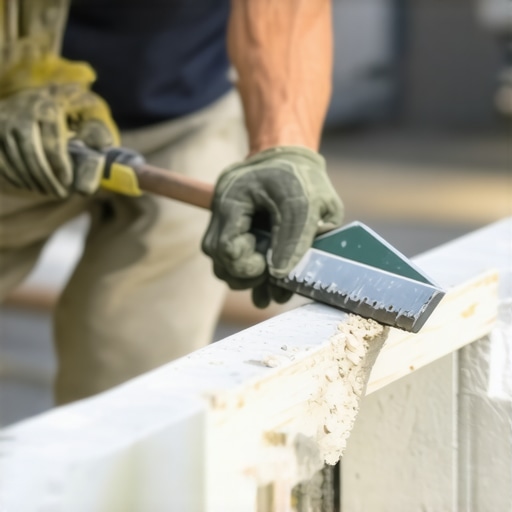
Why 95% Mortar Coverage is Non-Negotiable in Wet Areas
An advanced question I often get from seasoned renovators is: ‘Can I get away with standard coverage if I am using a high-end liquid membrane?’ The answer, according to the Tile Council of North America (TCNA) Handbook, is a flat no. For wet areas, you are required to achieve at least 95% mortar contact. Anything less leaves voids where water can pool, stagnate, and eventually grow mold that smells like a damp basement. This ‘oops’ factor is compounded when you transition to other materials. If you don’t manage the height and moisture barrier at the threshold, you’ll find that the transition strip move for carpet to bathroom tile is the only thing standing between a beautiful renovation and a moldy carpet edge. I’ve seen beautiful homes where why your baseboards look crooked on perfectly level floors was actually caused by the subfloor swelling from a shower leak that had traveled ten feet away from the actual drain.
Have you ever fallen into this ‘waterproof grout’ trap or noticed mystery moisture far away from your shower? Let me know in the comments. It’s a visceral reminder that in the world of flooring, what you don’t see—like the slope and the mortar coverage—is always more important than the tile you do see.
Why My Toolkit Always Includes a Digital Moisture Meter
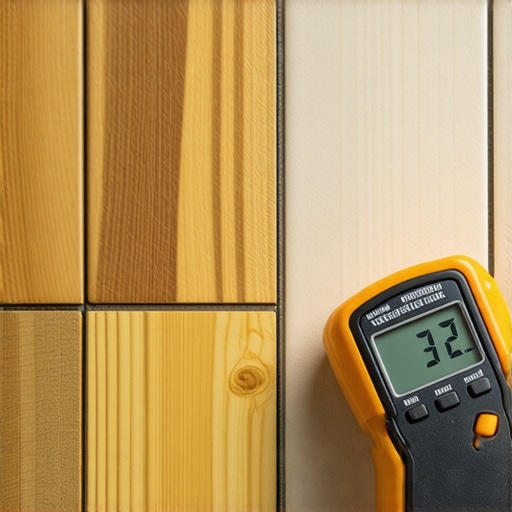
To really see what is happening beneath the surface, you need to upgrade your diagnostic game. People often ask me what the single most important tool in my truck is. It isn’t my wet saw or my power nailer; it is my pinless moisture meter. I use the Delmhorst BDX-30 because it allows me to toggle between wood and concrete modes instantly without poking holes in a client’s brand-new finish. This is the only way to satisfy the moisture meter requirement for basement flooring jobs. If you are flying blind without one, you are just guessing if that slab is dry enough for vinyl or if that subfloor is ready for tile. Most failures don’t happen because of bad tile; they happen because of invisible vapor pressure. When you are looking for long-term results, knowing the exact percentage of moisture in your substrate is the difference between a floor that lasts decades and one that buckles in six months.
How Do I Maintain My Professional Flooring Over Time?
Maintenance isn’t just about mopping; it is about proactive structural checks. For showers, I recommend a deep dive into the grout every six months. Even if it looks fine, I always suggest you how to seal a marble shower without changing the color to keep that barrier impenetrable. For those with carpet, you have to be vigilant about tension. If you start to see the slightest wave, you need to apply the power stretcher rule for large living room carpets immediately. According to the IICRC (Institute of Inspection Cleaning and Restoration Certification) S100 standards, dry soil is the primary enemy of carpet longevity. It acts like microscopic sandpaper, grinding down the fibers with every step. If you don’t keep it stretched and vacuumed with a HEPA-filter upright, you are essentially accelerating the ‘ugly-out’ phase of your investment. When it comes to the trim, I always keep a few 23-gauge pins handy; the pin nail secret for delicate baseboard moldings allows you to re-secure loose trim without leaving giant holes that require wood filler and touch-up paint.
The Future of Smart Surfaces and Moisture Detection
Looking ahead, the flooring industry is moving toward ‘smart’ substrates. I predict that within the next five years, we will see integrated moisture-sensing subfloor panels as a standard for high-end builds. Imagine getting a notification on your phone because a pipe started a pinhole leak under your kitchen island before the water ever reached your hardwood. Until then, we rely on the fundamentals of a step-by-step flooring installation from planning to perfect finish. My biggest piece of advice for scaling your DIY skills? Invest in a high-quality 360-degree laser level. It changes how you see a room, revealing dips and humps you’d never catch with a bubble level. Stop guessing where your high spots are and start mapping them. Go out and rent a power stretcher for that one bedroom with the ripple—it is the best ‘advanced’ skill you can master this weekend.
The Hardest Lessons Learned in the Wet Zone
I’ve spent twenty years crawling on my knees, and if there is one thing I’ve realized, it’s that the smallest details determine whether a project is a masterpiece or a ticking time bomb. First, remember that gravity is the only constant. Whether you are dealing with a shower curb or a baseboard makeover, you have to respect how fluids and physics interact. Second, don’t rush the ‘invisible’ phases. I see so many beginners rush to the pretty part—the tile—while ignoring the subfloor. Finally, always verify your own work. It is much easier to fix a slight deviation in the slope today than to perform shower repairs five years from now because you were too tired to check the pitch one last time.
#IMAGE_PLACEHOLDER_E#
Gear That I Trust When My Reputation is on the Line
To get these results, I rely on a few specific resources. The TCNA Handbook is my north star; it is the industry standard that keeps my installations compliant and safe. For daily work, the Bosch 3-Plane Laser is non-negotiable—it’s how I maintain perfectly horizontal shower tiles. For carpets, I never leave home without a Crain Power Stretcher, because achieving flawless results is impossible with a knee kicker alone. And if you are just starting, follow a step-by-step flooring installation guide to keep your workflow logical and efficient.
Your Foundation for a Lifetime of Quality
You are now armed with the technical secrets that separate a DIY ‘oops’ from a professional-grade finish. Building a home that lasts is about more than just aesthetics; it is about the peace of mind that comes from knowing your flooring installation was done right the first time. Whether you are tackling an ultimate shower renovation guide or just fixing a single tile, focus on the geometry first and the beauty will follow. Take that first step, check your levels, and build something beautiful. What was the most challenging ‘hidden’ detail you discovered during your last home renovation? Let me know in the comments below!