

I walked into my living room last spring, coffee in hand, ready to admire the sunrise hitting my floors, but I stopped dead in my tracks. Instead of that deep, amber glow I loved, the wood looked like it was covered in a thin layer of frozen breath. It was dull, milky, and frankly, it looked cheap. I spent the next three hours frantically scrubbing, only to realize I was making it worse. If you’re staring at your floors right now wondering why they look like they’ve aged thirty years overnight, I want you to take a deep breath. You aren’t crazy, and your floor isn’t necessarily ruined.
Stop Blaming Your Cleaning Routine for the Haze
Most of the time, we assume we just aren’t cleaning “hard enough.” In reality, that white film—often called “blushing”—is usually a chemical reaction or a physical buildup. Early in my DIY journey, I made the classic mistake of thinking that more product equaled more shine. I kept adding layers of store-bought polish, not realizing I was actually creating a “wax sandwich” that trapped dirt and turned opaque. It’s one of those flooring installation mistakes to avoid even years after the boards are laid. We often treat the symptoms rather than the cause, which only buries the problem under more chemicals.
Is a Professional Refinish Really the Only Way Out?
You might be terrified that the only solution is a dusty, expensive sanding job. I get it; that’s the ‘nuclear option’ we all want to avoid. But before you call in the heavy machinery, we need to look at what’s actually happening under the surface. Sometimes the cloudiness is actually moisture trapped beneath the finish, a common issue if the wood wasn’t bone-dry during the step-by-step flooring installation process. According to the National Wood Flooring Association, moisture-related issues account for the vast majority of wood flooring complaints, and ‘blushing’ is a primary symptom of finish reacting to humidity or trapped liquid. Have you noticed the cloudiness getting worse on humid days or right after you mop? I’d love to hear if your haze is localized or covering the whole room—it makes a huge difference in how we fix it. For instance, if the cloudiness is only near your doorway, you might be facing similar moisture stresses as why your hardwood floor has dark spots near the bathroom. We need to rule out these environmental factors before we can restore that crystal-clear depth you remember.
Find Out if It is Wax or a Deeper Disaster
Before you spend a dime on cleaners, you need to play detective. The easiest way to identify the culprit is the white-rag test. Take a clean, white cotton cloth and dampen a small corner with mineral spirits. Pick an inconspicuous spot—maybe behind the door or under the edge of a rug—and rub firmly. If the cloth comes up with a yellowish, waxy residue, you are dealing with product buildup. This is the ‘wax sandwich’ I mentioned earlier, where layers of quick-fix polishes have trapped grime. However, if the cloth stays clean but the hazy spot temporarily disappears while the wood is wet, you are likely looking at ‘blushing’ or moisture trapped within the finish itself. This often happens when the subfloor wasn’t properly checked using the moisture meter requirement for basement flooring jobs, leading to vapor pressure that clouds the topcoat. Identifying this correctly saves you from scrubbing a chemical problem with a physical solution.
Strip Away the Fake Shine Without Sanding
If your test revealed a waxy buildup, you have to strip the floor back to its original finish. I remember trying this in my hallway two years ago; I thought I could just use a heavy-duty floor cleaner, but it did nothing but move the grease around. You need a dedicated wax stripper or a 1:4 mix of white vinegar and water (use this sparingly!) to break the chemical bond. Work in small three-foot sections. Apply the solution, let it sit for sixty seconds—never long enough to soak the wood—and wipe it away with a microfiber cloth. It’s a tedious process, much like how the self-leveler move for perfectly flat vinyl installs requires patience and precision, but seeing that amber grain emerge from the milkiness is incredibly satisfying. Just be sure to dry the area immediately to prevent new moisture issues.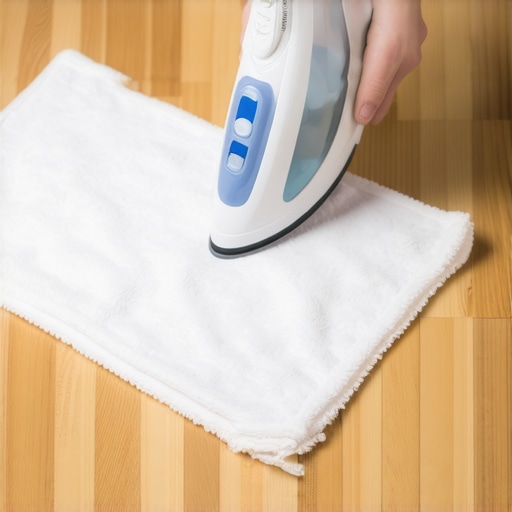
Pull Trapped Moisture Out with Controlled Heat
When the haze is actually ‘blushing’—moisture trapped in the polyurethane—the fix sounds terrifying but works like magic: heat. I first discovered this when a damp plant pot left a ghostly white ring on my oak floors. I took a dry cotton t-shirt, laid it over the spot, and ran a clothes iron on a medium setting (no steam!) over the fabric for ten seconds at a time. The heat opens the pores of the finish just enough to let the trapped gas escape. It’s very similar to the iron and towel trick for dented hardwood planks. If you aren’t comfortable with an iron, a hairdryer on high heat held six inches away can achieve the same result. You’ll literally watch the white cloud vanish before your eyes.
Establish a Low-Moisture Maintenance Routine
Once the floor is clear, your goal is to stop the cycle of haze. Most people cause their own cloudy floors by ‘wet mopping.’ Wood and standing water are natural enemies. Switch to a pH-neutral cleaner specifically designed for hardwood and apply it with a damp-not-dripping microfiber pad. If you are noticing new scratches alongside the haze, it might be time to implement the stop hardwood scratches with the felt pad routine to protect that restored finish. Also, keep an eye on your home’s humidity levels. Just as why your hardwood floors are crowning in the summer is a result of high moisture, that same humidity can cause your finish to look dull and milky if the air stays too thick for too long.
You’ve done the white-rag test and perhaps even dared to use the iron trick, but what if the cloudiness persists? This is where we move past the DIY basics and into the nuances that even some pros overlook. Everyone tells you to use a pH-neutral cleaner, and while that is good advice, it is a bit of a half-truth. In my years of troubleshooting floors, I’ve found that the residue from the cleaner is often more problematic than the acidity. Even a neutral cleaner can leave behind surfactants—essentially a microscopic soap scum—that acts like a magnet for dust. This creates a surface tension issue that dulls the light’s reflection, making the wood look flat regardless of how much you scrub.
The Steam Mop Trap That Ruins Your Topcoat
Here is the ‘oops’ factor that breaks my heart every time I see it: the steam mop. Marketing departments love to tell you that steam is the ultimate ‘natural’ cleaner, but for a hardwood floor, it is a Trojan horse. Pressurized steam forces moisture deep into the microscopic cracks of your finish. It doesn’t just clean the surface; it injects heat and water directly into the wood fibers. I’ve seen beautiful projects that followed a perfect step-by-step flooring installation ruined in six months because of a weekly steam habit. The National Wood Flooring Association (NWFA) explicitly warns that steam cleaners can cause finish peeling and ‘blushing’ that no amount of buffing can fix. If you’ve been using one, stop immediately. You aren’t just cleaning; you are slowly delaminating your floor’s protection.
Why Does the Haze Return After a Professional Deep Clean?
If you have paid for a professional cleaning and the haze returned within weeks, you are likely dealing with an environmental moisture imbalance rather than a surface contaminant. This is a sophisticated nuance many homeowners miss. When the air in your home is too dry, the wood shrinks, opening up the grain and allowing any household oils to penetrate deeper. Conversely, if your subfloor wasn’t protected by the vapor seal requirement for luxury vinyl on concrete or similar wood-specific barriers, you are fighting a constant upward pressure of moisture. This pressure ‘pushes’ against the underside of your finish, creating that milky appearance from the bottom up. It’s a common occurrence in basements or homes with crawlspaces where the moisture meter requirement for basement flooring jobs was ignored during the initial build.
Chemical Ghosts and the Microfiber Myth
Common wisdom says to use microfiber for everything, but not all microfiber is created equal. Cheap, low-denier cloths can actually create micro-scratches on modern high-gloss finishes, which look exactly like a white haze under LED lighting. To truly restore that ‘wet’ look, you need to understand ‘amorphic surface tension.’ According to a study by the American Institute of Physics on thin-film interference, even a layer of oil five nanometers thick can change how light hits a surface. This is why I always recommend a final pass with a dry, high-grade silk or specialized buffing cloth after your damp mop. It removes the ‘chemical ghosts’ left behind by even the best cleaners. Have you ever fallen into the trap of over-cleaning only to make things worse? Let me know in the comments. We’ve all been there, thinking one more spray of polish would be the magic fix, only to realize we’re just burying the beauty of the wood deeper under a cloudy veil. If you’re still seeing issues, it might be time to check for flooring installation mistakes to avoid that could be affecting the structural integrity of your finish.
To truly beat the haze for good, we have to move beyond the spray-and-wipe mentality and look at the actual physics of your floor’s topcoat. I’ve personally thrown away three different ‘best-selling’ mops because they were essentially just smear-sticks. If you want that gallery-depth shine, you need a high-denier, 80/20 polyester-to-polyamide split microfiber. These aren’t the ones you find in the cleaning aisle; these are professional-grade cloths that lift oils rather than just spreading them. According to Technical Bulletin 22-A from the American Coatings Association, residential polyurethanes can undergo ‘plasticization’ when exposed to high humidity and surfactants, which permanently softens the finish and makes it prone to cloudiness. This is why I use a dedicated high-pressure vacuum with a soft-brush attachment before a drop of liquid ever touches the wood—you have to remove the abrasive grit that creates micro-scratches.
Ditch the Supermarket Sprays for Professional Grade Gear
I stopped using grocery store ‘oil soaps’ years ago. They are the primary culprit behind the ‘wax sandwich’ we talked about earlier. Instead, I keep a gallon of professional-grade concentrate on hand that I dilute with distilled water. Using distilled water is a small but vital tweak; tap water contains minerals that contribute to the very film you’re trying to eliminate. This level of precision is exactly what I look for when researching carpet install secrets or shower waterproofing—the magic is in the details that most people skip because they take an extra five minutes. If you’re managing a bathroom, don’t let the floor cloudiness distract you from the bigger picture; knowing when to prioritize shower repairs ensures that moisture isn’t migrating through the wall studs and affecting your living room floors from the inside out.
How do I maintain my home’s finish over time?
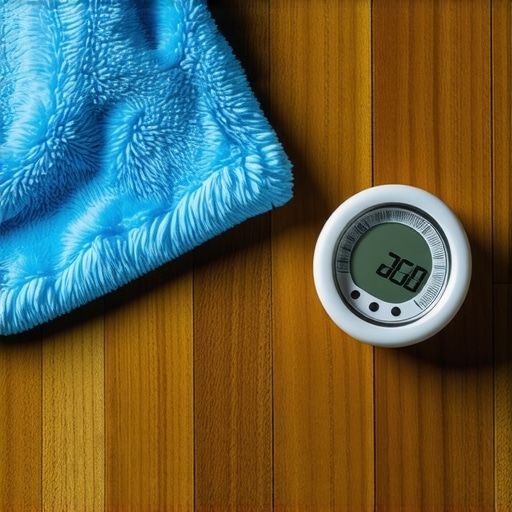
Long-term maintenance is about environmental control and mechanical protection. I recommend installing a digital hygrometer in your main living area to keep humidity between 35% and 55%. If you see it spike, your floor is at risk of ‘blushing’ or crowning. Beyond the air quality, look at your trim. I’ve found that staying current with baseboard trends in 2025 often leads to choosing profiles that are easier to clean, which prevents dust from accumulating and eventually scratching your floor’s finish. When I install new trim, I always use the inside corner cope technique to ensure a tight fit that won’t trap moisture or debris. I predict that within the next few years, we will see ‘smart finishes’—polyurethane coatings embedded with nano-sensors that sync to your phone to warn you when your subfloor moisture is reaching a critical level.
The next time you see a hazy spot, don’t reach for the polish. Reach for your hairdryer or a clean silk cloth and try the buffing technique. It’s an advanced move that requires patience, but it preserves the original integrity of the wood. I’m curious, have any of you tried the heat-transfer method on a white ring before? It’s a game-changer that feels like a magic trick the first time you see the haze vanish. Try the silk-buffing pass on a small three-foot section this weekend; the difference in how the light hits that area will likely convince you to ditch the chemical cleaners for good.
Three Hard-Earned Lessons from the Haze War
I’ve spent years chasing the perfect finish, and if there is one thing I’ve learned, it’s that your floor is a living, breathing part of your home. First, never confuse clean with shiny. A clean floor is often naturally matte; the high-gloss shine we often crave is frequently just a layer of temporary plastic that eventually turns milky. Second, if you didn’t start the journey with the acclimation test for avoiding hardwood floor gaps, you might be fighting internal moisture that eventually manifests as surface haze. Finally, don’t ignore the sounds of your floor. If you find yourself needing the powder lubricant trick for squeaks, it’s a sign your wood is moving, which can stress the topcoat and lead to that dreaded blushing look over time.
The Gear That Actually Lives in My Cleaning Closet
I don’t believe in magic cleaners, but I do believe in the right physics. My toolkit is surprisingly simple: a high-quality digital hygrometer to monitor room air, distilled water for diluting pH-neutral concentrates, and a dedicated stash of silk buffing cloths. When I’m looking at top trends in installation for 2025, I notice a move toward lower-sheen finishes specifically because they hide the micro-scratches and chemical residues that plague high-gloss wood. If you are currently updating your space, I highly recommend choosing the perfect baseboards to complement a cleaner, more natural floor aesthetic.
Reclaiming Your Home’s Natural Glow
Fixing a cloudy floor isn’t just about the aesthetics; it’s about restoring the pride you felt when those boards were first laid. It can be incredibly frustrating to see your hard work hidden under a white veil, but now you have the tools to diagnose whether it’s a waxy sandwich or trapped moisture. Take it one room at a time, and don’t be afraid to experiment with the heat-transfer method on small spots. You deserve a home that reflects the light—and your personality—perfectly. Have you ever tried the hairdryer trick on a white ring before, or are you still dealing with a mystery haze? Let me know in the comments below!