

I was standing in my freshly tiled bathroom, admiring the work. I had spent days on it, following every step-by-step guide I could find. But as I pulled the trigger on that caulking gun, my heart sank. The silicone bead didn’t look like the smooth, elegant line in the videos. It looked like a disaster. I tried to wipe it with a wet finger, and suddenly, I was just spreading the mess. By the time I was done, my tiles were smeared, my hands were sticky, and I wanted to rip the whole thing out. It was a classic rookie move, thinking I could just wing it with a ‘steady hand’ and some paper towels. That was the day I realized that even the best flooring installation tips mean nothing if the finishing touch—the silicone—looks like a crime scene. Today, I am going to show you why the ‘blue-tape’ trick is the absolute game-changer you have been looking for to get that professional, crisp edge without the headache. [image]
Stop Smearing Your Way to a Messy Finish
Silicone is meant to be a permanent, waterproof barrier, and because it is so durable, it is notoriously difficult to clean up once it touches a surface it should not. Unlike water-based caulk, you cannot just grab a sponge and wish it away. I learned this the hard way when I was working on some baseboard updates in my living room. I thought I could eyeball it. Instead, I left a greasy film on my brand-new paint that I had to sand off later. It was demoralizing. The reason we use the blue tape method is not just about being ‘neat’—it is about controlling a material that naturally wants to stick to everything. According to data from the American Chemical Society, silicone polymers are highly hydrophobic, meaning they repel water and cling tenaciously to dry surfaces, which is why even pros often rely on masking to ensure a perfect bead and smooth strategy. Have you ever had a project ruined right at the very end because of a messy caulk line?
Does the masking process actually save time?
I get it. You are tired, the project is almost done, and the last thing you want to do is spend twenty minutes precisely laying down painter’s tape. You might think it is an unnecessary step that slows you down. But let me tell you from experience: the ten minutes you spend taping is much shorter than the two hours you will spend scrubbing silicone haze off your modern shower enclosure or trying to fix a jagged line. Masking provides a physical barrier that allows you to over-apply slightly and pull away the excess, leaving a line so sharp you would swear it was done by a machine. We are not just aiming for ‘good enough’ here; we are aiming for that high-end look you see in luxury shower renovations. Trust me, once you see that clean line emerge from under the tape, you will never go back to the old way.
Master the Tape for a Factory Finish
I will never forget the time I tried to rush a shower corner. I was so confident after finishing the tile that I thought I could just ‘wing’ the silicone. I applied a thick bead, dipped my finger in water, and started dragging. Within seconds, the silicone had traveled two inches up the wall, filling the texture of the tile and creating a jagged, translucent mess that looked like a toddler had been playing with glue. I spent the next four hours with a razor blade and mineral spirits, praying I wouldn’t nick the waterproof membrane. That was the last time I ever ‘eyeballed’ a joint. To get results like the expert flooring installation tips for 2025 suggest, you have to treat the preparation with more respect than the application itself. Professional results aren’t about having a steadier hand; they are about setting physical boundaries that the silicone simply cannot cross. 
Get the Surface Bone-Dry Before You Begin
Silicone is a diva. If there is even a molecule of moisture or a speck of dust, it will peel away within weeks. Before you even touch your roll of tape, you need to scrub the area with denatured alcohol. Unlike soap, which can leave a film, alcohol evaporates quickly and leaves the surface pristine. This is especially vital when working on perfect baseboard installs where sawdust tends to settle in the gaps. I treat this step like a surgical prep—once it is clean, do not touch it with your bare hands, as the oils from your skin can ruin the bond. This level of detail is what separates a DIY look from a high-end luxury shower renovation.
Lay Down Parallel Lines for the Perfect Gap
The magic happens when you apply two parallel strips of painter’s tape. You want to leave a gap that is just slightly wider than the joint itself—usually about 1/8th to 1/4 of an inch. Think of it like a landing strip for your caulk gun. If you are working on a transition, like where the floor meets the wall, ensure the tape is pressed down firmly with a plastic putty knife to prevent the silicone from ‘bleeding’ underneath. This is the core of the masking tape trick for clean silicone joints. If the tape is not sealed tight, you will end up with a feathered edge that peels off later. I once skipped the ‘pressing’ step on a textured tile, and the silicone seeped into the grout lines, creating a serrated edge that looked terrible.
The Soapy Finger and the Big Reveal
Once your tape is down and your bead is applied, the real trick is the smoothing. Fill a small spray bottle with water and a heavy dose of dish soap. Spray the bead generously. This prevents the excess silicone from sticking to your finger or the rest of the tile. Using light pressure, pull your finger across the joint in one continuous motion. This is the essence of the bead and smooth strategy for shower corners. The most important moment, however, is the pull. Do not wait for the silicone to skin over. Pull the tape immediately while the silicone is still wet, pulling away from the joint at a 45-degree angle. This shears the silicone and leaves a crisp, raised edge that looks like it was molded in a factory. If you wait too long, the silicone will string out like melted mozzarella, ruining the sharp line you just worked so hard to create. This technique works equally well when you are trying to stop baseboard gaps with the caulk and paint sequence, ensuring that the transition between your wall and trim is absolutely seamless.
Don’t Trust the Standard Expansion Gap
Most DIY guides tell you to leave a simple quarter-inch gap around the perimeter and call it a day. In my experience, that is a recipe for a buckled floor, especially in high-humidity climates. Wood and laminate are living things; they breathe and react to the environment. If you are installing wide-plank material, that tiny gap can be swallowed up by a single humid afternoon. I always recommend using the acclimation test for avoiding hardwood floor gaps because simply leaving the boxes in the room for 48 hours is often insufficient. You need to measure the actual moisture content of the material versus the subfloor. According to the National Wood Flooring Association (NWFA), the moisture content differential between the subfloor and the flooring should be within 4% for strip flooring and as tight as 2% for wide-plank flooring. If you skip this specific measurement, no amount of silicone or fancy trim will save your project from the ‘summer swell.’ 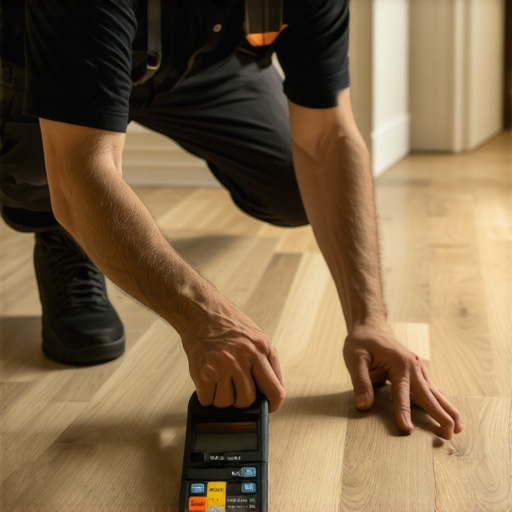
Why do my vinyl planks click when I walk on them?
It is the question that haunts every homeowner who spent a grueling weekend on a ‘click-lock’ install. You followed the step-by-step flooring installation instructions to the letter, but now it sounds like you are walking on bubble wrap. The ‘oops’ factor here is confusing ‘level’ with ‘flat.’ A floor can be perfectly level but have tiny dips that cause the locking mechanism to flex and groan under your weight. This is why your vinyl plank floor is clicking when you walk. To avoid this trap, I use a six-foot straight edge to hunt for any dip deeper than 3/16ths of an inch. If I find one, it gets filled with a high-quality patch before a single plank is laid.
Is your shower actually waterproof or just water-resistant?
People often think that tile and grout are waterproof barriers. They aren’t. They are merely the decorative layer. The real protection happens underneath the surface. I have seen countless luxury shower renovations fail because the installer ignored the full bed mortar rule for large-format shower tiles, leaving hidden voids where moisture can collect and mold can flourish. When it comes to the transition between your walls and floors, stop trying to miter your inside corners for baseboards. MITER joints will almost always open up as the house settles. Instead, master the inside corner cope for perfect baseboard installs. It takes a few minutes longer but provides a joint that stays tight forever. Similarly, with textiles, you must know the carpet install secrets achieving flawless results every time, such as checking the nap direction. If you ignore pile direction at a seam, you will never achieve a seamless look no matter how much you stretch the carpet. Have you ever fallen into the trap of thinking ‘good enough’ would do, only to have to redo the whole thing a year later? Let me know in the comments.It is not just about the technique; it is about the steel and glass you have in your hands. I spent years trying to eyeball horizontal lines in bathrooms, but everything changed the day I invested in a high-quality green-beam laser. If you are doing any kind of tile work, you need to master the laser level move for perfectly horizontal shower tiles. I use a self-leveling cross-line tool because it stays accurate even if the tripod gets bumped. Without it, you are just guessing, and in a standard shower, being off by a fraction of an inch at the base means a massive, ugly gap by the time you reach the ceiling. This level of precision is the bedrock of expert flooring installation tips for 2025 that will keep your home looking modern and sharp.
Maintain Your Investment with Professional Habits
I also swear by the subfloor screw routine for stopping floor squeaks before you even think about laying your finish floor. I carry a dedicated impact driver specifically for this task. I walk the entire room, putting my full weight on the joists, and every time I hear a peep, I sink a two-inch floor screw. Nails pull out over time; screws stay forever. This level of prep is why my floors stay silent while others sound like a haunted mansion. When it comes to the tile itself, do not ignore the trowel notch secret for better tile adhesion. I personally use a Euro-notch trowel for large format tiles because it collapses the ridges more effectively, ensuring the 95% coverage that is critical in wet areas. 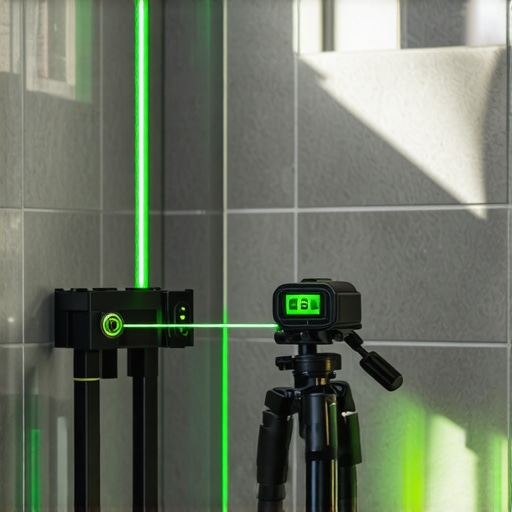
How do I keep my shower looking brand new for years?
The work does not stop once the grout is dry. Maintenance is where most DIYers fail, and I have seen beautiful installations crumble because someone used the wrong cleaner. If you went with marble or slate, you absolutely must use the deep seal tactic for porous natural stone showers. Do not just spray a surface sealer and walk away; you need a penetrating sealer that fills the pores of the stone from the inside out. According to the Tile Council of North America (TCNA) Handbook, you should perform a ‘water droplet test’ every six months—if the water does not bead up, it is time to re-seal. This simple habit prevents you from needing shower repairs when to fix vs replace for longevity later down the line. Looking ahead, I predict we are going to see a massive shift toward integrated ‘smart’ subfloor sensors that can detect leaks before they even hit your ceiling. We are moving toward a world where your flooring will include more tech than timber. My advice? Try that ‘water droplet test’ on your shower floor tonight. It takes ten seconds, but it could save you thousands in water damage next year.#IMAGE_PLACEHOLDER_E#
What the Pros Keep Quiet About Achieving That Pro-Level Finish
Over the years, I have realized that the biggest secret to a seamless look is actually knowing when to stop. Here are a few lightbulb moments from my own renovation journey that you won’t find in a basic manual. First, less is truly more with silicone; most people apply a bead that is far too thick, which leads to that dreaded ‘bead creep’ where the material spreads beyond the tape line. Second, your masking tape trick for clean silicone joints only works if you use high-quality painter’s tape—cheap versions will tear when wet. Finally, always remember that silence is a feature. If you ignore a subfloor squeak now, it will haunt your step-by-step flooring installation for the next decade. Always sink those extra screws before the finish floor goes down.
The Gear That Actually Makes a Difference
You do not need a truck full of expensive gadgets, but these specific items changed my results from ‘amateur’ to ‘architectural.’ I swear by 100% silicone sealant for any ultimate shower renovation because it handles the natural expansion and contraction of your home much better than hybrid caulks. I also never start a project without a dedicated 6-foot aluminum straight edge to verify floor flatness. Lastly, a simple plastic caulking tool set is often better than your finger, as it provides a consistent radius that a human hand simply cannot replicate every single time. These tools are the backbone of a durable flooring installation that looks as good as it performs.
Take the First Step Toward Your Dream Interior
DIY home improvement is a journey of patience and precision. Don’t let the fear of a messy caulk line or a tricky corner stop you from starting. By utilizing these expert flooring installation tips for 2025, you are already ahead of the curve. Every great bathroom or living room floor started with a single, careful measurement. You have the knowledge and the strategy now—it is time to put them into practice and transform your home into the sanctuary you deserve. Have you ever had a silicone disaster that required a complete do-over, or did the tape trick save your project? Let me know in the comments below!