

I blew it. I really did. About five years ago, I stood in my master bathroom staring at my brand-new travertine tiles. They were gorgeous, earthy, and expensive. I had followed every ‘expert’ YouTube video I could find, wiped a single coat of sealer over the surface, and called it a day. Six months later, my ‘spa-like’ retreat looked like an old basement floor. The stone wasn’t just wet; it was saturated. It looked dark, blotchy, and honestly, a little gross. I realized right then that my gorgeous stone was basically a giant, heavy sponge. If you have ever watched water disappear into your shower floor instead of beading up, you know exactly that sinking feeling I am talking about.
My Travertine Heartbreak and the Lesson It Taught Me
That failure led me down a rabbit hole of stone chemistry. I learned that porous stones like marble, travertine, and slate have microscopic ‘highways’ that lead straight into the heart of the slab. When you just wipe a sealer on the surface, you are essentially putting a screen door on a submarine. It might look okay for a week, but the pressure and heat of daily showers will force moisture right through. This is where sealing a marble shower correctly becomes the difference between a lifetime of beauty and a moldy nightmare. Today, I want to walk you through the ‘Deep-Seal’ Tactic—a method I developed through trial, error, and a lot of wasted sealer—to ensure your stone stays as pristine as the day it was installed. We are going to solve the mystery of why standard seals fail and how to saturate your stone for real protection.
Is this deep-seal stuff actually worth the extra effort?
I get it. You are tired. You just finished a long renovation, or maybe you are just trying to keep your head above water with maintenance. You might be thinking, ‘Can’t I just use a spray-and-wipe product every few months?’ The short answer is no. According to the Natural Stone Institute, some types of marble and limestone can have a water absorption rate high enough to harbor deep-seated bacteria and minerals that cause ‘blooming’ or efflorescence from the inside out. One major mistake I made early on was trusting a ‘pre-sealed’ label from the factory. Never do that. Those factory seals are often thin and get beat up during transit and installation. To get a real Deep-Seal, you have to be the one to ensure the pores are truly filled to capacity. Have you ever noticed your stone changing color the second it gets hit with a spray? If so, your current seal has already quit on you.
Why Surface Sprays Fail You Every Single Time
Surface sprays are the fast food of home maintenance—convenient, but ultimately unsatisfying. When we talk about creating a spa-like shower experience, we aren’t just talking about fancy showerheads; we are talking about the structural integrity of the materials. Most off-the-shelf sealers sit on top of the stone. Over time, the alkalinity of your soap and the friction of your feet wear that layer down to nothing. The Deep-Seal Tactic involves a specific ‘wet-on-wet’ application that forces the impregnator deep into those mineral highways I mentioned earlier. It’s about longevity. This approach also pairs perfectly with the pre-seal move for grout, ensuring that every square inch of your shower is a fortress against moisture. Stick with me, and I’ll show you the exact sequence to ensure your stone never ‘drinks’ again.
Wait for the Stone to Stop Breathing Moisture
Before you even crack open a bottle of sealer, you have to ensure the stone is bone-dry. Think of your marble or travertine like a sponge that has been sitting in a bucket of water for a week. If you try to pour wax on a wet sponge, the wax just slides off. I once used a hairdryer for three hours on a single corner of a shower floor because the homeowner had used the shower that morning—don’t be that person. You need at least 48 to 72 hours of zero water contact. To be scientifically certain, I often use a tool similar to what we discuss in the moisture meter requirement for basement flooring jobs. If the internal moisture of the slab is too high, the sealer will get trapped, turn milky, and eventually flake off in a process called ‘blushing.’ Your stone needs to be thirsty, not just dry to the touch.
Flood the Pores with the Wet-on-Wet Move
Standard instructions tell you to wipe a thin layer on and wait. That is the quickest way to guarantee a failure. The Deep-Seal Tactic relies on the ‘Flood and Push’ method. You want to pour the impregnating sealer onto the stone until it pools slightly. Use a lamb’s wool applicator or a lint-free cloth to move the liquid around, ensuring every inch is drowning in product. This is critical for sealing a marble shower without changing the color, as it ensures the protection is deep within the mineral structure rather than on the surface. About ten minutes in, while the first coat is still glistening and wet, apply a second coat. This is the ‘wet-on-wet’ secret. The second application acts as a hydraulic press, forcing the first layer even deeper into those microscopic highways I mentioned earlier.
What Happens When Sealer Turns into Glue
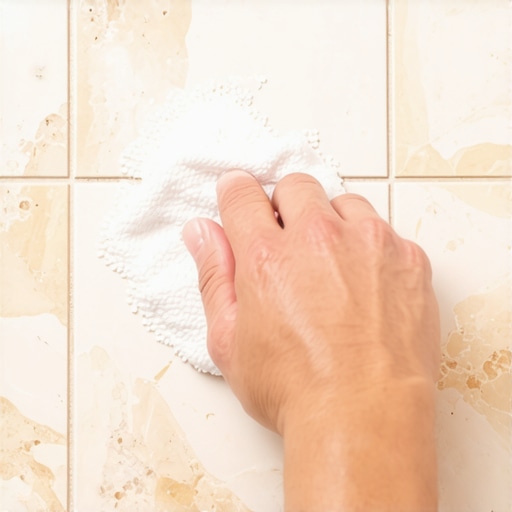
I learned the hard way that timing is everything. On a massive Carrara marble project three years ago, I got distracted by a delivery driver and left the sealer to dwell for twenty minutes instead of the recommended ten. When I went to wipe it off, the sealer had started to ‘gel.’ It felt like I was trying to buff out half-dried maple syrup. My arms were dead by the end of the day because I had to use fresh sealer to reactivate the sticky residue and then buff it off with microfibers. The lesson? Never let the sealer dry on the surface. If it dries, it leaves a hazy, plastic-looking film that ruins the natural luster. You want to wipe the stone until it looks completely dry, leaving the protection inside the stone, not on top. This level of detail is what separates a basic DIY job from modern designs for a luxury feel where the stone looks raw and natural but repels water like a raincoat.
Mastering the Buff and the Final Polish
Once you have finished your wet-on-wet application and wiped away the excess, you aren’t done. You need to buff the surface with a clean, dry microfiber cloth until no streaks remain. This is a bit like the finesse required for clean silicone joints; it’s all about the final 10% of the effort. If you are working with large format tiles, pay close attention to the grout lines. Because we often use the full bed mortar rule for large format shower tiles, there is a lot of structural density there, and you don’t want sealer pooling in the grout joints and causing discoloration. If the stone still looks ‘thirsty’ after the first two rounds, wait 24 hours and do it again. You’ll know you’ve succeeded when a stray drop of water sits on the surface like a perfect glass bead, refusing to soak in even after several minutes. This is how you achieve that spa-like shower experience without the constant fear of water damage or staining.
I see it all the time: a homeowner spends ten thousand dollars on high-end materials, only to have the floor fail in three years because of a nuance that wasn’t in the DIY manual. Most people think that once the stone is sealed or the carpet is down, the job is done. But the real expertise lies in understanding how these materials behave under tension and moisture over long periods. Let’s move past the basics and look at the structural choices that separate a ‘nice’ floor from a ‘forever’ floor.
Thick carpet padding is often a recipe for disaster
It sounds counterintuitive, but the thickest, softest carpet pad is rarely the best choice. I call this the ‘marshmallow trap.’ Homeowners assume that more cushion equals more luxury. In reality, the Carpet and Rug Institute (CRI) 104 residential installation standards specify that a pad should not exceed 7/16 of an inch for most applications. If the pad is too thick, the carpet backing flexes too much when you walk on it. This constant vertical movement pulls the primary and secondary backings apart, leading to delamination and those ugly ripples that no amount of kicking can fix. When you are looking at carpet install secrets for flawless results, the focus should be on density, not thickness. A high-density 8-lb pad that is thinner will actually protect your investment better than a 1/2-inch ‘cloud’ pad.
Your baseboards need more than just a few finish nails
One of the biggest mistakes in high-end renovations is treating baseboards as purely decorative. In a floating floor system, your baseboards are actually your perimeter management tools. If you nail your baseboards straight down into the flooring, you have effectively pinned the floor, preventing it from expanding and contracting. This is a common ‘oops’ factor that leads to boards separating in the winter. Instead, you need to use the scribe tool trick for baseboards against stone walls or uneven drywall to ensure the trim sits perfectly without putting downward pressure on the planks. This allows the floor to slide slightly underneath the trim as the humidity changes in your home.
Why your subfloor prep is probably lying to you
I have a bone to pick with the ‘good enough’ subfloor philosophy. You can buy the most expensive waterproof vinyl on the market, but if you skip the self-leveler move for perfectly flat vinyl installs, your floor is doomed. Even a 3/16-inch dip over ten feet creates an air pocket. Every time you step on that spot, the locking joint flexes. Eventually, that plastic tongue will snap. This is precisely why your vinyl plank floor is clicking when you walk. It’s not a product defect; it’s a failure of the installer to address the ‘waves’ in your home’s foundation. Experts know that ‘flat’ is significantly more important than ‘level’ when it comes to the longevity of click-lock systems.
Is a 24-hour moisture test enough for your peace of mind?
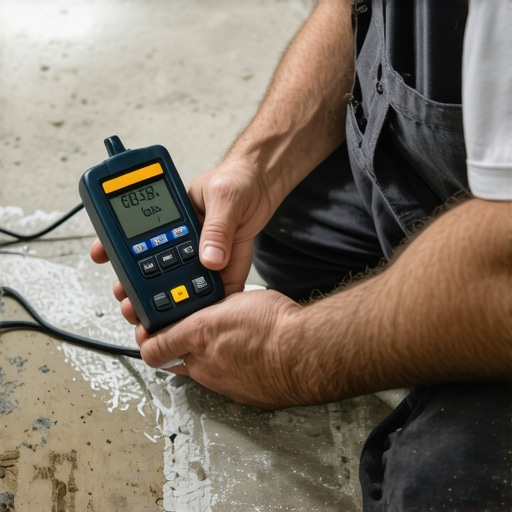
The short answer is absolutely not. Most contractors do a quick ‘plastic sheet test’ on concrete, but that only measures the surface. For true expertise, you have to understand why we never skip the subfloor moisture test on concrete using In-Situ Relative Humidity probes. Concrete is a porous alkaline material that acts like a battery for moisture. It might be dry on top, but the core could be at 90% RH. If you seal that moisture in with a vapor barrier, the pH level of the moisture will rise, eventually attacking the adhesives or causing the flooring to cup from the bottom up. This is especially critical in kitchens where you might use the island anchor tactic, as the weight of the island further restricts the floor’s ability to handle that trapped vapor pressure.
The hidden danger of ignoring the shower sub-base
Finally, let’s talk about the shower. Everyone focuses on the tile, but the tile is just the skin. According to the Tile Council of North America (TCNA), the substrate is what actually determines the life of the shower. If you aren’t using the dry pack secret for rock-solid shower subbases, you are relying on thin layers of plywood or pre-sloped foam that can compress over time. A traditional sand-and-cement bed provides a thermal mass and structural rigidity that foam simply cannot match. It ensures your slope remains perfect, preventing the standing water that leads to grout rot and mold. Have you ever fallen into the trap of thinking the tile was the waterproof layer? Let me know in the comments.
Stop Trusting Your Eyes and Start Trusting the Green Beam
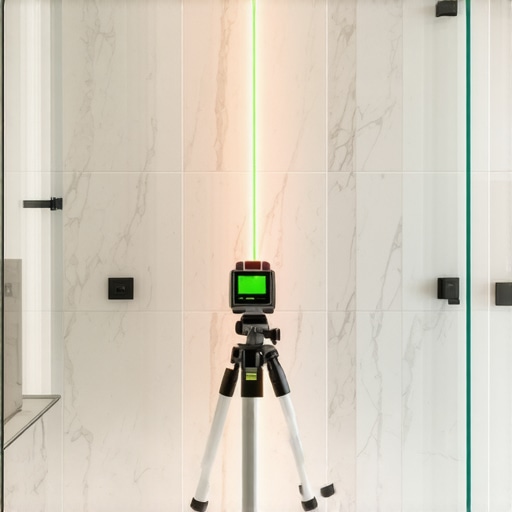
For the first decade of my career, I carried a four-foot bubble level like it was a holy relic. I thought I was being precise, but I was wrong. The moment I switched to a 360-degree self-leveling green beam laser, my world changed. If you are aiming for that high-end finish, using the laser level move for perfectly horizontal shower tiles is the only way to go. Why green? Because a red laser disappears the moment a work light hits it, but a high-intensity green beam cuts through the glare. This tool ensures that your first row of tile is dead-on across all three or four walls of a shower. If you’re off by even a sixteenth of an inch at the bottom, you’ll be looking at a massive, ugly sliver of tile by the time you reach the ceiling. Precision layout is the first step in a step-by-step flooring installation from planning to perfect finish that actually stands the test of time.
The Tools That Separate the Pros from the Amateurs
Beyond the laser, I never step onto a job site without my digital moisture meter. I personally use the Tramex MEP because it allows for non-destructive testing on wood, drywall, and even plaster. As I mentioned before, guessing at moisture levels is a recipe for catastrophic failure. If you are trying to understand how to fix a hollow sound under your vinyl plank floor, nine times out of ten, it’s because the installer ignored a subfloor dip or ignored the humidity during the install. I also swear by a high-torque, low-RPM mixer for my thinset. Mixing by hand or using a cheap drill introduces too much air, which weakens the bond. According to the ANSI A108 standards for ceramic tile installation, the substrate must be flat within 1/8 inch in 10 feet for large format tiles—a spec you simply cannot hit without a straightedge and a bucket of self-leveler.
How do I keep my high-end floors and showers in peak condition for years?
Maintenance is where most people drop the ball. If you’ve invested in a natural stone shower, you have to banish the ‘scrubbing bubbles’ and harsh acids. I tell all my clients that once they’ve achieved that modern design for a luxury feel, they must switch to pH-neutral cleaners. Acidic cleaners—even ‘natural’ ones with lemon or vinegar—will slowly eat away at the calcium in your marble or travertine, leaving it dull and etched. For carpets, the secret isn’t just vacuuming; it’s the frequency. High-traffic areas should be hit three times a week to prevent dirt particles from acting like sandpaper on the fibers. If you wait until it ‘looks dirty,’ the damage to the fiber tips is already done. This proactive approach is the core of shower repairs when to fix vs replace for longevity—prevention is always cheaper than a total teardown.
The Future Is Tech-Driven and Precision-Obsessed
Looking ahead, I see a massive shift toward pre-fabricated waterproof systems and integrated technology. We are moving away from ‘build-as-you-go’ methods toward high-precision components. I predict that in the next few years, we will see more Augmented Reality (AR) tools that allow homeowners to visualize the exact grain direction of their hardwood before the first board is ever nailed down. This evolution is already starting with top trends in installation for 2025, where customization meets extreme durability. If you really want your home to stand out, stop looking at what’s on the shelves today and start looking at the structural advancements that ensure stability. I challenge you to try the ‘Wet-on-Wet’ sealing method I described earlier on a small piece of scrap stone; once you see how much product a ‘sealed’ stone can actually absorb, you’ll never go back to the old way again.
The Hard Truths I Learned While Buffing My Way to Perfection
Looking back at years of projects, the biggest ‘lightbulb moment’ I ever had was realizing that the visible surface is just a vanity plate for the structural work underneath. If you focus 90% of your energy on the tile and only 10% on the subfloor, your floor will fail every single time. One of the most important flooring installation mistakes to avoid is treating the sealer or the finish as a ‘fix’ for poor preparation. Perfection isn’t found in the last coat of wax; it’s found in the 72 hours of drying time and the meticulous moisture checks that no one sees once the job is done. I’ve also learned that ‘sealed’ isn’t a permanent state. Just because water beads today doesn’t mean the stone is protected for a decade; maintenance is a rhythmic process, not a one-time event.
The Toolkit I Trust for Every High-End Job
If you are serious about DIY or professional results, you cannot rely on guesswork. My essential arsenal always includes a non-destructive moisture meter like the Tramex MEP—it has saved me from thousands of dollars in rework by telling me the subfloor was still ‘breathing’ moisture when it looked dry to the eye. I also never start a layout without a self-leveling green beam laser to ensure my first row is perfect. For those looking for a comprehensive roadmap, following a step-by-step flooring installation guide is the only way to ensure you don’t skip the small, critical nuances like expansion gaps or proper thinset combing. Finally, I always keep a copy of the TCNA Handbook nearby; it is the ‘bible’ of the industry and provides the exact standards for every possible substrate and stone type.
#IMAGE_PLACEHOLDER_E#
Start Your Next Project with Confidence
Renovating your home can feel overwhelming, but when you break it down into these precision-based tactics, the fear disappears. Whether you are picking out baseboard styles that elevate your interior design or deep-sealing a slab of Carrara marble, remember that you are building something meant to last for generations. Don’t be afraid to slow down, double-check your moisture levels, and invest in the right tools from the start. You are now equipped with the ‘insider’ knowledge to ensure your next flooring installation is not just beautiful, but structurally sound. It is time to stop dreaming about that spa-like retreat and start building it. Check out more expert flooring installation tips for 2025 to stay ahead of the curve. Have you ever found yourself panicking over a ‘gelled’ sealer or a clicking floor? Let me know your experiences in the comments below!