

I remember staring at that ceiling like it was a crime scene. A dark, ugly water stain was spreading right over the homeowner’s expensive breakfast nook. Just weeks earlier, I had finished a “perfect” shower upstairs. The tiles were straight, the grout was clean, and I felt like a million bucks. But I had skipped one tiny, boring step because I was in a rush to get to my next flooring installation. I didn’t test the pan. That mistake cost me thousands in repairs and a whole lot of pride. Today, I’m showing you the ‘Flood-Test’ secret so you never have to feel that gut-punch of a phone call. We are going to ensure your modern shower designs stay beautiful and dry.
I Learned the Hard Way So You Don’t Have To
When I first started out, I thought waterproofing was just about slathering some red goo on the walls and calling it a day. I was wrong. Water is relentless. It finds the pinhole you missed while you were distracted by a podcast. If you’re planning an ultimate shower renovation, you cannot trust your eyes alone. You need to verify. My early failure taught me that deciding when to repair vs replace isn’t nearly as important as building it right the first time.
Is a 24-hour flood test really necessary for every shower?
I get this question from my neighbors all the time. They think it’s overkill. But according to the Tile Council of North America (TCNA), a flood test is the industry standard for verifying the integrity of a shower pan. It’s not just a ‘good idea’; it’s the difference between a spa-like retreat and a structural nightmare. Have you ever noticed a mysterious damp smell in your bathroom that just won’t go away? That might be a slow leak that a simple test could have caught.
Why Water is the Sneakiest Tenant in Your Home
Think of a shower pan like a tiny swimming pool. If that pool has even the slightest leak, gravity is going to pull that water straight into your subfloor. Before you even think about the mortar rules for large tiles, you need to know that your foundation is solid. I’ve seen beautiful homes ruined because someone wanted to save one day of prep time. Using a proper flood test requirement is your only real guarantee. Have you ever had to deal with a bathroom leak that felt like it was never-ending? In the next section, I’ll walk you through exactly how to set this up without actually flooding your house.
The Equipment You Need for a Fail-Proof Test
You don’t need a degree in fluid dynamics to do this right, but you do need the correct gear. Think of your shower pan as a boat hull; if there is a hole, the ocean—or in this case, your living room—is coming in. First, you need a pneumatic or mechanical test plug. I used to try and ‘hack’ this with duct tape and a plastic bag, but that is a recipe for disaster. I remember one job in a high-rise where I tried a cheap rubber stopper. It slipped while I was at lunch, and I came back to a dry shower and a very wet hallway. Now, I only use a proper expansion plug that fits tightly into the pipe below the drain flange. This is especially critical if you are using the flush mount secret for integrated shower drains where the tolerances are tight.
Mark Your Territory with a Grease Pencil
Once the drain is plugged, fill the pan with water until it’s about an inch below the top of the curb. Do not fill it to the very brim, or a slight splash will give you a false positive. Use a grease pencil or a piece of painter’s tape to mark the exact water level on the waterproofing membrane. This is where the laser level move can actually help you ensure your mark is perfectly level across all four walls. 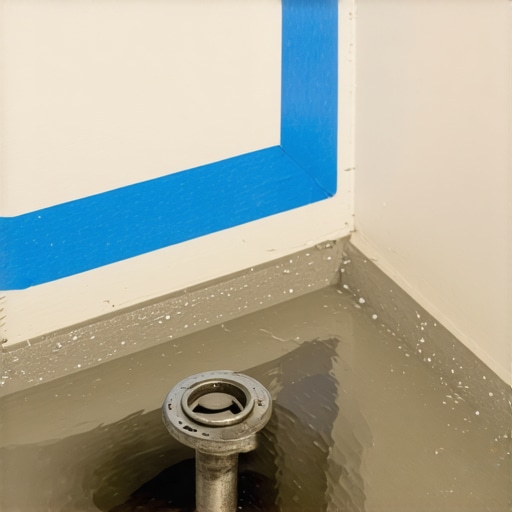
The Agonizing 24-Hour Waiting Game
This is the part where most DIYers and even some pros fail. They wait two hours, see the water is still there, and start tiling. Don’t do that. You need a full 24 hours. Why? Because a slow drip through a microscopic pinhole in the dry-pack secret for rock-solid shower subbases might not show a visible drop for half a day. I once had a client who was furious I was ‘wasting time’ waiting. I stood my ground. The next morning, the water had dropped half an inch. We found a staple that a drywaller had accidentally driven through the liner. That 24-hour wait saved me a $5,000 demolition later.
Checking for the Curb Crawl
While the water is sitting, check the outside of the curb. If the waterproofing wasn’t wrapped correctly according to the curb slope requirement, water can ‘wick’ over the top or through the corners. It’s not just about the floor; it’s about the transitions. If you see dampness on the subfloor outside the shower area, you have a wicking problem. This is just as dangerous as a floor leak because it will eventually rot your baseboard styles and the drywall adjacent to the shower.
What a Drop in Water Level Actually Means
If you come back and the water is lower, don’t panic immediately—but do investigate. Evaporation can account for a tiny fraction of an inch, especially in dry climates or if the AC is blasting. However, anything more than an eighth of an inch is a red flag. Before you blame the liner, check your plug. Sometimes the plug itself leaks. I always dry the area around the plug after tightening it to see if it’s dripping. If the plug is dry and the water is down, you need to strip the membrane and find the hole. It’s painful, but it’s much easier now than after you’ve applied the full-bed mortar rule for large format shower tiles and finished the room. Always remember that a successful stop shower pan leaks with the flood test requirement is your final ‘go’ signal for the entire project.
More Layers Won’t Save a Bad Shower
Some pros will tell you to put a sheet of plastic behind the cement board and then paint a liquid membrane on top for extra protection. This is a massive mistake. According to the TCNA Handbook, creating a ‘double barrier’ traps moisture between those two layers with nowhere to go, leading to mold and rot in your wall cavity. You have to pick one system and stick to it for your ultimate shower renovation. I’ve had to tear out entire bathrooms because a well-meaning DIYer thought ‘more is better.’ Instead of doubling up, focus on the integrity of your transitions. Even the best membrane fails if you don’t use the bead and smooth strategy for shower corners. Have you ever fallen into this trap? Let me know in the comments.
Why Your Concrete Slab Might Be Sabotaging Your New Vinyl
Many homeowners assume that because a concrete slab is twenty years old, it’s bone-dry. That is a dangerous myth. Concrete is like a hard sponge; it can pull moisture from the earth through a process called vapor drive. If you lay down planks without checking this, you will eventually deal with why your vinyl plank floor is telegraphing subfloor bumps or, worse, adhesive failure. This is exactly why the vapor seal requirement for luxury vinyl on concrete is non-negotiable in my book. I always use a calcium chloride test or a moisture meter to verify the emission rate before I ever open a box of flooring. 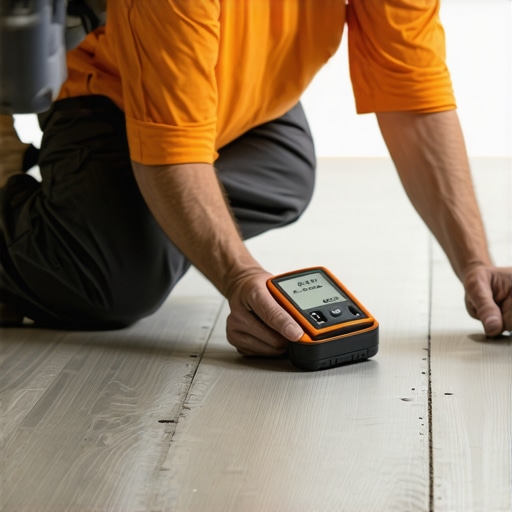
Does every carpet really need a power stretcher?
I see this shortcut taken more than any other in the industry. A contractor walks in with a knee-kicker, bumps the edges, and calls it a day. The Carpet and Rug Institute (CRI) standards 104 and 105 are very clear: power stretching is a mandatory requirement for a professional installation. If you skip this, the carpet isn’t properly tensioned to the tack strips. Within three years, as the backing relaxes, you’ll be searching for the power stretcher move to fix loose carpet bubbles. It isn’t just about looks; a loose carpet wears out faster because the fibers move too much underfoot. This is the primary reason behind why your carpet is buckling only three years later.
Stop Fighting Your Wavy Walls
When it comes to the finishing touches, people often get obsessed with making their baseboards ‘level.’ But if your floor has a slight dip, a perfectly level baseboard will show a massive, ugly gap. Your eye doesn’t notice a level line as much as it notices a consistent gap. Instead of forcing it, I use the inside corner cope for perfect baseboard installs. Coping allows the wood to move and fit against uneven surfaces far better than a simple miter cut. In wet areas, don’t forget the silicon bead secret for waterproofing baseboards in bathrooms. This prevents the bottom of your trim from soaking up mop water and swelling like a sponge. Real expertise isn’t about following a straight line; it’s about knowing how to hide the crooked ones.I’ve spent thousands of dollars on tools over the years, and I’ve learned that the most expensive tool is the one you didn’t buy before the disaster happened. If you are doing any kind of below-grade work, you absolutely must follow the moisture meter requirement for basement flooring jobs. I personally use a pinless meter because it won’t mar the surface of expensive hardwoods. I’ve seen contractors skip this and then call me six months later wondering why their expensive oak is cupping. According to the National Wood Flooring Association (NWFA), wood should typically be acclimated to a specific moisture content relative to its environment, often between 6% and 9%. Without a meter, you’re just guessing. You need to run the acclimation test for avoiding hardwood floor gaps every single time, or you’re just building a floor that’s destined to shrink or buckle.
My Toolkit is My Insurance Policy
For any serious flooring installation, accuracy is your best friend. I don’t just mean a tape measure; I mean using high-precision gear like a laser level for your walls and a 10-foot straightedge for your subfloors. If your floor has even a 1/8-inch dip, your luxury vinyl won’t sit right. For vinyl, I always follow the stay sharp blade rule for cutting luxury vinyl. A dull blade doesn’t just make the work harder; it creates micro-fractures in the wear layer that can lead to delamination under heavy foot traffic.
How do I maintain my shower grout for the next decade?
Maintenance isn’t just about cleaning; it’s about the prep work you did on day one. If you want to avoid that ‘dirty bathroom’ look, you have to stop shower grout from staining with the pre-seal move. I see people scrub their grout with harsh acids, which actually eats away at the cement and makes it more porous. Instead, use a high-quality penetrating sealer before you ever turn the water on. For the finishing touches where the tile meets the tub or the floor, use the blue tape trick for cleaning up silicone beads to get that factory-perfect line that won’t harbor mold. 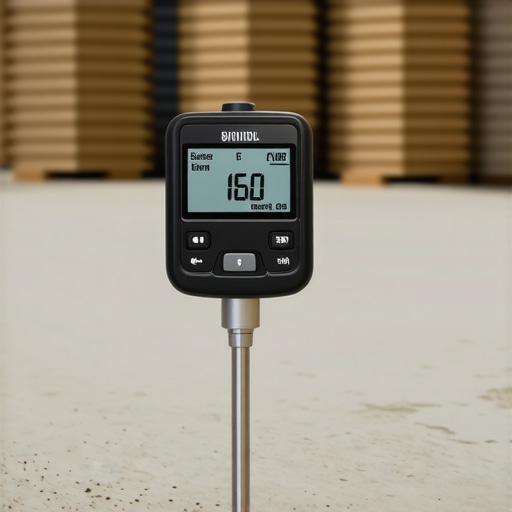
Don’t Let Your Grout Become a Science Experiment
Water and heat are the two biggest threats to your home’s interior. In sun-drenched rooms, you will eventually see why your vinyl floor is fading in front of the patio door if you don’t use UV-rated finishes. In the world of carpet, longevity depends entirely on tension. You have to follow the directional pull rule for power stretching carpet to ensure the backing is locked onto the pins properly. If you don’t, you’ll be calling a professional in three years to fix those ugly waves. I want you to try one thing on your next project: use the blue tape method for your silicone work. It’s a five-minute technique that will make a standard ultimate shower renovation look like a high-end custom build. Once you see that perfectly smooth bead, you’ll never go back to the old ways.
The Reality Check Most Contractors Won’t Give You
After years of expert flooring installation, I’ve realized that the perfect job isn’t the one that looks the best on day one; it’s the one that stays that way for a decade. One of the biggest myths is that expensive materials can compensate for poor prep work. They can’t. If your subfloor isn’t flat, even the most luxurious marble will eventually crack. Another hard truth is that most flooring installation mistakes to avoid for a seamless look happen because of ego—thinking you’re faster or smarter than the manufacturer’s instructions. Always read the bag, always wait the extra day, and never assume a surface is level just because it looks that way. Your future self will thank you when you aren’t tearing up tiles on a Saturday afternoon three years from now.
A Few Investments That Save Your Sanity and Your Wallet
You don’t need a warehouse full of equipment, but you do need these three essentials that I carry to every single site. First, a high-quality pneumatic test plug is worth its weight in gold for shower pans—don’t trust the cheap rubber stoppers. Second, I never step onto a job site without a pinless moisture meter to check for hidden dampness in concrete or wood. Finally, I highly recommend keeping a digital copy of the TCNA Handbook on your phone. It is the absolute gold standard for every ultimate shower renovation and provides the technical data you need to ensure your work meets international standards. These tools are your insurance policy against expensive rework.
Building a Home That Lasts a Lifetime
Renovating your home is about more than just resale value; it’s about the peace of mind that comes from knowing every layer of your floor was built with care. Whether you are tackling a guest bath or a full-house flooring project, don’t be afraid to take it slow and verify each step. The satisfaction of a job well done is only possible when you know the foundation is dry and the tiles are secure. If you ever feel like you’ve hit a wall or a detail doesn’t seem right, don’t hesitate to contact us for professional advice. High-quality flooring installation is a craft that rewards patience and precision above all else. Have you ever discovered a hidden leak or subfloor issue halfway through a project? I’d love to hear your horror stories and how you fixed them in the comments below!