

I remember the exact moment I realized I’d screwed up my guest bathroom. I was kneeling on the floor, cleaning up a bit of spilled bathwater, when my finger sank right into the bottom of the baseboard. It felt like wet cardboard. That beautiful, crisp white trim I’d spent all weekend installing was essentially a giant sponge, wicking up every stray drop of moisture and turning into a fuzzy, moldy mess. I had followed every standard guide on step-by-step flooring installation, but I completely missed the one hidden vulnerability that kills most bathroom remodels.
Water Always Finds the Gap
Water is a persistent little devil. You can have the most expensive baseboard styles that elevate your interior design, but if there is even a microscopic path between your floor and your trim, gravity will find it. Most people think a bit of painter’s caulk at the top is enough. It’s not. My big mistake early on was using standard MDF trim without protecting the bottom edge. According to data from the Insurance Information Institute, water damage and freezing account for nearly 24 percent of all homeowner insurance claims, and a lot of that starts with slow, unnoticed seepage in wet areas. If you aren’t sealing the meeting point between your floor and your walls with more than just a hope and a prayer, you are basically inviting rot into your home.
Is a simple bead of silicone actually worth the effort?
I get it—you’re tired, your back hurts from the flooring installation mistakes you’ve been trying to avoid, and the last thing you want to do is crawl around with a caulk gun. But this ‘Silicon-Bead’ secret is the difference between a bathroom that looks great for ten years and one that needs shower repairs or a full trim replacement in two. We aren’t just talking about a messy glob of goo here; we are talking about a structural moisture barrier. Have you ever noticed your baseboards looking ‘puffy’ near the tub or shower? That’s the sign that the battle is already lost.
The Tiny Detail That Saves Your Trim
Today, I want to show you how to apply a hidden, waterproof seal that acts like a gasket for your walls. It’s a technique that professional high-end installers use, but rarely talk about because it takes an extra twenty minutes. By utilizing the bead and smooth strategy specifically adapted for the floor-to-wall transition, you can stop water from ever touching the raw edge of your molding. I’ve even found that using the blue tape trick for cleaning up silicone beads makes this job remarkably clean, even for a DIYer. We’re going to walk through the exact product choice and the angle of the bead that ensures water sheds off the trim and stays on the tile where it belongs. Have you ever had to rip out baseboards because of that nasty ‘black foot’ mold at the bottom? It’s a frustrating, smelly job, but it’s entirely preventable. Let’s get into the mechanics of how we fix this for good.I’ve learned the hard way that not all trim is created equal. If you are standing in the aisle at the hardware store, skip the MDF. Even with the best baseboard trends in 2025 pushing sleek profiles, MDF is just compressed sawdust waiting to drink water. Go for PVC or solid wood that has been primed on all six sides.
Stop the Rot Before the Trim Hits the Wall
The most common of all flooring installation mistakes is thinking the seal happens after the baseboard is nailed in. It doesn’t. To create a true moisture gasket, you need to apply a thin, continuous bead of 100% silicone to the bottom edge of the baseboard before it ever touches the floor. I remember my first attempt at this; I used way too much silicone and it squished out like toothpaste, getting all over my new tile. I spent three hours scrubbing it off. Now, I use a ‘less is more’ approach.
The Secret to a Waterproof Gasket
Think of this like a head gasket in a car engine or the curb slope requirement for waterproof shower pans; you are creating a seal that prevents fluids from crossing a boundary. Flip your baseboard upside down on a couple of sawhorses. Run a 1/8-inch bead of high-quality silicone along the bottom edge that will rest against the floor. When you press that board down, that silicone creates a compressed barrier. If you are dealing with a particularly wonky floor, you might need the wood shim secret for baseboards on uneven slabs to keep things level while the silicone sets.
Make the Visible Bead Look Flawless
Once the baseboard is nailed—preferably using the pin nail secret for delicate baseboard moldings to minimize hole filling—it’s time for the secondary seal. This is the one people actually see. If your floor is tile, you likely have some slight lippage. You can stop tile lippage with this leveling system move during the floor install, but if you’re working with what you’ve got, the caulk line needs to be perfect to hide the gaps.
Apply the Blue Tape Trick
I used to think I could freehand a silicone bead until I saw a pro use the blue tape trick for cleaning up silicone beads. Lay a strip of tape on the floor about 1/8-inch away from the baseboard, and another strip on the baseboard itself, 1/8-inch up from the floor. Run your bead, smooth it with a gloved finger, and pull the tape immediately. The result is a crisp, surgical line that looks like it was factory-installed. This is essentially a variation of the bead and smooth strategy we use for vertical corners. It ensures that even if a toddler overflows the tub, the water stays on the surface of the floor where it can be mopped up, rather than disappearing into the drywall. For your corners, always favor the inside corner cope for perfect baseboard installs to ensure that even as the house shifts, your waterproof seal stays tight and un-cracked.
The ‘Waterproof’ Marketing Trap That Rots Your Subfloor
Everyone tells you to buy ‘waterproof’ vinyl or laminate and call it a day. In my experience, that label is the most dangerous marketing gimmick in the industry. People assume that because the planks can survive a flood, the room is invincible. This is a massive mistake. While the flooring itself won’t swell, water that seeps through the perimeter or seams gets trapped. Without the vapor seal requirement for luxury vinyl on concrete, you are essentially creating a petri dish for mold under your feet. I once pulled up a three-year-old ‘waterproof’ floor that looked perfect on top, but the plywood subfloor underneath was so soft I could put a screwdriver through it.
Can you actually run one continuous floor through an entire open-concept home?
It’s the dream for a seamless look, but it’s often a recipe for disaster. Most DIYers and even some ‘pros’ ignore the expansion joint rule for large tile floors and floating systems. Large-scale flooring needs to breathe. If you pin it down under heavy kitchen islands or run it too far without a break, the floor will eventually buckle or the joints will separate. According to the National Wood Flooring Association (NWFA), environmental moisture and lack of expansion space cause over 70% of post-installation flooring failures. If you’re seeing your floor lift in the center of the room, you likely missed the nuance of perimeter clearance.
Why Your Carpet Is Buckling Instead of Staying Flat
It’s not just hard surfaces that have hidden traps. If you’ve ever noticed a wave or ripple in your guest room, you might blame the vacuum, but the real culprit is usually a shortcut during the install. I see it all the time: installers who skip the power stretcher and only use a knee kicker. This is one of the most common flooring installation mistakes in the book. A knee kicker is for positioning; a power stretcher is for tension. This is why your carpet is buckling only three years later—the backing has lost its ‘memory’ and can no longer hold the stretch. 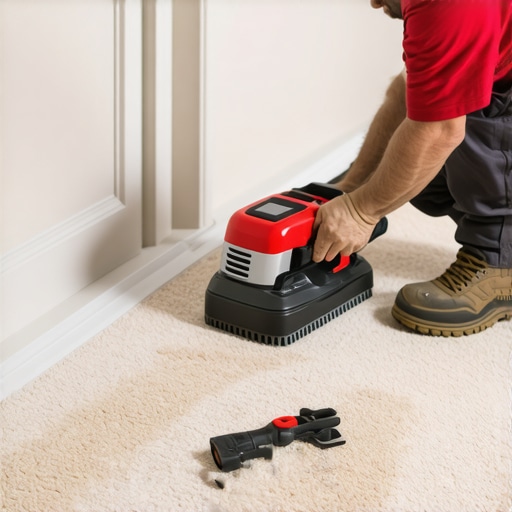
Mastering the Transition Nuance
The real mark of an expert isn’t the main field of the floor; it’s the transitions. Whether it’s learning carpet install secrets or handling a tricky bathroom doorway, how you bridge two materials matters. Many people use cheap, bulky transition strips that look like an afterthought. I always recommend the transition strip move for carpet to bathroom tile that keeps the profile low and the safety high. If you fail to account for the height difference between a thick tile and a thin vinyl, you’re creating a trip hazard that no amount of beautiful baseboard can fix. Before you start your next project, remember the acclimation test for avoiding hardwood floor gaps—it’s the difference between a floor that stays tight and one that whistles in the winter. Have you ever fallen into the ‘waterproof’ trap or dealt with a floor that just wouldn’t stay flat? Let me know in the comments.
Why Your Eyes Can’t Compete with a Green Laser
I’ve realized that the difference between a ‘good’ DIY job and a professional finish usually comes down to the gear you trust. For me, it’s not the flashy $500 saw; it’s the $80 moisture meter. If you’re working anywhere near a slab, the moisture meter requirement for basement flooring jobs is non-negotiable. I once ignored it and watched a gorgeous hardwood floor cup within three months because the concrete was still off-gassing. Now, I don’t even open a box of planks until the reading is within the manufacturer’s spec. According to the Tile Council of North America (TCNA) Handbook, substrate flatness is just as critical; they specify that for large-format tiles, the floor must not vary more than 1/8 inch over 10 feet. If you skip the laser level move for perfectly horizontal shower tiles, you are basically guessing, and your eyes will lie to you every time.
How do I keep my floors and showers looking new for a decade?
Maintenance isn’t just about cleaning; it’s about prevention. I’ve seen beautiful homes ruined because someone forgot the felt pad routine for their furniture, leading to deep gouges in the finish. In the bathroom, you have to watch the grout. If you notice it starting to pit, address it immediately. Usually, why your shower grout is crumbling just months after install is due to improper mixing or movement in the subfloor. For those of you with carpets, don’t let furniture dents stay permanent; I swear by the iron and towel trick for fixing carpet dents to bring the pile back to life. 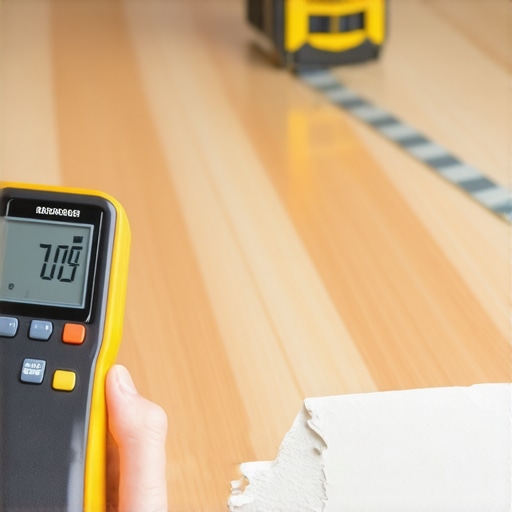
The Tool That Actually Predicts a Subfloor Disaster
Looking ahead, I suspect we’re moving toward ‘smart’ flooring systems with embedded moisture sensors that alert your phone if a leak starts under your baseboard styles that elevate your interior design. Until then, your best defense is a high-quality sealant and a rigorous inspection once a year. I’ve found that using the silicone wash trick for easy grout cleanup makes the maintenance phase much less daunting. My advice for your next project? Invest in a self-leveling cross-line laser. It’s the single most used tool in my kit because it ensures that everything from your step-by-step flooring installation to your highest piece of trim is perfectly square. Try the laser level on your next baseboard run—it will change how you see your walls forever.
Hard-Won Truths from My Worst Remodel Disasters
Reflecting on years of sawdust and silicone, I’ve realized that the most expensive mistakes are always the ones you can’t see until it’s too late. First, never underestimate humidity. Even if a room feels dry, failing to check the moisture meter requirement for basement flooring jobs is a gamble you will eventually lose. Second, ‘waterproof’ is a floor rating, not a room guarantee; without a proper perimeter seal, the subfloor remains vulnerable. Finally, the best designs fail if the foundation is wonky. I used to rush the prep, but now I know that 90% of a great carpet install secrets success comes from fixing the subfloor before the first roll is even moved.
Gear That Actually Makes a Difference
If you are serious about leveling up your DIY game, there are three things I recommend without hesitation. A high-quality moisture meter is your insurance policy against rot. I also swear by using the laser level move for perfectly horizontal shower tiles because it eliminates the ‘visual tilt’ that ruins a professional look. For those tackling soft surfaces, always follow the directional pull rule for power stretching carpet. It might seem like overkill, but it is the only way to ensure your floor doesn’t look like an unmade bed in three years.
Building a Bathroom That Lasts a Lifetime
At the end of the day, home improvement is about peace of mind. When you take the extra twenty minutes to seal that baseboard or double-check your subfloor flatness, you aren’t just doing a task—you’re protecting your sanctuary. Your next upgrade-your-bathroom project doesn’t have to be perfect, but it should be resilient. Take your time, trust your tools, and remember that the best work is often the work no one ever sees because it never fails. Have you ever discovered a ‘spongy’ baseboard too late? Tell me your horror stories in the comments below!