

I’ll never forget the sound of my first major DIY disaster—a wet, sickening *thud* as a sheet of mosaic tile peeled away from the wall and collapsed into a pile of gray goo. There I was, knee-deep in a shower renovation, trying to be the hero, but I’d mixed my thin-set so runny it looked more like soup than structural adhesive. It was a mess. It was embarrassing. More importantly, it was a waste of time and money that I could have avoided if I’d just known the one secret that every pro keeps in their back pocket. [IMAGE_PLACEHOLDER]
Why Your Tiles Keep Slumping Toward the Floor
Most people focus on the color of the grout or the pattern of the tile, but the real magic happens in the bucket. If your mix is too thin, your tiles will sag, creating uneven gaps that no amount of spacers can fix. If it’s too thick, you won’t get the ‘wet-out’ needed for a permanent bond. I learned this the hard way during a project where I ignored the back buttering rule for large format wall tiles. I thought I could just slap the mud on the wall and go. Instead, I spent the next three hours scraping dried concrete off my subfloor. The secret isn’t just about the mix; it’s about the ‘slake’ time and the final texture. When you get it right, the mortar feels like creamy peanut butter. It should stand up in ridges that don’t collapse, allowing you to use the ledger board trick for heavy wall tiles with total confidence. According to industry standards from the Tile Council of North America (TCNA), achieving the correct mortar transfer is critical—improperly mixed thin-set is a primary culprit behind tiles that ‘pop’ or crack years down the road.
Is the ‘Peanut Butter’ Texture Actually That Important?
You might be wondering if you can just ‘eyeball it’ and get away with it. Honestly? You might get lucky once or twice, but why risk it? When you’re working on a spa-like shower experience, the last thing you want is a tile falling off while you’re mid-lather. I used to be a skeptic, too, until I realized that how to mix thinset for the perfect peanut butter consistency is the difference between a job that looks DIY and a job that looks like you paid five figures for it. Have you ever had a tile slide right off the wall the second you let go? It’s a soul-crushing moment, isn’t it? Tell me about your most frustrating tiling fail—did the mud run down the wall, or did it dry out before you could even get the tile in place? The good news is that mastering this isn’t about having expensive tools; it’s about patience and a few simple adjustments to your workflow. We’re going to dive into the exact steps to ensure your next project stays exactly where you put it.
Stop Guessing with Your Mixing Ratio
To get that professional finish, you have to treat your mortar like a science experiment, not a soup recipe. Start by pouring the water into the bucket first, then add the powder. If you do it the other way around, you’ll end up with a ‘flour pocket’ at the bottom that will never fully incorporate, leading to weak spots. I learned this the hard way during a kitchen backsplash job where I was fighting dry lumps for two hours because I was too lazy to follow the order of operations. For those working on older homes, remember that the floor prime move for porous concrete subfloors is your first defense against the subfloor sucking the moisture right out of your mix before it even cures. Use a low-speed drill—around 300 RPM—to avoid whipping air bubbles into the mud. Too much air makes the mortar brittle, which is a major contributor to flooring installation mistakes to avoid for a seamless look.
The Magic of the Five-Minute Slake
This is the step everyone skips because they’re in a hurry to see the tile on the wall. Slaking is simply letting the mixed mortar sit undisturbed for five to ten minutes. During this time, the polymers and chemicals fully hydrate. I once skipped this during a guest bath remodel, and the mortar felt ‘gritty’ and difficult to spread. It didn’t grab the tile. When I finally let it slake, the texture transformed into that glorious, smooth consistency we’re looking for. After the wait, give it one final quick spin with the mixer—but whatever you do, do not add more water at this stage. Adding water after the slake ruins the chemical bond, a common error that leads to shower repairs being needed much sooner than expected. 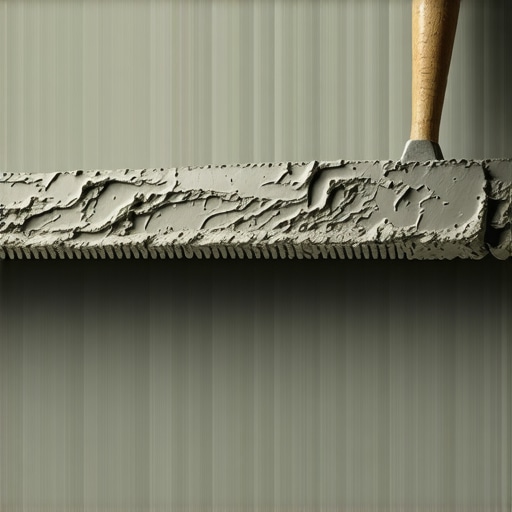
Ridges That Actually Support the Weight
Once you have the right consistency, your trowel technique determines whether that tile stays put. Hold your trowel at a consistent 45-degree angle. If you flatten the angle, the ridges will be too small; if you hold it too steep, they’ll be too large and messy. You should hear a distinct ‘zipping’ sound as the metal teeth scrape against the substrate. For larger tiles, you must follow the back buttering rule for large format wall tiles, which involves spreading a thin, flat layer of mortar on the back of the tile itself before pressing it into the ridged wall. This ensures 100% coverage.
Getting the Mud to Stick Every Time
If you are working on a vertical surface, your thin-set needs to be slightly ‘stiffer’ than it would be for a floor. It should be able to hang off your trowel without dripping, yet still feel moist to the touch. This balance is critical when you are aiming for carpet install secrets achieving flawless results every time in adjacent rooms, as you want the transitions to be level and secure. When the mix is right, you can use the ledger board trick for heavy wall tiles to keep your first row perfectly level without the bottom tiles sliding under the weight of the ones above. It’s all part of the step by step flooring installation from planning to perfect finish that separates a weekend warrior from a master craftsman. Keep your bucket clean between batches—dried mortar will act like sandpaper in your new mix, ruining the smooth flow you worked so hard to achieve.
Why Thick Padding Sabotages Your New Carpet
Common wisdom suggests that the thicker the pad, the more luxurious the feel underfoot. I used to believe this too, until I saw a high-end installation fail within six months because the pad was so lofty it sat higher than the pins on the tack strip. This is exactly why your carpet pad is too thick for the tack strip. When the carpet isn’t properly anchored, it stretches, ripples, and eventually delaminates. Industry experts at the Carpet and Rug Institute (CRI) confirm in their CRI 105 standard that residential cushions should rarely exceed 7/16 of an inch to maintain structural integrity. If you’re aiming for carpet install secrets achieving flawless results every time, start by choosing density over sheer thickness. Have you ever stepped on a carpet that felt ‘mushy’ rather than firm? That’s a major red flag for poor longevity.
How Do You Know If Your Shower Is Actually Watertight?
Another major nuance that separates pros from amateurs is the validation of the waterproofing layer. Most DIYers assume that because they used a waterproof backer board and taped the seams, they are ready for tile. But the flood test secret for guaranteed leak-proof showers is the only way to know for sure before you commit to thin-set. If you skip this, you’re just guessing. I’ve seen stunning bathrooms torn apart simply because the homeowner didn’t understand why your shower niche is growing mold behind the tile—usually due to a pinhole leak in the membrane or a poorly sloped sill. 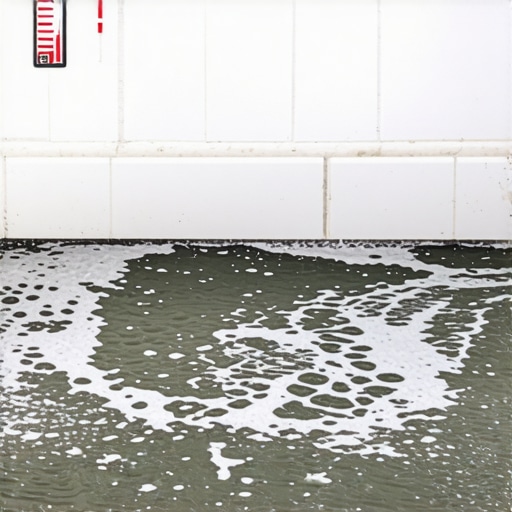
The Corner Trap Most Installers Ignore
When it comes to the finishing touches, the biggest ‘oops’ factor is the rigid corner. Many people love to grout the inside corners of a shower or caulk baseboard miters with zero room for movement. But houses breathe. This is where the soft joint rule for shower wall corners becomes vital. If you don’t use 100% silicone in those change-of-plane areas, the grout will crack as the house shifts. The same logic applies to your trim; why your baseboard miters keep gapping in the winter is usually a result of ignoring seasonal expansion. To avoid visible seams on long walls, I always lean on the scarf joint rule for long baseboard runs rather than a simple butt joint. Have you ever fallen into this trap where a ‘perfect’ corner opened up just a month later? Let me know in the comments.
Invisible Seams Require More Than Sharp Blades
In the world of flooring, the ‘hidden nuance’ is often found in the transitions and the subfloor prep. Whether you are using the double cut method for invisible carpet seams or struggling with flooring installation mistakes to avoid for a seamless look, the secret is in the flatness of the substrate. A flat floor is not always a level floor, and a level floor is not always flat. Understanding that distinction is key for your guide to durable flooring installation for a stylish home. If your subfloor has a ‘hump’ you didn’t grind down, no amount of high-end flooring will sit right. Stick to the plan, trust the science of your materials, and don’t take the easy way out on the steps no one will see.
Put Down the Tape Measure and Buy a Laser
I’ll tell you right now, if you’re still using a 4-foot bubble level for your shower walls, you’re working twice as hard for half the accuracy. I used to pride myself on my ‘eye,’ but one slightly tilted wall can throw off an entire layout and lead to unsightly sliver cuts in the corners. Now, I never start a layout without the laser level hack for straight tile rows. It gives you a constant reference point that doesn’t smudge or move as you work. Beyond tile, professional wood installers live by their moisture meters. According to the National Wood Flooring Association (NWFA) Technical Publication A100, checking the moisture content of your subfloor and wood is the only way to prevent buckling or gapping. If you aren’t testing the humidity of your substrate, you’re just guessing on the longevity of your investment.
How do I make my flooring and tile last a lifetime?
The real work starts after the tools are packed away. People often ask me why their floors look dull after six months, and usually, it’s because they’re ‘cleaning’ them to death with the wrong tools. Harsh chemicals and too much water are the primary enemies of long-term durability. For my own home, I swear by the microfiber mist rule for cleaning matte floors. It uses just enough moisture to lift dirt without soaking into the joints or underlayment. If you do run into a freak accident, don’t panic and tear everything out. Knowing how to replace a single broken tile without total demo can save you thousands in a few years. Regular inspections are also key; catch a hairline crack early and you can handle shower repairs before they turn into structural rot behind the walls. 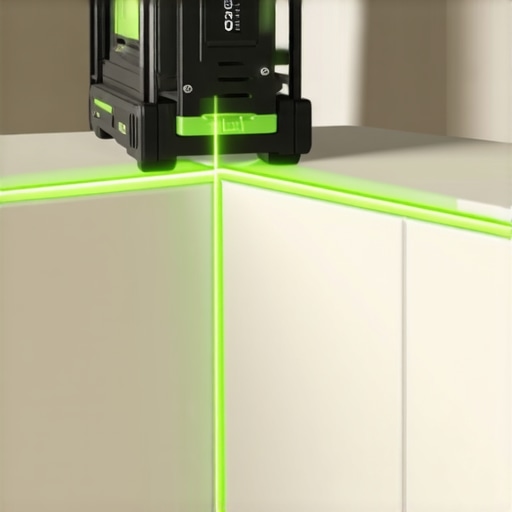
The Simple Trick for Miters That Never Open
When you move on to the trim, the battle usually shifts to the corners. We’ve all seen those gaps that appear in December as the wood shrinks and the house settles. While wood will always move with the seasons, I’ve found that the hot glue hack for holding baseboard miters while nailing is a total game-changer. It provides an instant bond that holds the miter tight while your wood glue cures, preventing the joint from sliding as you fire your nail gun. It’s one of those tiny ‘aha’ moments that makes carpet install secrets achieving flawless results every time feel like child’s play by comparison.
Expect Smarter Materials and AI Layouts by 2030
Looking ahead, I see the industry moving toward even more user-friendly, high-performance materials. We are already seeing transform-your-flooring-top-trends-in-installation-for-2025 focusing on waterproof hybrids that have the warmth of wood but the resilience of stone. I predict that in the next few years, Augmented Reality (AR) will become the standard for DIYers to preview baseboard trends in 2025 fresh styles for every room on their actual walls before making a single cut. If you want to elevate your craftsmanship today, stop eyeballing your corners and start using a dedicated miter adhesive or the hot glue trick. It’s the fastest way to turn a ‘decent’ job into a professional masterpiece.
What Most Pros Forget to Tell You About Home Renovations
Looking back on years of dusty knees and sore thumbs, the biggest takeaway isn’t about which brand of tile is best. It’s that the quality of your work is almost entirely determined by what you can’t see once the job is done. I’ve realized that 90% of my early failures happened because I was rushing to see the ‘pretty’ finish rather than respecting the chemistry of the mortar or the moisture levels in the subfloor. If you want to avoid common flooring installation mistakes to avoid for a seamless look, you have to treat the prep work as the main event, not the warm-up act.
- Patience is a technical skill. Whether it’s waiting for thin-set to slake or allowing wood to acclimate, time is your most important tool.
- Subfloors speak to you. If a floor feels ‘bouncy’ or sounds hollow, no amount of high-end material will fix the underlying structural issue.
- Small details like the soft joint rule for shower wall corners are the difference between a bathroom that lasts three years and one that lasts thirty.
The Toolkit That Saves My Sanity Every Time
I stopped guessing a long time ago, and my stress levels plummeted. If you’re serious about a professional-grade finish, there are three things I never start a project without. First is a high-quality moisture meter. Before you even think about your guide to durable flooring installation for a stylish home, you must know the humidity of your substrate. Second, I swear by the TCNA (Tile Council of North America) Handbook; it’s the definitive guide that removes all the ‘he-said-she-said’ from mixing and layout. Finally, for those tricky wood-to-concrete bonds, I always rely on the urethane glue secret for hardwood on concrete to ensure the planks stay put regardless of seasonal shifts. These tools don’t just make the work better; they give you the confidence to tackle larger projects.
Turn Your Home Into Your Best Teacher
Every master craftsman started exactly where you are: standing in the middle of a room, staring at a pile of materials, and feeling a little bit overwhelmed. The only way to move from ‘DIY-er’ to ‘expert’ is to embrace the learning curve. Whether you are figuring out how to choose the right carpet for a cozy living space or attempting your first mitered baseboard, remember that every cut you make is an investment in your skills. Your next **flooring installation** doesn’t have to be flawless on day one, but by following the science of the materials and refusing to cut corners, you’ll create something that stands the test of time. Have you ever finished a project only to realize you skipped a tiny but crucial prep step? Tell me your ‘oh no’ moment in the comments below!