

I’ll never forget the sound of my white oak floorboards gasping for air. It was a humid Tuesday in July, and every step I took across my basement sounded like I was walking on bubble wrap. I had spent a week meticulously laying those planks over the concrete slab, feeling like a DIY king. But I had made one fatal, rookie mistake: I used the cheap, water-based adhesive instead of the high-end urethane stuff. I thought I was being frugal. In reality, I was just setting my money on fire. The wood swelled, the bond snapped, and my $2,000 investment became a tripping hazard within a single season.
Why My First Hardwood Project Ended in Tears
The secret isn’t just about sticking wood to stone; it’s about managing an inevitable war between two materials. When you’re dealing with concrete, you’re dealing with a giant, porous sponge that breathes moisture constantly. Most guys starting out think they can just slap some glue down and call it a day. But if you skip the moisture meter requirement for basement flooring jobs, you are flying blind. I didn’t realize that learning how to level a subfloor dip without removing the old subfloor was only half the battle. The real hero is the chemical bond. [image-placeholder] Urethane glue acts as a moisture vapor retarder. It’s a flexible bridge. It lets the wood move slightly as seasons change without snapping the bond or pulling up the concrete’s surface. I learned this the hard way after my first floor buckled so badly I couldn’t even close the door to the utility room. This isn’t just about a durable flooring installation for a stylish home; it’s about long-term structural peace of mind. If you’ve ever seen a floor cup and curl, you know exactly what I’m talking about.
Is This Fancy Glue Actually Worth the Price Tag?
I get the skepticism. When you see a bucket of urethane glue costing three or four times more than the standard stuff, your wallet starts to ache. You might wonder if it’s just a marketing ploy. It isn’t. According to data from the National Wood Flooring Association (NWFA), moisture is the leading cause of floor failure, often costing homeowners thousands in replacements. Urethane-based products are specifically engineered to provide a moisture membrane that water-based glues simply can’t match. Even if you’ve followed the acclimation test for avoiding hardwood floor gaps, the vapor coming up from the slab can still ruin everything from below. Have you ever had a floor start talking back to you with clicks and pops weeks after you finished it? It’s a gut-wrenching feeling. Today, I’m going to show you why that happens and how the urethane secret ensures your floor stays flat and silent for decades. We’re going to dive into the application methods that actually work, including the glue assist strategy for wide plank hardwood installs, so you never have to rip out a floor like I did.
Get the Concrete Flat Before You Open the Glue
If your concrete looks like the surface of the moon, no amount of expensive urethane will save you. I learned this on a bedroom remodel where I ignored a 1/8-inch dip. I thought the glue would fill the void. Big mistake. Once the glue cured, that board became a ‘bridge’ that bounced and clicked every time someone walked on it. You must ensure the slab is within 3/16 of an inch over a 10-foot span. If it isn’t, you need to master the feather edge secret for smoothing subfloor transitions to create a gradual slope that the wood can actually follow. Think of the glue as your insurance policy, not your structural filler. Even when you are working with other materials, like LVP, you can’t ignore the vapor seal requirement for luxury vinyl on concrete, and the same principle of a dry, flat surface applies to hardwood. Hardwood is even more demanding because it lacks the flexibility of vinyl.
Why Your Trowel Choice Dictates Your Floor’s Life
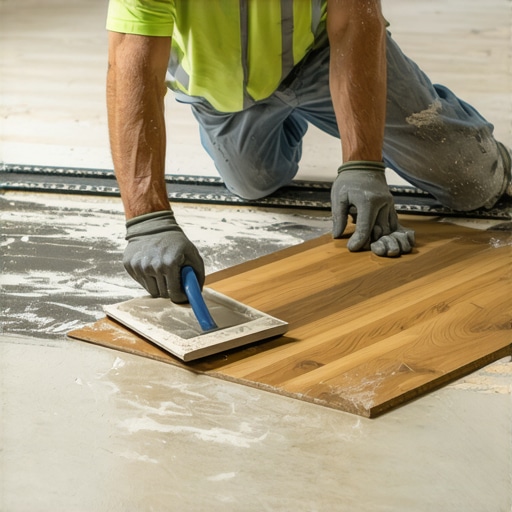
Applying urethane isn’t like spreading butter on toast; it’s a calculated science of volume. Use the wrong notch size, and you’ll either have ‘hollow’ spots where the board doesn’t touch the adhesive or glue oozing through the seams and ruining your finish. I once used a worn-down trowel because I was too lazy to run to the store for a new one. The result? Half the floor didn’t actually make contact with the glue. Much like the trowel notch secret for better tile adhesion, you need a deep V-notch to ensure the ‘ribs’ of glue collapse and create a 100% bond. This bond is what provides the moisture barrier. If there are gaps in the glue, there are gaps in your protection. [image-placeholder]
Lock Down Wide Planks with the Glue Assist
If you’re working with planks wider than five inches, a simple nail-down installation won’t cut it. The wood is too powerful; it will pull the nails right out of the subfloor as it expands and contracts with the seasons. This is where you deploy the glue assist strategy for wide plank hardwood installs. You run a serpentine bead of urethane on the back of every board before nailing it into the joists or subfloor. It’s messy, and you’ll likely get it on your jeans, but it stops that ‘walking on bubble wrap’ sound forever. I remember a job in a humid coastal home where we skipped this on the first three rows—we eventually had to go back and inject epoxy into the hollow spots because the boards started ‘talking’ within a week.
Finish with Tight Trim and Smooth Transitions
Once the floor is down, the job isn’t over. You need to hide those expansion gaps while allowing the floor to breathe. This is where most DIYers lose their patience and the quality drops. If you’re transitioning to another room with different flooring, make sure you know why your hardwood transitions are tripping guests—it’s usually because the heights aren’t matched or the transition strip is too bulky. Then, when you get to the walls, don’t just ‘butt’ the baseboards together at the corners. Use the inside corner cope for perfect baseboard installs to ensure the corners stay tight even when the house settles or the wood moves. I used to just miter everything, but after seeing my first few jobs develop gaps you could fit a nickel in, I switched to coping. It takes ten minutes longer but provides a professional look that lasts as long as the wood itself.
You’ve got the glue, you’ve got the wood, and you’ve got the ambition. But here is the nuance most ‘weekend warriors’ miss: more glue isn’t always better. In fact, over-applying urethane adhesive can lead to a phenomenon known as ‘glue creep,’ where the planks actually shift over time because the adhesive bed is too thick to remain stable. I’ve seen guys try to use adhesive to fill massive gaps in the concrete, thinking it’s a shortcut to avoid how to level a subfloor dip without removing the old subfloor. It doesn’t work. The glue eventually compresses or hollows out, and you’re back to square one with a noisy, bouncing floor. If you really want to avoid flooring installation mistakes to avoid for a seamless look, you have to treat the adhesive as a bond, not a structural patch.
Stop Treating Your Adhesive Like a Gap Filler
The biggest trap in the industry is the ‘set it and forget it’ mentality with moisture barriers. A common myth is that urethane glue is a 100% waterproof shield. It’s not. It is a vapor retarder. According to technical guidelines from the National Wood Flooring Association (NWFA), wood is hygroscopic, meaning it will always try to reach an Equilibrium Moisture Content (EMC) with its environment. If your slab has a hydrostatic pressure issue—meaning water is literally being pushed up through the concrete—no amount of expensive glue will stop that wood from eventually warping. You must perform a calcium chloride test or use a high-end pinless meter before you even crack the lid on that $200 bucket of adhesive. If you’re working on other areas of the home, like the bathroom, the same precision applies to the dry pack secret for rock solid shower subbases to ensure your foundation is actually capable of supporting the finish.
Does 100% Glue Coverage Actually Stop Wood Movement?
I get asked this at least once a month. The short answer is no; it manages movement, it doesn’t eliminate it. Wood is a living material. Even with a perfect bond, it will expand and contract. This is why you must combine your glue strategy with a proper mechanical backup where possible. For instance, using the subfloor screw routine for stopping floor squeaks before you glue ensures the skeleton of the house isn’t moving against your new finish. If you’re installing large format tiles in a shower instead of wood, you face a similar challenge with ‘lippage,’ which is why I always emphasize the full-bed mortar rule for large format shower tiles. It’s all about eliminating the air pockets where moisture and movement live.
The Hidden Danger of Over-Bonding Your Baseboards
One ‘oops’ factor that ruins beautiful floors happens at the very end: the baseboards. I see people nail their baseboards directly into the hardwood planks. Don’t do it. This ‘pins’ the floor to the wall, preventing the natural expansion your floor needs. Instead, you should be using the pin nail secret for delicate baseboard moldings to fire your fasteners into the wall studs only. If you’re worried about the boards shifting, learn stop baseboard squeaks with the angled pin tactic. This keeps the trim tight to the wall while allowing the floor to slide underneath it like it’s supposed to. Even when moving on to softer surfaces, like mastering carpet install secrets for achieving flawless results every time, the goal is always tension and freedom—not just sticking things down until they can’t breathe. Have you ever fallen into this trap of over-fastening or over-gluing? Let me know in the comments.
Installing the floor is only the first half of the marathon. Once the urethane cures and the dust settles, you enter the maintenance phase—the part where most people get lazy and watch their investment slowly degrade. If you want to avoid a situation where you are looking at shower repairs: when to fix vs replace for longevity, you have to be proactive from day one. For hardwood, that means immediate surface protection. I am obsessed with the stop hardwood scratches with the felt pad routine because one heavy chair leg without a pad can ruin a $10,000 finish in a single afternoon. I have seen it happen on high-end oak installs where the homeowner thought the ‘commercial grade’ finish was bulletproof. It is not. Hardwood is a natural product, and its beauty is tied to how well you shield it from physical friction and climate shifts.
How do I maintain my flooring over time?
Consistency beats intensity when it comes to floor care. You do not need to sand and refinish every five years if you manage your humidity levels. I use a smart hygrometer that pings my phone if the house drops below 35% humidity. Low humidity is the silent killer that leads to those unsightly gaps you tried so hard to avoid during a step-by-step flooring installation from planning to perfect finish. In wet areas, like your custom shower, longevity is entirely about the chemical barrier. I always recommend the stop shower grout from staining with the pre-seal move. According to the Tile Council of North America (TCNA) Handbook, cementitious grout is inherently porous and requires a high-quality sealer to maintain its structural integrity against mold and moisture penetration. If you skip the sealer, you are just inviting grime to live permanently inside your walls. 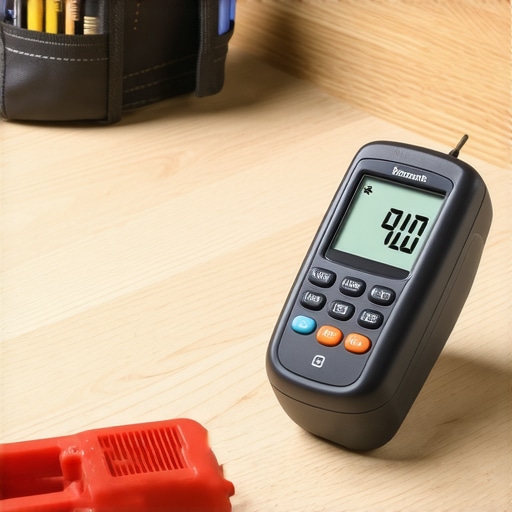
The Tools That Actually Make a Difference
I have wasted thousands on ‘gimmick’ tools over the years, but three items never leave my truck: a high-quality pinless moisture meter, a power stretcher for those carpet install secrets for achieving flawless results every time, and a green-beam laser level. The laser is not just for walls; it is how I check for subfloor deflection before I even think about laying tile. If you are following the transform your flooring: top trends in installation for 2025, you will see a massive shift toward automated moisture monitoring systems embedded under the subfloor. While we are not quite there for standard residential DIY yet, the technology is coming. For now, rely on your meter. Do not guess. If you are dealing with different floor heights, always use how to hide a transition strip between carpet and tile to keep the look seamless as materials age at different rates. My best advice for you today? Go buy a $40 digital hygrometer and place it in your living room. It is the cheapest insurance policy you will ever buy for your hardwood.
The One Mistake That Costs More Than a Whole Floor
After twenty years in the trade, I’ve realized that the most expensive part of a floor isn’t the lumber—it’s the rework. If I could go back to my younger self, I’d scream ‘check the slab again!’ People often ask me for expert flooring installation tips for 2025, and my answer is always the same: respect the moisture. I’ve seen $15,000 floors turn into firewood because the installer didn’t wait 24 hours for the concrete to stabilize. Another lightbulb moment was realizing that choosing the perfect baseboards is the frame of your masterpiece; if the frame is tight, the whole room feels expensive. Don’t let a lack of prep turn your dream into a nightmare.
The Three Gear Picks I Swear By
I don’t leave my garage without a few non-negotiables that keep my projects on track. First, a Wagner pinless moisture meter is the only way to be certain the wood and slab are ready for bonding. Second, the NWFA (National Wood Flooring Association) installation manual is my bible for expansion gaps. Third, a high-end laser level prevents the slopes that lead to flooring installation mistakes. If you are diversifying into other rooms, these same tools help with an ultimate shower renovation guide or even carpet install secrets for those cozy bedrooms. I trust these tools because they’ve saved my reputation more times than I can count.
[image-placeholder]
Build a Floor That Outlasts Your Mortgage
Your home is your sanctuary, and a solid, silent floor is the foundation of that peace. Don’t let the technical details of urethane or moisture barriers intimidate you. By following a step-by-step flooring installation process, you are building something that will literally carry your family for decades. Take your time, buy the good glue, and don’t be afraid to reach out if you hit a snag. If you have questions about your specific layout, feel free to contact us for advice. This is your chance to turn a simple renovation into a legacy. Have you ever had a floor start ‘talking’ to you after a few months, and how did you fix it? Let me know in the comments below!