

I remember standing in my freshly tiled shower, shivering slightly as I admired the sleek marble niche I had just finished, only to notice a shimmering pool of water that refused to go down the drain. It just sat there, stagnant and mocking me, like a tiny, unwanted pond right where my soap was supposed to live. I reached out, poked the water, and felt that tell-tale slickness of early-stage mildew. It is a gut-punch moment. You spend thousands on a bathroom renovation, obsessing over tile patterns and grout colors, only to realize you have accidentally built a permanent petri dish into your wall. If you are seeing water collect in your shower niche, you are not alone, and frankly, you are right to be worried. Stagnant water leads to more than just slimy shampoo bottles; it is the precursor to failed grout and expensive structural repairs. Today, I am going to help you identify exactly why that water is staying put and how we can get it moving toward the drain where it belongs.
Standing Water is a Silent Shower Killer
I made a massive mistake during my first DIY build when I assumed level was the goal for every horizontal surface. I was wrong. In a wet environment, level is actually the enemy. Water does not have a motor; it needs gravity to do the heavy lifting. If your niche shelf is not slightly pitched toward the shower floor, that moisture will just hang out until it finds a way into your walls. This is often where homeowners start looking at shower repairs and when to fix vs replace. When water sits, it creates hydrostatic pressure that eventually bypasses even the best sealants. According to the Tile Council of North America (TCNA), all horizontal surfaces in a shower environment must have a 1/4-inch per foot slope toward the drain to ensure proper drainage and prevent microbial growth. Without that pitch, you are essentially building a shelf for mold. Have you noticed a funky smell or a persistent orange slime in your niche lately?
Is a shower niche actually worth the headache?
You might be looking at that puddle and wondering if you should have just stuck with a plastic caddy that hangs from the showerhead. I have been there. But the truth is, a properly executed niche is a vital part of creating a spa-like shower experience. The issue is not the niche itself; it is the physics of the installation. When I first started, I did not realize that even a tiny error could lead to niche mold growth behind the tile. We need to look at how the tile was set and whether the waterfall method for tiling shower niches was used to ensure the top layers overlap the bottom. It is about working with gravity, not against it. If you are in the middle of a build or a repair, check out this shower renovation guide to avoid these pitfalls before the grout dries. Let us dive into the common culprits behind the niche pond and how we can redirect that water for good.
Grab Your Level and a Pencil
I’ve seen guys try to eyeball a slope, but eyes are liars in a dark shower. You need a 6-inch torpedo level. Place it on the bottom shelf of the niche; if that bubble stays dead center, you’ve found your culprit. I once spent three hours trying to ‘caulk’ my way out of a flat niche in a guest bath, only to realize I was just creating a bigger dam for the water to sit behind. Eventually, I had to accept the mess and pop the bottom tile off. If you are lucky and the niche isn’t leaking into the wall yet, you might be able to perform a surgical strike. Knowing how to replace a single broken tile without total demo is a life-saving skill here. Once that tile is out, you have to build up the back of the shelf with thinset to create that necessary pitch.
Why Your Grout Might Be Acting Like a Dam
Sometimes the pitch is fine, but the execution of the finish is the problem. If the grout is too high—what we call ‘proud’ of the tile—it acts like a speed bump. This is a common issue in shower renovation projects where the installer was a bit too enthusiastic with the grout float. You can carefully sand down grout lines to be flush with the tile edge, but you must be incredibly careful not to scratch your tile glaze or pierce the waterproofing underneath. 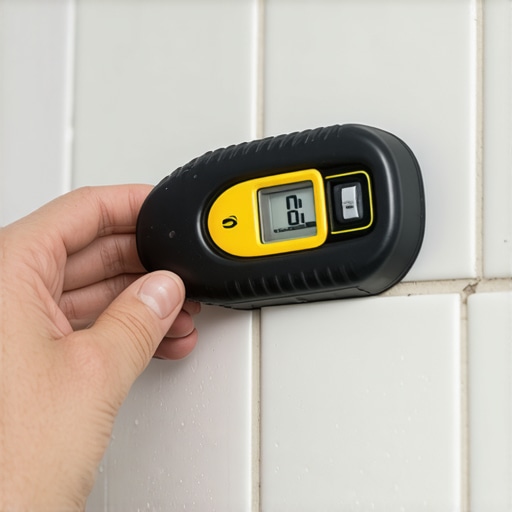
Rebuilding the Slope with the Right Mud
When you’re rebuilding that slope, the secret is all in the consistency of your mortar. You cannot use runny thinset for this; it will just slump under the weight of the tile and leave you right back where you started with a flat surface. You need to learn how to mix thinset for the perfect peanut butter consistency. This ‘stiff’ mix allows you to wedge the back of the tile up slightly higher than the front. I usually aim for a 1/8 to 1/4 inch difference from back to front. While you have the niche open, check the corners. This is usually where the waterproofing fails first. I always use the overlap trick for waterproofing shower corners by extending the membrane at least two inches past the joint. If you just butt the pieces together, you’re basically inviting water to visit your wall studs.
Choosing Materials That Shed Water
Also, consider the material you chose for the shelf. Natural stone like marble or travertine is porous and can hold moisture much longer than porcelain or ceramic. If you have a marble niche, it needs to be sealed religiously every six months. Otherwise, that water isn’t just sitting on top; it is soaking into the stone and feeding mold from the inside out. If you are still in the planning phase or looking at shower repairs and when to fix vs replace, consider using a solid surface piece for the bottom sill of the niche rather than individual tiles. One solid piece of quartz or granite eliminated grout lines entirely, giving the water a smooth, uninterrupted highway straight to the drain.One of the most common myths I see in the DIY community is the ‘more is better’ approach to sealant. Most homeowners think if they caulk every single line in a shower, they are creating a fortress. In reality, you might be creating a tomb for moisture. If you do not follow the soft joint rule for shower wall corners, you are not allowing for the natural expansion and contraction of your home. When the house shifts (and it will), that rigid grout or over-applied silicone will crack, creating microscopic entry points for water. This is exactly how you end up with why your shower niche is growing mold behind the tile. You need to understand that a shower is a living system that needs to move without breaking its skin.
Why does my luxury flooring sound like it is clicking?
This is the advanced question I get most often from people who just finished a ‘perfect’ install. Usually, it is because they ignored why you need a perimeter expansion gap for vinyl planks. I once saw a beautiful white oak install ruined because the owner did not follow the penny gap rule for hardwood expansion space. They thought a tight fit against the wall looked ‘cleaner.’ But as the humidity changed, the wood had nowhere to go but up. According to the National Wood Flooring Association (NWFA), wood is hygroscopic, meaning it constantly gains and loses moisture; without a 1/4 inch to 1/2 inch gap hidden under your trim, the floor will eventually buckle. 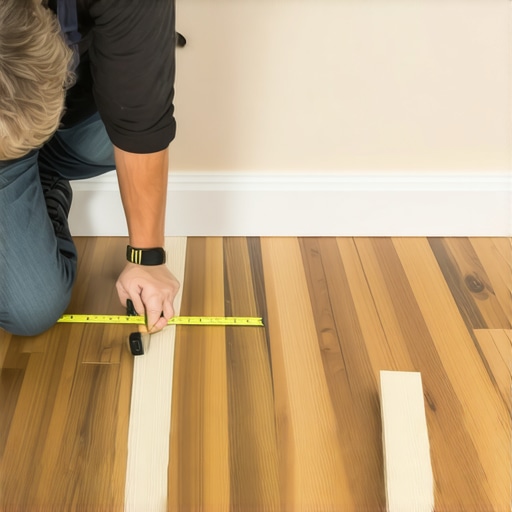
The Hidden Danger of the Premium Carpet Pad
We have all been there—standing in the flooring showroom, squishing the thickest, softest carpet pad and thinking, ‘this is the one.’ It feels like walking on a cloud, right? Well, that is the trap. If the pad is too thick or too soft, it does not provide enough resistance for the carpet backing. This leads to why your carpet pad is crushing down too fast and causes the carpet to stretch and ripple over time. For high-traffic areas, a thinner, denser pad is actually the hallmark of a professional install. It is the difference between a floor that looks good for two years and one that stays flat for twenty. If you are tackling this yourself, make sure you understand the power stretcher vs knee kicker debate—using a kicker alone is a recipe for loose carpet by next summer.
Stop Nailing Your Baseboards Into the Floor
This is a classic ‘oops’ factor that can void your flooring warranty. I have walked onto jobs where the trim carpenter nailed the baseboards downward into the flooring planks rather than into the wall studs. This essentially ‘pins’ the floor in place. When the subfloor expands, the floor cannot move, leading to squeaks, pops, and eventually, failed joints. Always ensure your baseboards makeover involves nailing horizontally into the studs. This allows the floor to slide freely underneath the trim as the seasons change. Have you ever fallen into this trap or noticed your floor starting to ‘speak’ to you in the winter? Let me know in the comments—I would love to hear how you handled the fix!
Stop Eyeballing and Start Measuring
I have spent way too much money fixing things that could have been avoided with a fifty-dollar tool. If you are serious about your home, you need to stop trusting your handyman’s eye. I personally swear by the Bosch GLL 30 self-leveling cross-line laser. Whether I am checking if a subfloor is flat for a step-by-step flooring installation or ensuring a shower niche has that vital 1/4-inch pitch, the laser provides a literal line in the sand. It takes the guesswork out of expert flooring installation tips for 2025 and ensures that your baseboards are perfectly level across a long run. Using a laser is the only way I can sleep at night knowing the scarf joint rule for long baseboard runs was followed with mathematical precision.
How do I keep my shower niche looking brand new for years?
The secret isn’t a fancy chemical; it is a simple squeegee. After every single shower, I take ten seconds to pull the water off that bottom niche shelf. If you let the water evaporate there, you are leaving behind mineral deposits that eventually eat through your sealer. This leads directly to shower repairs and when to fix vs replace. For carpet, maintenance means a professional deep clean every twelve to eighteen months—not just when it looks dirty. If you are dealing with how to remove pet odors from deep carpet padding, you need to get to the pad, because cleaning the surface is only half the battle. 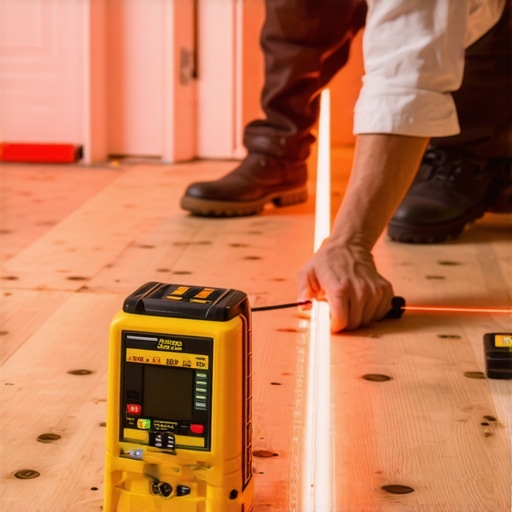
Moisture Meters are Not Optional
In the coming decade, I expect we will see built-in smart sensors that alert your phone the moment a leak starts behind your tile, but until then, we rely on the the moisture meter test for concrete subfloors. I never lay a single plank of wood without checking the levels with my Delmhorst J-2000. According to the NWFA (National Wood Flooring Association) Technical Manual, specifically Section II on subfloor requirements, you should never install wood if the subfloor moisture content is more than 4% different from the flooring itself for planks under 3 inches. This level of precision is what separates carpet install secrets from a DIY disaster. If you want a floor that doesn’t gap or squeak, you have to respect the data. I strongly encourage you to go out and buy a basic moisture meter before your next project; it is the cheapest insurance policy you can buy for your home.
Hard Truths I Learned While Tearing Out My First Bathroom
I used to think that as long as it looked pretty, it was fine. I was wrong. The hardest lesson I learned was that beauty is skin deep, but waterproofing is bone deep. I once spent a week on a gorgeous mosaic niche only to realize I had not used the waterfall method correctly, and water was tracking behind the tile. Now, I always prioritize the 1/4-inch pitch over the perfect pattern. Another lightbulb moment came when I stopped using standard grout in wet areas and switched to high-performance epoxy for niches; it does not soak up water like a sponge. Lastly, I realized that if I am questioning whether to repair or start over, I should usually start over. Knowing shower repairs and when to fix vs replace saves you from the patch-and-pray cycle that inevitably leads to mold.
My Secret Toolkit for Professional Results
If you want to move beyond DIY and start seeing expert outcomes, you need the right gear. I trust the Bosch GLL 30 self-leveling laser because it does not have an off day when checking for level subfloors or sloped niches. For anyone tackling wood floors, I never skip the moisture meter test for concrete subfloors using a Delmhorst J-2000; it is the only way to be 100% sure your floor will not buckle in six months. When it comes to the actual setting of tile, mastering how to mix thinset for the perfect peanut butter consistency is the difference between a tile that stays put and one that slumps, ruining your drainage slope. Finally, I always keep a 6-inch torpedo level in my back pocket; it is the ultimate lie detector for every horizontal surface in your bathroom.
Your Future Home Projects Deserve a Solid Foundation
Building or renovating a bathroom is an act of love for your home, but it is also a battle against physics. Do not let a small puddle in a niche discourage you from the goal of expert flooring installation tips for 2025 and beyond. Whether you are adjusting a slope or learning the scarf joint rule for long baseboard runs, the effort you put into the details today is what prevents a disaster tomorrow. You have the knowledge now to spot the signs of standing water and the tools to fix it before it becomes a structural nightmare. Your home is your sanctuary; keep it dry, keep it level, and keep moving forward with confidence. Have you ever found a surprise puddle in your niche weeks after the project was finished? Let me know how you fixed it in the comments below!